Onboarding SSR Conductor Managed SSR1300 onto Mist
The Mist App can be downloaded from the following locations:
-
For Apple Devices
-
For Android Devices
Pre-Onboarding Verification
When onboarding a conductor-managed appliance, the process is simplified by ensuring that the IP address of the managing conductor is configured for the site that will adopt the appliance. This is typically done during Site Configuration.
To verify the conductor IP address has been assigned:
-
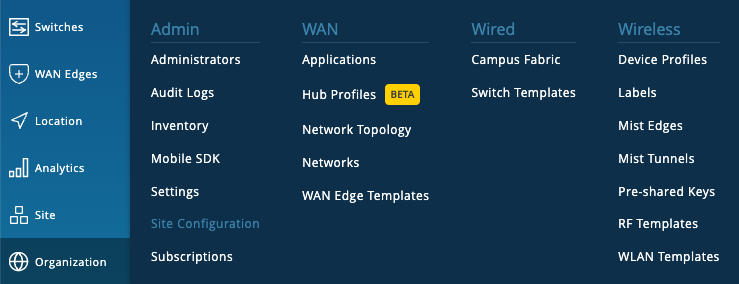
Select Site Configuration from the Organization menu.
-
Select the Site the appliance will be adopted into from the list of Sites.
-
Scroll down to Session Smart Conductor and verify the IP address.
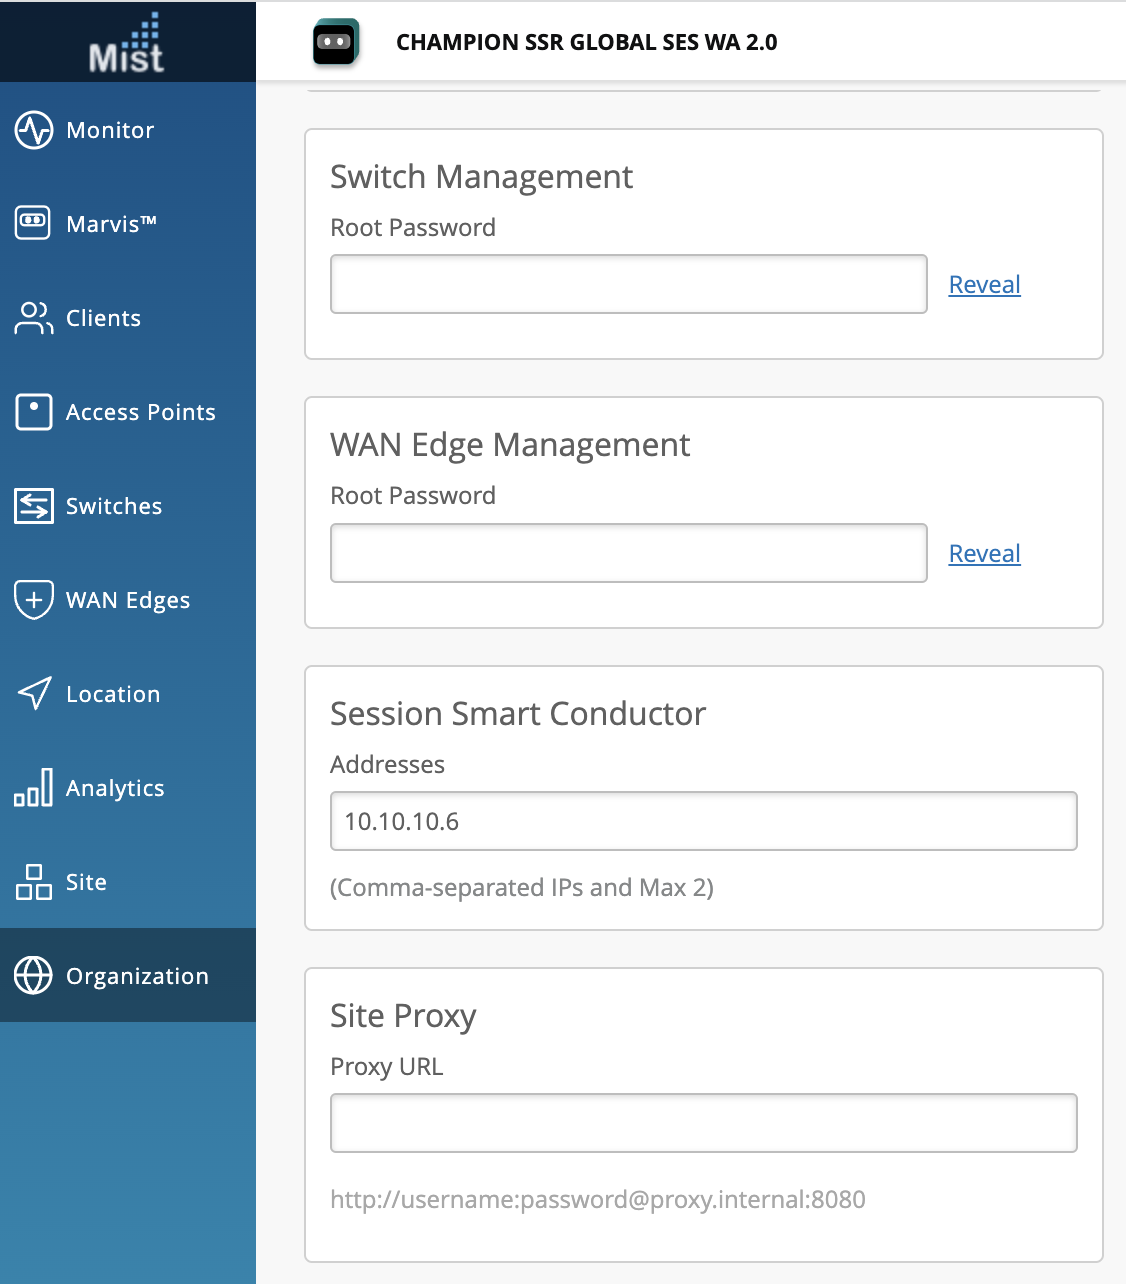
If no IP address is present, use the SSR GUI to copy the IP address.
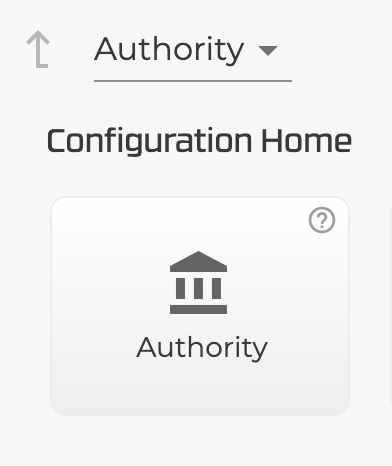
On the Configuration Home panel in the SSR GUI, click Authority.
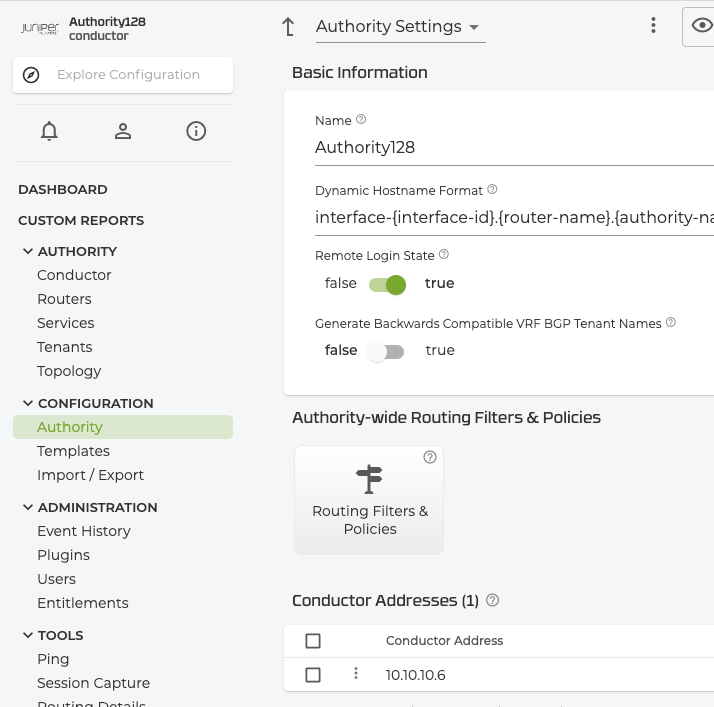
Under Authority Settings, scroll down to Conductor Addresses and copy the IP address of the conductor.
-
Return to the Mist Site Configuration, scroll down to the Session Smart Conductor and add the Conductor IP address.
Onboarding Conductor-Managed SSR1300 Through the Mist Portal
Use the following process to onboard a conductor-managed SSR device into the Mist cloud using the Mist UI and your Claim Code.
-
Unbox the SSR1300 appliance.
-
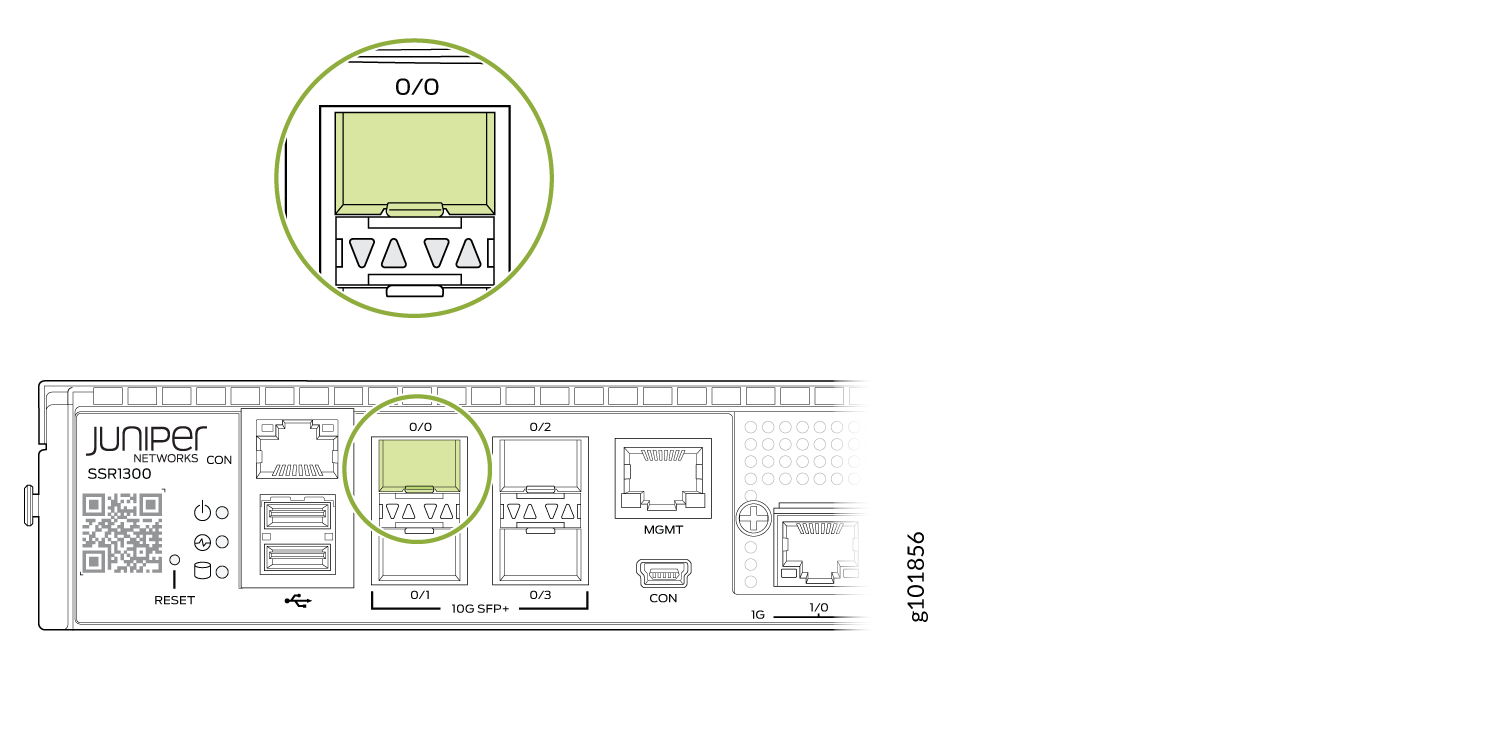
Connect to the WAN port. The port 0/0 on the front panel of the SSR1300 appliance is the WAN 1 network interface port.
-
Power up the SSR1300.
-
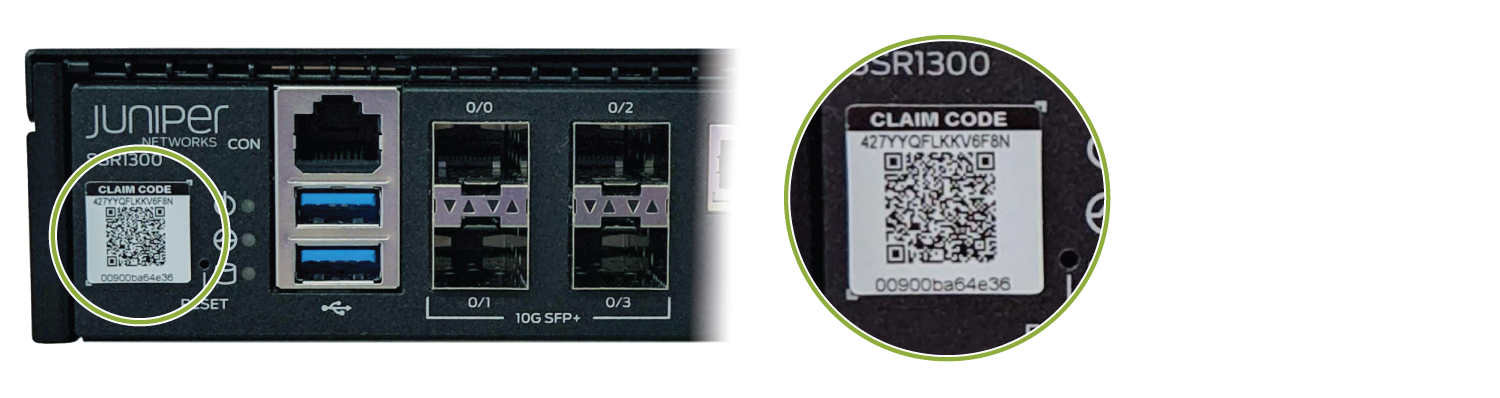
Copy the Claim Code from the QR sticker. The number listed on the top is the claim code. For example: In the following picture, the claim code is 427YYQFLKKV6F8N.
-
Login to the Mist UI on another device and navigate to your organization.
-
Go to the WAN Edges page and click Claim WAN Edges.

-
Enter the Claim Code.
Note:Under Manage Configuration, do not check Manage Configuration with Mist if your SSR1300 is running the SSR version 5.4.4 software.
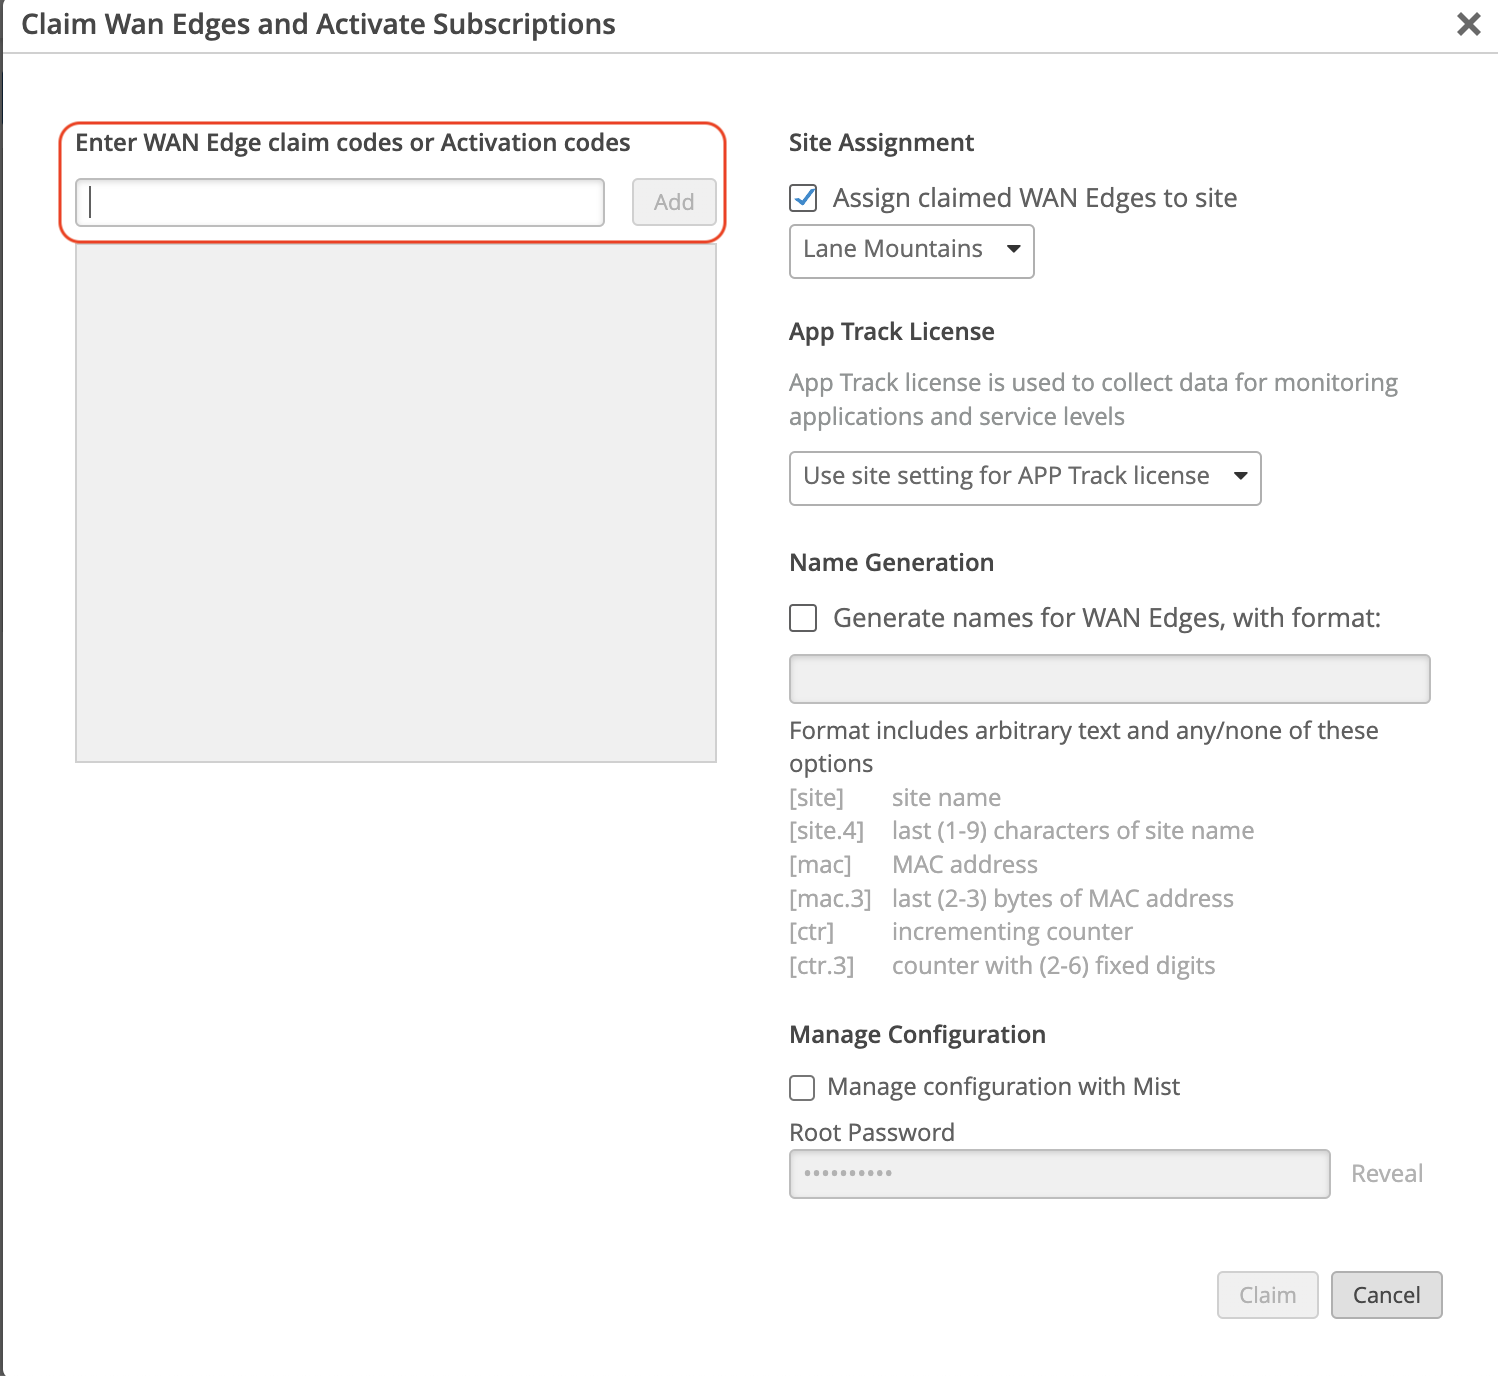
In the onboarding processes, conductor-managed devices reinitialize to use the factory default configuration with the conductor IP address. During the initialization process, it reaches out to the conductor and pulls down the appropriate configuration.
After a few minutes the SSR will appear in the inventory as "Unassigned". Once it appears in the inventory, it must be assigned to a site. Assign the SSR1300 appliance to a site to complete the SSR onboarding. See Assign SSR1300 to a Site.
Assign SSR1300 to a Site
After the SSR has been onboarded to the Mist Cloud, assign it to a site to begin managing the appliance configuration and gathering data in Mist.
In the Mist Inventory page the new appliance shows as Unassigned.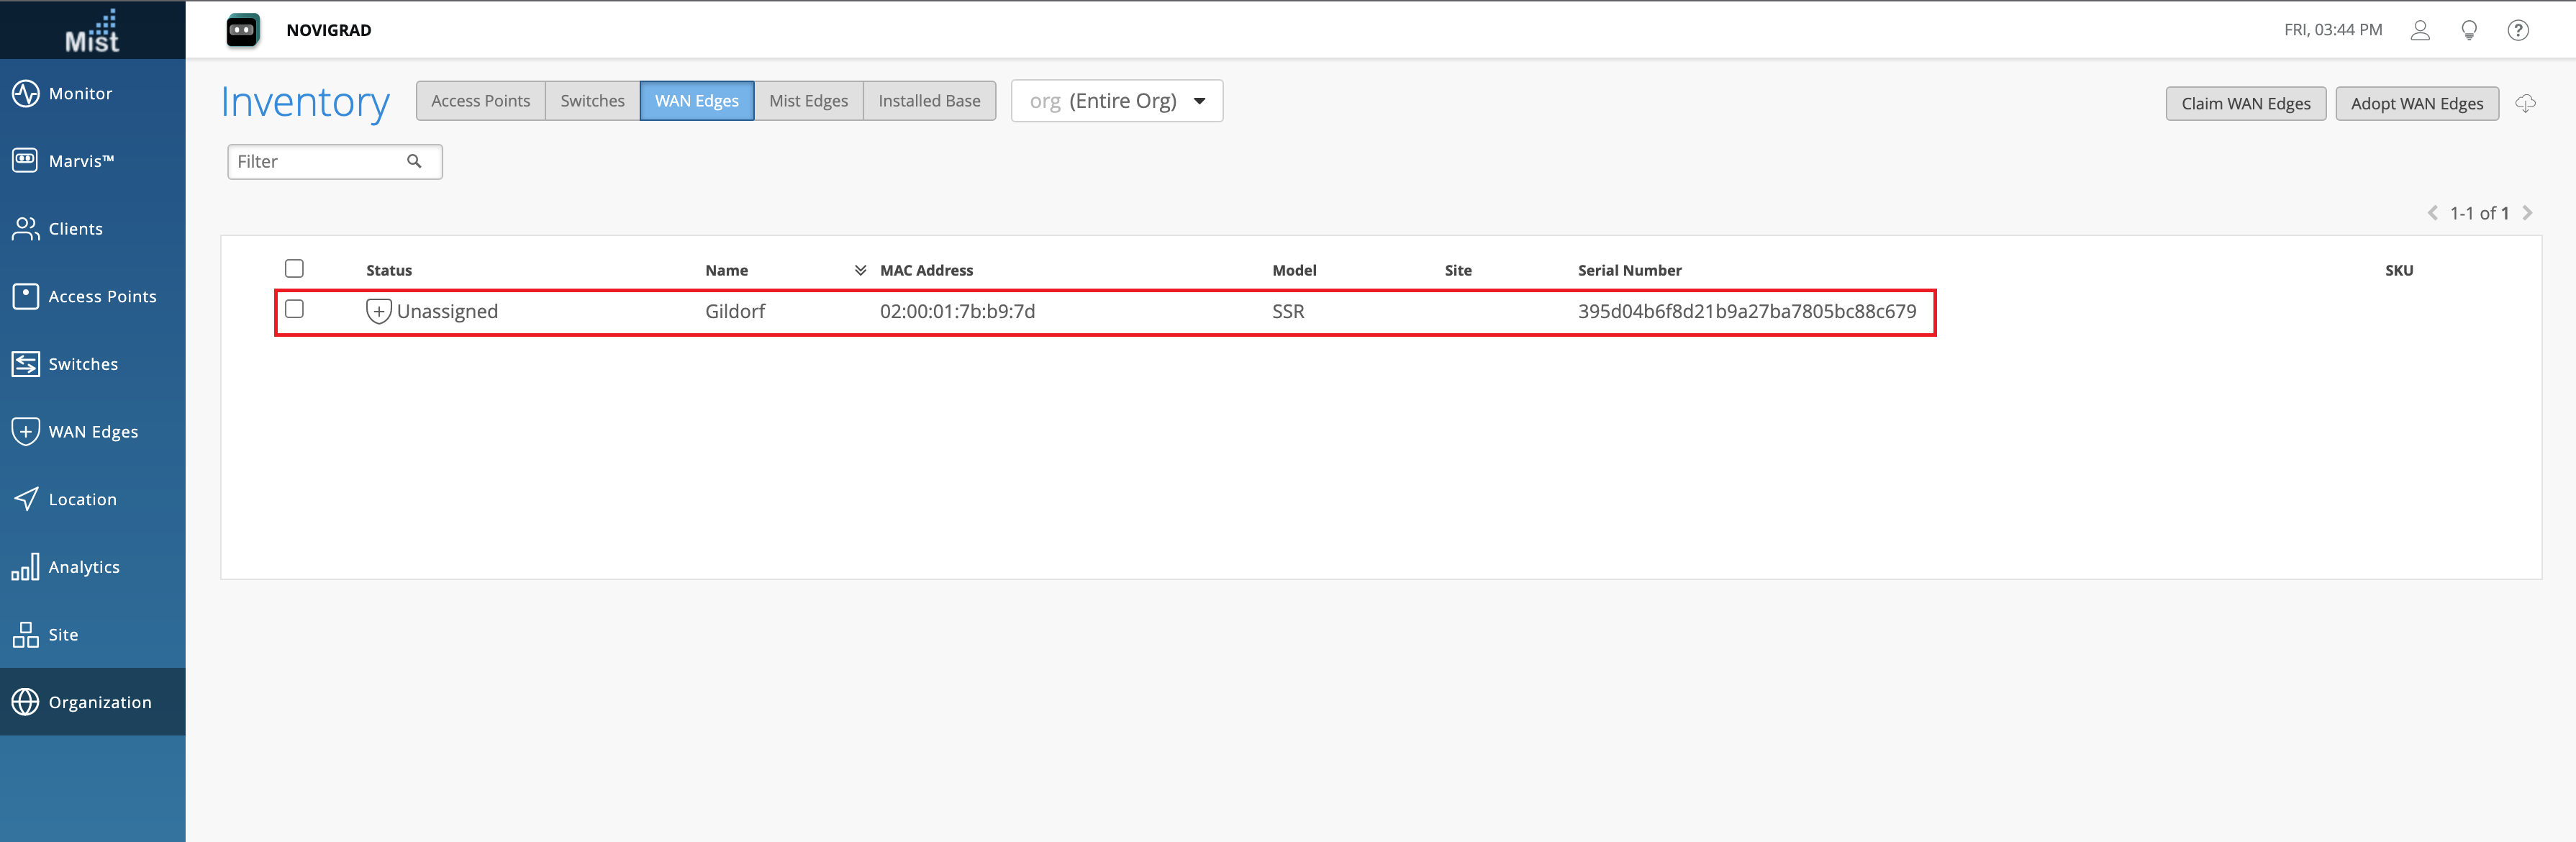
-
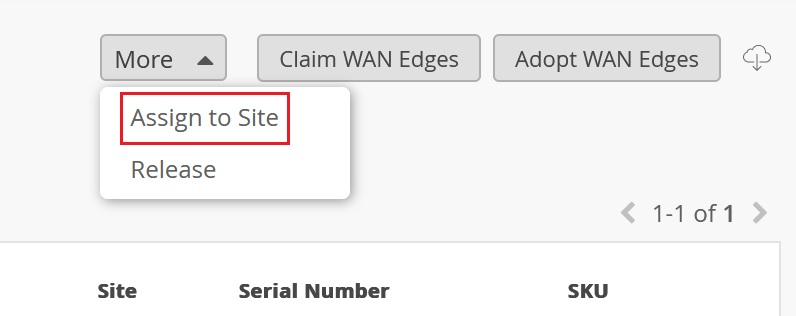
Select the new appliance. From the More drop-down list, select Assign to Site.
-
Select the site from the Site list.
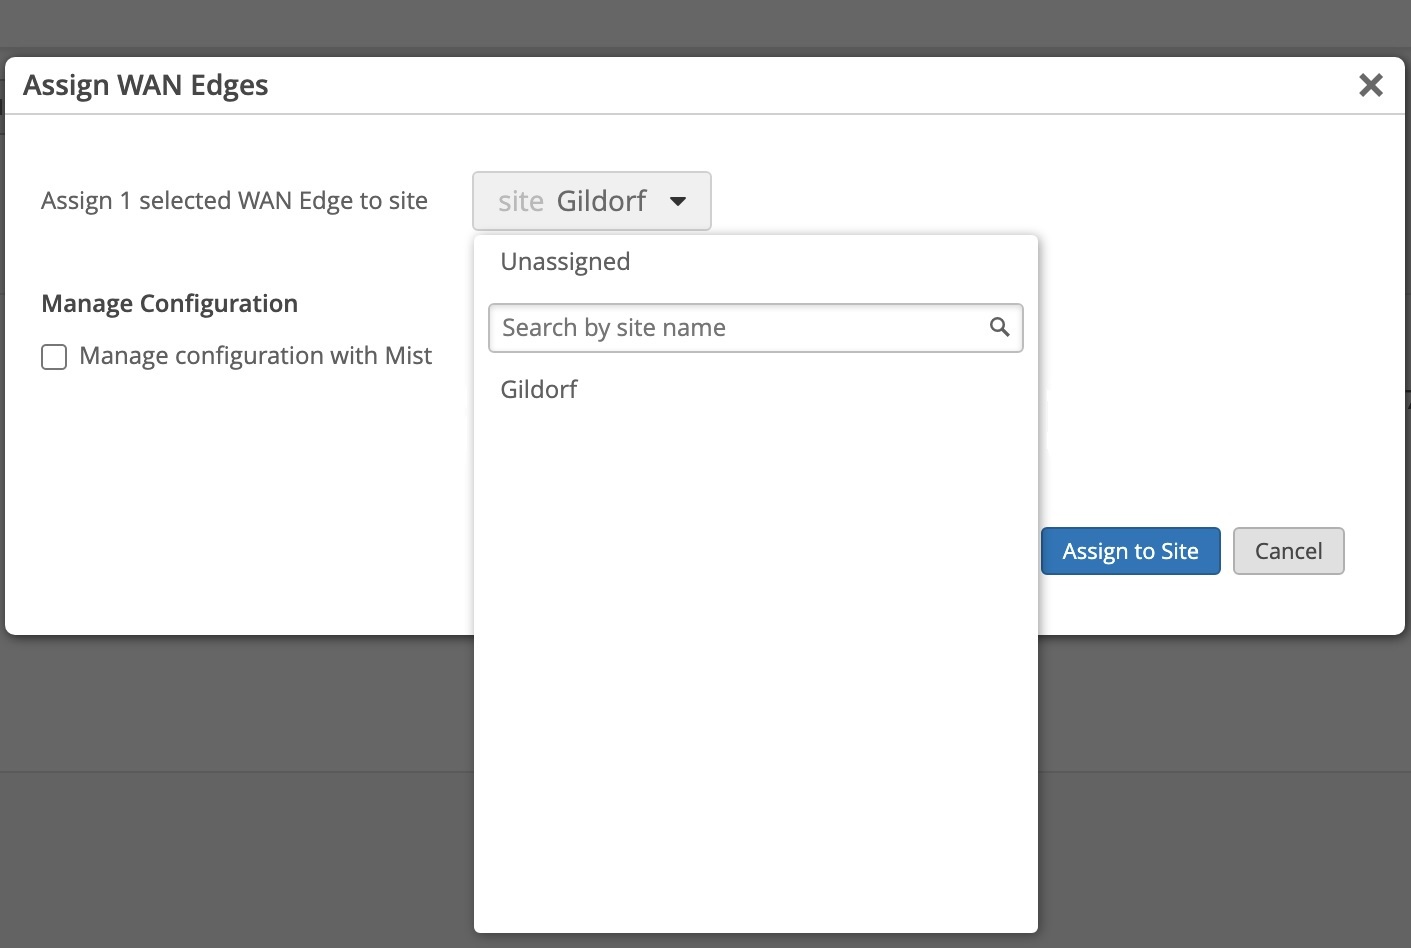
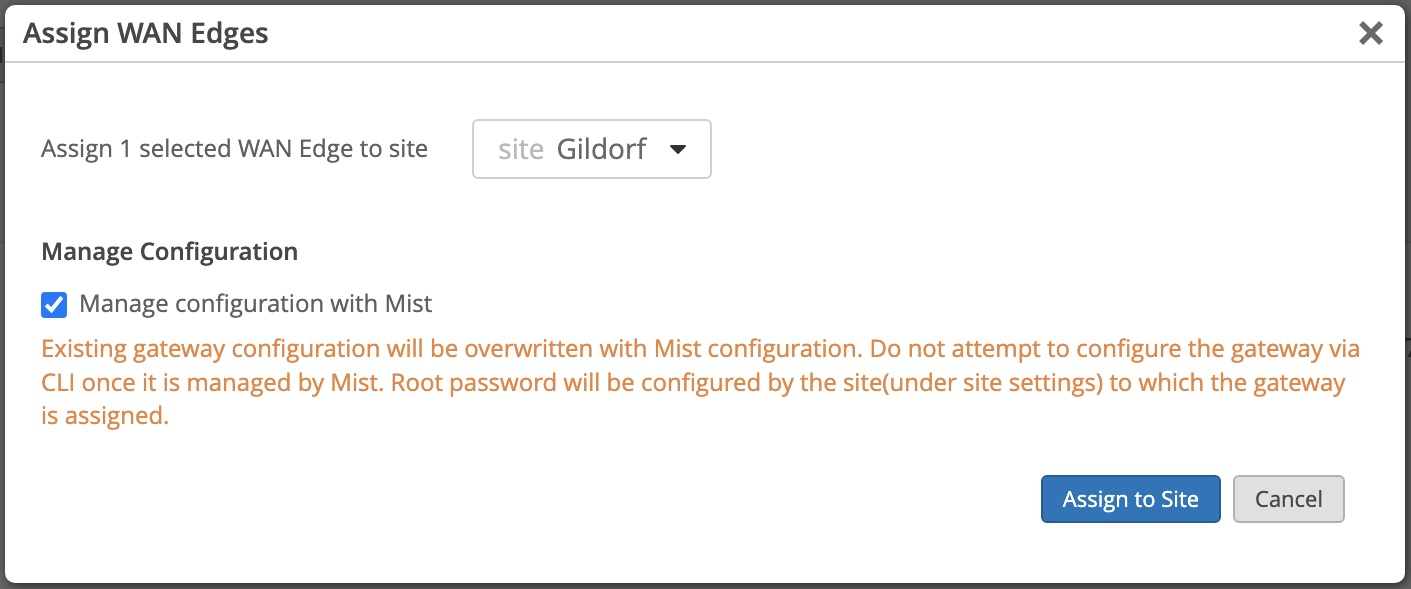
Under Manage Configuration, do not check Manage Configuration with Mist for the SSR Conductor managed appliance. This allows the device to reach out to the conductor IP address specified when the site was created to receive configuration information.
Note:Select Manage Configuration with Mist under Manage Configuration if you are on-boarding a Mist-managed device using Session Smart Router software version 6.0. If Manage Configuration with Mist is not selected, the appliance will not be managed by Mist.
-
Click Assign to Site.
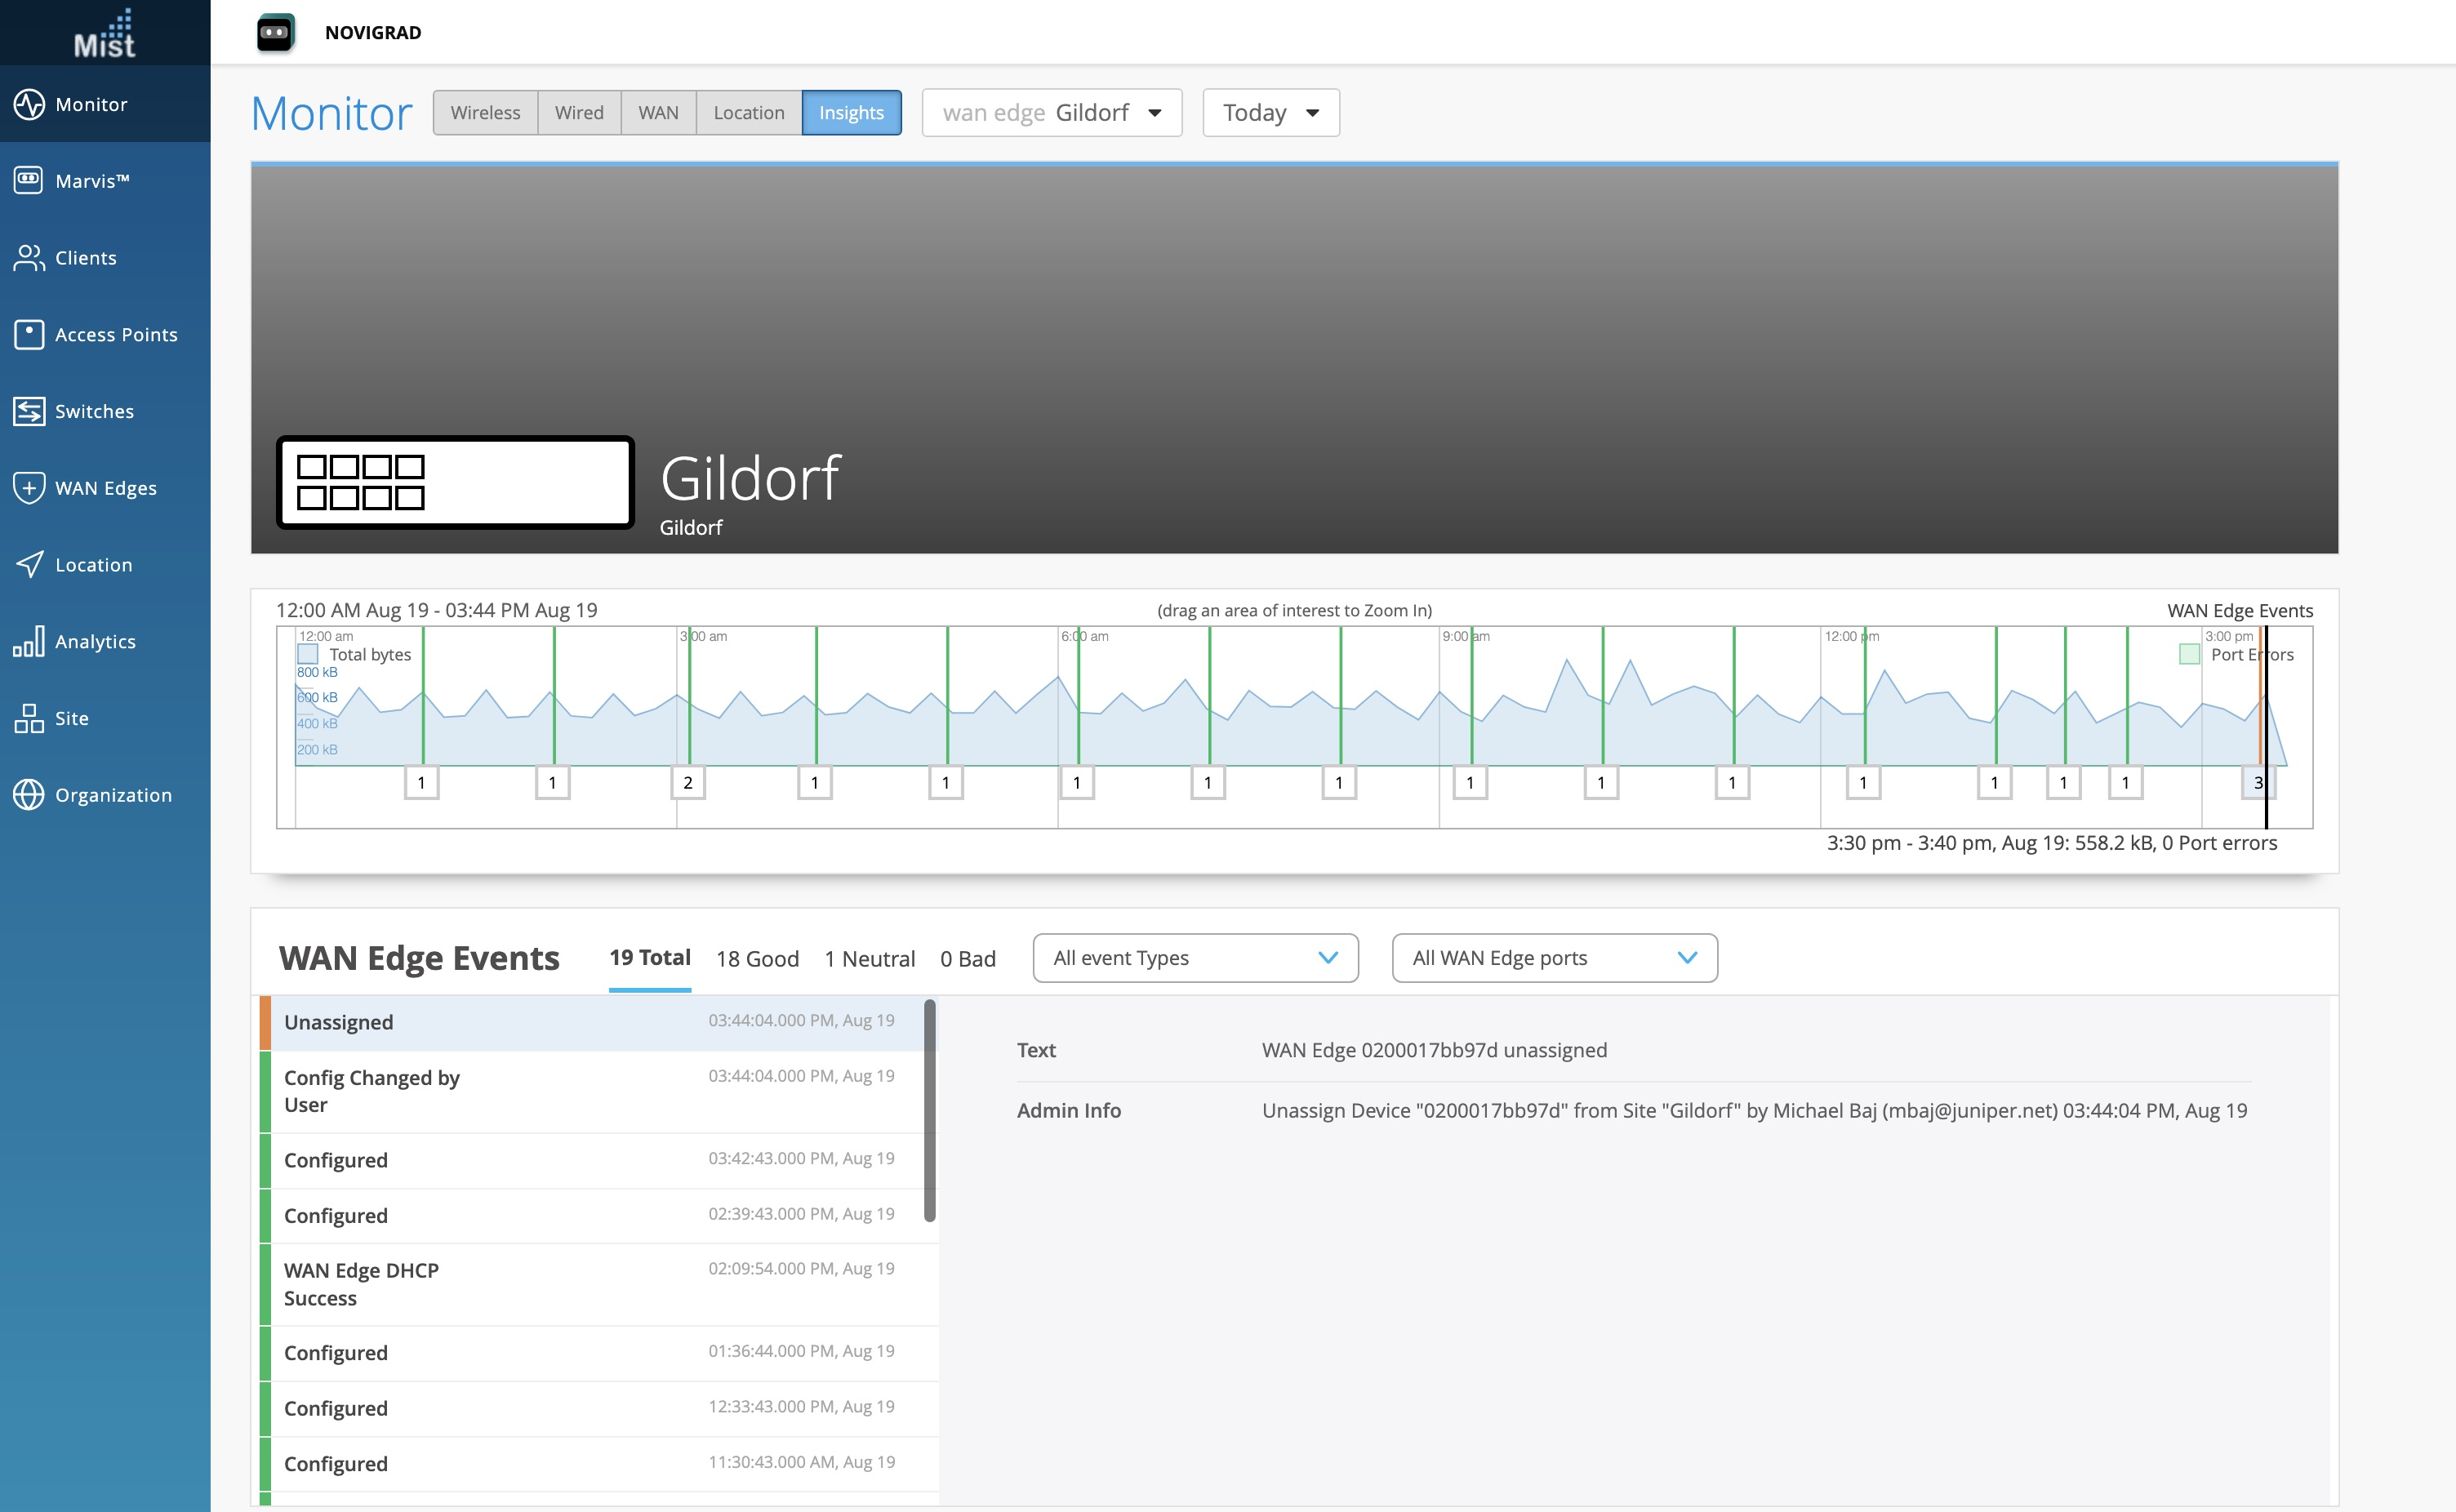
The site assignment will take a few minutes. Once the site is fully onboarded, use the Mist WAN Edge - Device View to access the appliance, and the Insights view to view events and activity.