Help us improve your experience.

Let us know what you think.

Do you have time for a two-minute survey?


Onboarding an SSR Conductor-Managed SSR120 Onto Mist Cloud

SSR120 comes pre-installed with the Session Smart Router software version 5.4.4. The appliance includes a QR code that when scanned, automatically adopts your device into your Mist Organization. Scan the code using your Mist AI App or a QR Scanner and follow the on-screen instructions to adopt your device.

The Mist App can be downloaded from the following locations:

Note:

When a SSR120 device is assigned to a site and set to be managed by Mist, you will be prompted to upgrade to a version of software compatible with Mist. In some initial onboarding cases, the upgrade process may take thirty minutes or more.

For devices that are to be conductor-managed in a non-Mist environment, see QuickStart From the OTP ISO

Pre-Onboarding Verification

When onboarding a conductor-managed appliance, the process is simplified by ensuring that the IP address of the managing conductor is configured for the site that will adopt the appliance. This is typically done during Site Configuration.

To verify the conductor IP address has been assigned:

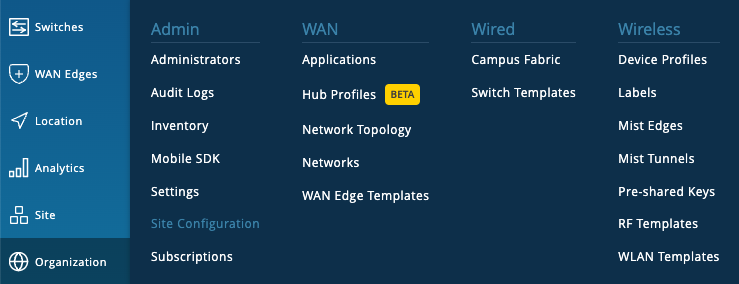
  1. Select Site Configuration from the Organization menu.
    Menu interface from a network management system with sections for Admin, WAN, Wired, and Wireless options.
  2. Select the Site the appliance will be adopted into from the list of Sites.
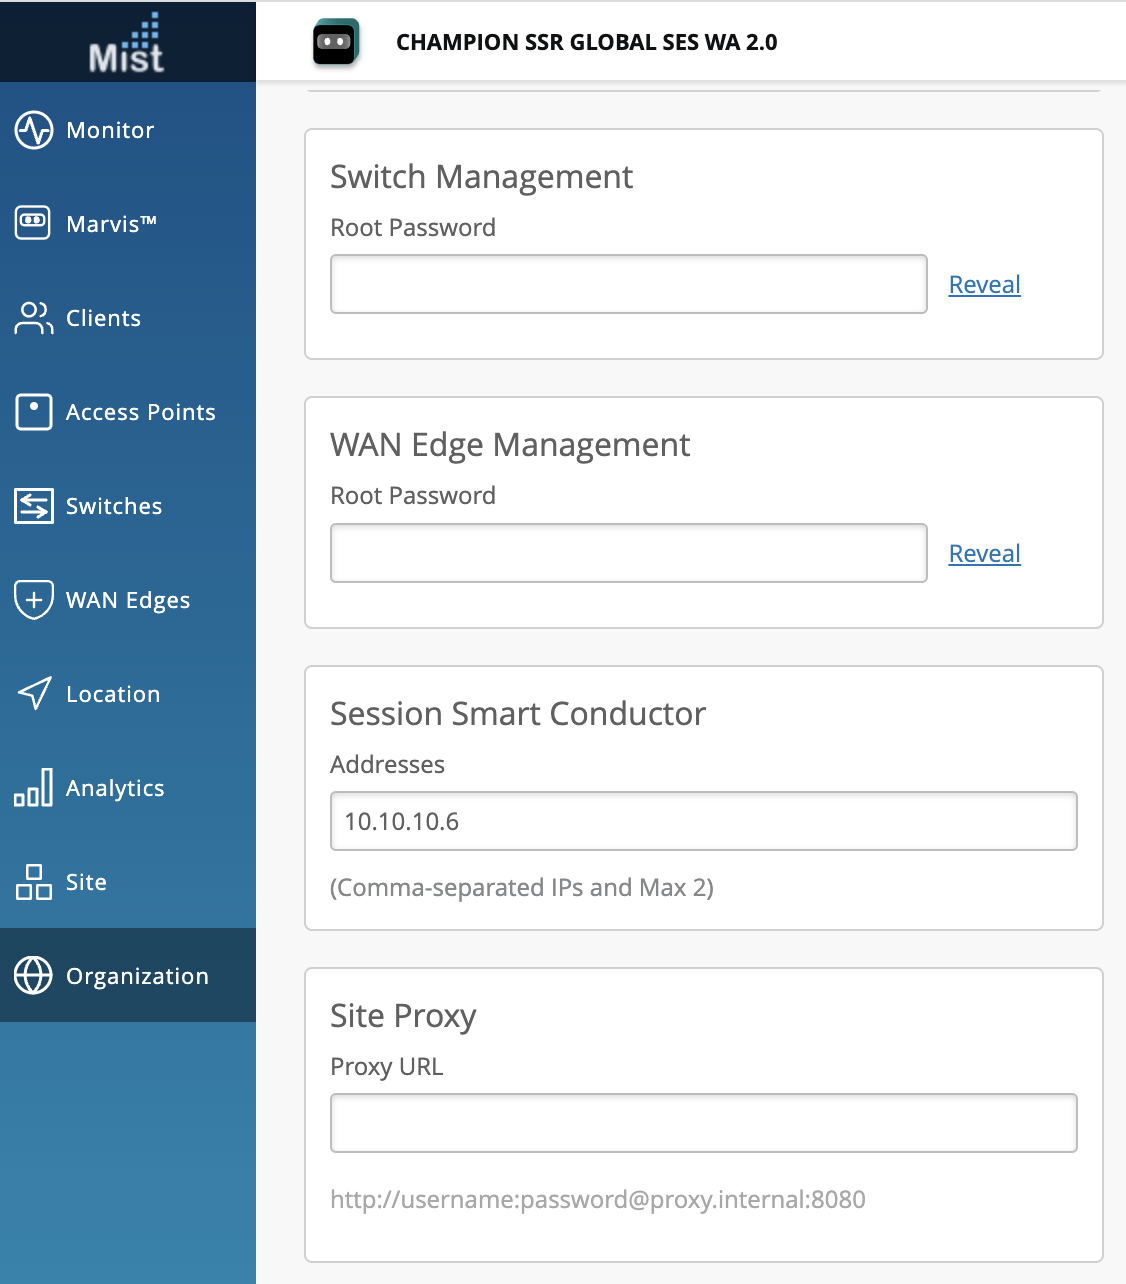
  3. Scroll down to Session Smart Conductor and verify the IP address.
    Network management interface from Mist titled CHAMPION SSR GLOBAL SES WA 2.0 with sections for Switch Management, WAN Edge Management, Session Smart Conductor, and Site Proxy, plus a navigation menu on the left.

    If no IP address is present, copy the IP address from the SSR GUI.

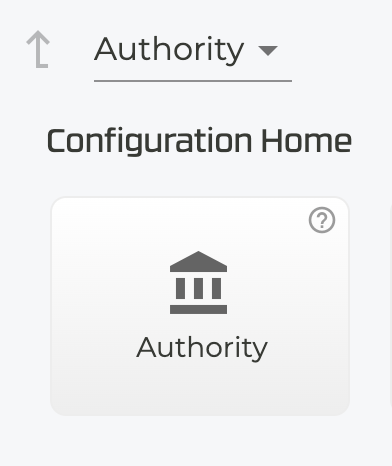
    1. On the Configuration Home panel in the SSR GUI, click Authority.

      Authority configuration dashboard with dropdown menu, Configuration Home title, government building icon labeled Authority, and help icon in top-right corner.
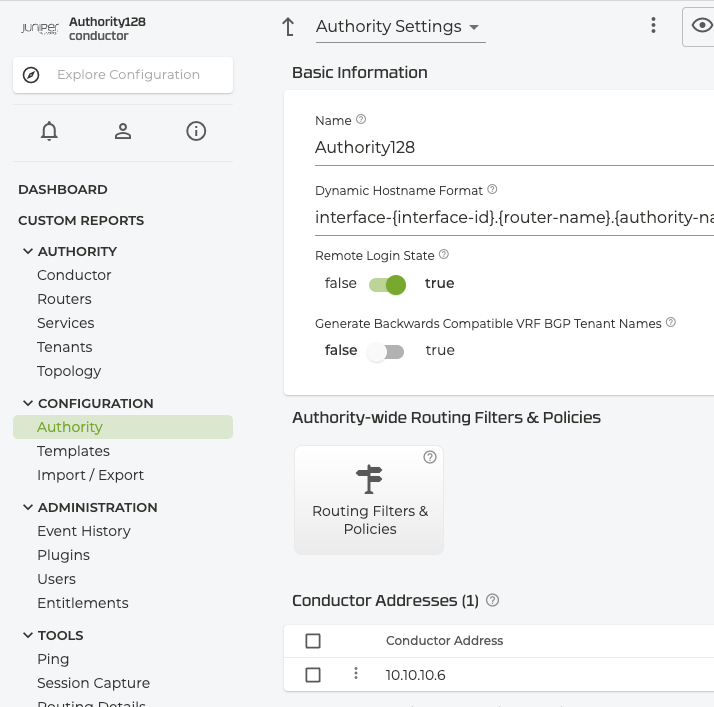
    2. Under Authority Settings, scroll down to Conductor Addresses and copy the IP address of the conductor.

      Network management interface showing Authority Settings with Authority128, dynamic hostname format, remote login state, VRF BGP tenant names, routing filters, policies, and conductor address 10.10.10.6. Navigation includes Dashboard, Custom Reports, Configuration, Administration.
  4. Return to the Mist Site Configuration, scroll down to the Session Smart Conductor and add the conductor IP address
    Network management interface from Mist titled CHAMPION SSR GLOBAL SES WA 2.0 with sections for Switch Management, WAN Edge Management, Session Smart Conductor, and Site Proxy, plus a navigation menu on the left.

Onboarding a Conductor-Managed SSR120 Through the Mist Portal

Use the following process to onboard a conductor-managed SSR appliance into the Mist cloud using the Mist UI and your claim code.

  1. Unbox the SSR120 appliance.
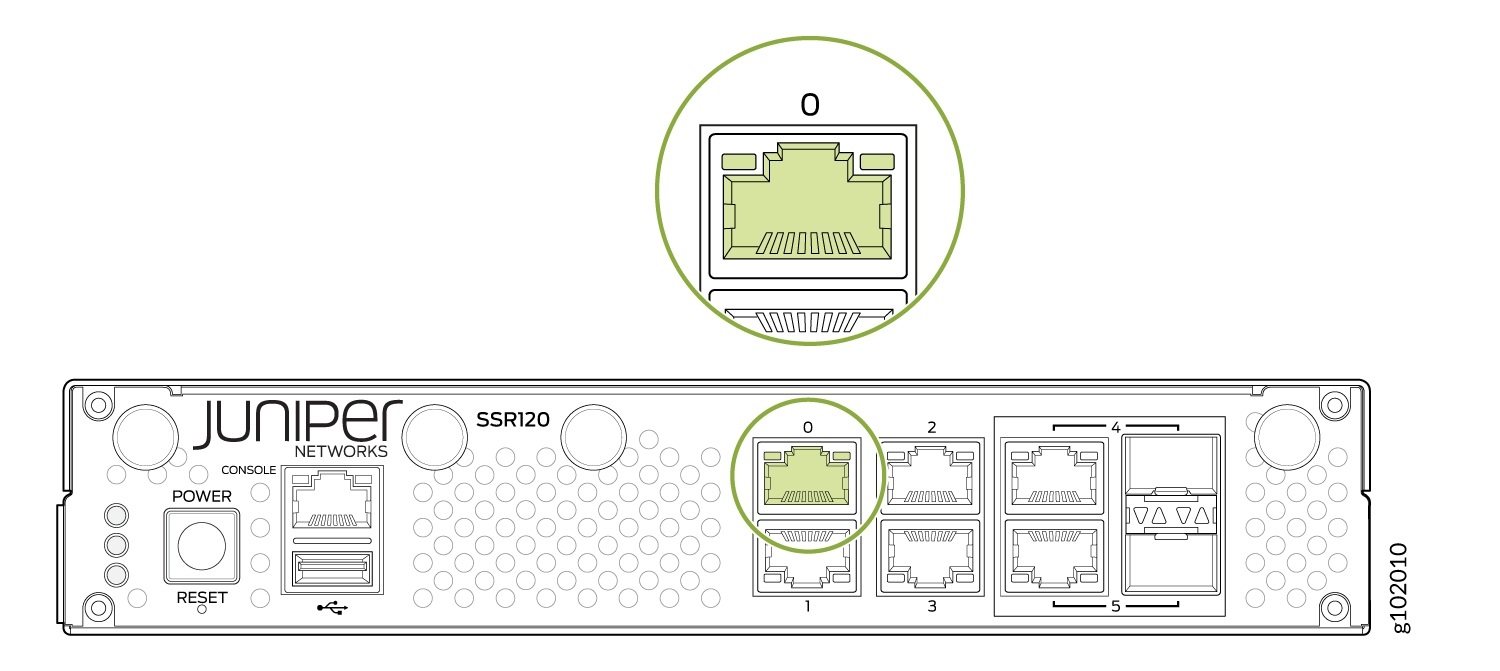
  2. Connect to the WAN port. The port 0 on the front panel of the SSR120 appliance is the WAN 1 network interface port.
    Juniper Networks SSR120 front panel with power and reset buttons, console and USB ports, Ethernet ports 0, 1, 2, and SFP ports 4, 5. Highlight on Ethernet Port 0.
  3. Power up the SSR120.
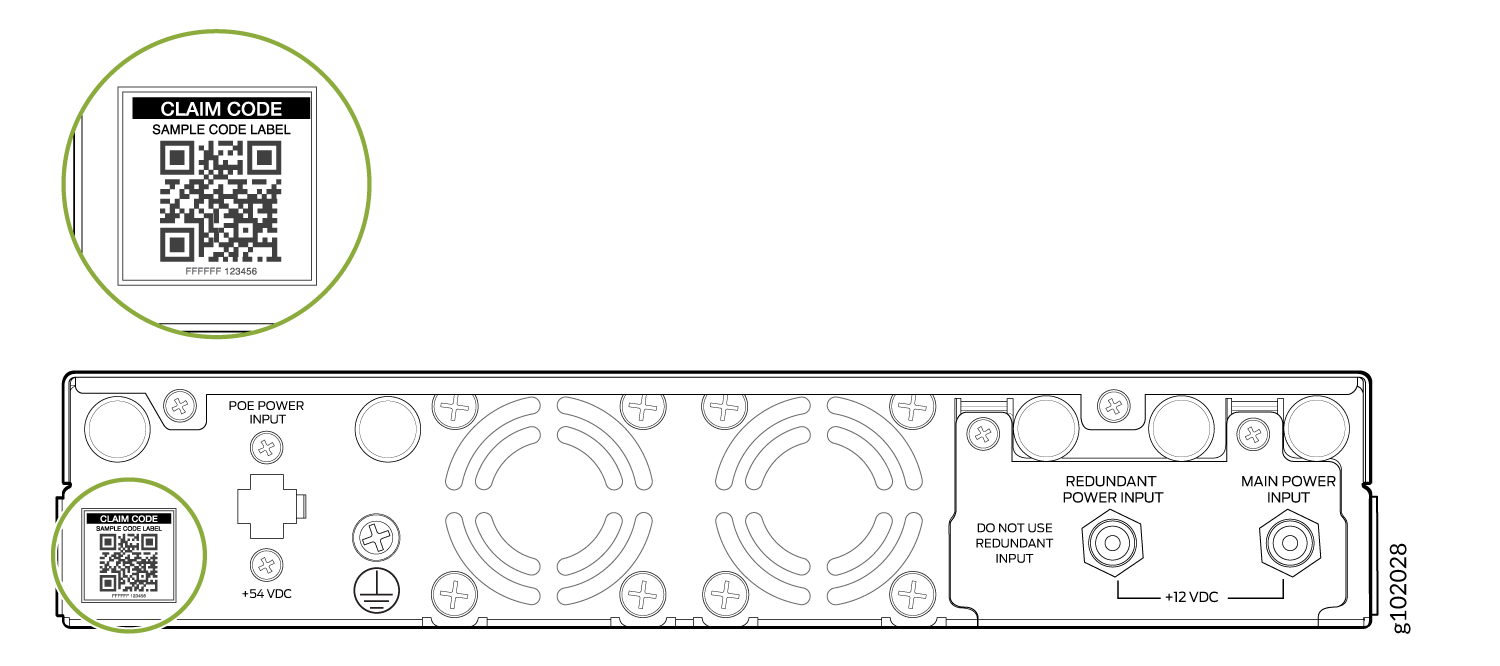
  4. Copy the claim code from the QR sticker. The number listed on the top is the claim code. For example: In the following picture, the claim code is SAMPLECODELABEL.
    Back panel of a device with labeled ports: POE Power Input for Ethernet, Redundant Power Input +12 VDC, Main Power Input +12 VDC. Includes a QR code for device registration and cooling fans.
  5. Login to the Mist UI on another device and navigate to your organization.
  6. Go to the WAN Edges page and click Claim WAN Edges.
    Screenshot of Mist's WAN Edges section showing site selection, view options, and Claim WAN Edges button. No data displayed in the table.
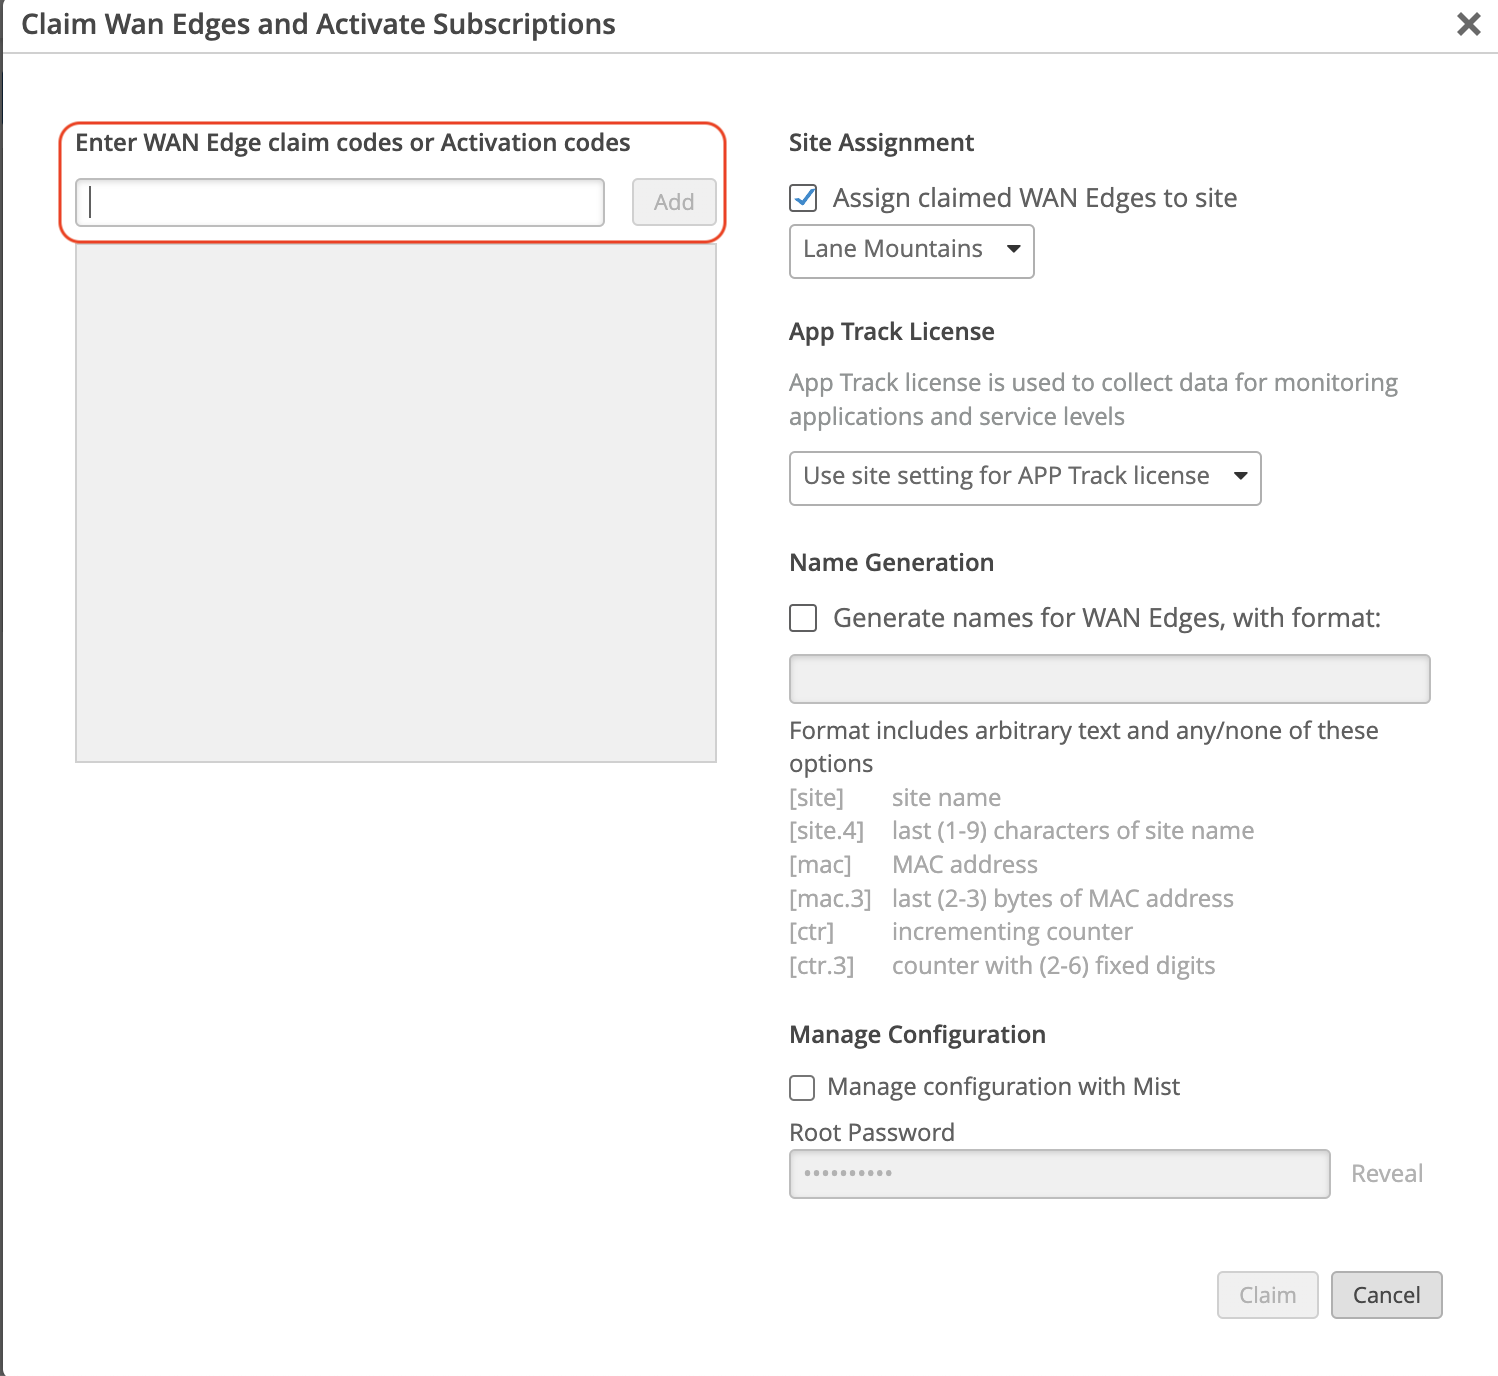
  7. Enter the claim code.
    Note:

    Under Manage Configuration, do not check Manage Configuration with Mist if your SSR120 is running the SSR software version 5.4.4.

    Configuration interface for claiming WAN Edge devices and activating subscriptions with options for entering claim codes, site assignment to Lane Mountains, App Track license configuration, optional name generation, and managing configuration with Mist. Includes Claim and Cancel buttons.

In the onboarding process, conductor-managed appliances reinitialize to use the factory-default configuration with the conductor IP address. During the initialization process, it reaches out to the conductor and pulls down the appropriate configuration.

After a few minutes, the SSR120 appears in the Inventory with the status as Unassigned. Once it appears in the inventory, it must be assigned to a site. Assign the SSR120 appliance to a site to complete the SSR onboarding.

Assign SSR120 to a Site

After the SSR has been onboarded to the Mist Cloud, assign it to a site to begin managing the appliance configuration and gathering data in Mist.

In the Mist Inventory page, the new appliance shows as Unassigned.

Mist dashboard showing an unassigned WAN Edge device named Gildorf with MAC 02:00:01:7b:b9:7d and serial 395d04b6f8d21b9a27ba7805bc88c679.
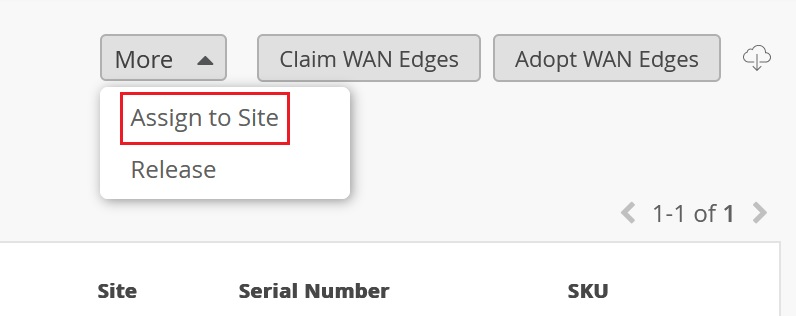
  1. Select the new appliance. From the More drop-down list, select Assign to Site.
    User interface screenshot with buttons labeled More, Claim WAN Edges, and Adopt WAN Edges; dropdown menu with Assign to Site and Release; table with one row labeled Site, Serial Number, and SKU.
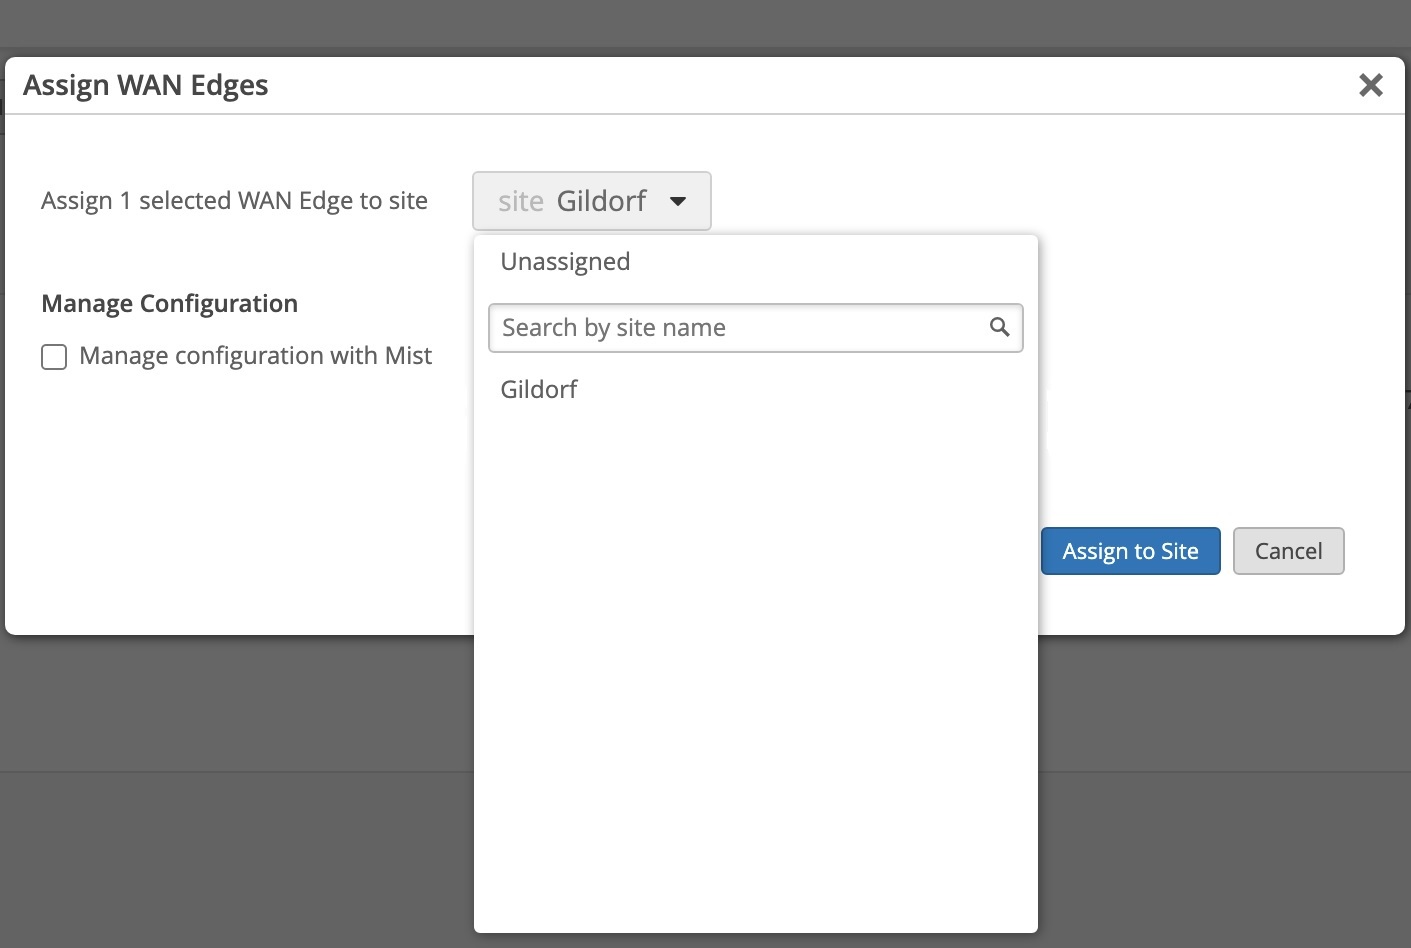
  2. Select the site from the Site list.
    Assign WAN Edges dialog with site dropdown showing Gildorf selected, manage configuration checkbox unchecked, and buttons for Assign to Site and Cancel.

    Under Manage Configuration, do not check Manage Configuration with Mist for the SSR Conductor managed appliance. This allows the device to reach out to the conductor IP address specified when the site was created to receive configuration information.

    Note:

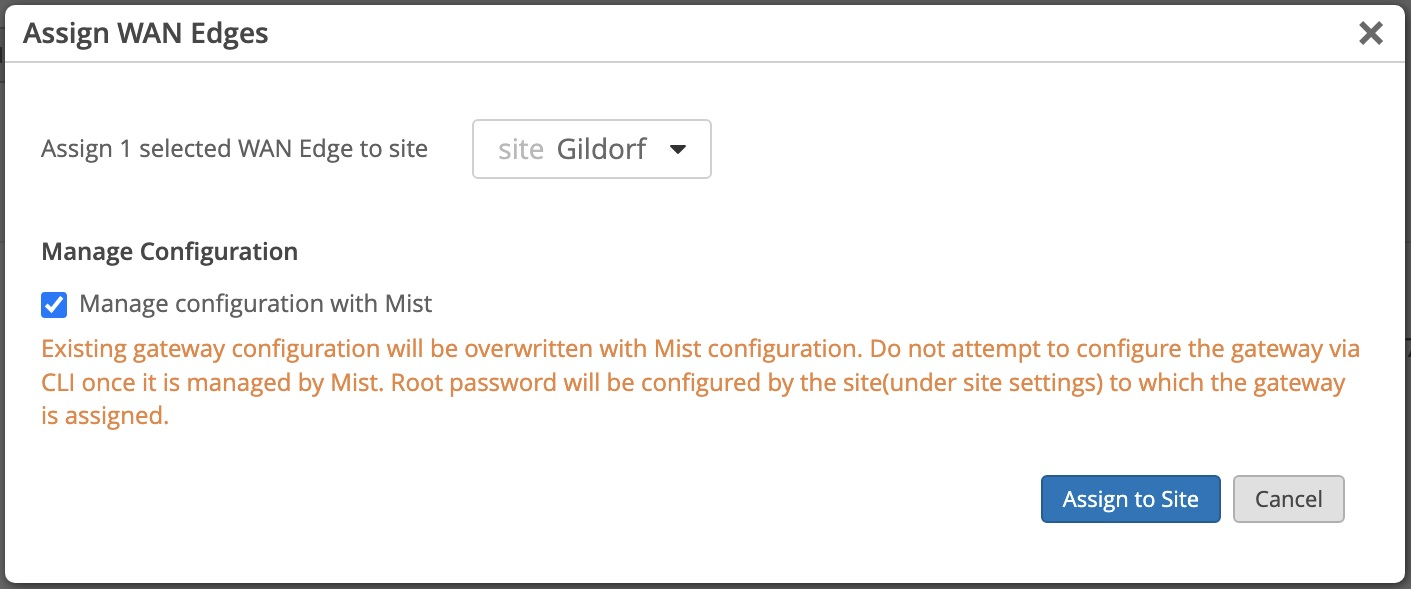
    If you are onboarding a Mist-managed appliance using Session Smart Router software version 6.0, select Manage Configuration with Mist. If Manage Configuration with Mist is not selected, the appliance will not be managed by Mist.

    Assign WAN Edges dialog box in network management interface with site selection dropdown, warning messages, and Assign to Site and Cancel buttons.
  3. Click Assign to Site.
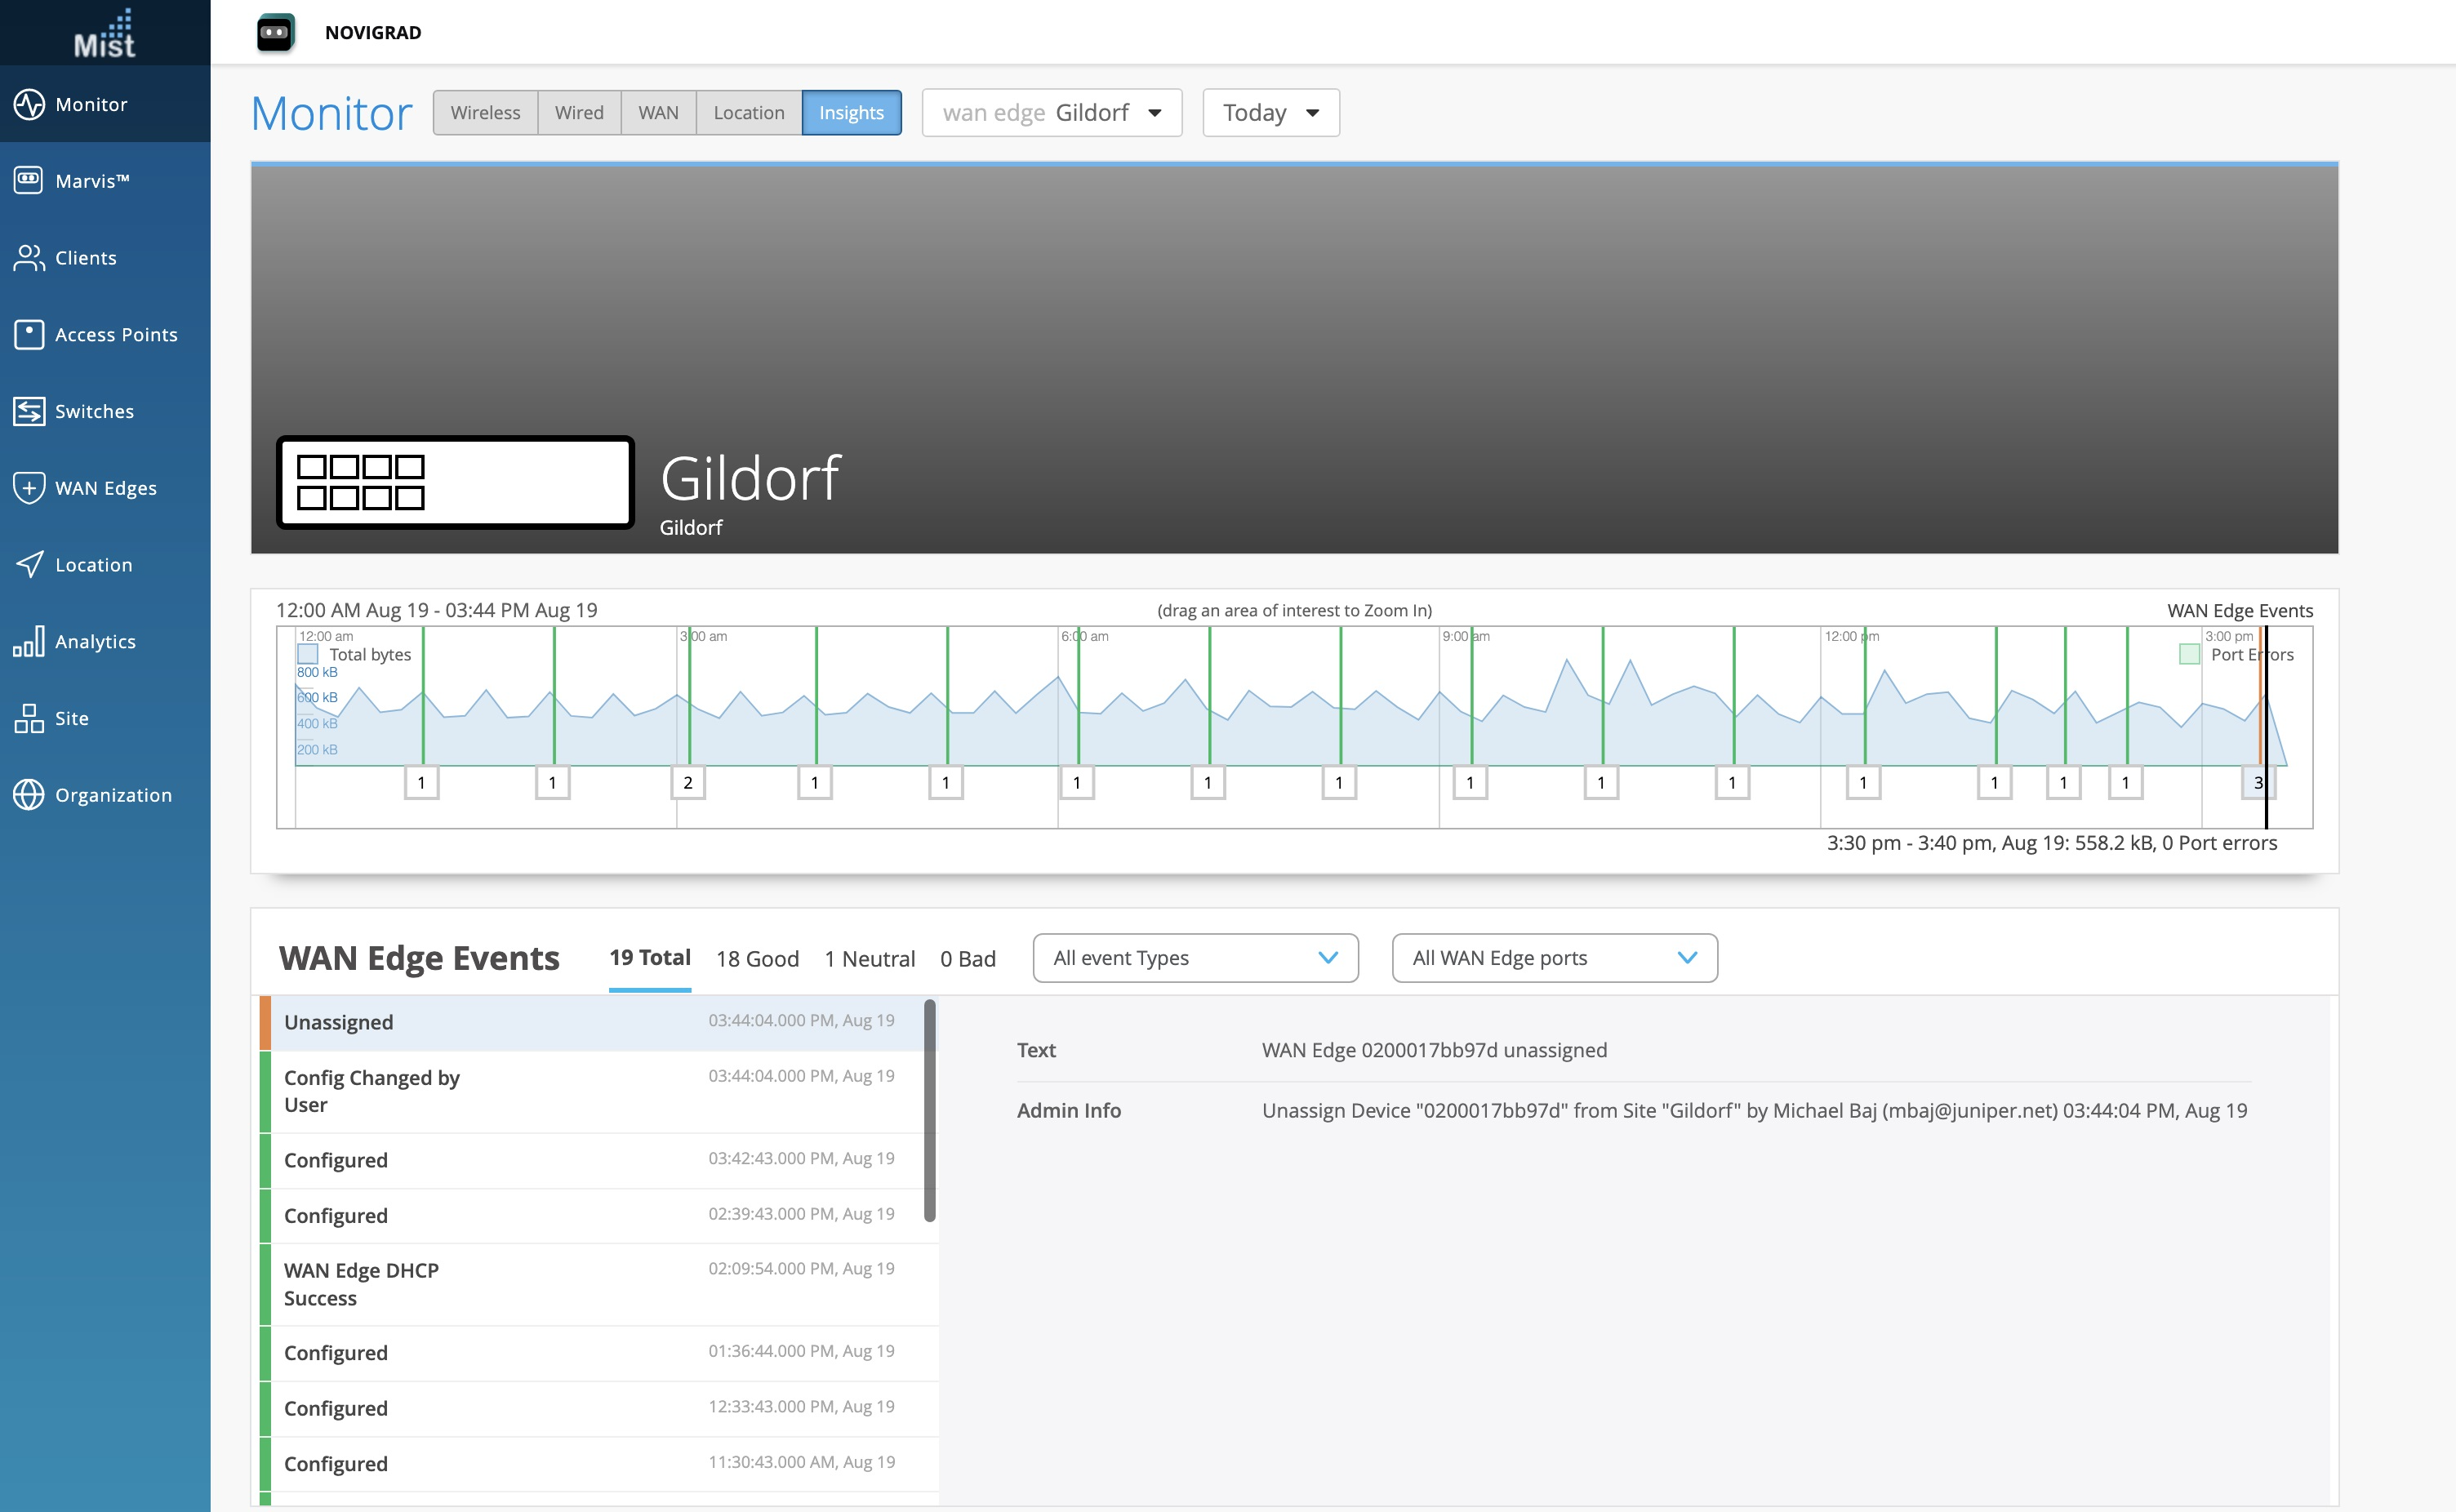
    Screenshot of Mist Systems network monitoring dashboard for WAN edge device Gildorf showing network activity timeline from 12:00 AM to 3:44 PM on August 19 with events and navigation menu.

The site assignment will take a few minutes. After the site is fully onboarded, use the Mist WAN Edge - Device View to access the appliance, and the Insights view to view events and activity.