Help us improve your experience.

Let us know what you think.

Do you have time for a two-minute survey?


Maintaining the SRX4100 Cooling System

Replacing the SRX4100 Services Gateway Fan Tray

To replace the fan tray:

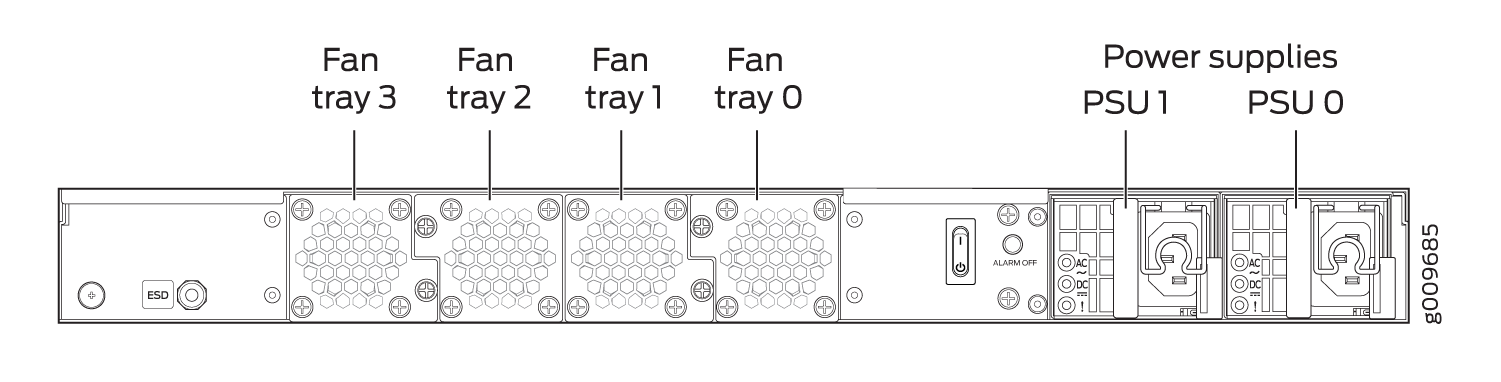
  1. Identify the physical location of the faulty fan tray on the rear panel of the chassis. Figure 1 shows how the fan trays are numbered.
    Figure 1: SRX4100 Services Gateway Fan Tray NumberingSRX4100 Services Gateway Fan Tray Numbering
  2. Attach an electrostatic discharge (ESD) grounding strap to your bare wrist, and connect the strap to the ESD point on the chassis.
  3. Loosen the captive screws on the fan tray faceplate.
  4. Grasp the captive screw and pull out the fan tray completely out of the chassis.
  5. Insert the replacement fan tray straight into the chassis.
  6. Tighten the captive screw on the fan tray faceplate to secure it in the chassis.