Step 2: Install the ACX5400 Chassis in the Rack
To install the router in a four-post rack or cabinet:
- Position the router in front of the rack or cabinet.
- Wrap and fasten one end of the ESD grounding strap around your bare wrist, and connect the other end of the strap to the ESD point on the chassis.
- Align the holes in the front-mounting rails with the holes
on the side of the chassis (see Figure 1 for ACX5448, Figure 2 for ACX5448-D,
and Figure 3 for ACX5448-M).Figure 1: Install Mounting Rails on an ACX5448 Router
 Figure 2: Install Mounting Rails on an ACX5448-D Router
 Figure 3: Install Mounting Rails on an ACX5448-M Router
- Using a Phillips (+) number 2 screwdriver and the mounting screws, secure the mounting rails to the chassis.
- With one person on each side, hold on to the bottom of the chassis and carefully lift it so that the mounting rails contact the rack rails.
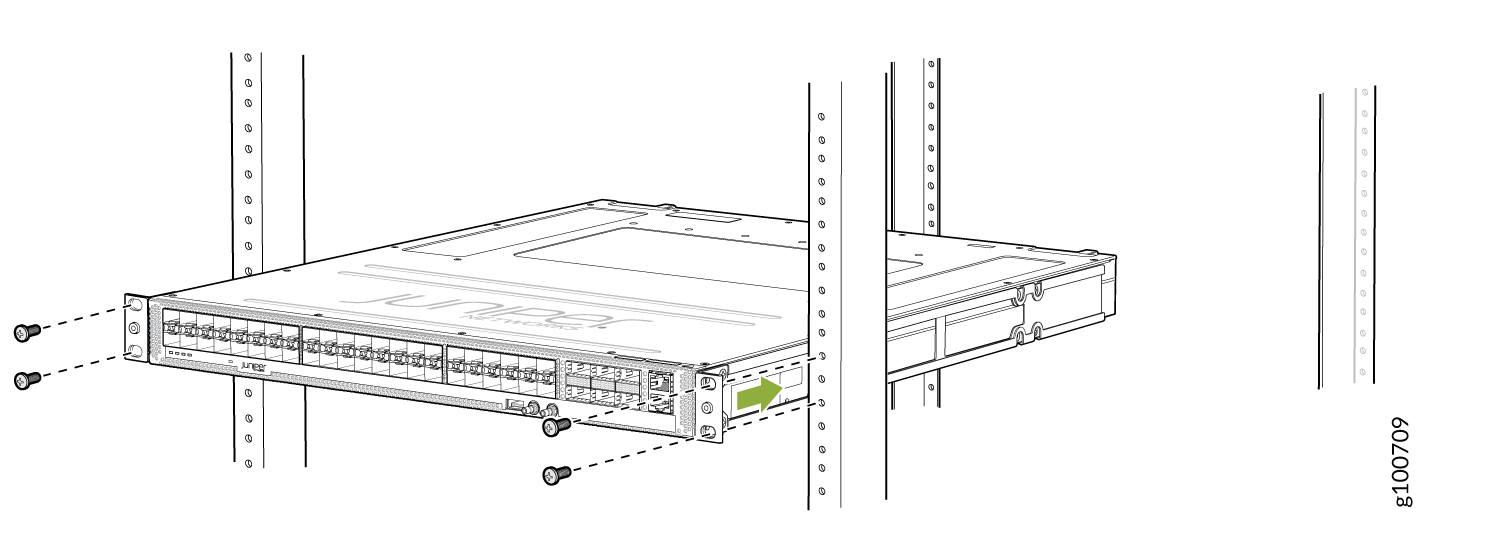
- Carefully slide the chassis with the rails attached on
to the rack rails (see Figure 4 for the ACX5448 router, Figure 5 for the ACX5448-D router, and Figure 6 for ACX5448-M router).Figure 4: Install the ACX5448 Router in a Four-Post Rack
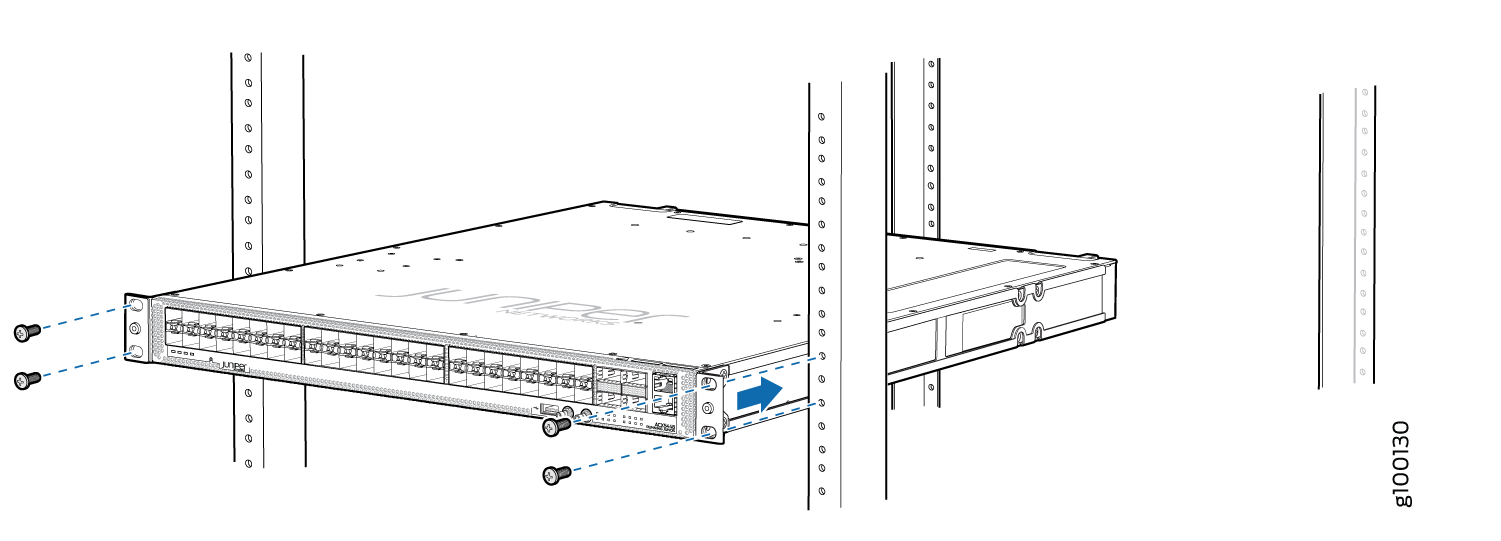 Figure 5: Install the ACX5448-D Router in a Four-Post Rack
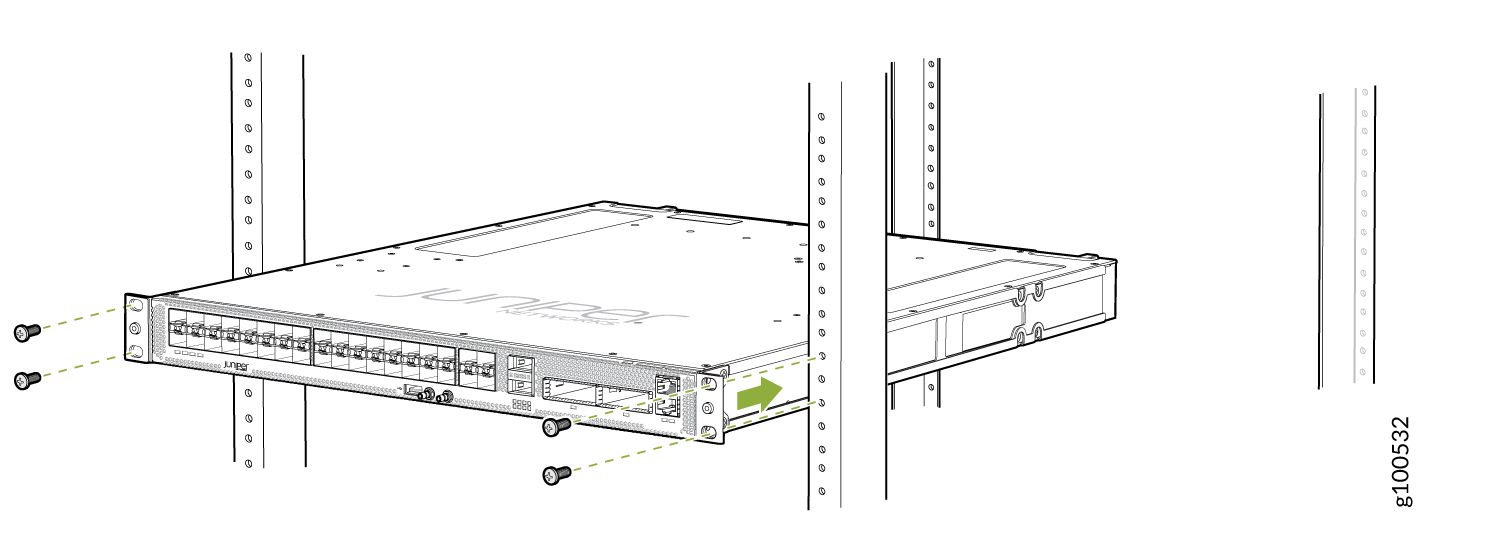 Figure 6: Install the ACX5448-M Router in a Four-Post Rack
- Install mounting screws into each of the open front-mounting
bracket holes aligned with the rack, starting from the bottom, and
secure them tightly. Figure 7, Figure 8, and Figure 9show the router fully secured to the front rails of the four-post
rack.Figure 7: ACX5448 Router Secured by Front-Mounting Brackets
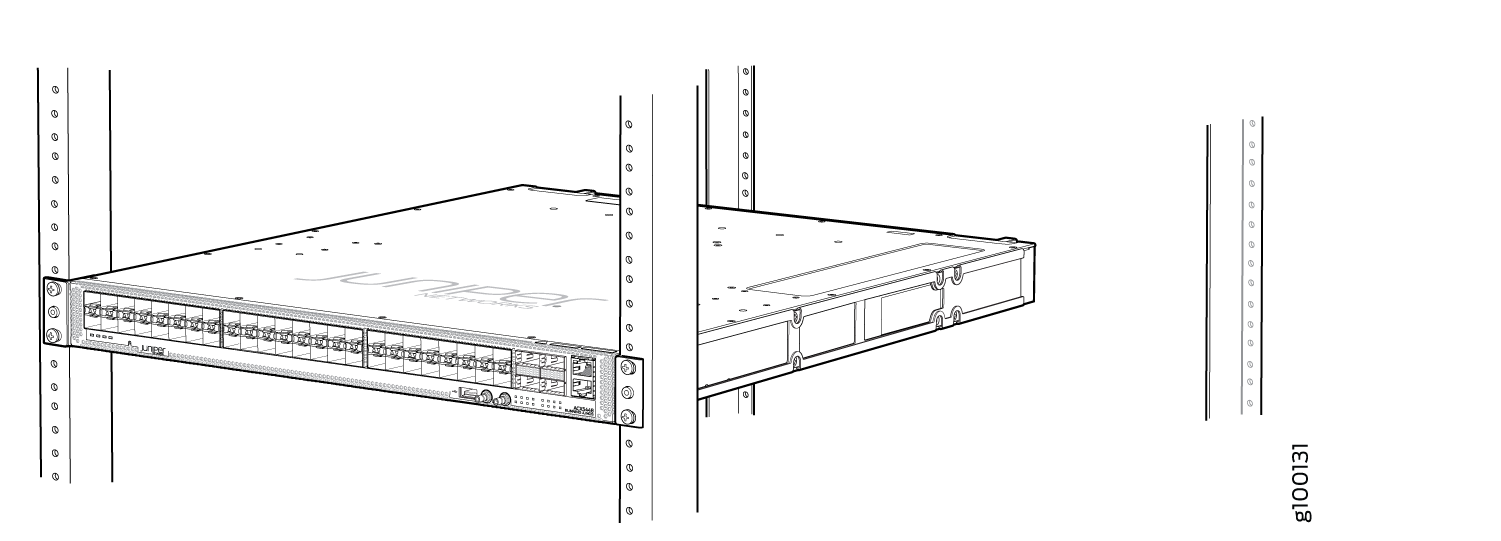 Figure 8: ACX5448-D Router Secured by Front-Mounting Brackets
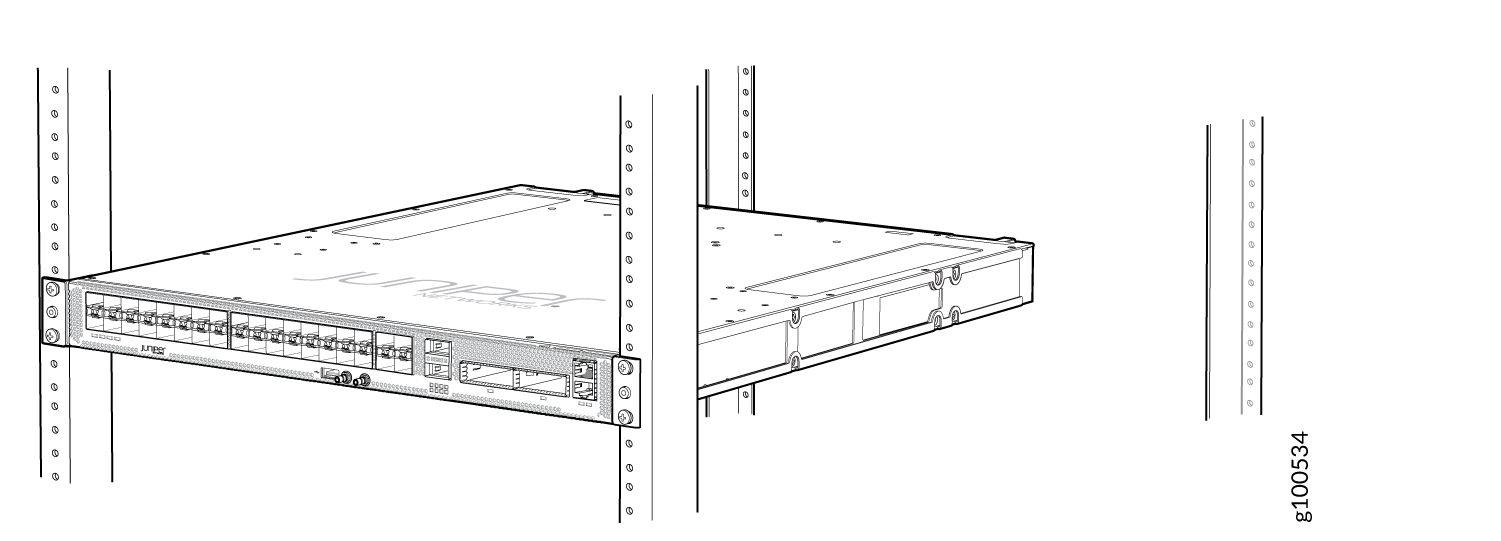 Figure 9: ACX5448-M Router Secured by Front-Mounting Brackets
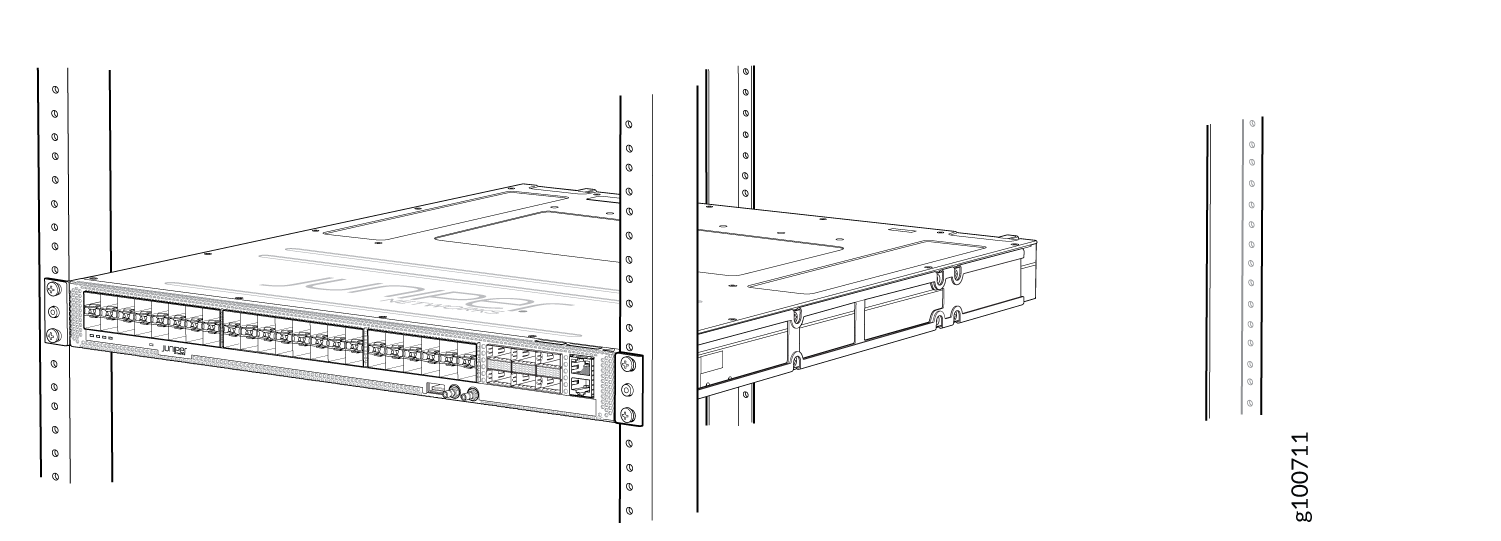
- On the rear of the chassis, slide the rear-mounting blades
on either side of the chassis until the rear-mounting brackets at
the end of the blades contact the rack rails (see Figure 10 for the ACX5448 router, Figure 11 for the ACX5448-D router,
and Figure 12 for the ACX5448-M
router).
The mounting blades are movable. You can adjust the length of the blades according to the depth of the rack.
Figure 10: Install Mounting Blades on an ACX5448 Router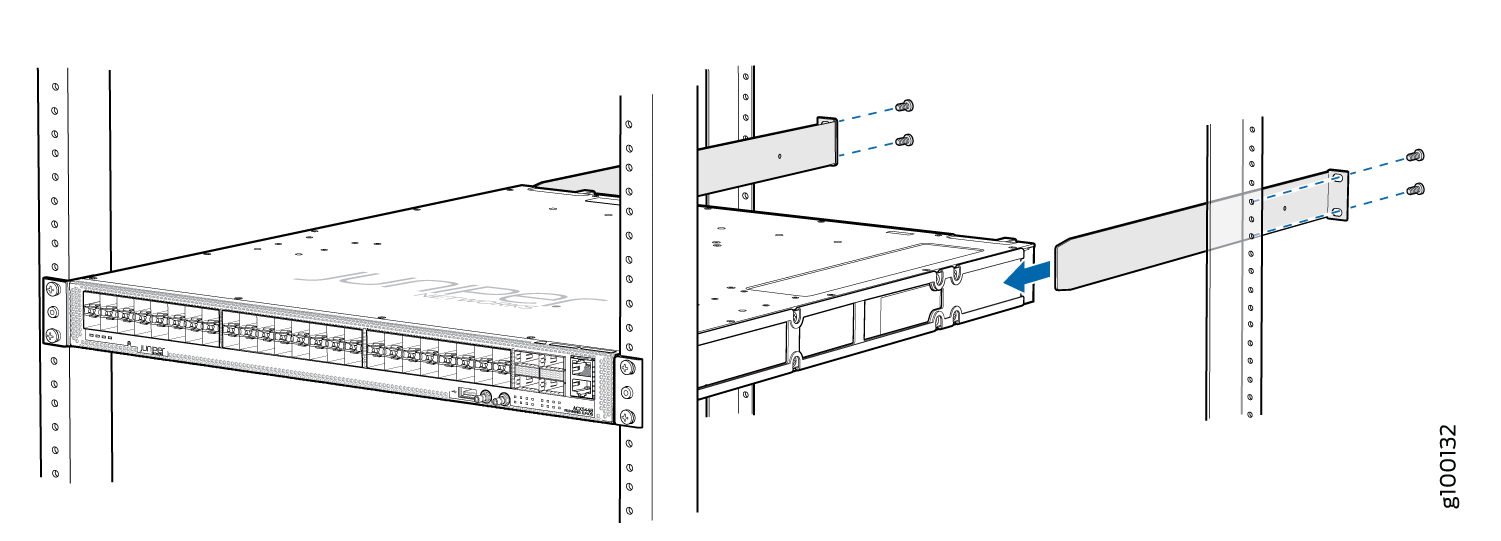 Figure 11: Install Mounting Blades on an ACX5448-D Router
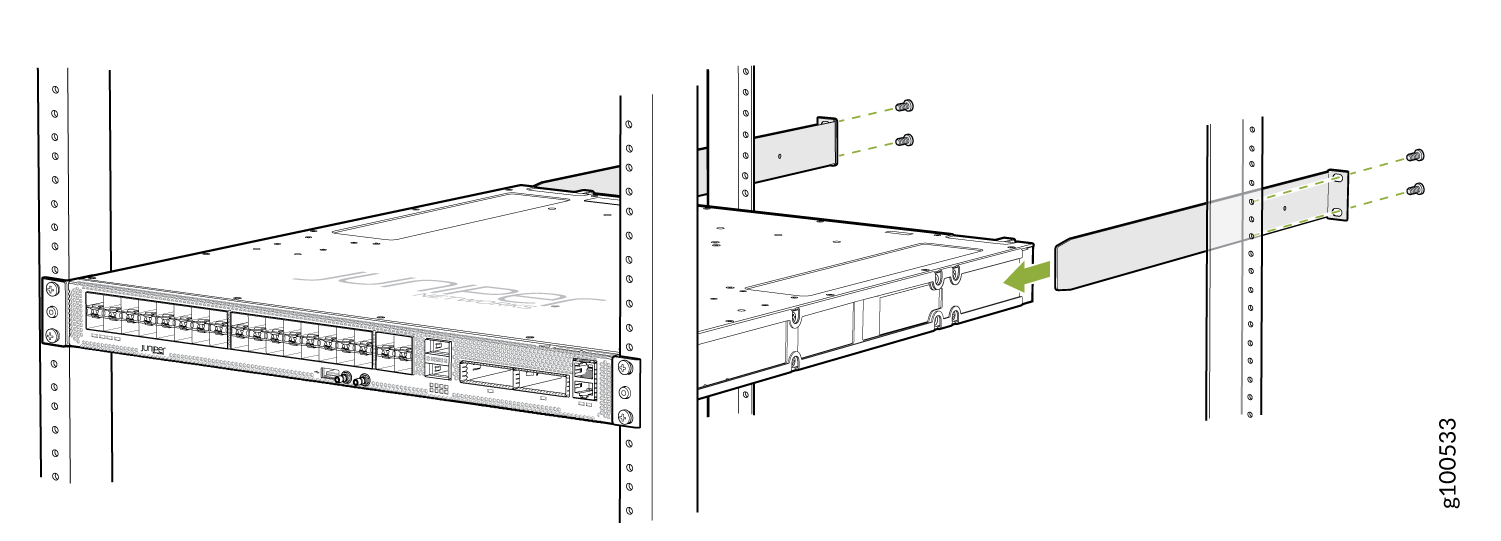 Figure 12: Install Mounting Blades on an ACX5448-M Router
- Install mounting screws into each of the rear-mounting bracket holes aligned with the rack, starting from the bottom, and secure them tightly.
- Visually inspect the alignment of the chassis. If you’ve
installed the chassis properly in the rack, all the mounting screws
on one side of the rack are aligned with the mounting screws on the
opposite side, and the router is level. Figure 13, Figure 14, and Figure 15 show the router fully
secured and installed in a four-post rack.Figure 13: ACX5448 Router Installed in the Rack
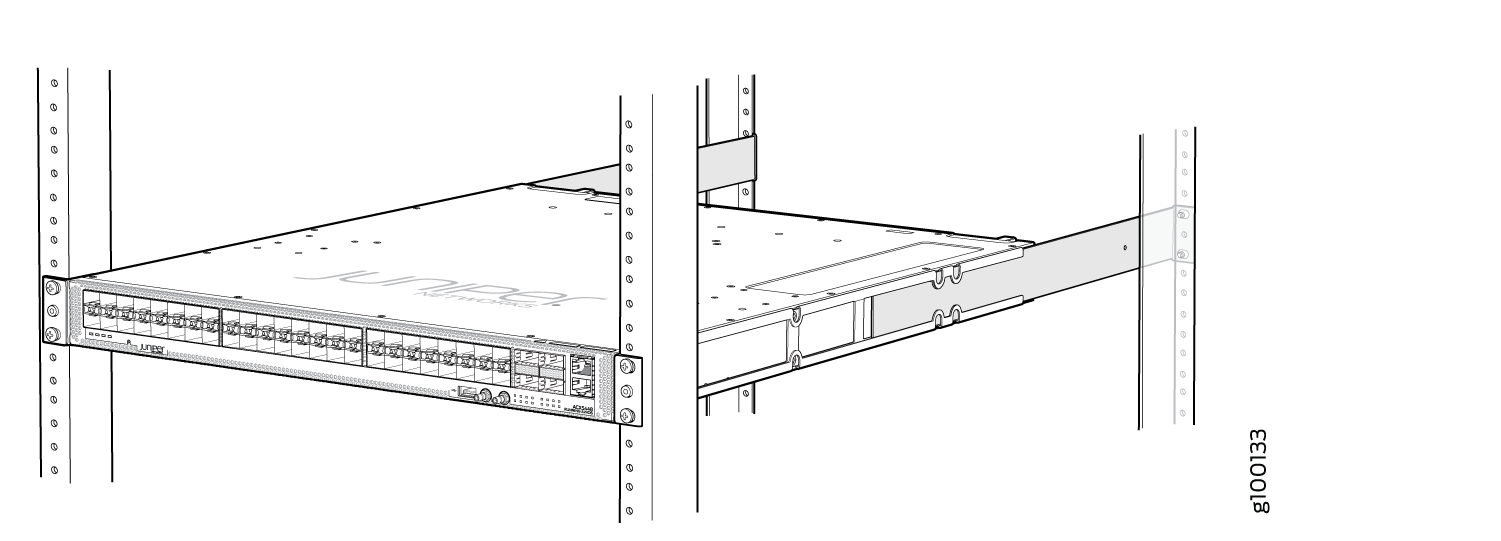 Figure 14: ACX5448-D Router Installed in the Rack
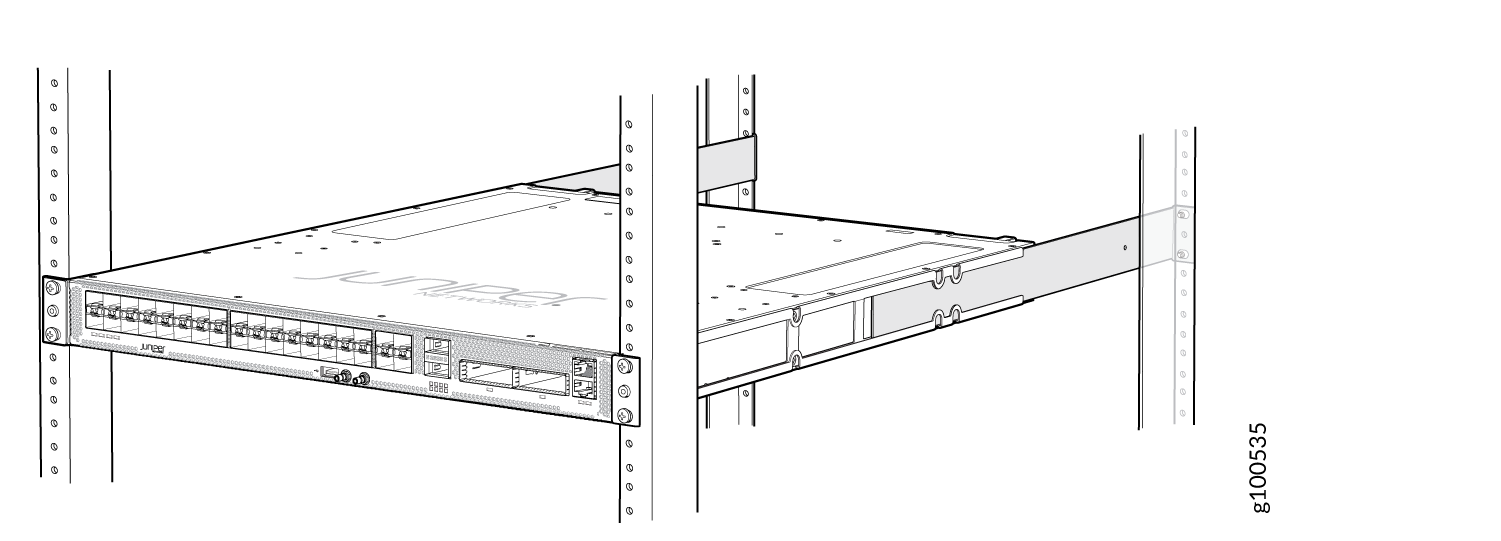 Figure 15: ACX5448-M Router Installed in the Rack
