QFX5700 Fan Tray Maintenance
The QFX5700 chassis has two independent, field-replaceable fan trays. Each fan tray is a hot-removable and hot-insertable field-replaceable unit (FRU), which means that you can remove and replace the fan trays while the router is running. You remove and replace the fan trays without turning off power to the router or disrupting routing functions.
Remove a QFX5700 Fan Tray from the QFX5700 Switch
Before you remove a fan tray:
-
Ensure that you understand how to prevent ESD damage.
-
Ensure that you have the following parts and tools available to remove a fan tray from the QFX5700 router:
-
Electrostatic discharge (ESD) grounding strap
-
Replacement fan tray
-
A Phillips (+) screwdriver, number 1 or 2 (optional), for the captive screws
-
Do not remove the fan tray unless you have a replacement fan tray available.
The JNP5700-FAN fan tray can be removed and replaced while the router is operating. However, the fan tray must be replaced within three minutes of removing the fan tray to prevent overheating of the chassis. If you are removing a JNP5700-FAN in order to access an QFX5700-FEB Forwarding Engine Board (FEB), we recommend that you either perform the necessary work during a maintenance window or reinstate the fan tray within three minutes.
Do not remove the fan tray unless you have a replacement fan tray available.
A single fan tray can be removed and replaced while the switch is operating. However, if you remove both fan trays at the same time you’ll trigger a thermal alarm and the system will shut down.
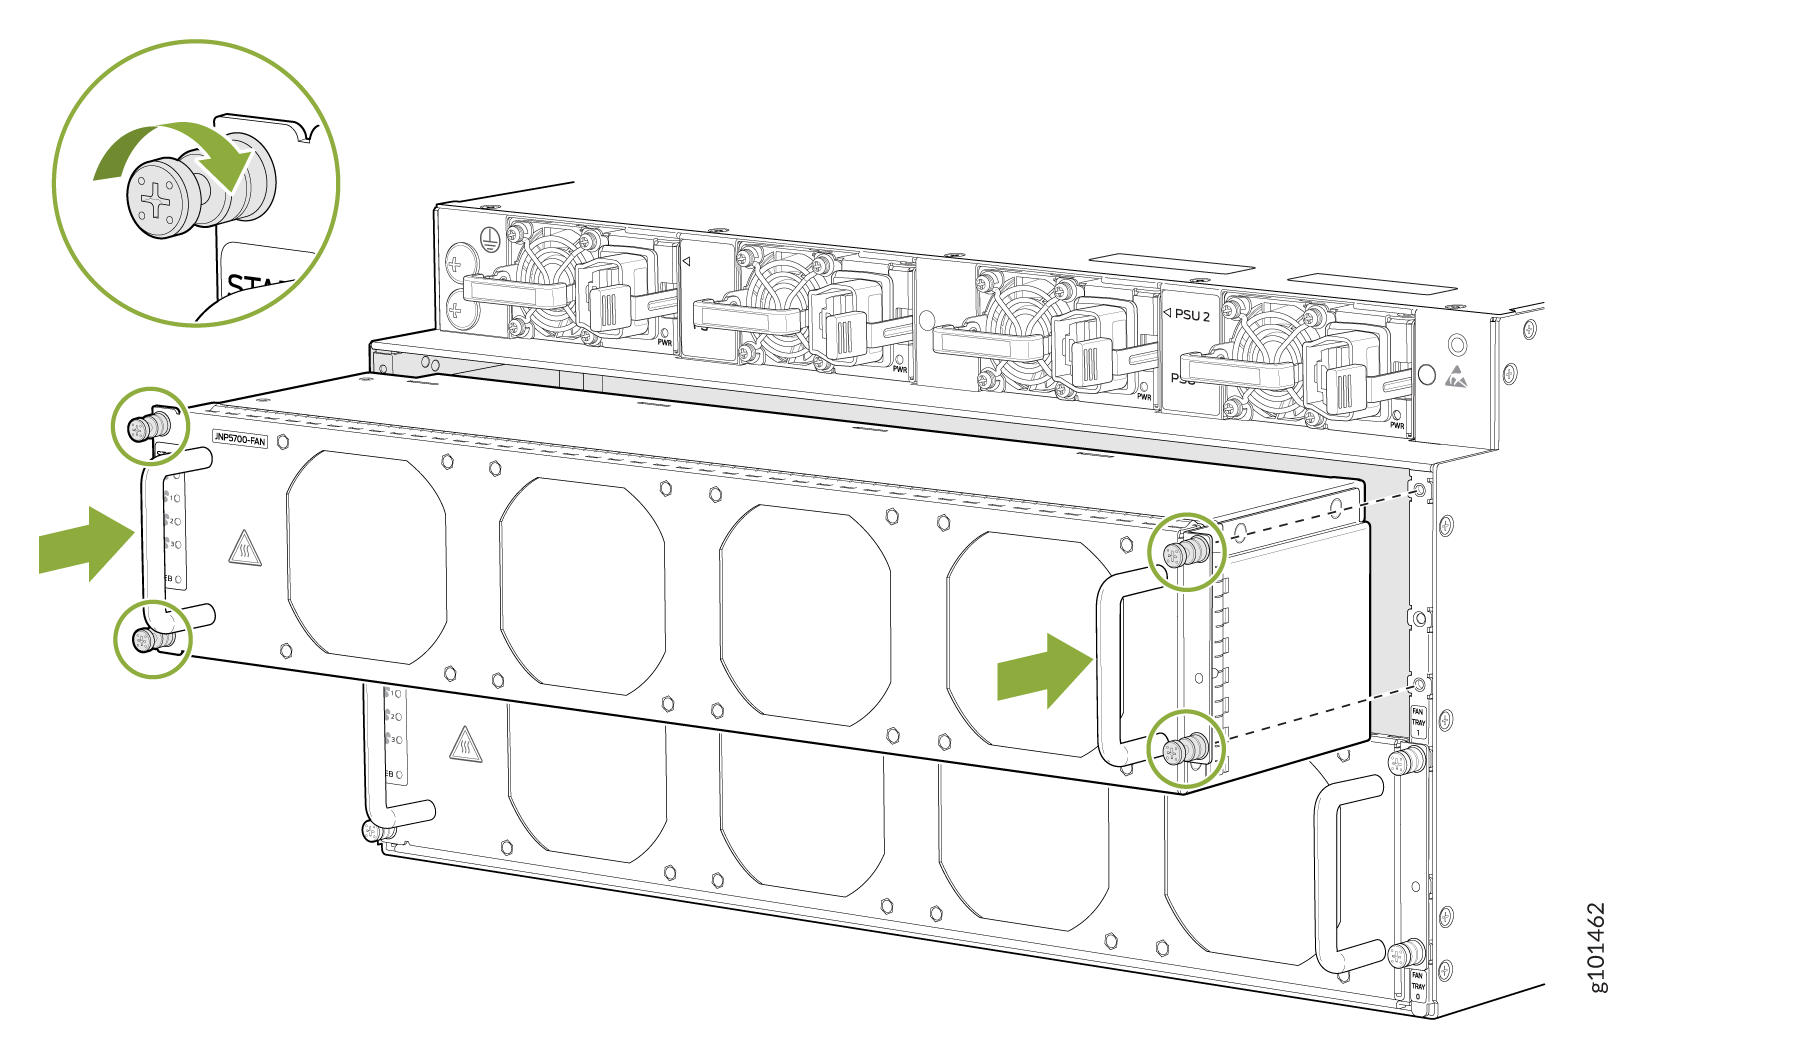
To remove a QFX5700 fan tray:
-
Grasp both the handles and pull the fan tray completely out of the chassis. See Figure 1.
Figure 1: Remove a QFX5700 Fan Tray
Install a QFX5700 Fan Tray
Before you begin to install a fan tray:
-
Ensure that you understand how to prevent ESD damage. .
-
Ensure that you have the following parts and tools available to install a fan tray in a QFX5700 switch:
-
Electrostatic discharge (ESD) grounding strap
-
A Phillips (+) screwdriver, number 1 or 2 (optional), for the captive screws
-
A replacement fan tray
-
You can remove and replace the JNP5700-FAN fan tray while the router is operating. However, you must replace the fan tray within three minutes of removing the fan tray, to prevent overheating of the chassis. If you are removing a JNP5700-FAN to access an QFX5700-FEB Forwarding Engine Board (FEB), we recommend that you either perform the necessary work during a maintenance window or replace the fan tray within three minutes of removal.
Each fan tray is a hot-removable and hot-insertable field-replaceable unit (FRU); you can remove and replace the fan tray while the switch is running without turning off power to the switch or disrupting routing functions.
Each fan tray is installed horizontally on the rear, or FRU side, of the chassis.
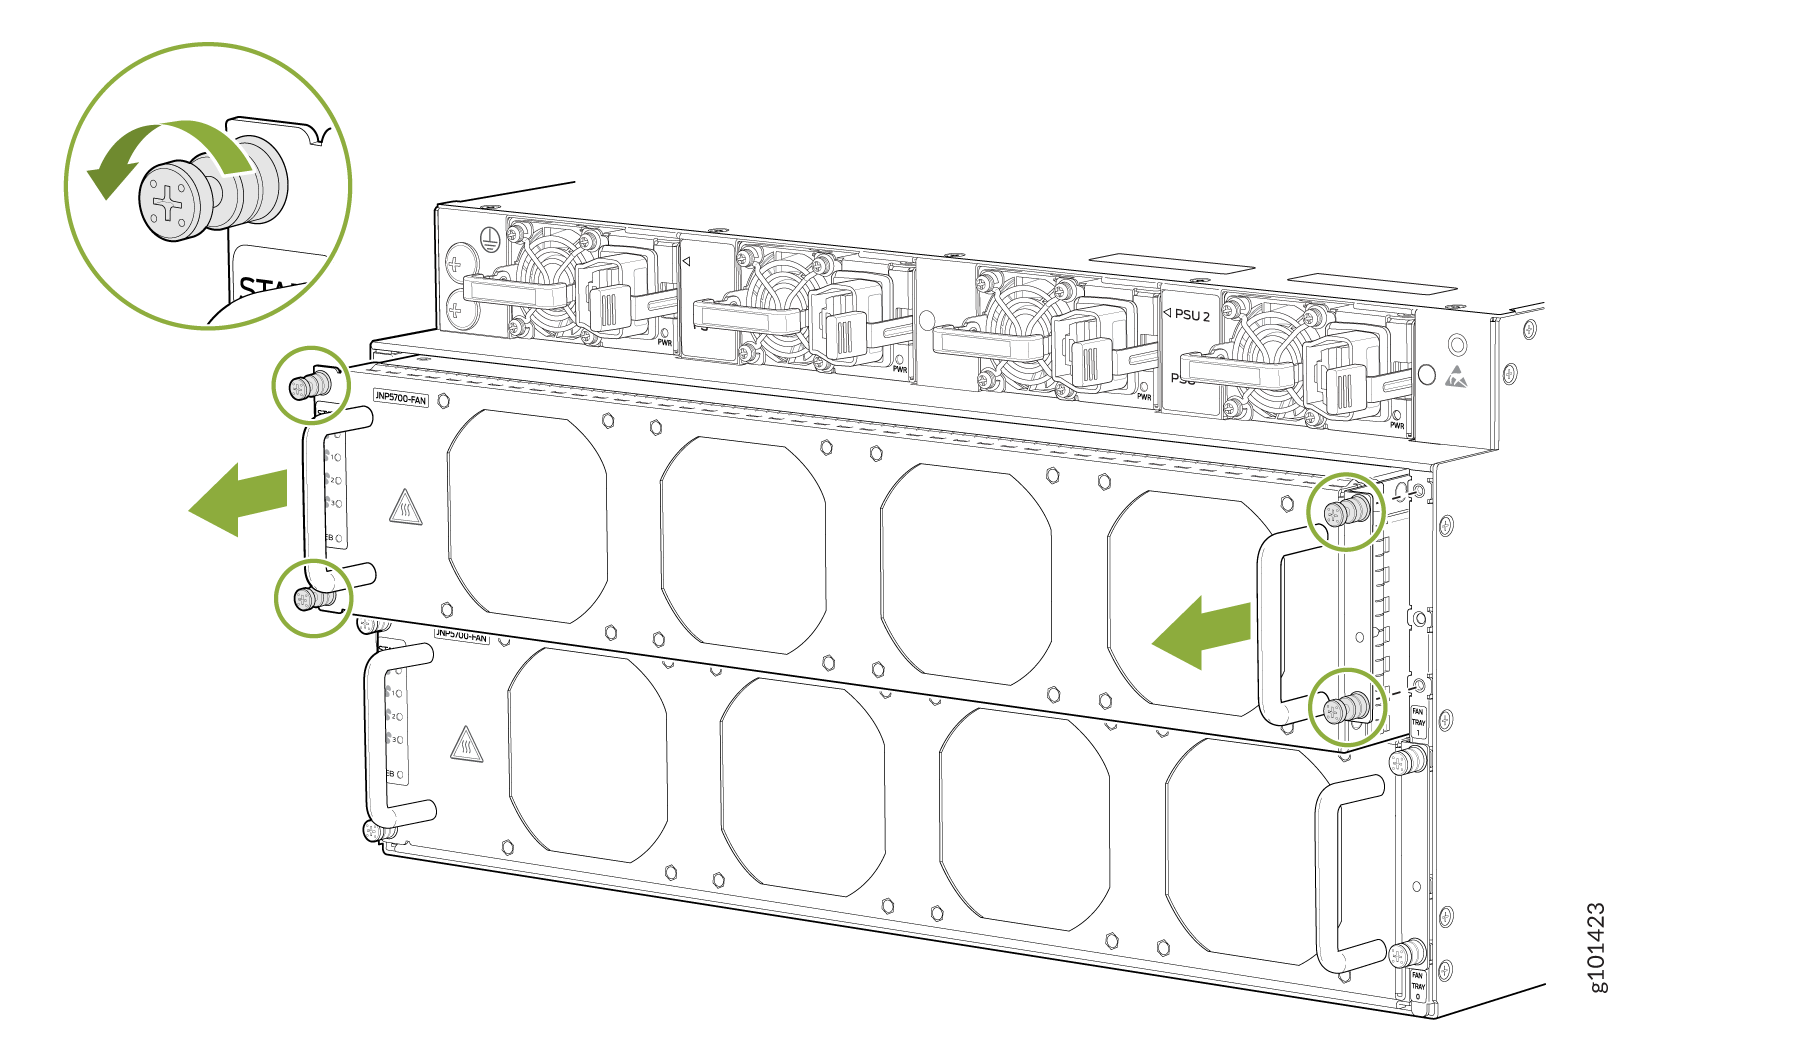
To install a QFX5700 fan tray:
-
Tighten the captive screws with the Phillips screwdriver or your fingers until the
screws are finger tight. See Figure 2.
Figure 2: Install the Fan Tray in a QFX5700