Maintain the Solid-State Drive in a QFX5250 Switch
The QFX5250 switch supports two 200-GB SSDs. You cannot install or remove the SSDs when the switch is powered-on. You must shut down the switch before replacing the SSD. The SSDs are preinstalled in the switch.
Remove the Solid-State Drive from a QFX5250 Switch
Before you remove a solid-state drive (SSD) from the device, ensure that you have taken the necessary precautions to prevent ESD damage.
Ensure that you have the following parts and tools available to remove an SSD from a QFX5250 switch:
-
ESD grounding strap
-
Antistatic bag or an antistatic mat
-
Phillips (+) screwdriver, number 1
An SSD heatsink covers the two SSDs in the liquid-cooled QFX5250 model, QFX5250-64OE-L. After removing the SSD cover, remove the heatsink. You cannot remove the SSD without removing the heatsink.
-
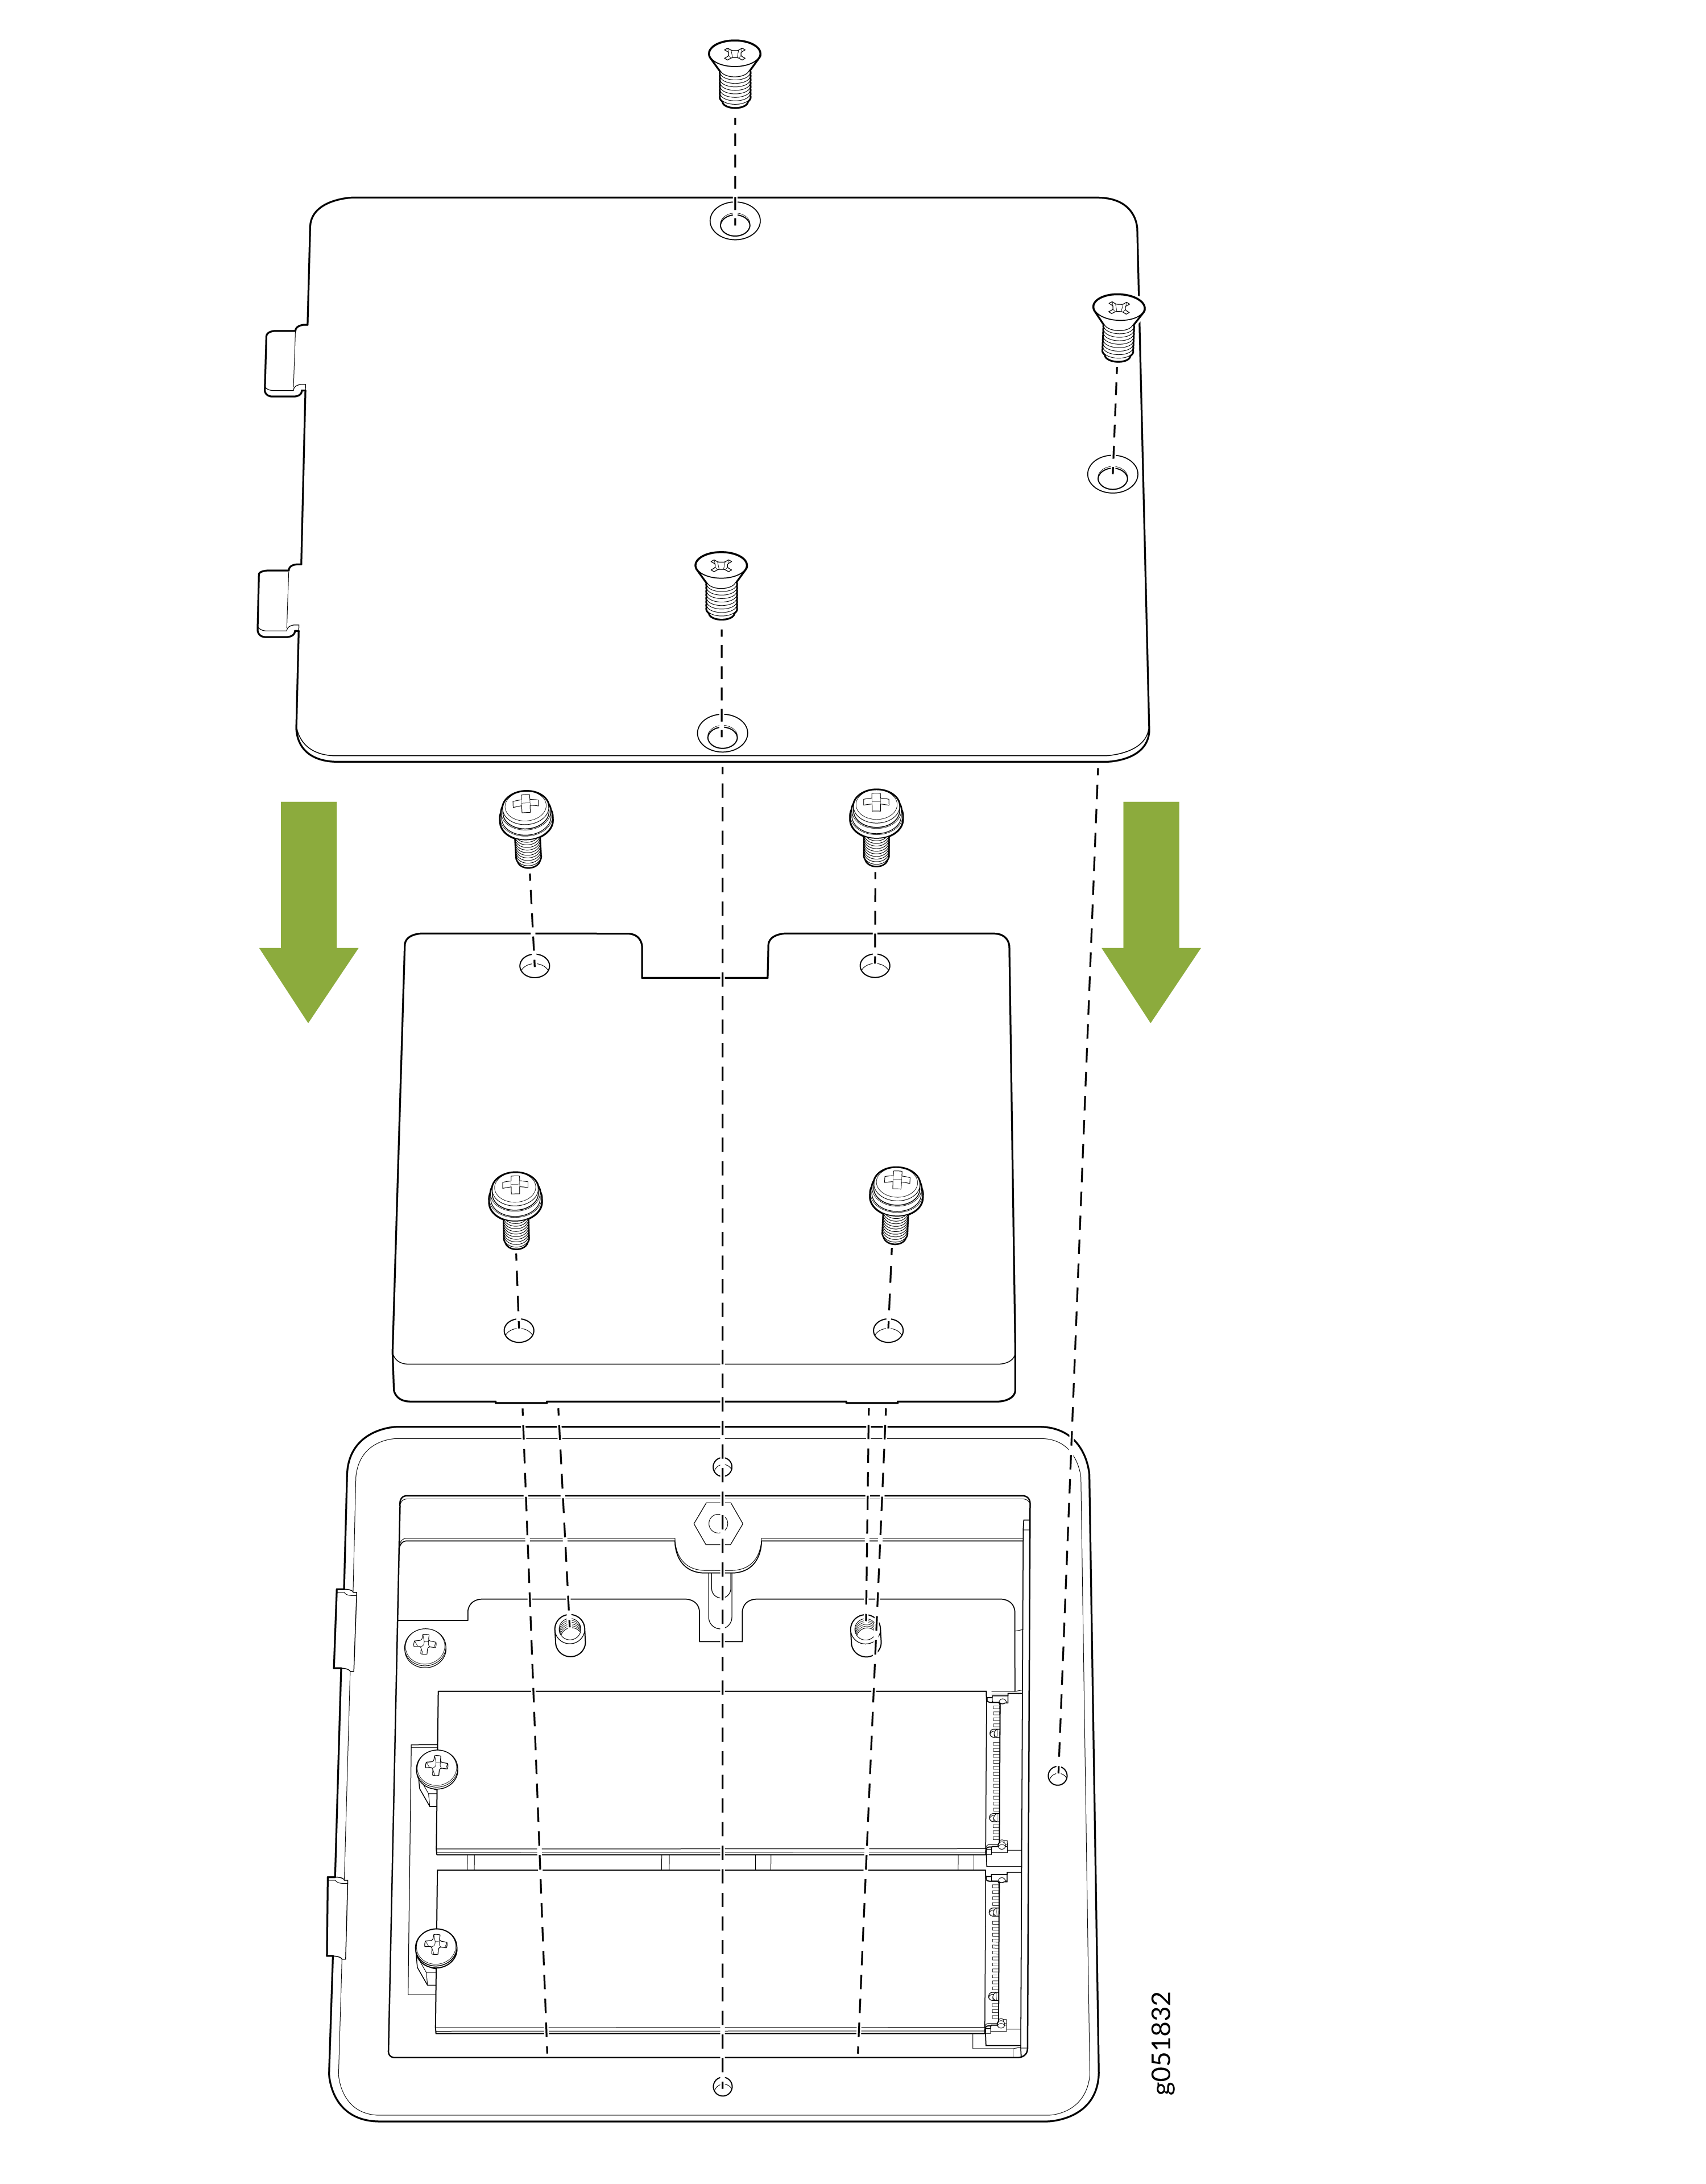
Remove the three screws securing the SSD cover plate by using the Phillips
(+) screwdriver.
Figure 1: Remove the SSD Cover Plate for QFX5250-64OE-L (Liquid-cooled Model)
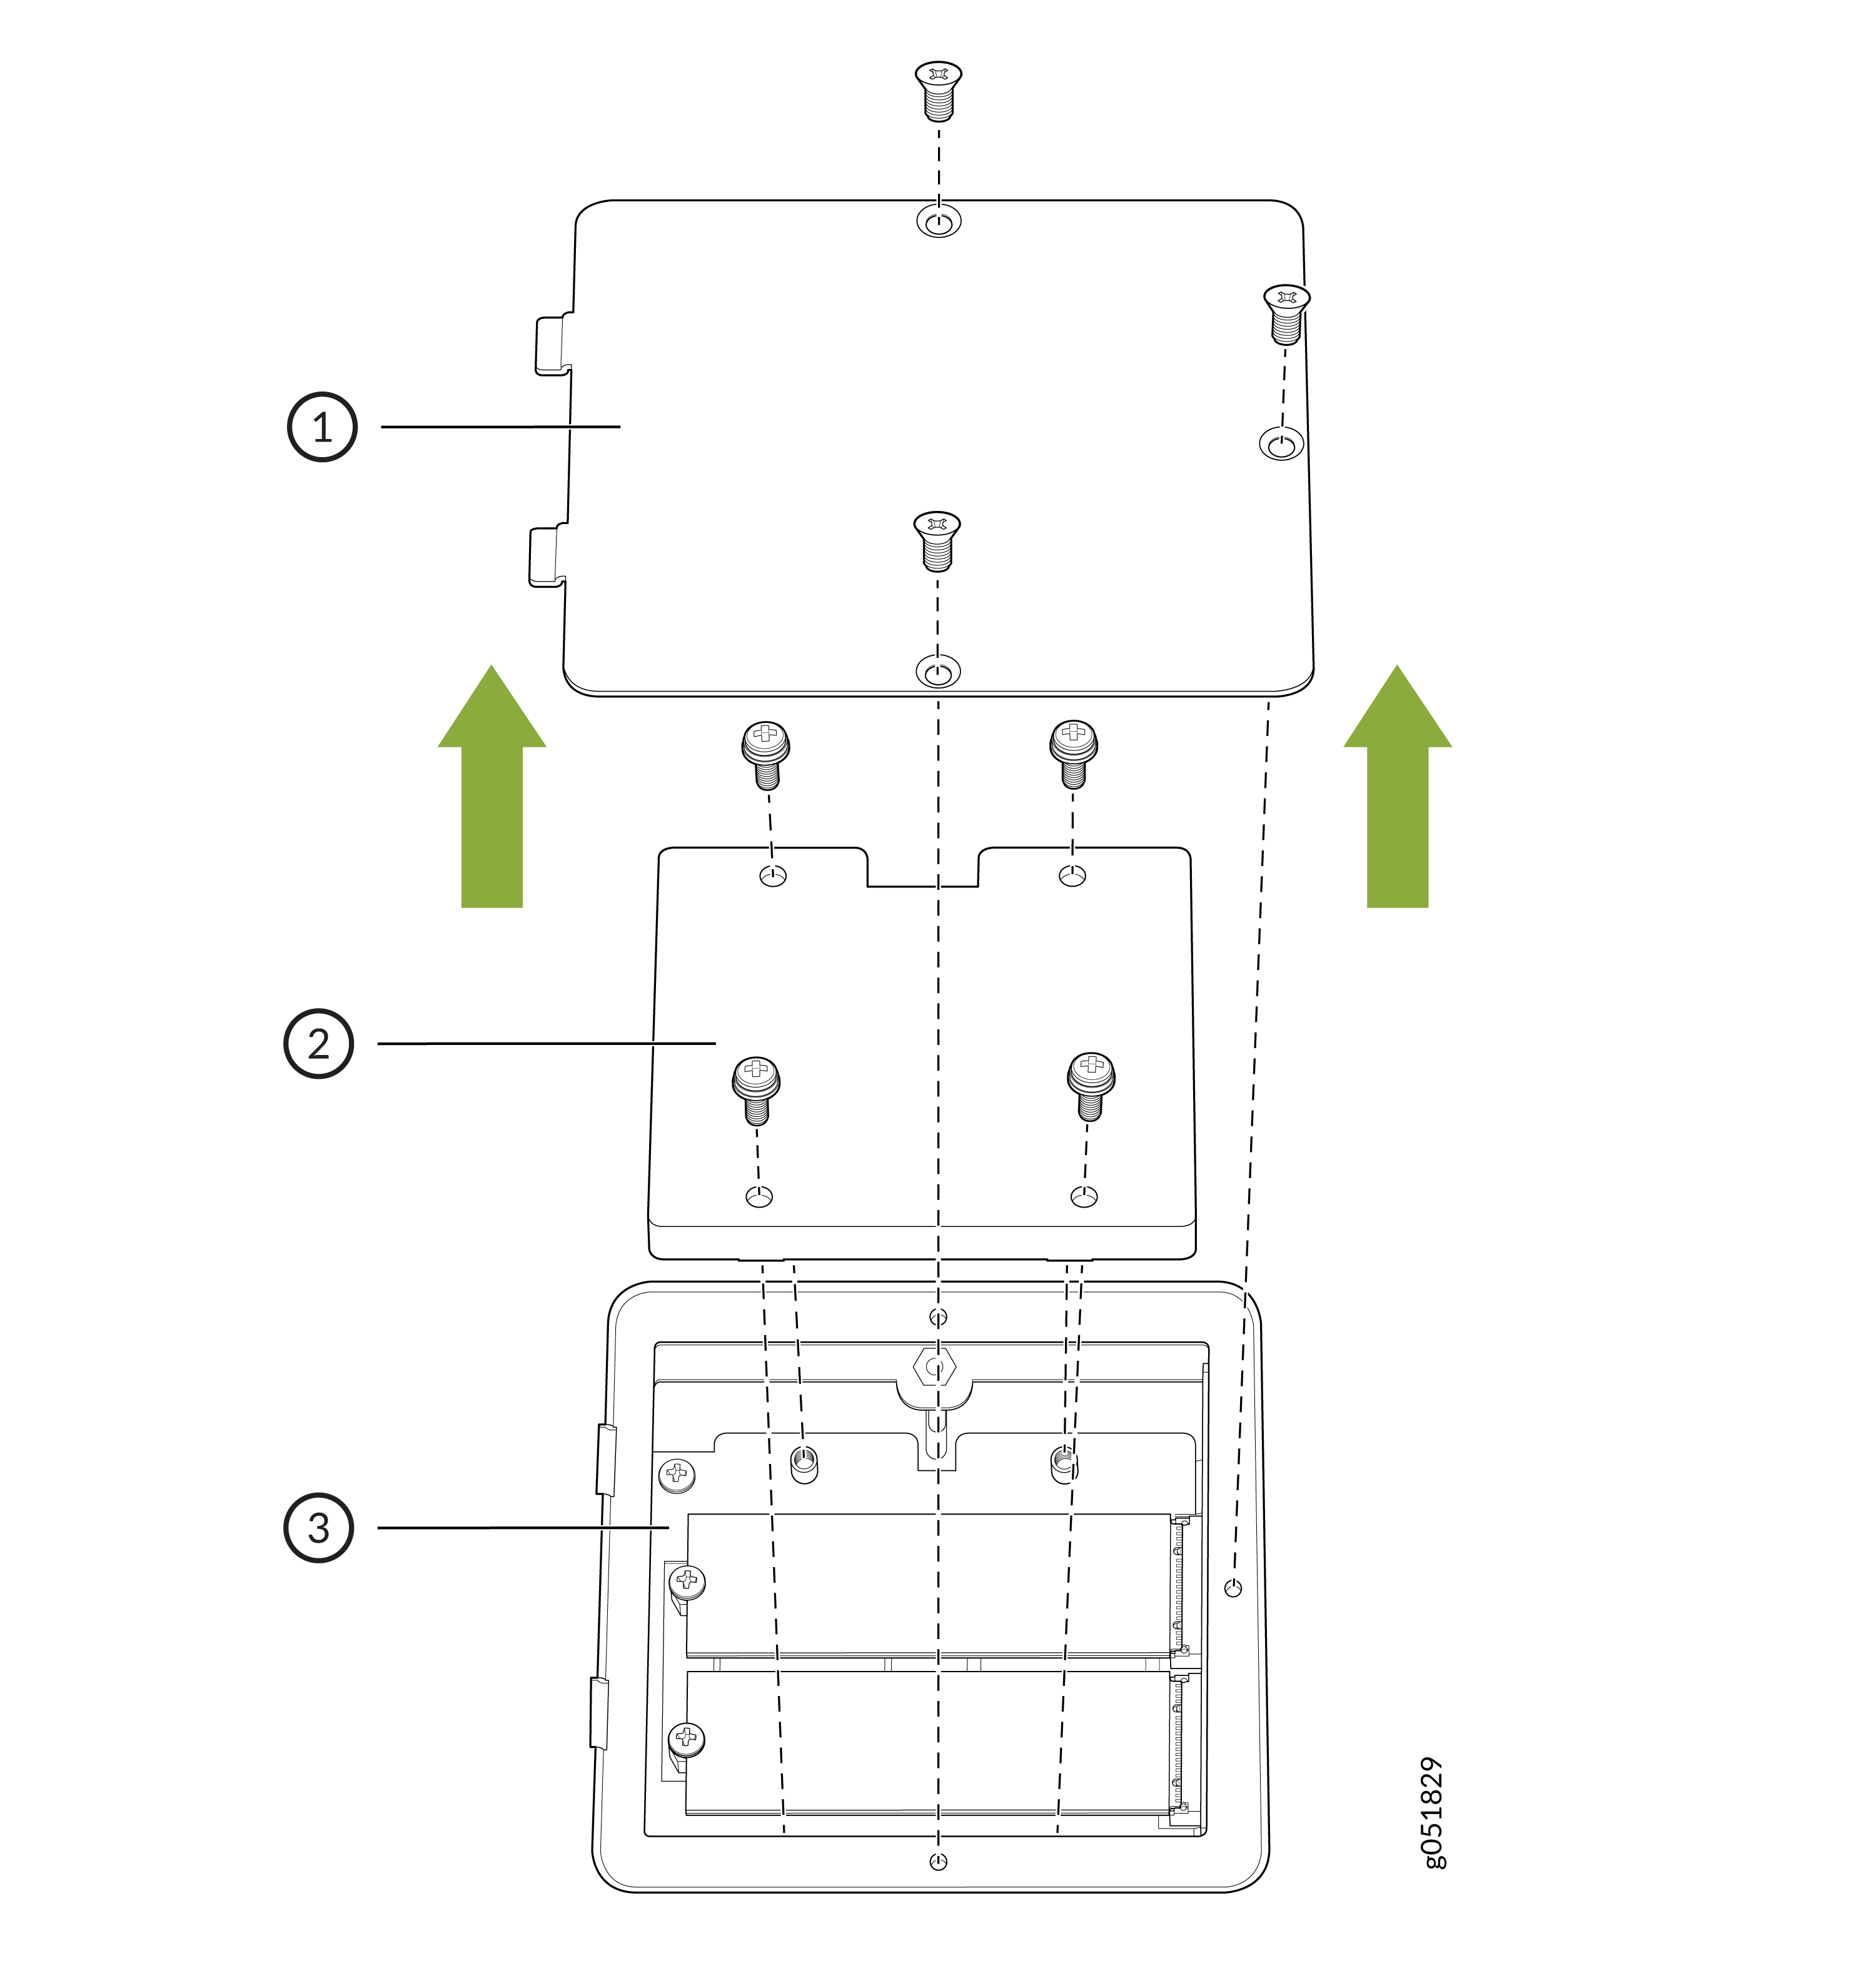
Table 1: Components on the QFX5250 SSD Callout Item 1
SSD cover plate
2
SSD heatsink
3
SSD
-
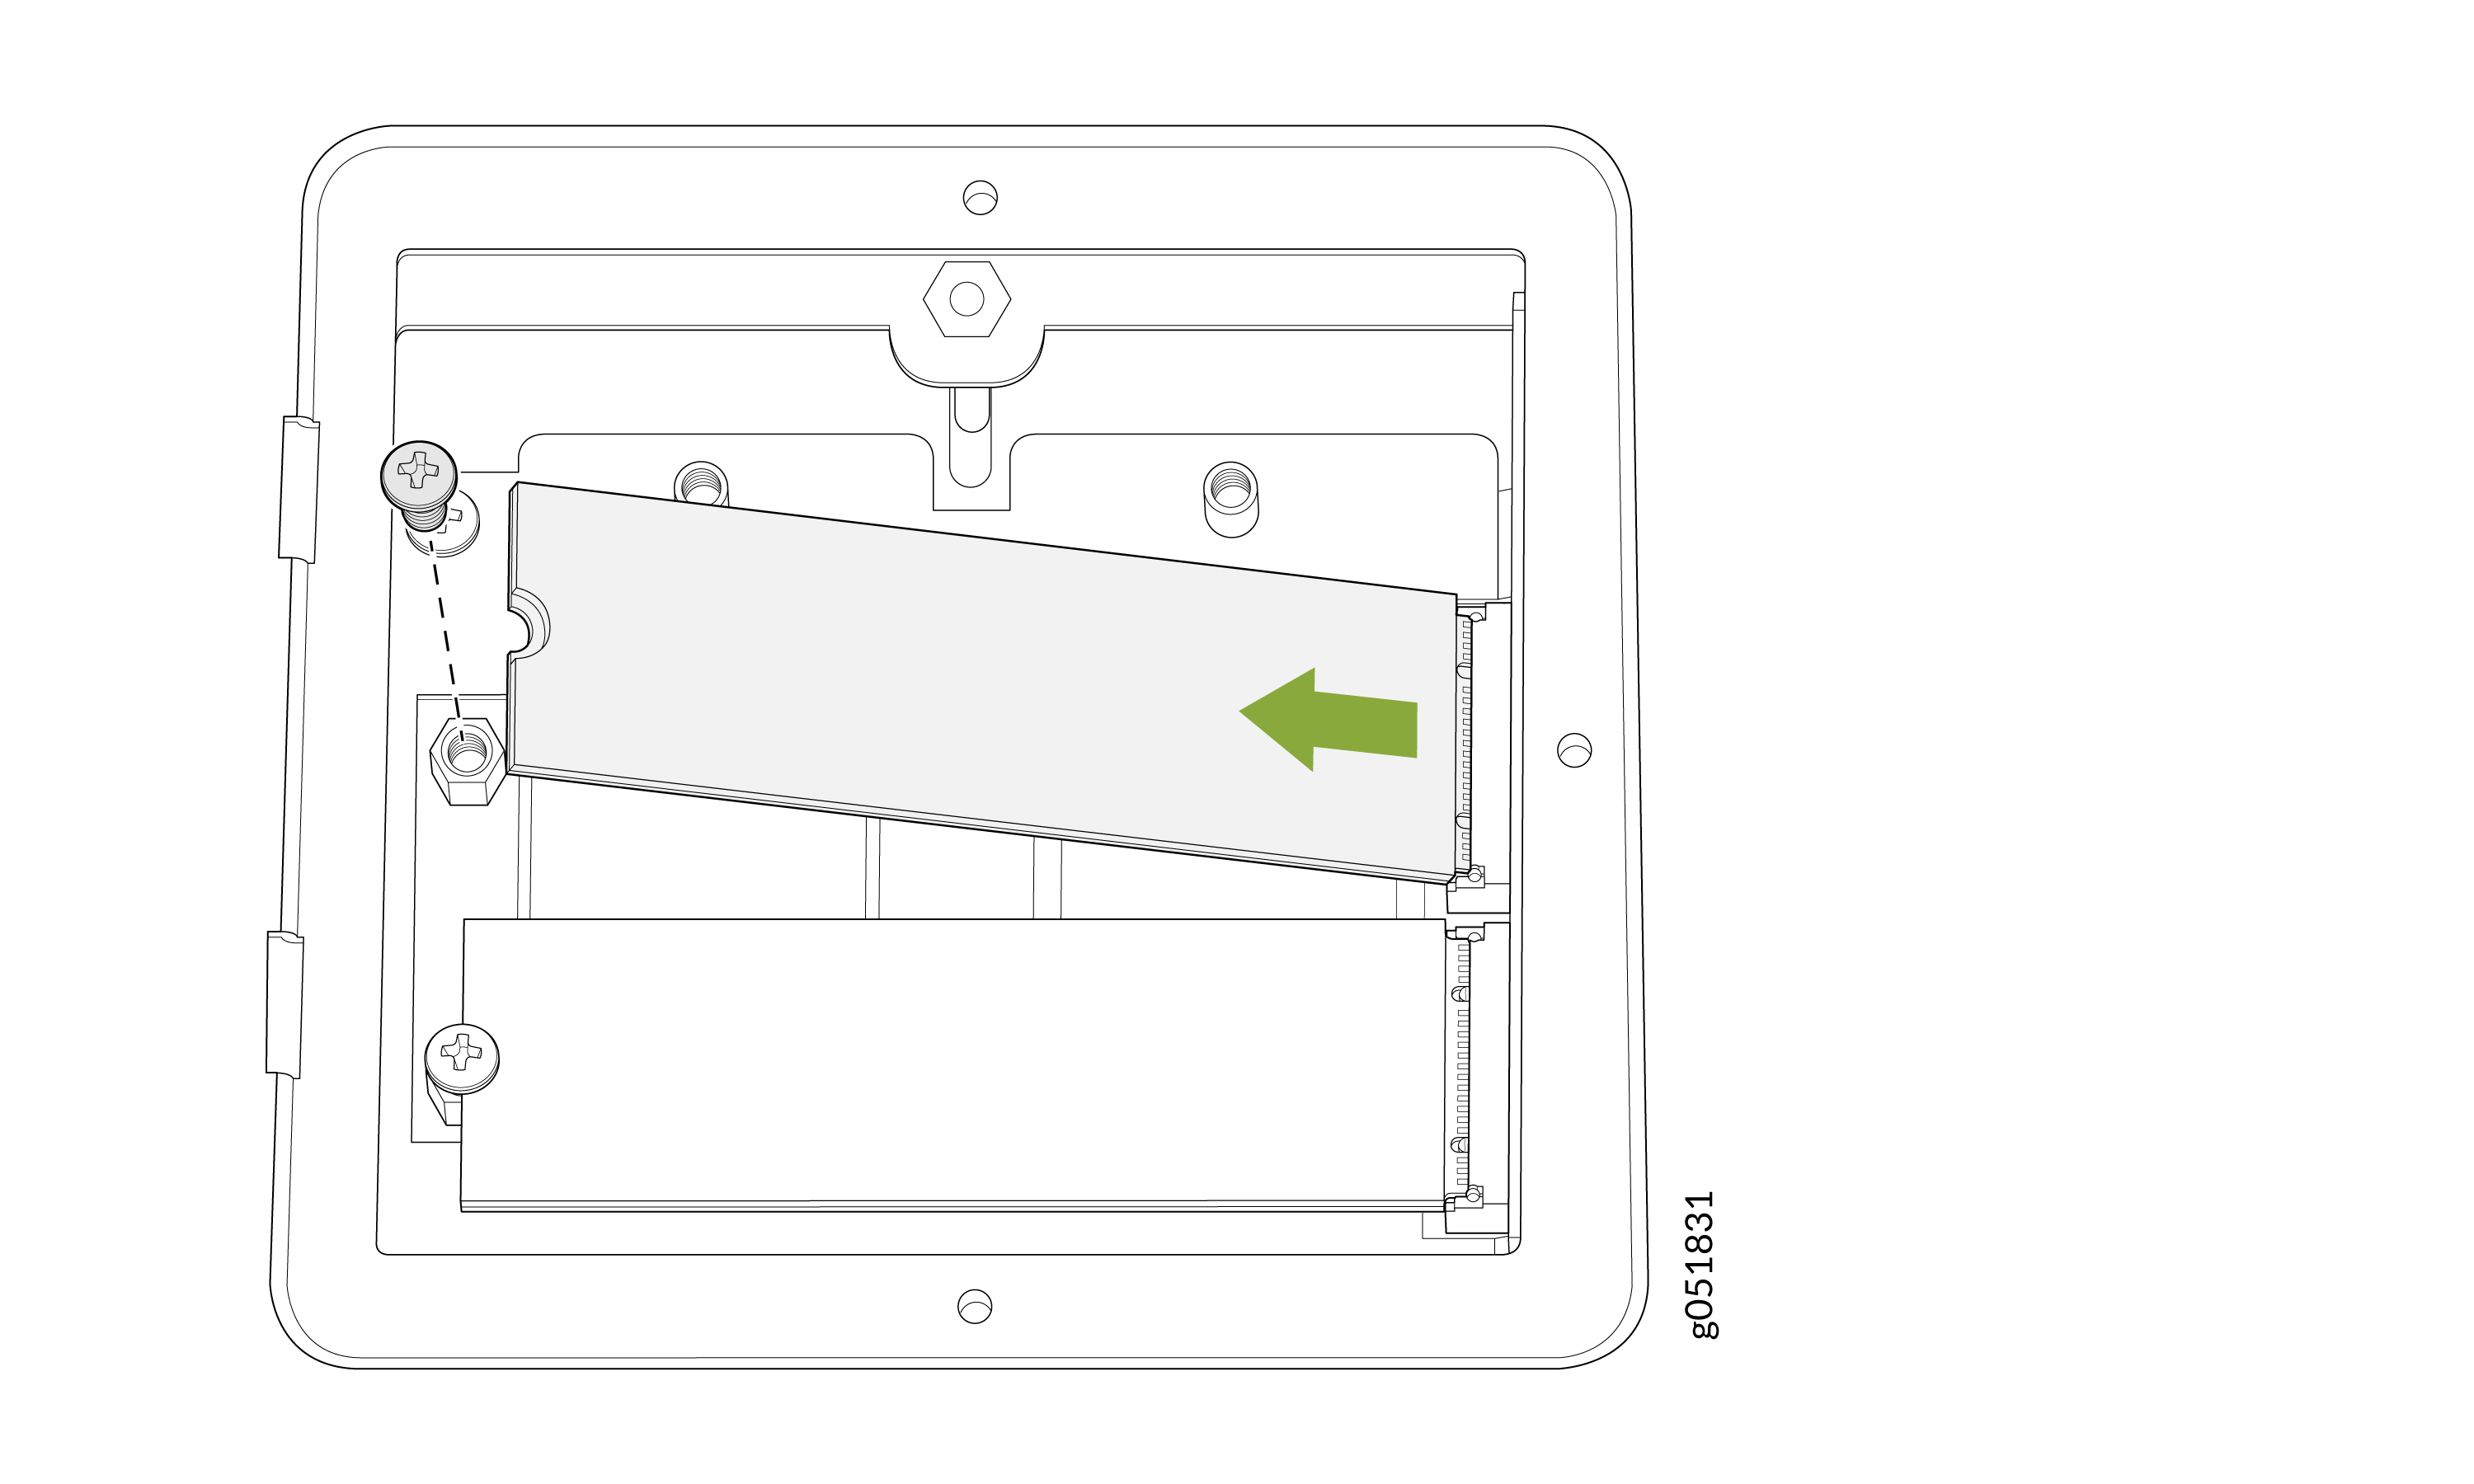
Remove the single screw holding the SSD in place and slide the drive out of
its slot.
Figure 2: Remove the SSD
Install the Solid-State Drive in a QFX5250 Switch
Before you install an SSD in the device, ensure that you have taken the necessary precautions to prevent ESD damage.
Ensure that you have the following parts and tools available to install an SSD in the QFX5250 switch:
-
ESD grounding strap
-
Antistatic bag containing the SSD or an antistatic mat
-
Phillips (+) screwdriver, number 1
-
If the screws are not already removed, remove the three screws securing the
SSD cover plate by using the Phillips (+) screwdriver.
Figure 3: Remove the SSD Cover Plate for QFX5250-64OE-L (Liquid-Cooled Model)
Table 2: Components on the QFX5250 SSD Callout Item 1
SSD cover plate
2
SSD heatsink
3
SSD
-
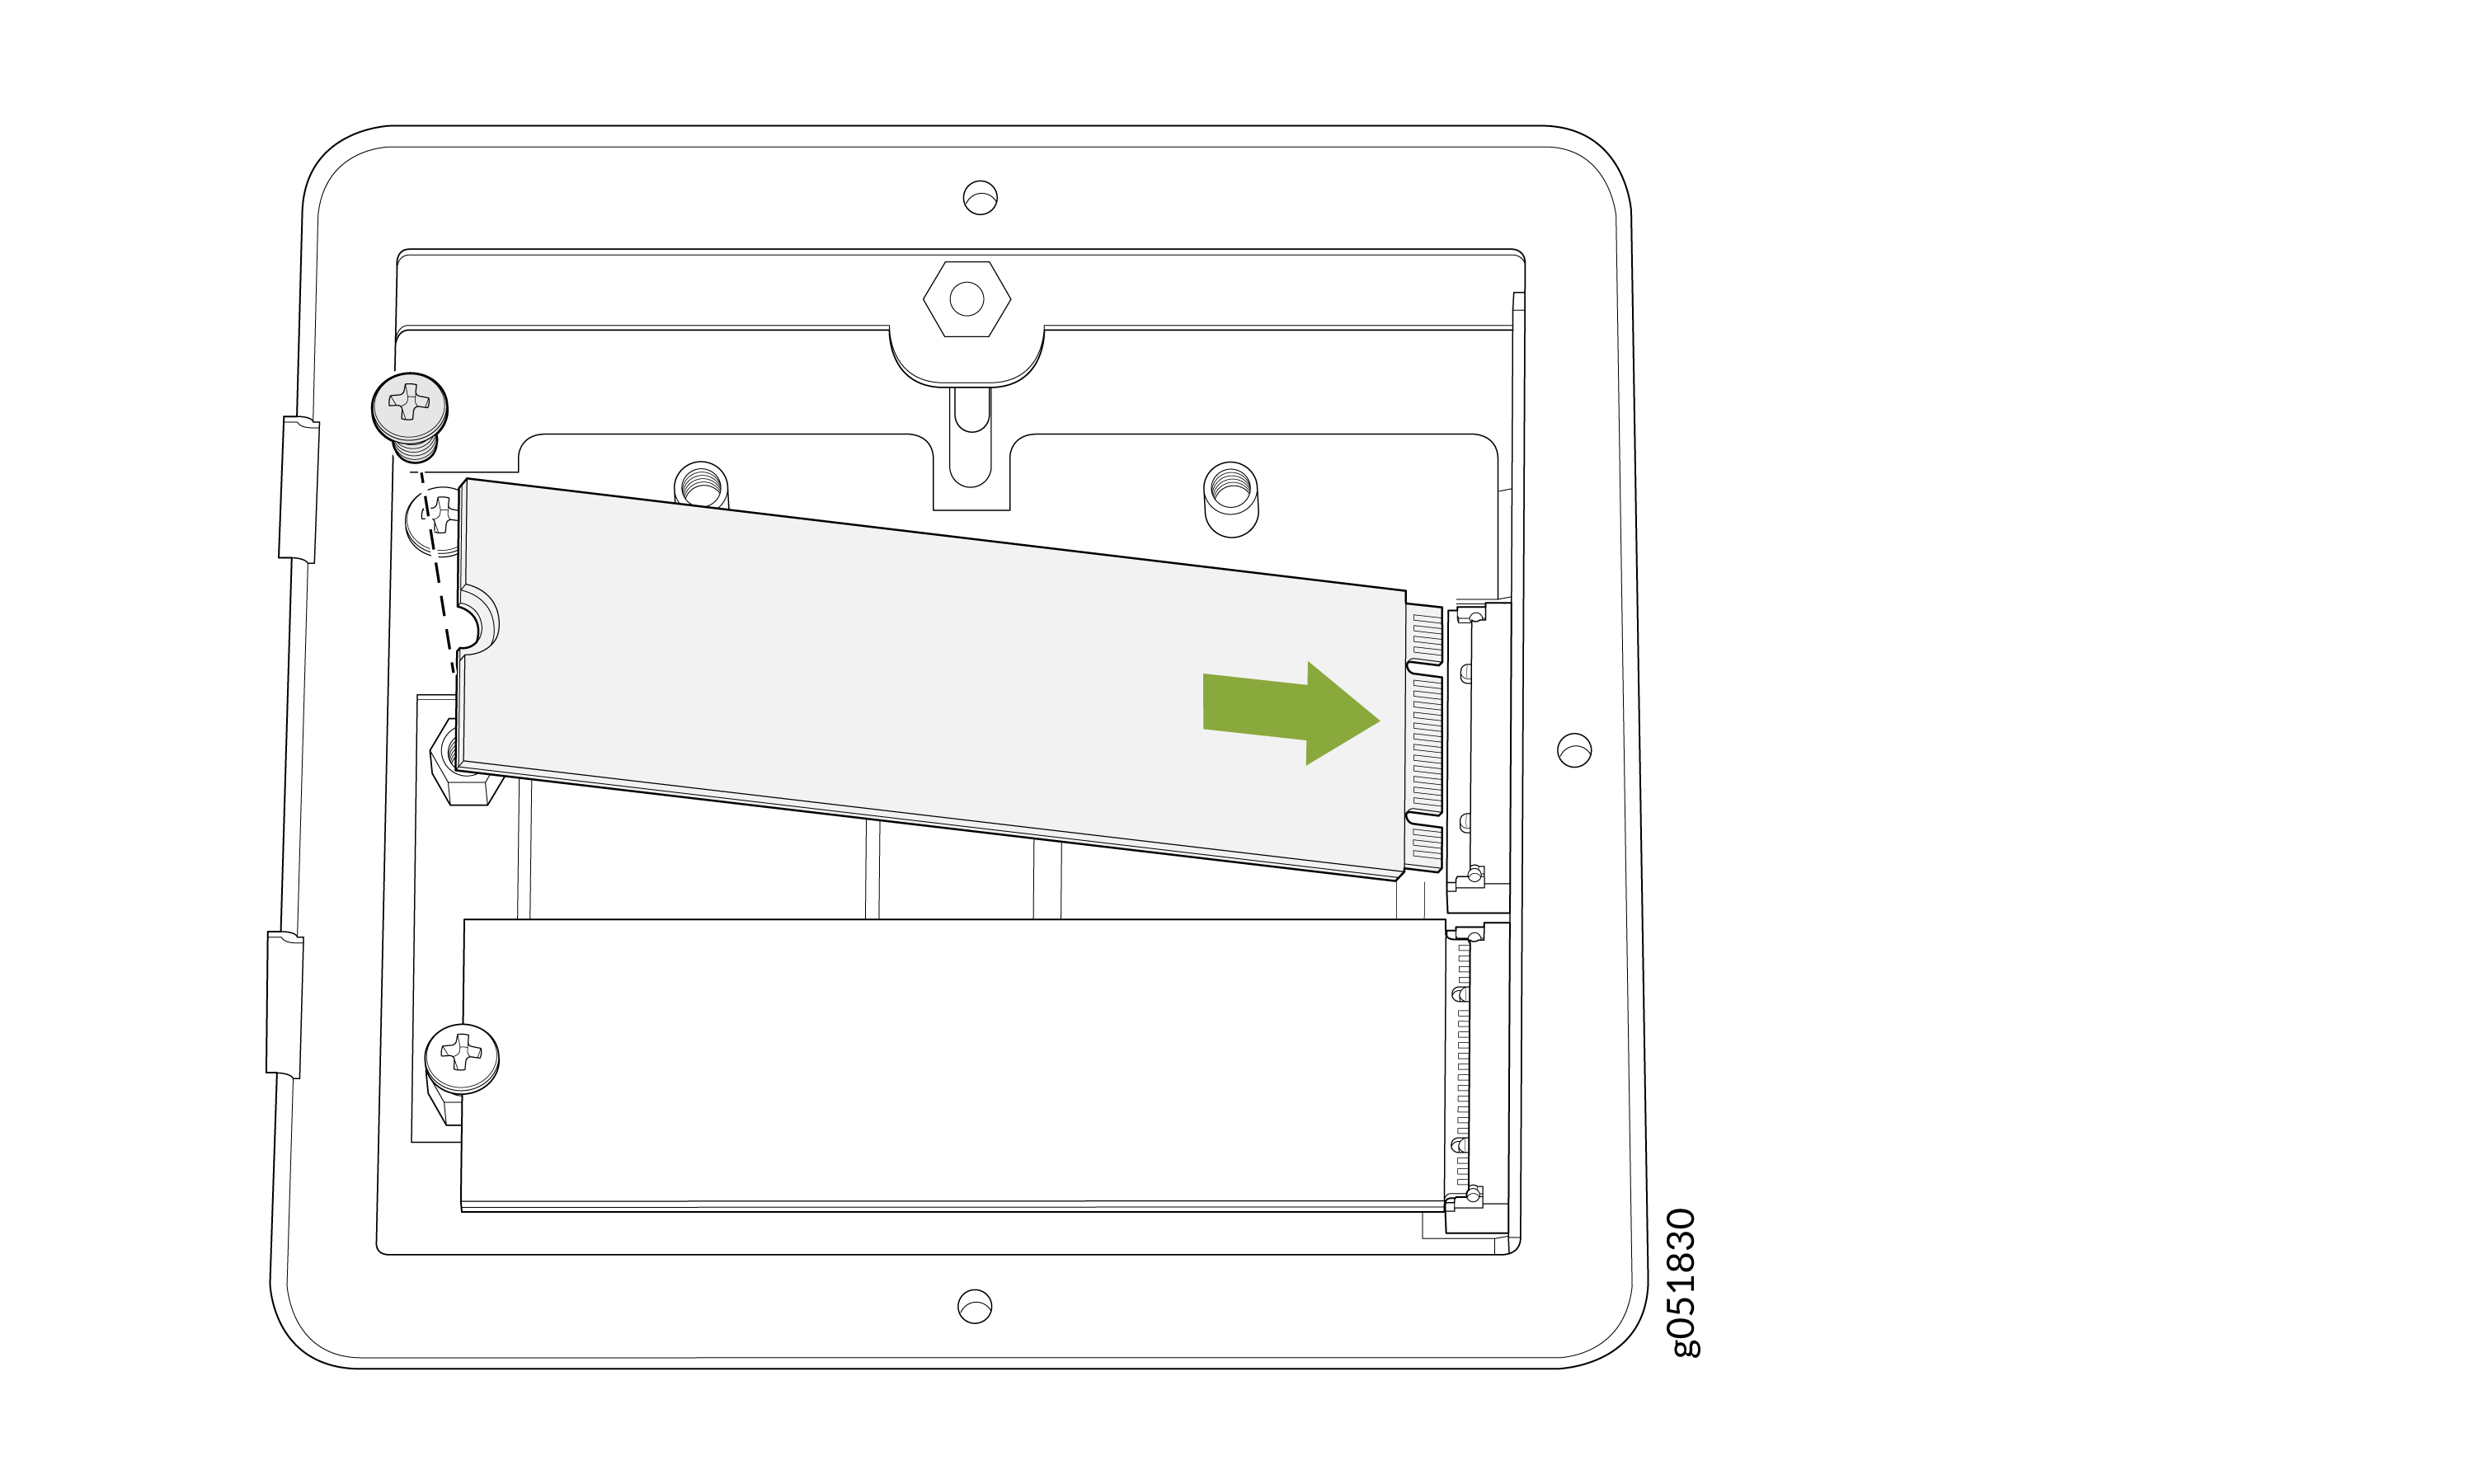
Slide the drive into the SSD slot and tighten the single screw holding the
SSD.
Figure 4: Install the SSDs
-
Place the SSD cover plate back on the chassis and tighten the three screws
securing the SSD cover plate.
Figure 5: Replace the SSD Cover Plate for QFX5250-64OE-L (Liquid-Cooled Model)