Maintain the Solid-State Drive in a QFX5240 Switch
Remove a Solid-State Drive from a QFX5240 Switch
Before you remove a solid-state drive (SSD) from the device, ensure that you have taken the necessary precautions to prevent electrostatic discharge (ESD) damage.
Ensure that you have the following parts and tools available to remove a SSD from a QFX5240 switch:
-
ESD grounding strap
-
Antistatic bag or an antistatic mat
-
Phillips (+) screwdriver, number 1
The QFX5240 supports two 480-GB NVMe SSDs. You cannot install or remove the SSDs when the system is up. You must shut down the system before replacing the SSD. The SSDs are preinstalled in the QFX5240.
Install a Solid-State Drive in a QFX5240 Switch
Before you install an SSD in the device, ensure that you have taken the necessary precautions to prevent electrostatic discharge (ESD) damage (see No link title).
Ensure that you have the following parts and tools available to install an SSD in the QFX5240 switch:
-
ESD grounding strap
-
Antistatic bag containing the SSD or an antistatic mat
-
Phillips (+) screwdriver, number 1
-
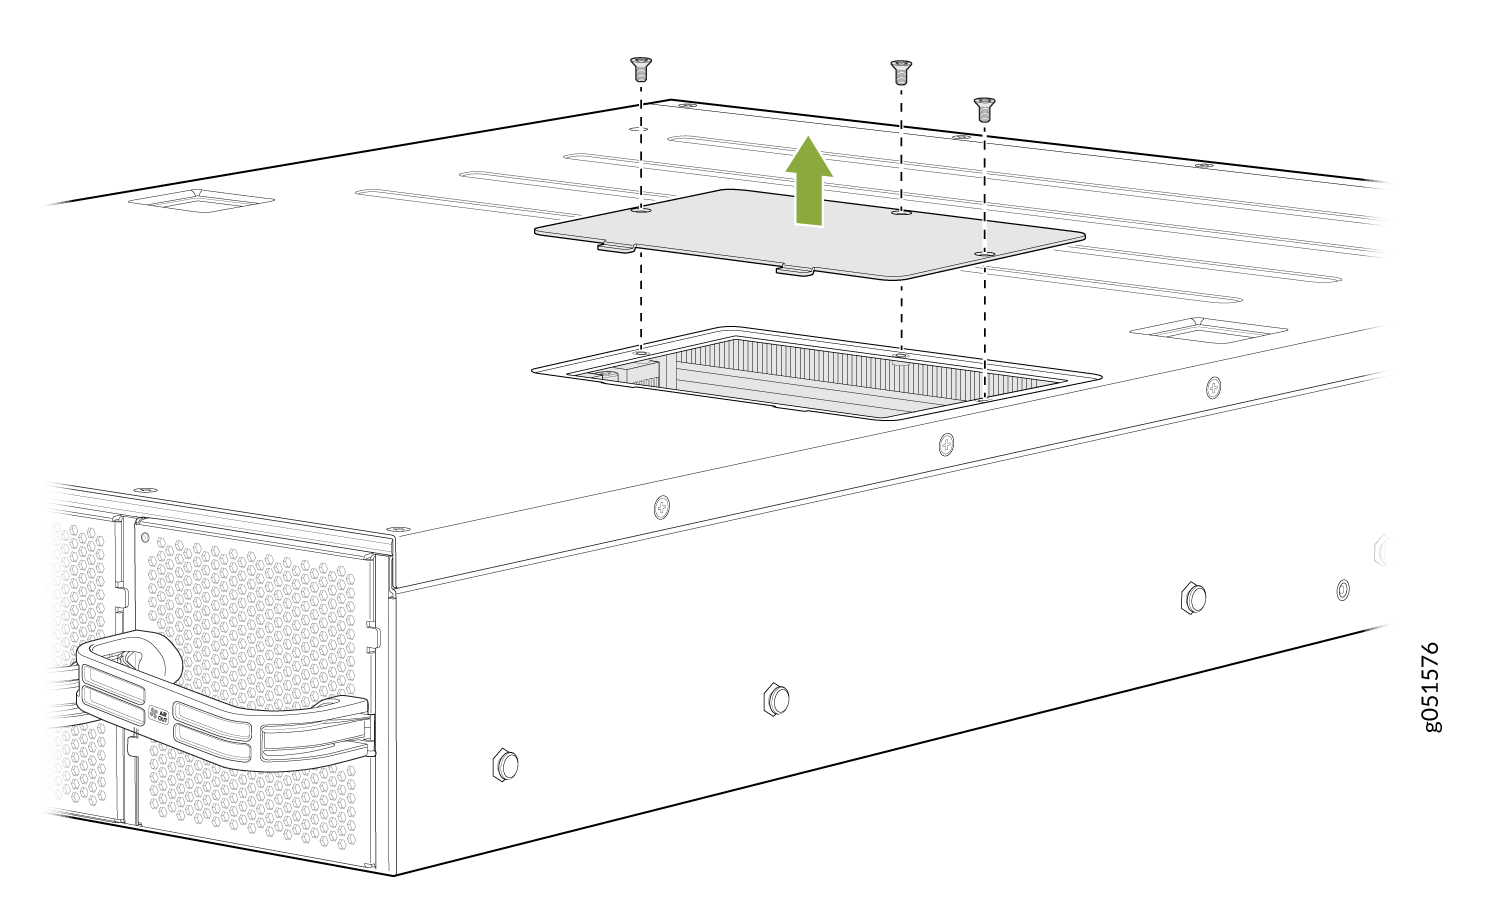
If not already removed, remove the three screws securing the SSD cover plate by
using the Phillips (+) screwdriver. See Figure 3.
Figure 3: Remove the SSD Cover Plate
-
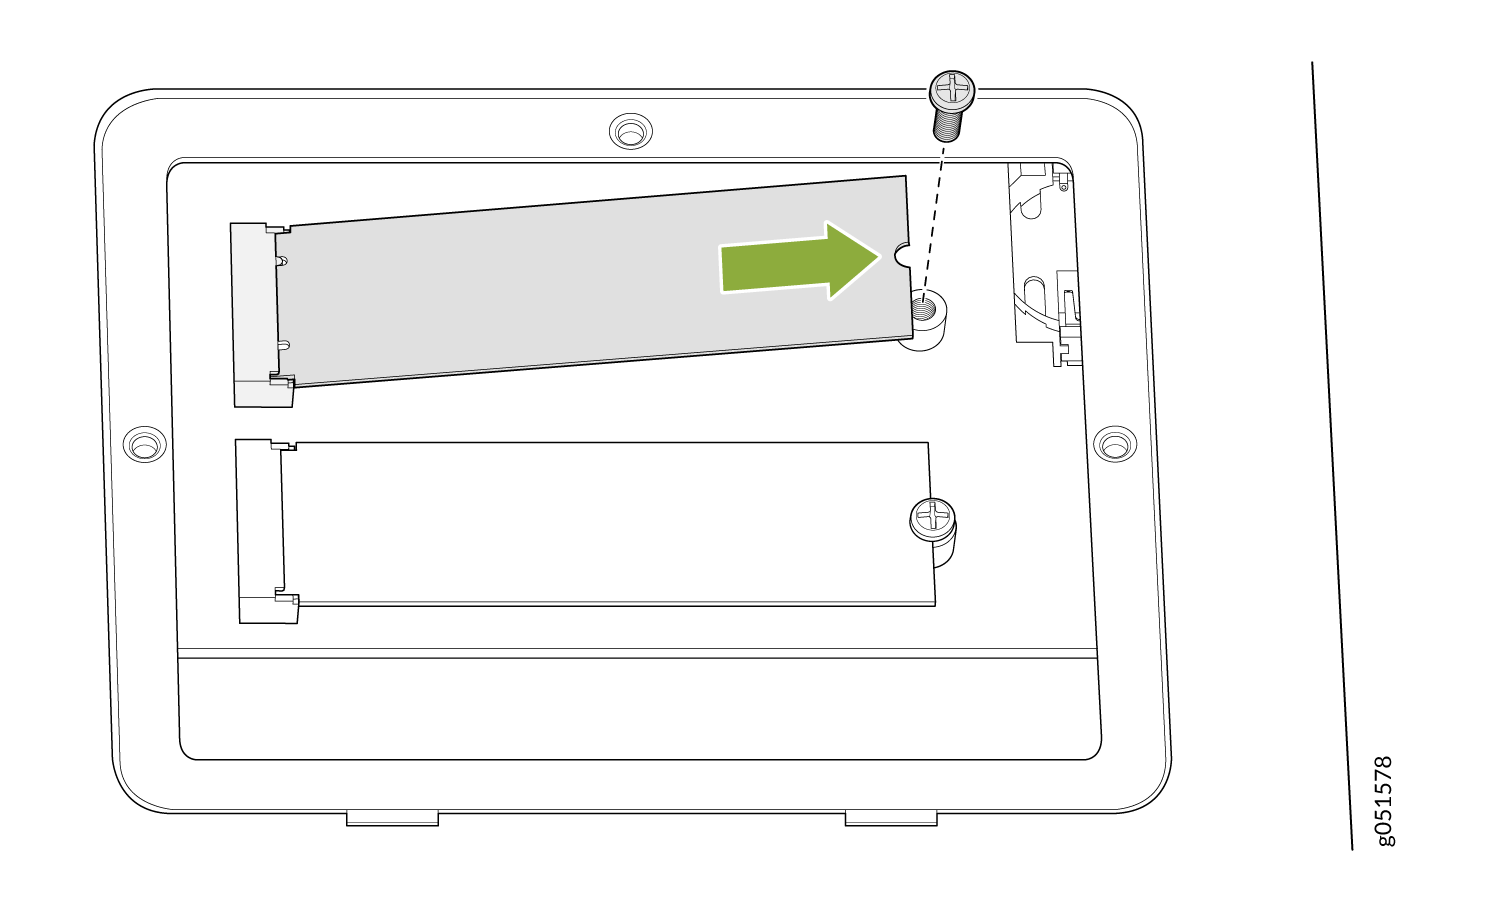
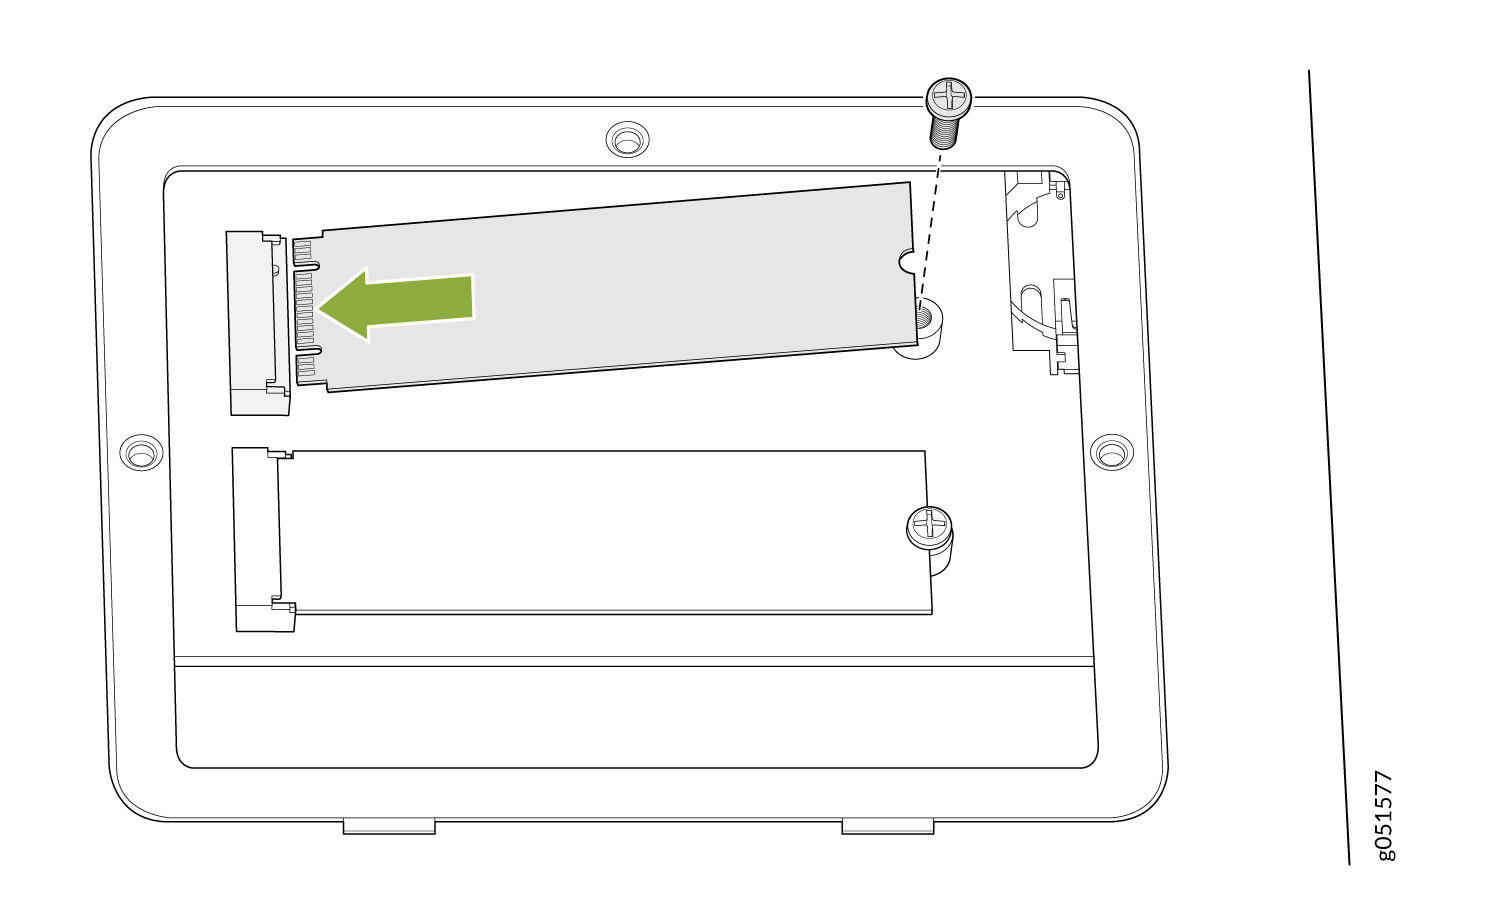
Slide the drive into the SSD plug and tighten the single
screw holding the SSD (see Figure 4).
Figure 4: Install the SSD
-
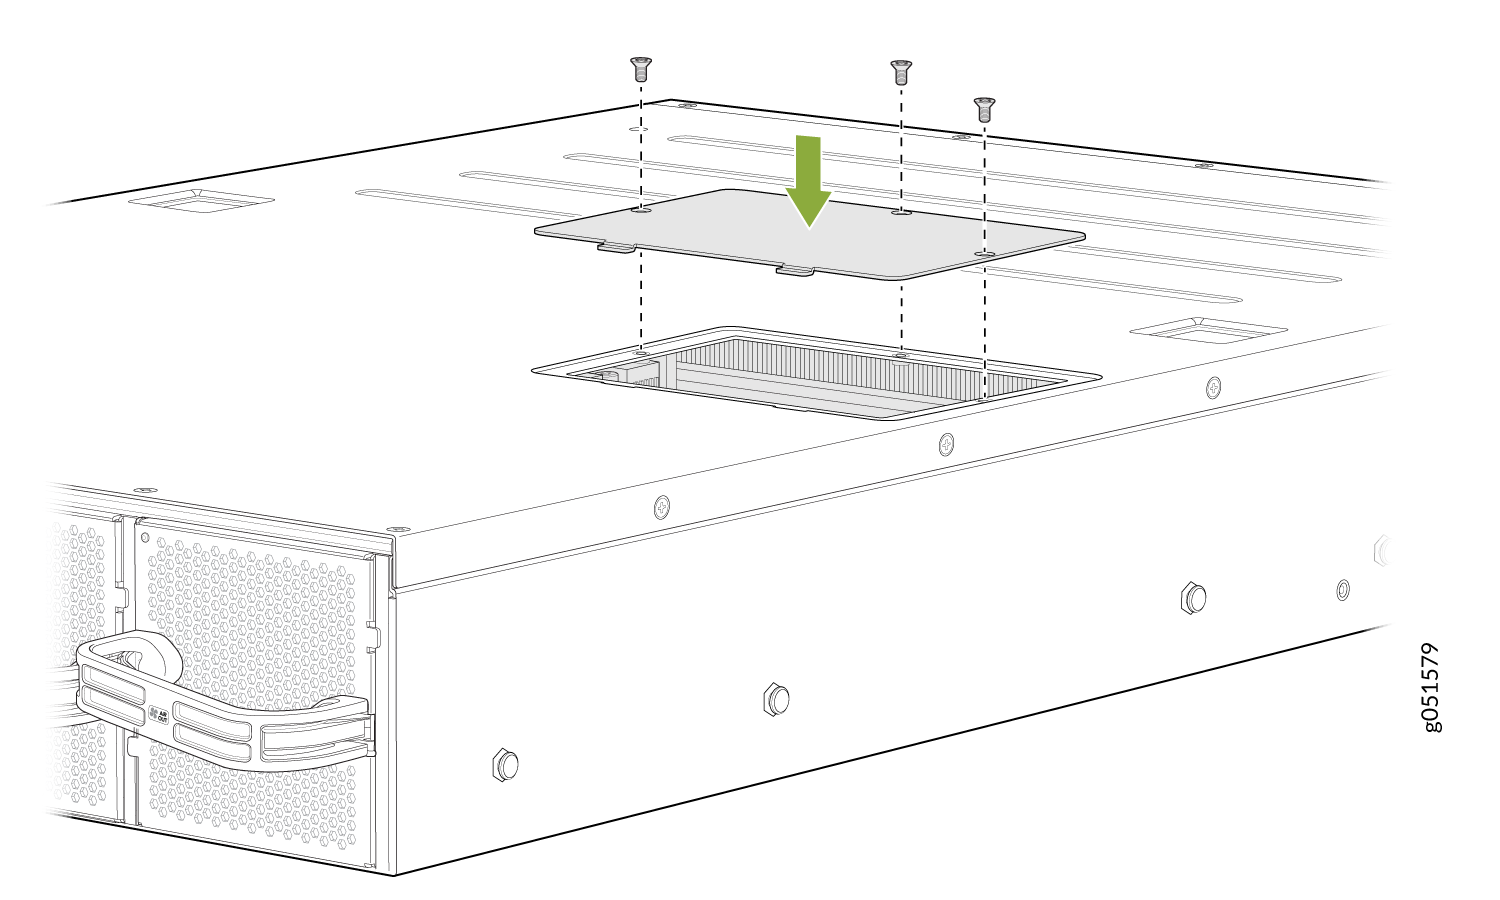
Place the SSD cover plate back on the chassis and tighten the three screws
securing the SSD cover plate. See Figure 5.
Figure 5: Replace the SSD Cover Plate