Help us improve your experience.

Let us know what you think.

Do you have time for a two-minute survey?


Removing the EMI Panel from QFX5220-128C

Use this procedure to remove the EMI panel from the QFX5220-128C when returning the switch to Juniper Networks or when packing your device for storage.

Before you begin, ensure you have a Phillips (+) number 2 screwdriver.

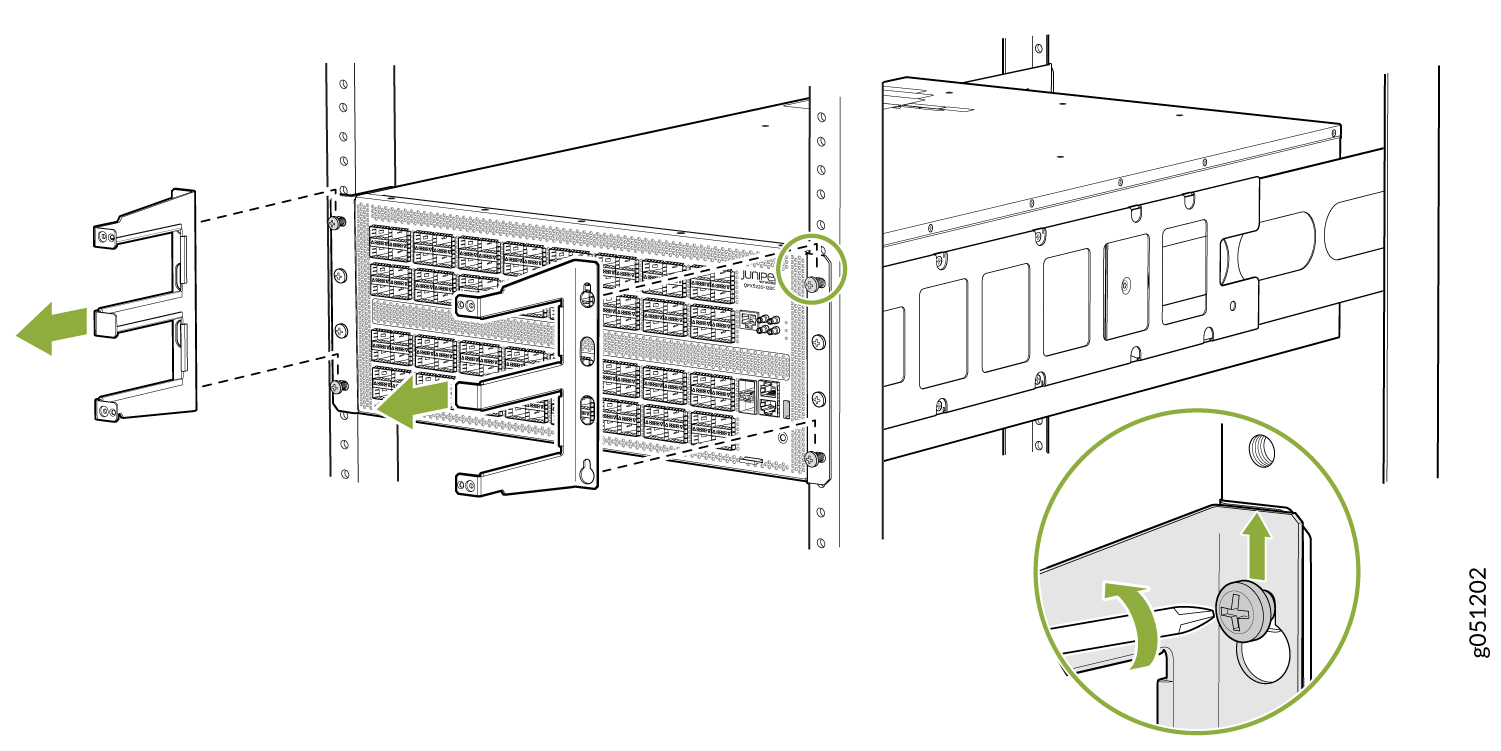
  1. Loosen the four captive screws on the two deflectors using the Phillips screwdriver. See Figure 1.
    Figure 1: Remove Deflectors Server installation or removal process with screws and brackets, highlighted by green arrows and circles for guidance.
  2. Use your hand to support a deflector and continue to unscrew until the deflector separates from the EMI panel. Set aside and repeat with the second deflector.
  3. Loosen the four captive screws on the EMI panel using the Phillips screwdriver.
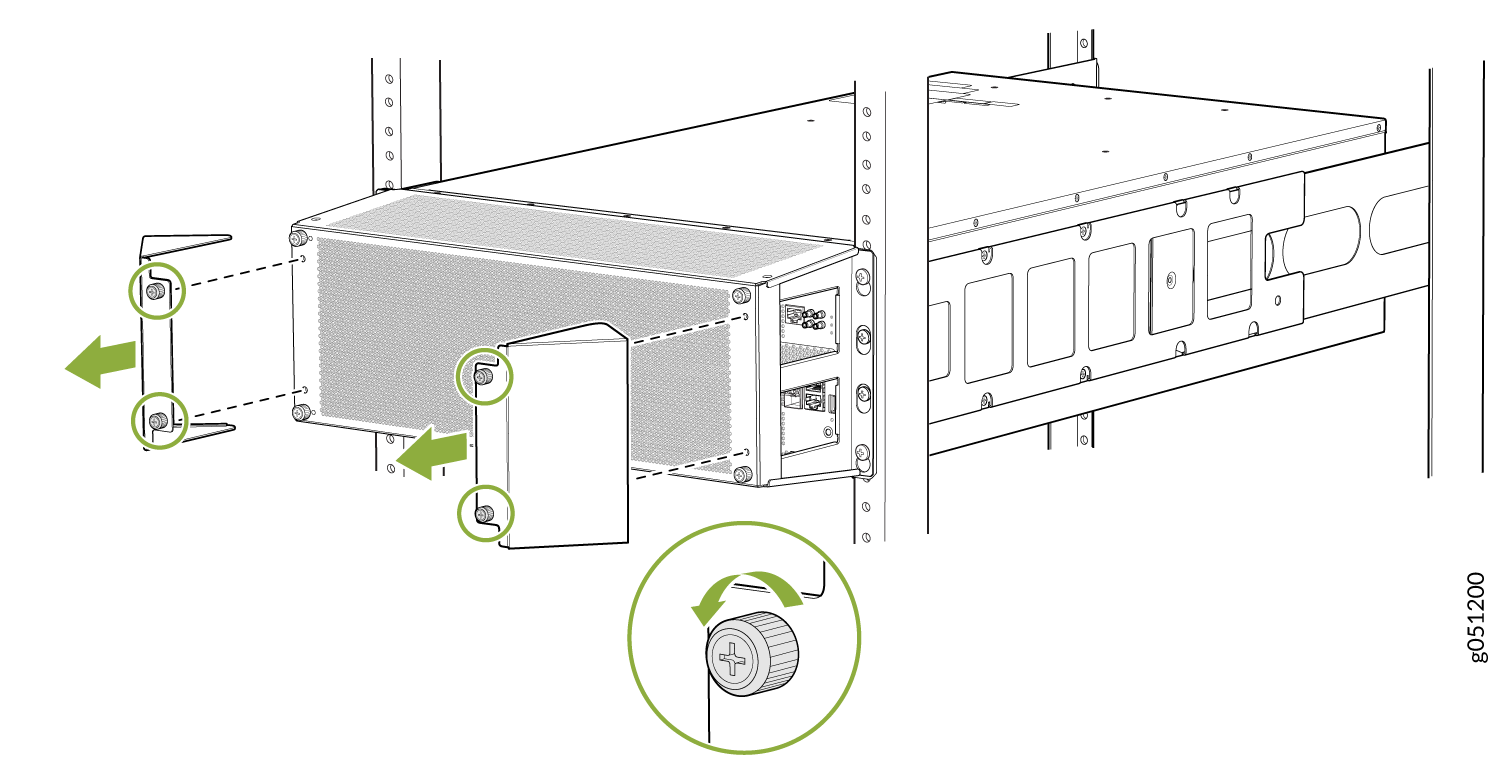
  4. Gently pull the EMI panel straight out to detach from the mounting shelf. See Figure 2.
    Figure 2: Remove EMI Panel from the Mounting Shelves Server rack illustration showing steps to remove or install a front panel using green arrows and highlighted knobs.
  5. Loosen the top and bottom rack mount screws using the Phillips screwdriver so that the mounting shelf can easily slide up.
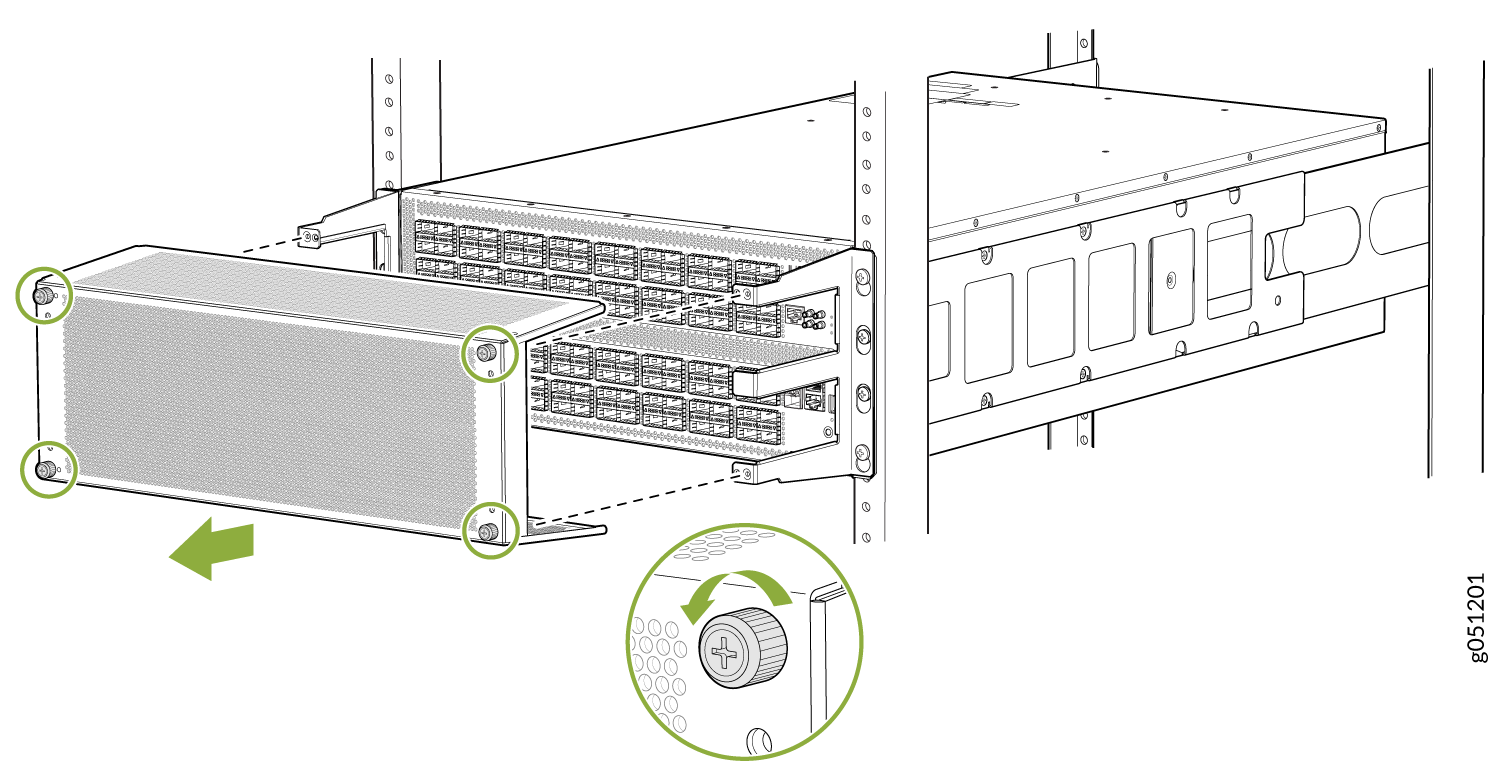
  6. Slide the mounting bracket up and out to release from the rack mount screws.
    Figure 3: Remove the Mounting Shelf Juniper Networks device being mounted on a rack using brackets, with screws being tightened on the rack rails.
  7. Tighten the four rack mount screws using the Phillips screwdriver.
  8. Pack the EMI components for storage.