Connect the QFX5140 to Power
Connect the QFX5140 to power by performing the following steps. Take safety precautions to prevent equipment damage and personal injury
Ground the QFX5140
To meet safety and electromagnetic interference (EMI) requirements and to ensure proper operation, you must connect the QFX5140 to an earth ground before you connect it to power.
Before you connect an earth ground to the protective earthing terminal of the device, ensure that a licensed electrician attaches an appropriate grounding terminal to the grounding cable. Using a grounding cable with an incorrectly attached terminal can damage the device.
You must install the router in a restricted-access location and ensure that the chassis is always properly grounded. The router has a two-hole protective grounding 73 terminal on the rear panel. Under all circumstances, use this grounding connection to ground the chassis. For AC and HVAC/HVDC-powered systems, you must also use the grounding wire in the power cord along with the two-hole protective grounding lug connection. This tested system meets or exceeds all applicable EMC regulatory requirements with the two-hole protective grounding terminal.
Before connecting the device to an earth ground, ensure that you have the following parts and tools:
-
An electrostatic discharge (ESD) grounding strap (provided).
-
Terminal lug (provided)—Panduit LCD6-14AF-L terminal lug or an equivalent lug are sized for 6 AWG (4.11 mm²) power source cables. The 2-hole terminal lug connects to the grounding point located at the rear panel of the QFX5140.
-
Grounding cable for your device (not provided)—The grounding cable must be 6 AWG (4.11 mm²) stranded wire and rated 90 °C or according to local electrical code.
-
A Phillips (+) screwdriver, number 2 to tighten the screw (not provided).
You must install heat-shrink tubing insulation around the crimped section of the power source cables and lugs.
Under all circumstances, use the chassis grounding point to ground the chassis to earth ground.
To ground the QFX5140:
-
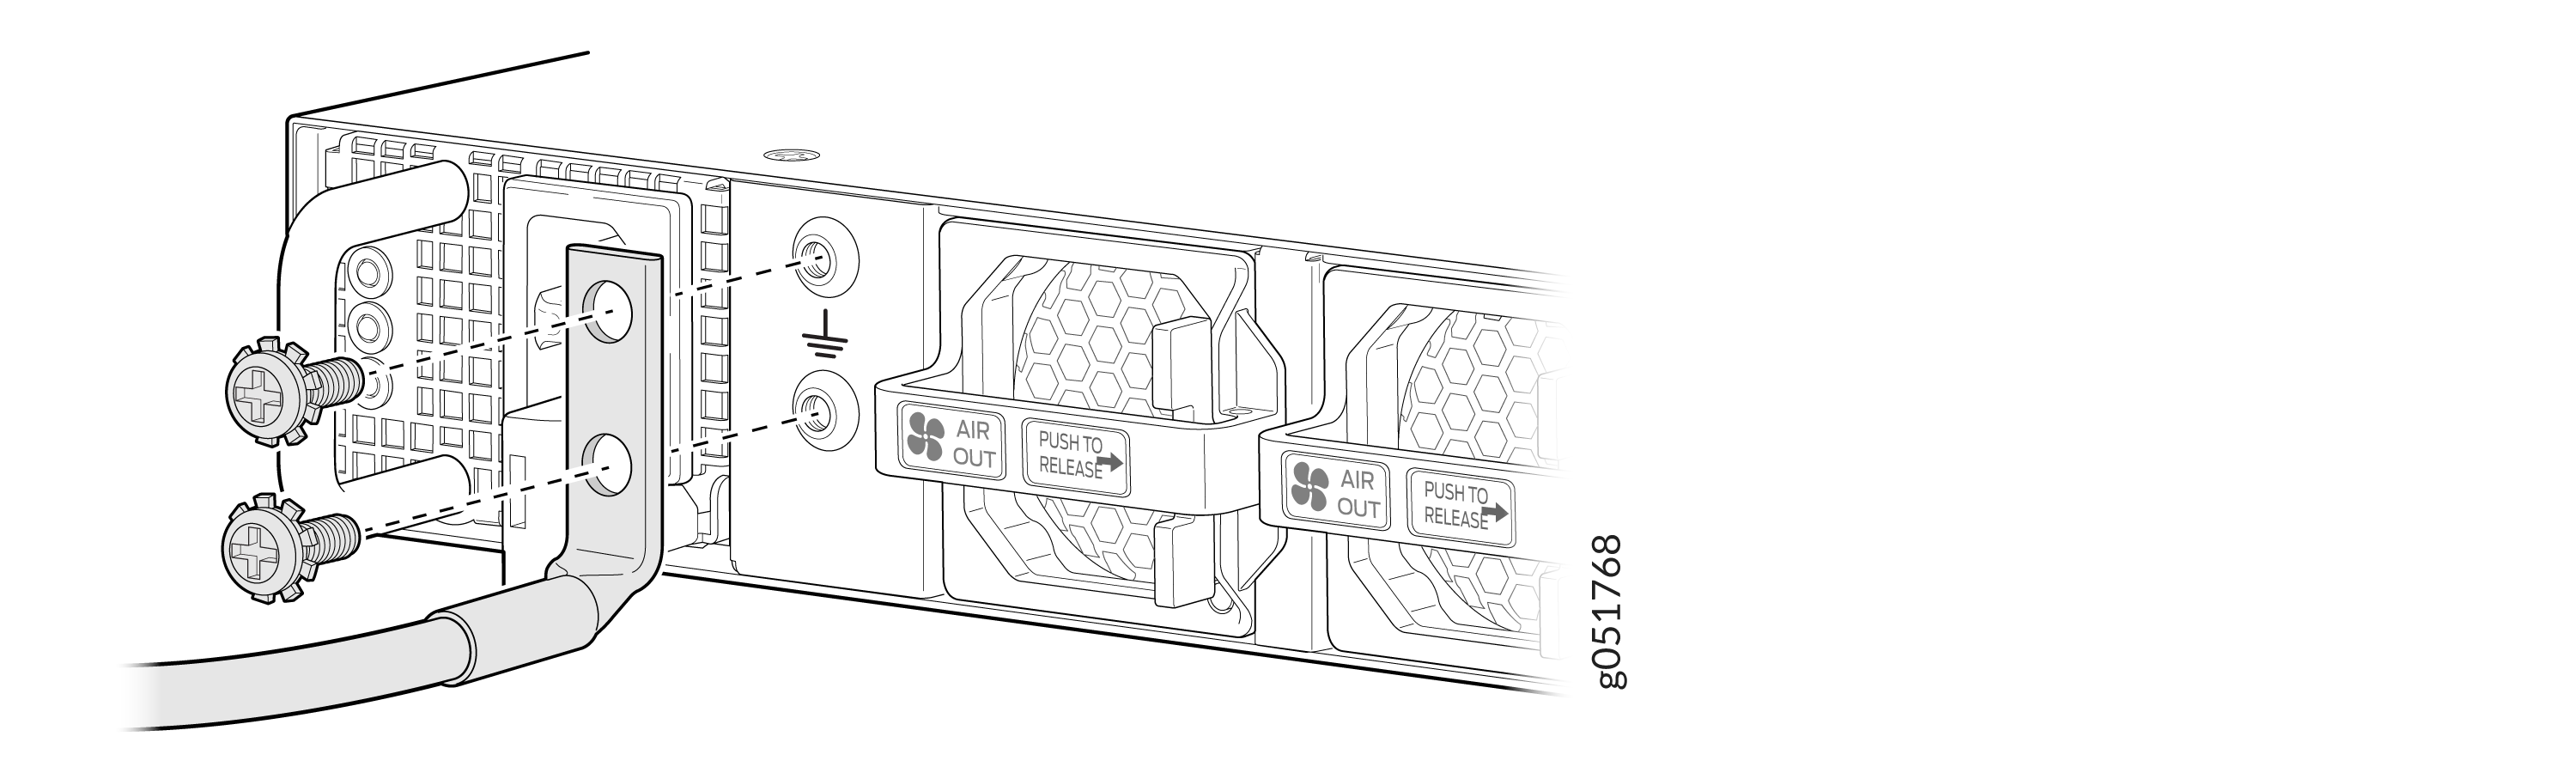
Secure the terminal lug attached to the other end of the ground cable to
the chassis grounding point. Use the screws that you removed from the
chassis grounding point in the earlier step.
Figure 1: Connect the Terminal Lugs to the
Install Heat-Shrink Tubing on a Power Cable
-
Shrink the tubing with a heat gun. Ensure that you heat all sides of the
tubing evenly so that it shrinks around the cable tightly.
CAUTION:
Do not overheat the tubing.
Figure 2: Install Heat-Shrink Tubing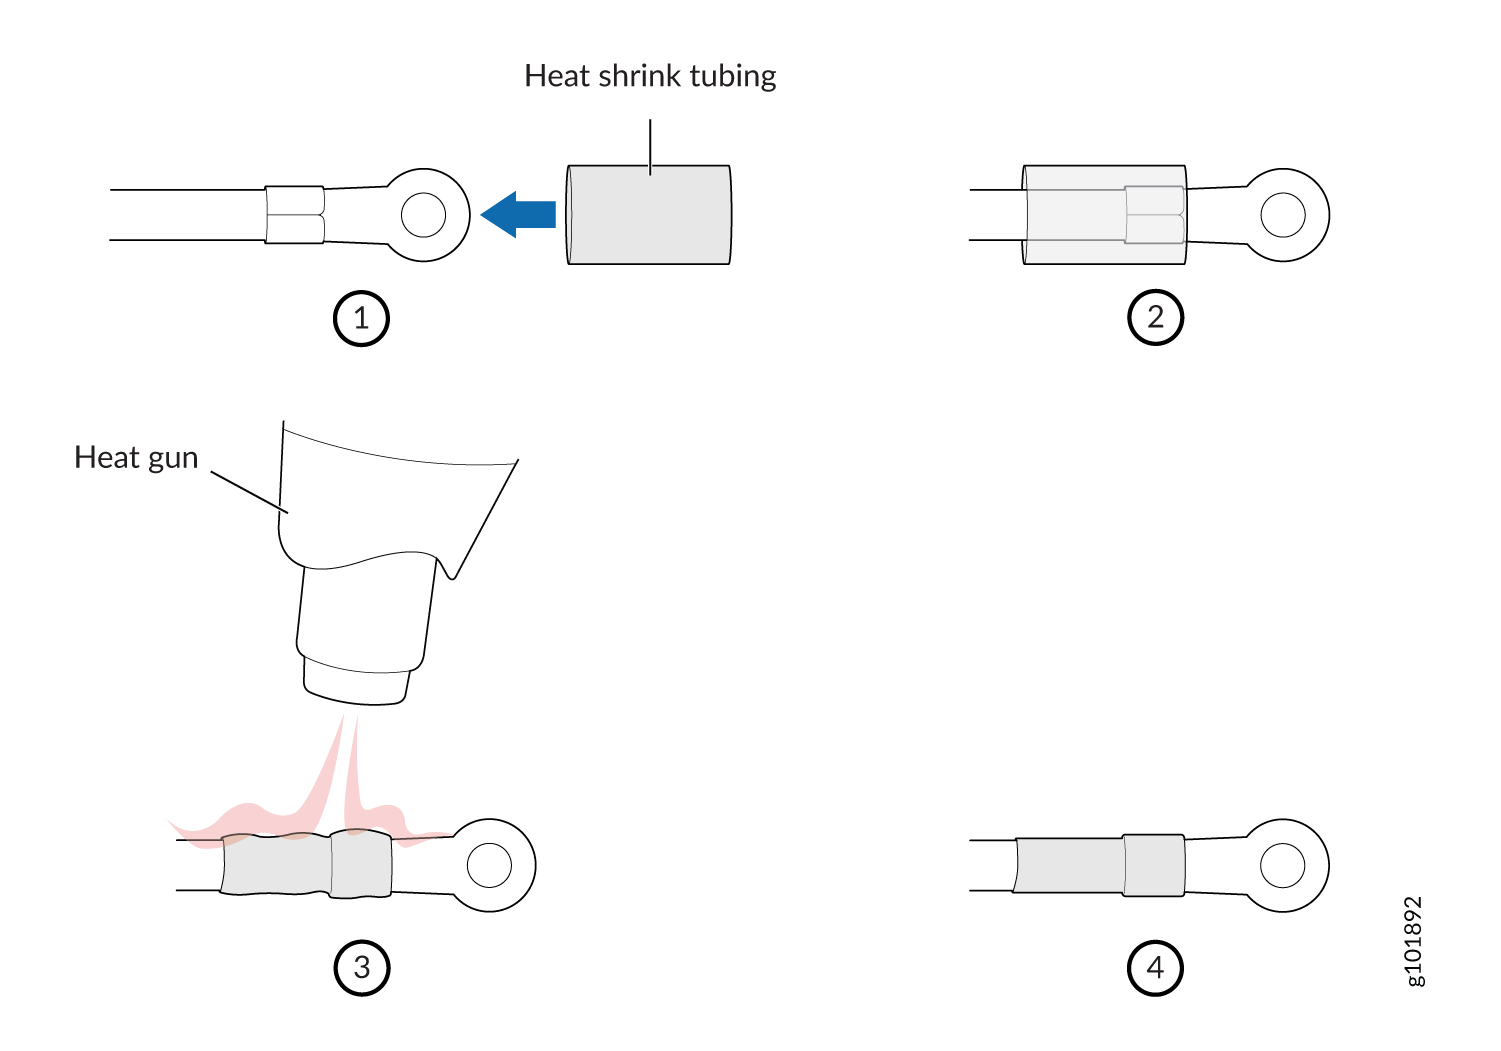
Connect AC Power to the QFX5140
Power supply units (PSUs) in the QFX5140 are hot-removable and hot-insertable field-replaceable units (FRUs) with support for 1+1 redundancy. You can remove and replace a redundant PSU without powering off the QFX5140 or disrupting the device functions.
Do not mix AC and DC power supplies in the same chassis.
Before you begin to connect AC power to the device:
-
Ensure that you have connected the chassis to an earth ground.
-
Ensure that you have a power cord appropriate for your geographical location available to connect AC power to the device.
-
Ensure that you familiarize yourself with AC Power Electrical Safety Guidelines and Action to Take After an Electrical Accident.
-
Ensure that you have taken the necessary precautions to prevent electrostatic discharge (ESD) damage.
-
Ensure that you have an ESD grounding strap.
-
If not already installed, install the PSUs in the device.
Connect the QFX5140-24CD8O-AO to Power
This topic guides you through the steps to connect the QFX5140-24CD8O-AO to power.
To connect the QFX5140-24CD8O-AO to power:
-
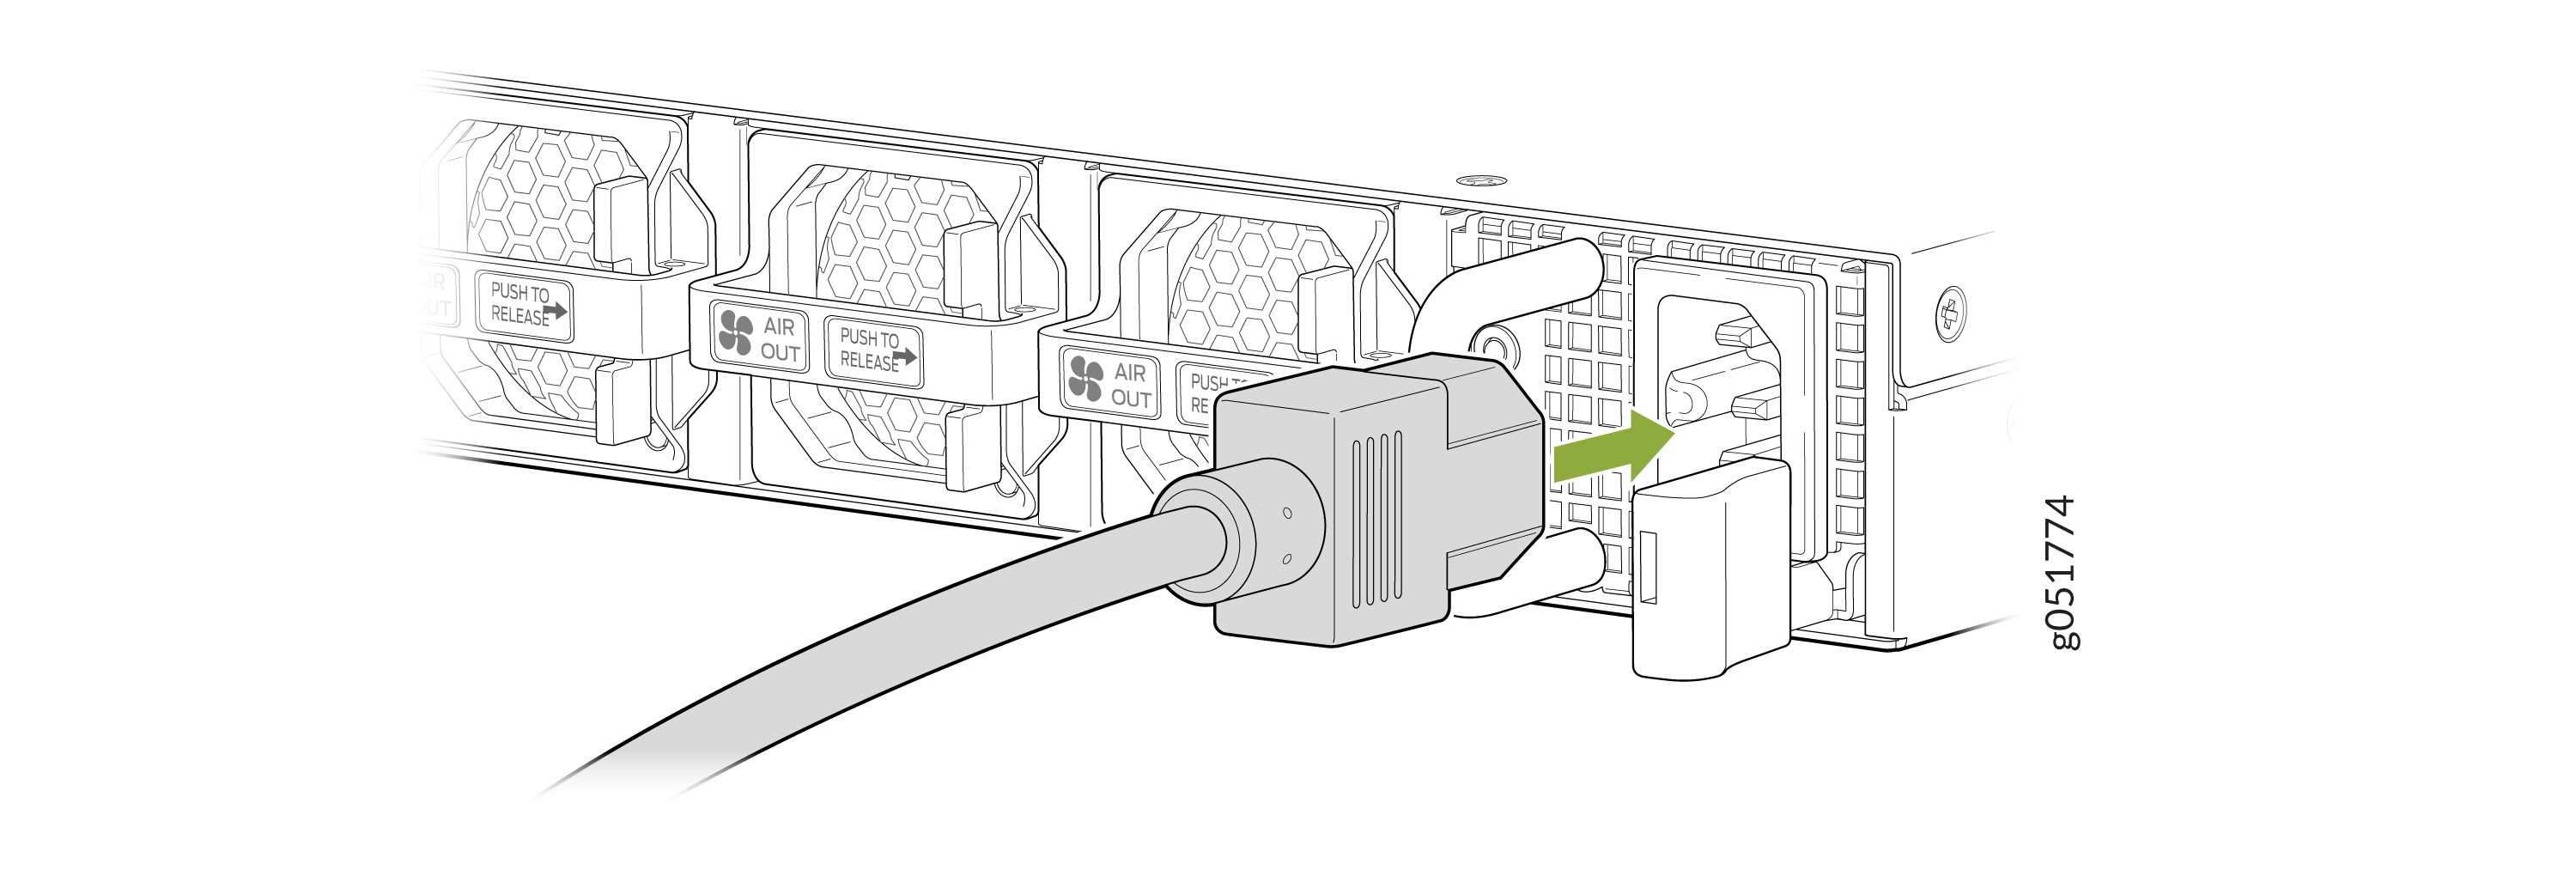
Firmly push the power cord plug straight into the PSU input receptacle
until it is fully seated. Ensure that the retention latch (shown in
green) locks into place to prevent accidental removal.
Figure 3: Connect power cord to the QFX5140 AC PSU