
ON THIS PAGE
Connect the PTX12008 to Power
Connnecting power to the PTX12008 involves the following steps and safety precautions to prevent equipment damage and personal injury.
Ground the PTX12008
To meet safety and electromagnetic interference (EMI) requirements and to ensure proper operation, you must connect the PTX12008 to an earth ground before you connect it to power.
You must install the PTX12008 in a restricted-access location and ensure that the chassis is always properly grounded. The PTX12008 has a two-hole protective grounding terminal on the upper right corner of the rear panel of the chassis. Under all circumstances, use this grounding terminal to ground the chassis. For AC/HVAC/HVDC-powered systems, you must also use the grounding wire in the power cord along with the two-hole grounding connection. This tested system of using the grounding wire along with the two-hole protective grounding terminal meets or exceeds all applicable EMC regulatory requirements.
Before you connect the protective grounding terminal on the router to an earth ground, ensure that a licensed electrician has attached an appropriate grounding terminal to the grounding cable you supply. Using a grounding cable with an incorrectly attached terminal lug can damage the router.
Ensure that you have taken the necessary precautions to prevent electrostatic discharge (ESD) damage. See Prevention of Electrostatic Discharge Damage.
Before you ground the router, ensure that you have the following parts and tools:
-
An ESD grounding strap—not provided
-
A grounding cable—not provided. The grounding cable must be of the same size (4 AWG) or heavier than the input wire of each power supply module (PSM).
-
A protective grounding terminal lug—provided. This lug attaches the grounding cable to the two-hole protective grounding terminal on the lower-left corner of the rear panel of the chassis. The grounding lug required is a Panduit LCD4-14A-L or equivalent.
-
A Phillips (+) screwdriver, number 3—not provided
An AC/HVAC/HVDC-powered PTX12008 gains additional grounding when you plug each PSM into a grounded power outlet by using an power cord appropriate for your geographical location.
To connect the PTX12008 to an earth ground:
-
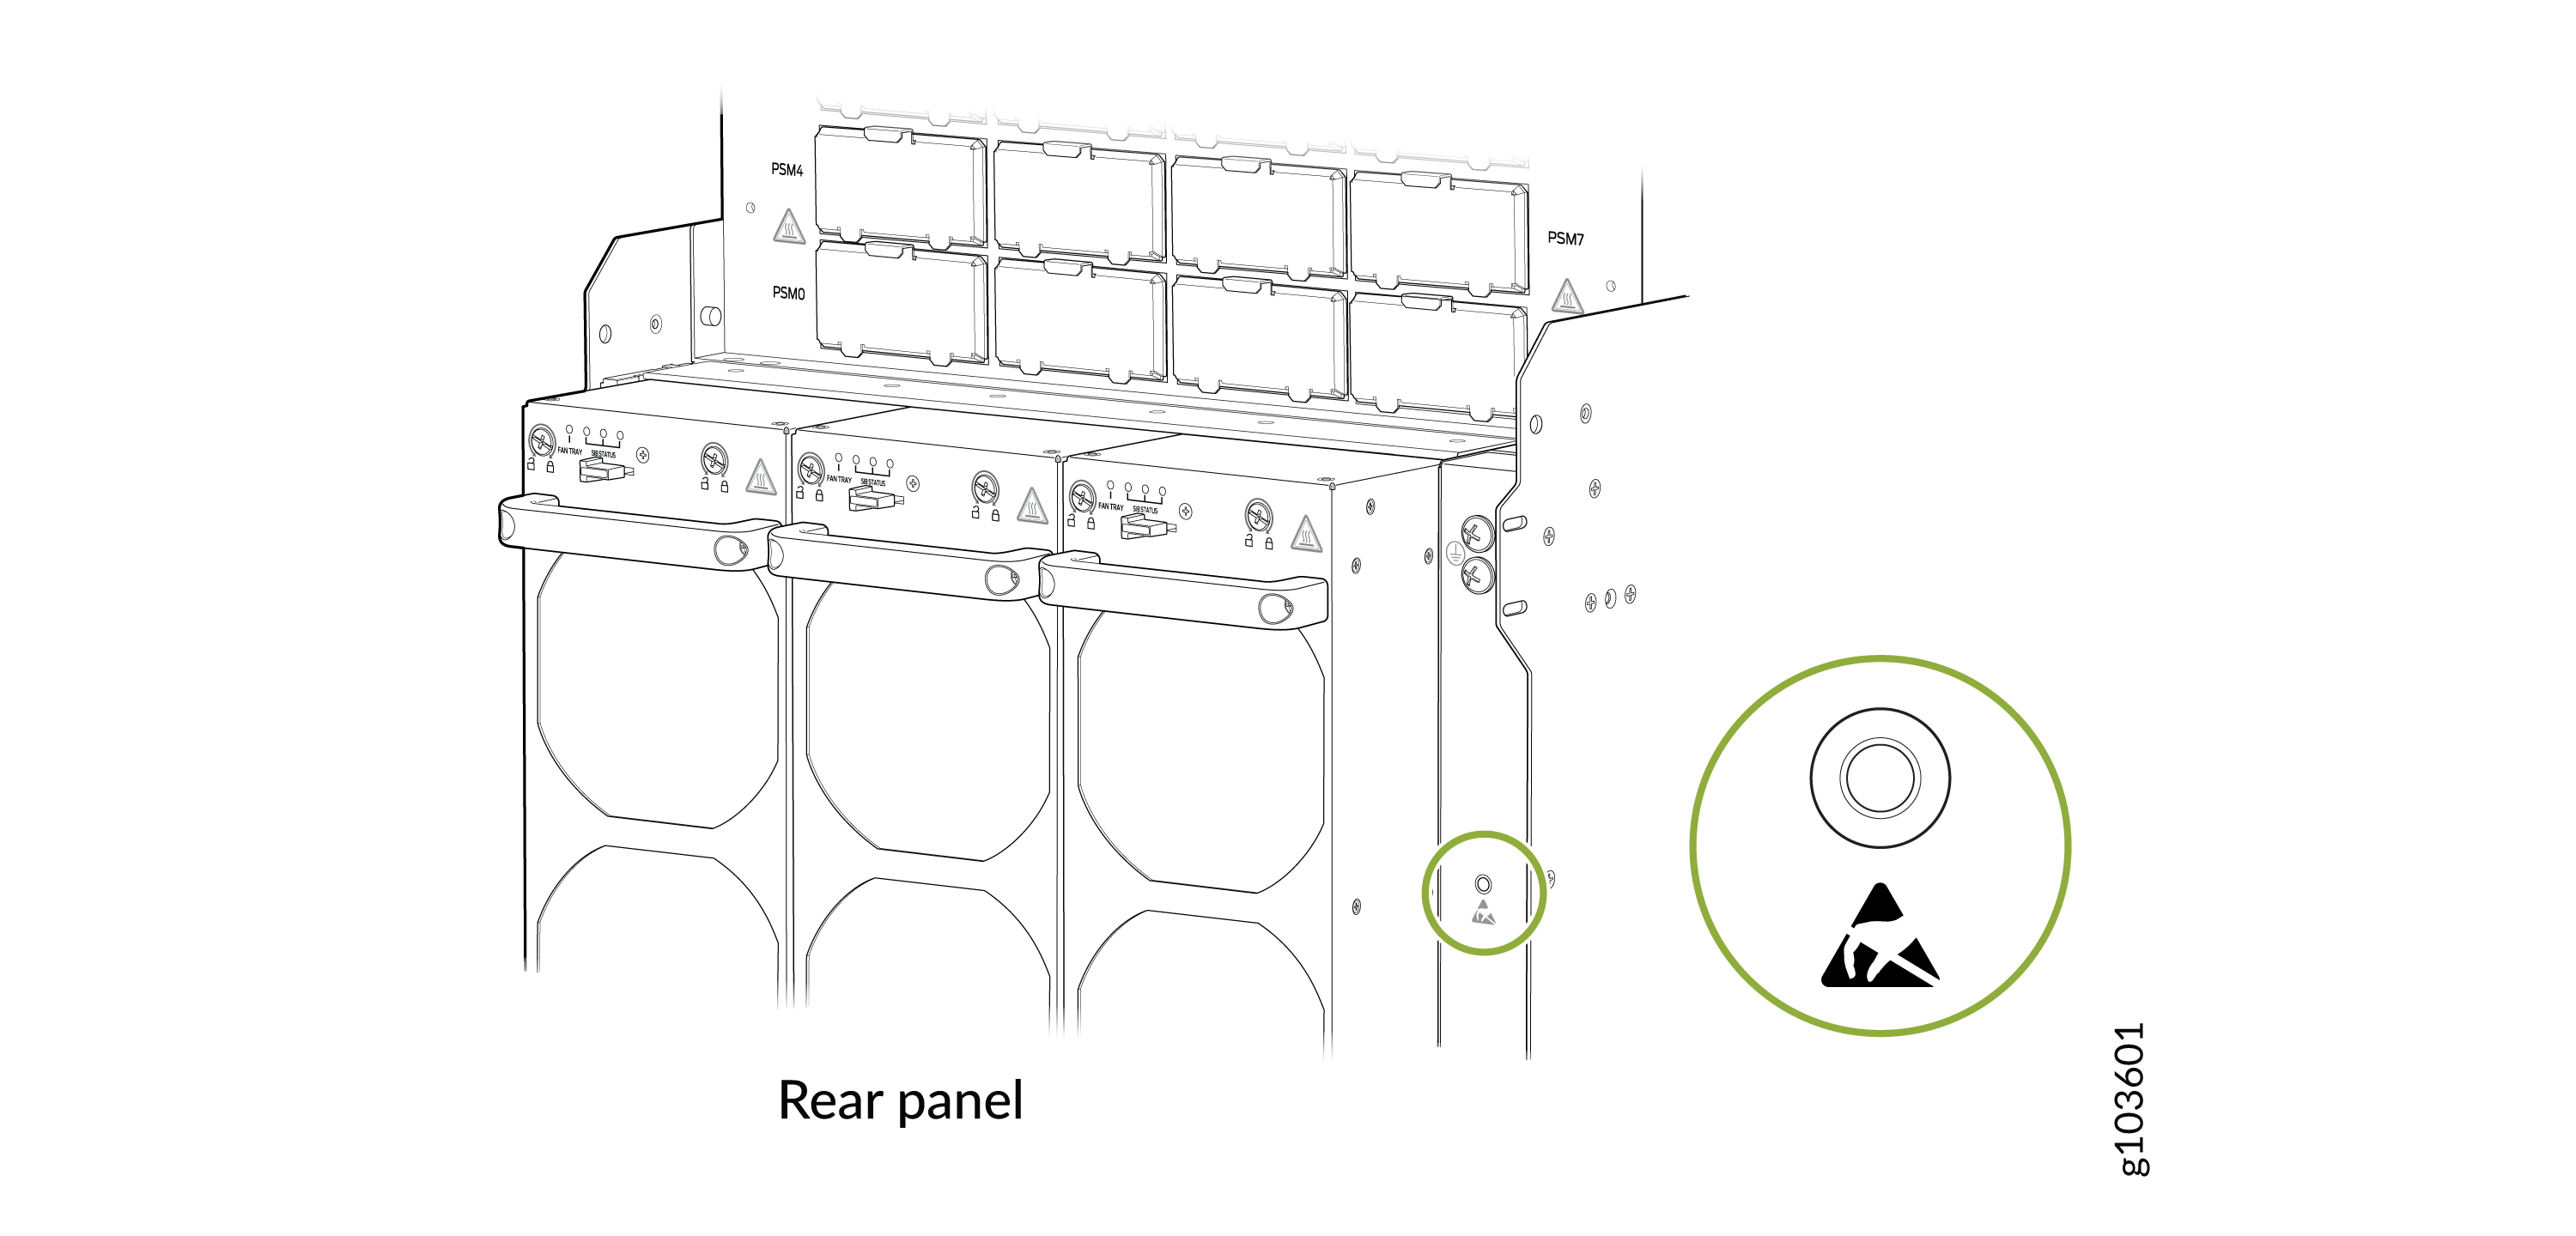
Wrap and fasten one end of the ESD grounding strap around your bare wrist and
connect the other end of the strap to the ESD point on the rear panel of the
chassis.
Figure 1: ESD Point on the Rear Panel of the Chassis
-
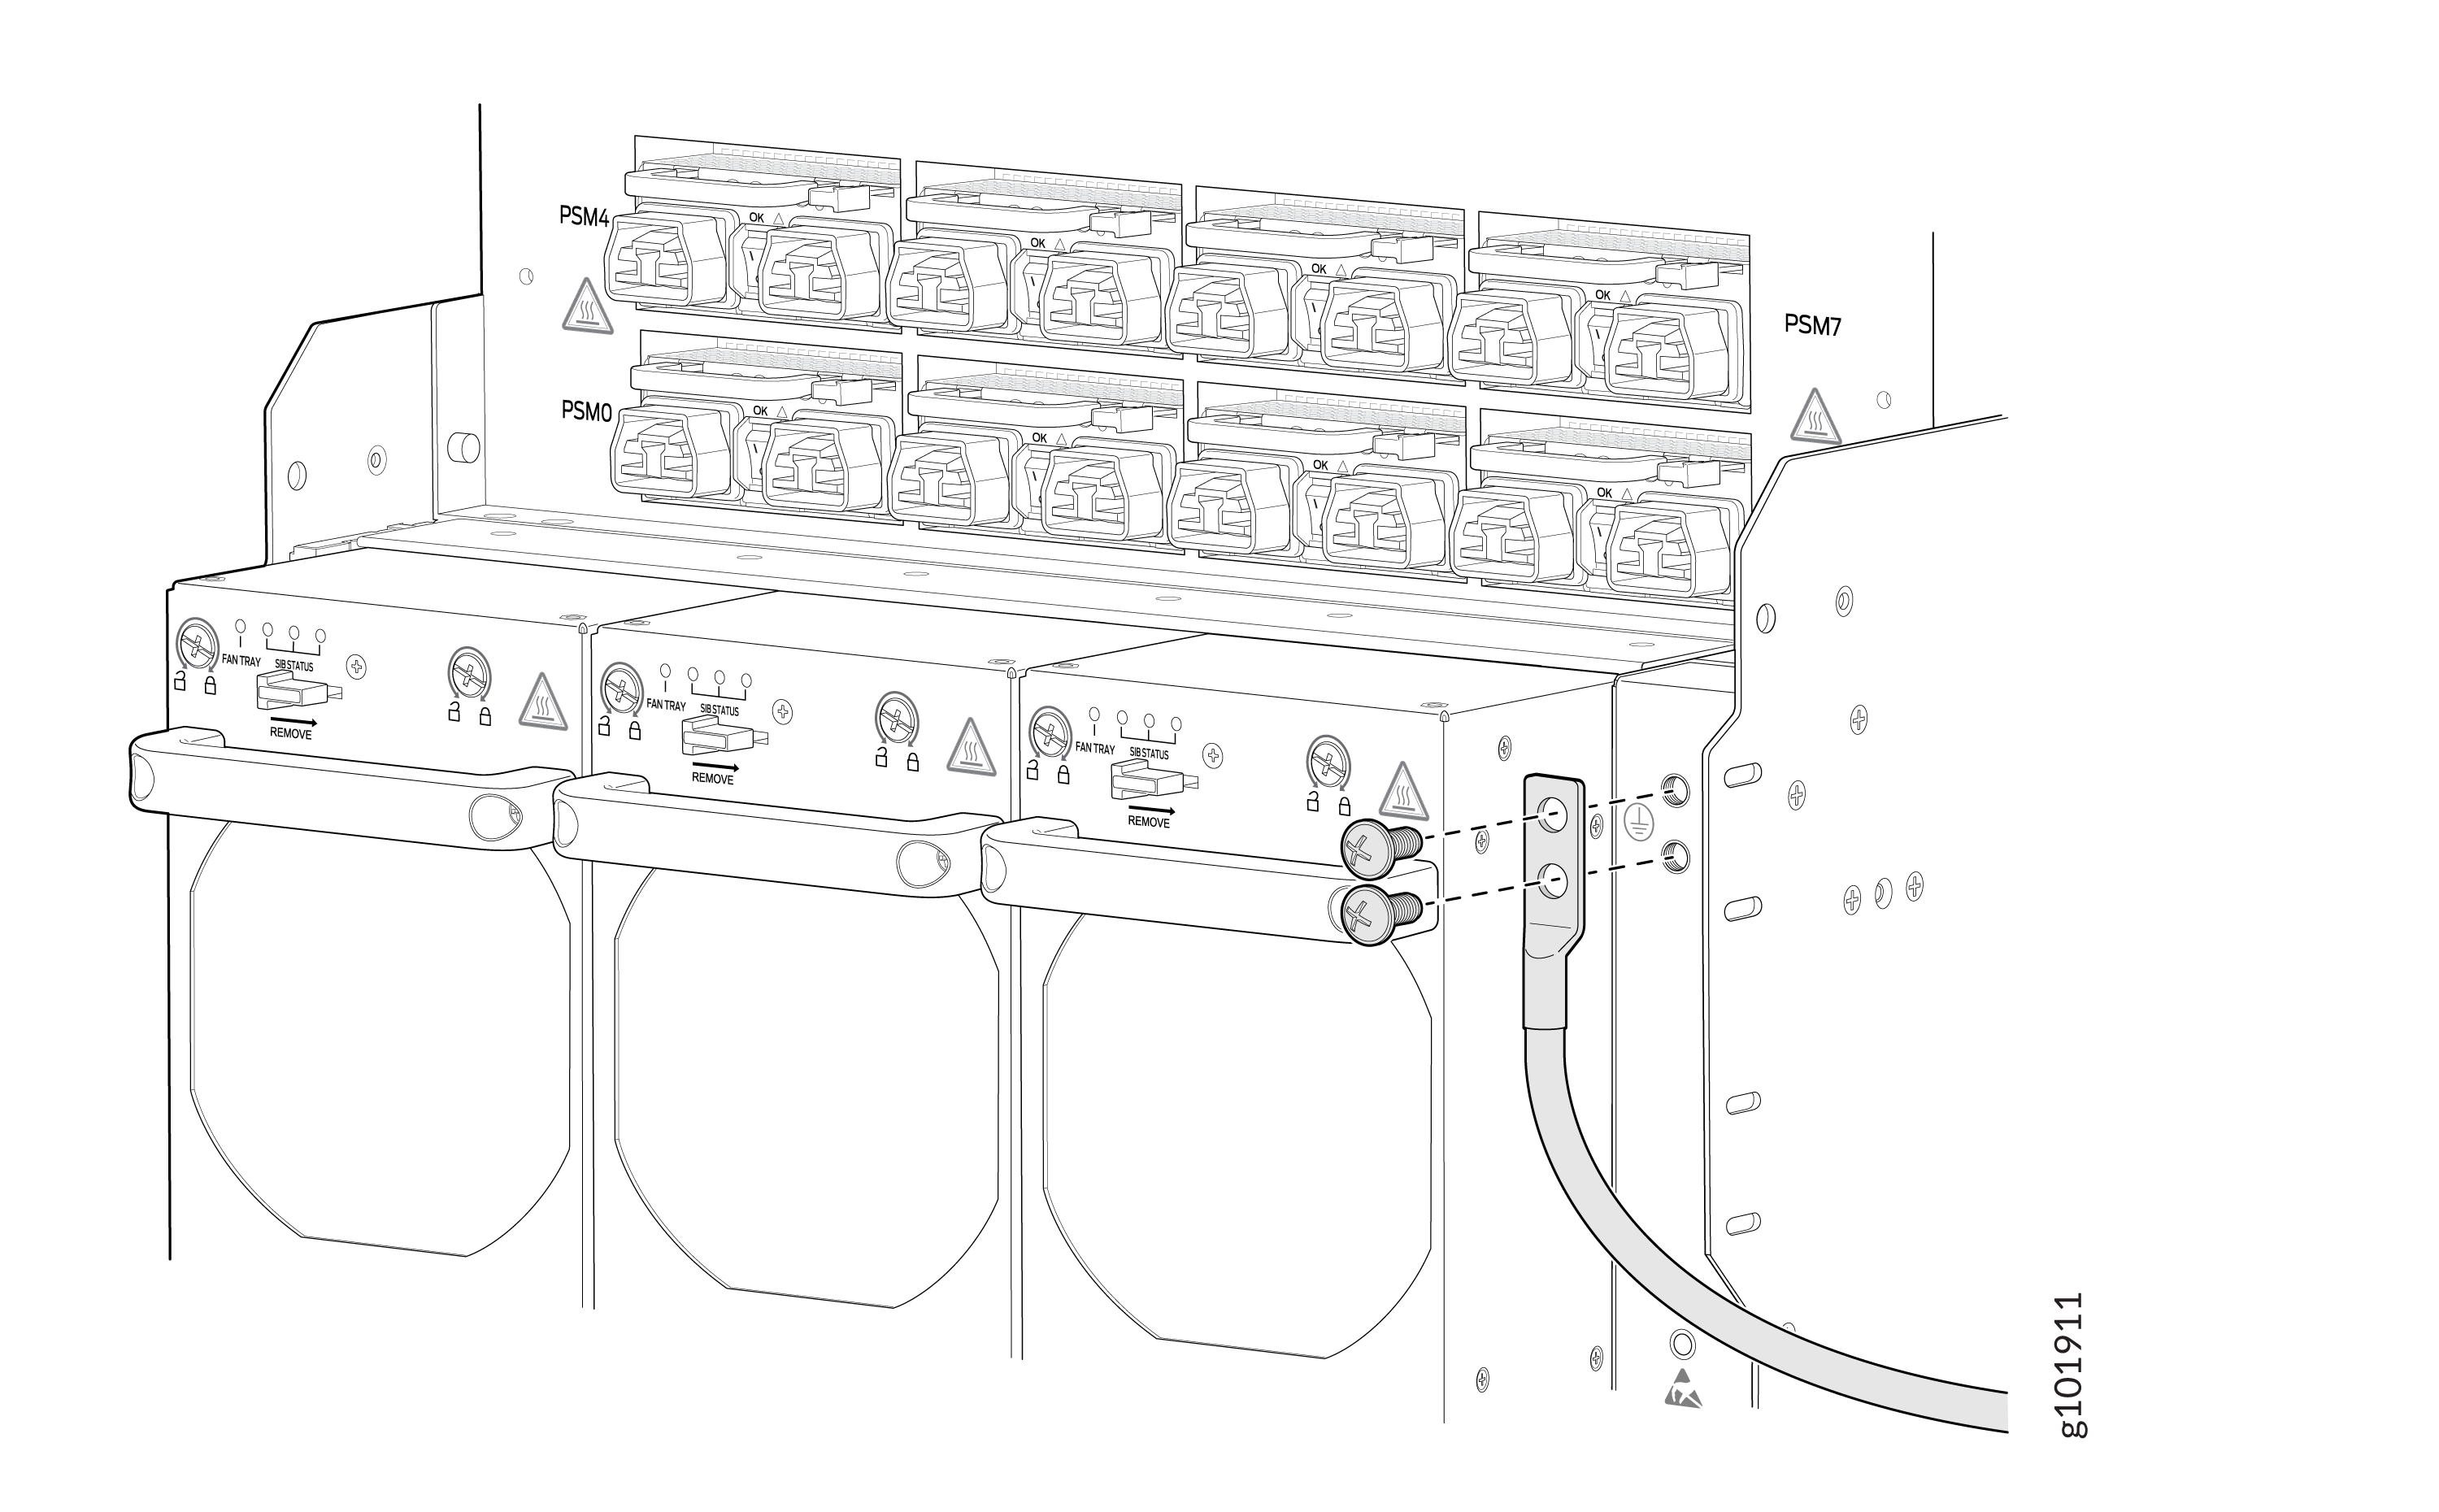
Place the protective grounding terminal lug and cable over the protective
grounding terminal screw holes.
Connect Power
After you ground the chassis, install power supply modules (PSMs), and supply power to the chassis, the PTX12008 initiates the power-on sequence.
To install AC/HVAC/HVDC PSMs in a PTX12008 and connect them to power, see Install an AC/HVAC/HVDC PSM on the PTX12008 and Connect to Power.
To install DC PSMs in a PTX12008 and connect them to power, see Install a DC PSM on the PTX12008 and Connect to Power.