Install the Front Door on a PTX10004 Router
The front door (JNP10004-FRPNL1 or JNP10004-FRNT-PNL) on the Juniper Networks PTX10004 router protects the fiber-optic cabling and protects the router from electromagnetic interference (EMI).
Front door is required on the PTX10004 router to protect the fiber-optic cabling and to provide additional protection from electromagnetic interference (EMI). You can install the front door with or without the optional cable management system.
The PTX10004 supports two types of front doors:
Front door with air filter—JNP10004-FRPNL1
Front door without air filter—JNP10004-FRNT-PNL
Install the Front Door With Air Filter
Before you install the front door with the air filter, ensure that you have the following tools and parts available:
-
Front door with air filter—JNP10004-FRPNL1 (provided)
-
Three cable seals—Two seals for the right side and one for the left side (provided)
-
Cable management system (optional and provided)
-
A Phillips(+) screwdriver, number 2 (not provided)
-
An Electrostatic discharge (ESD) grounding strap
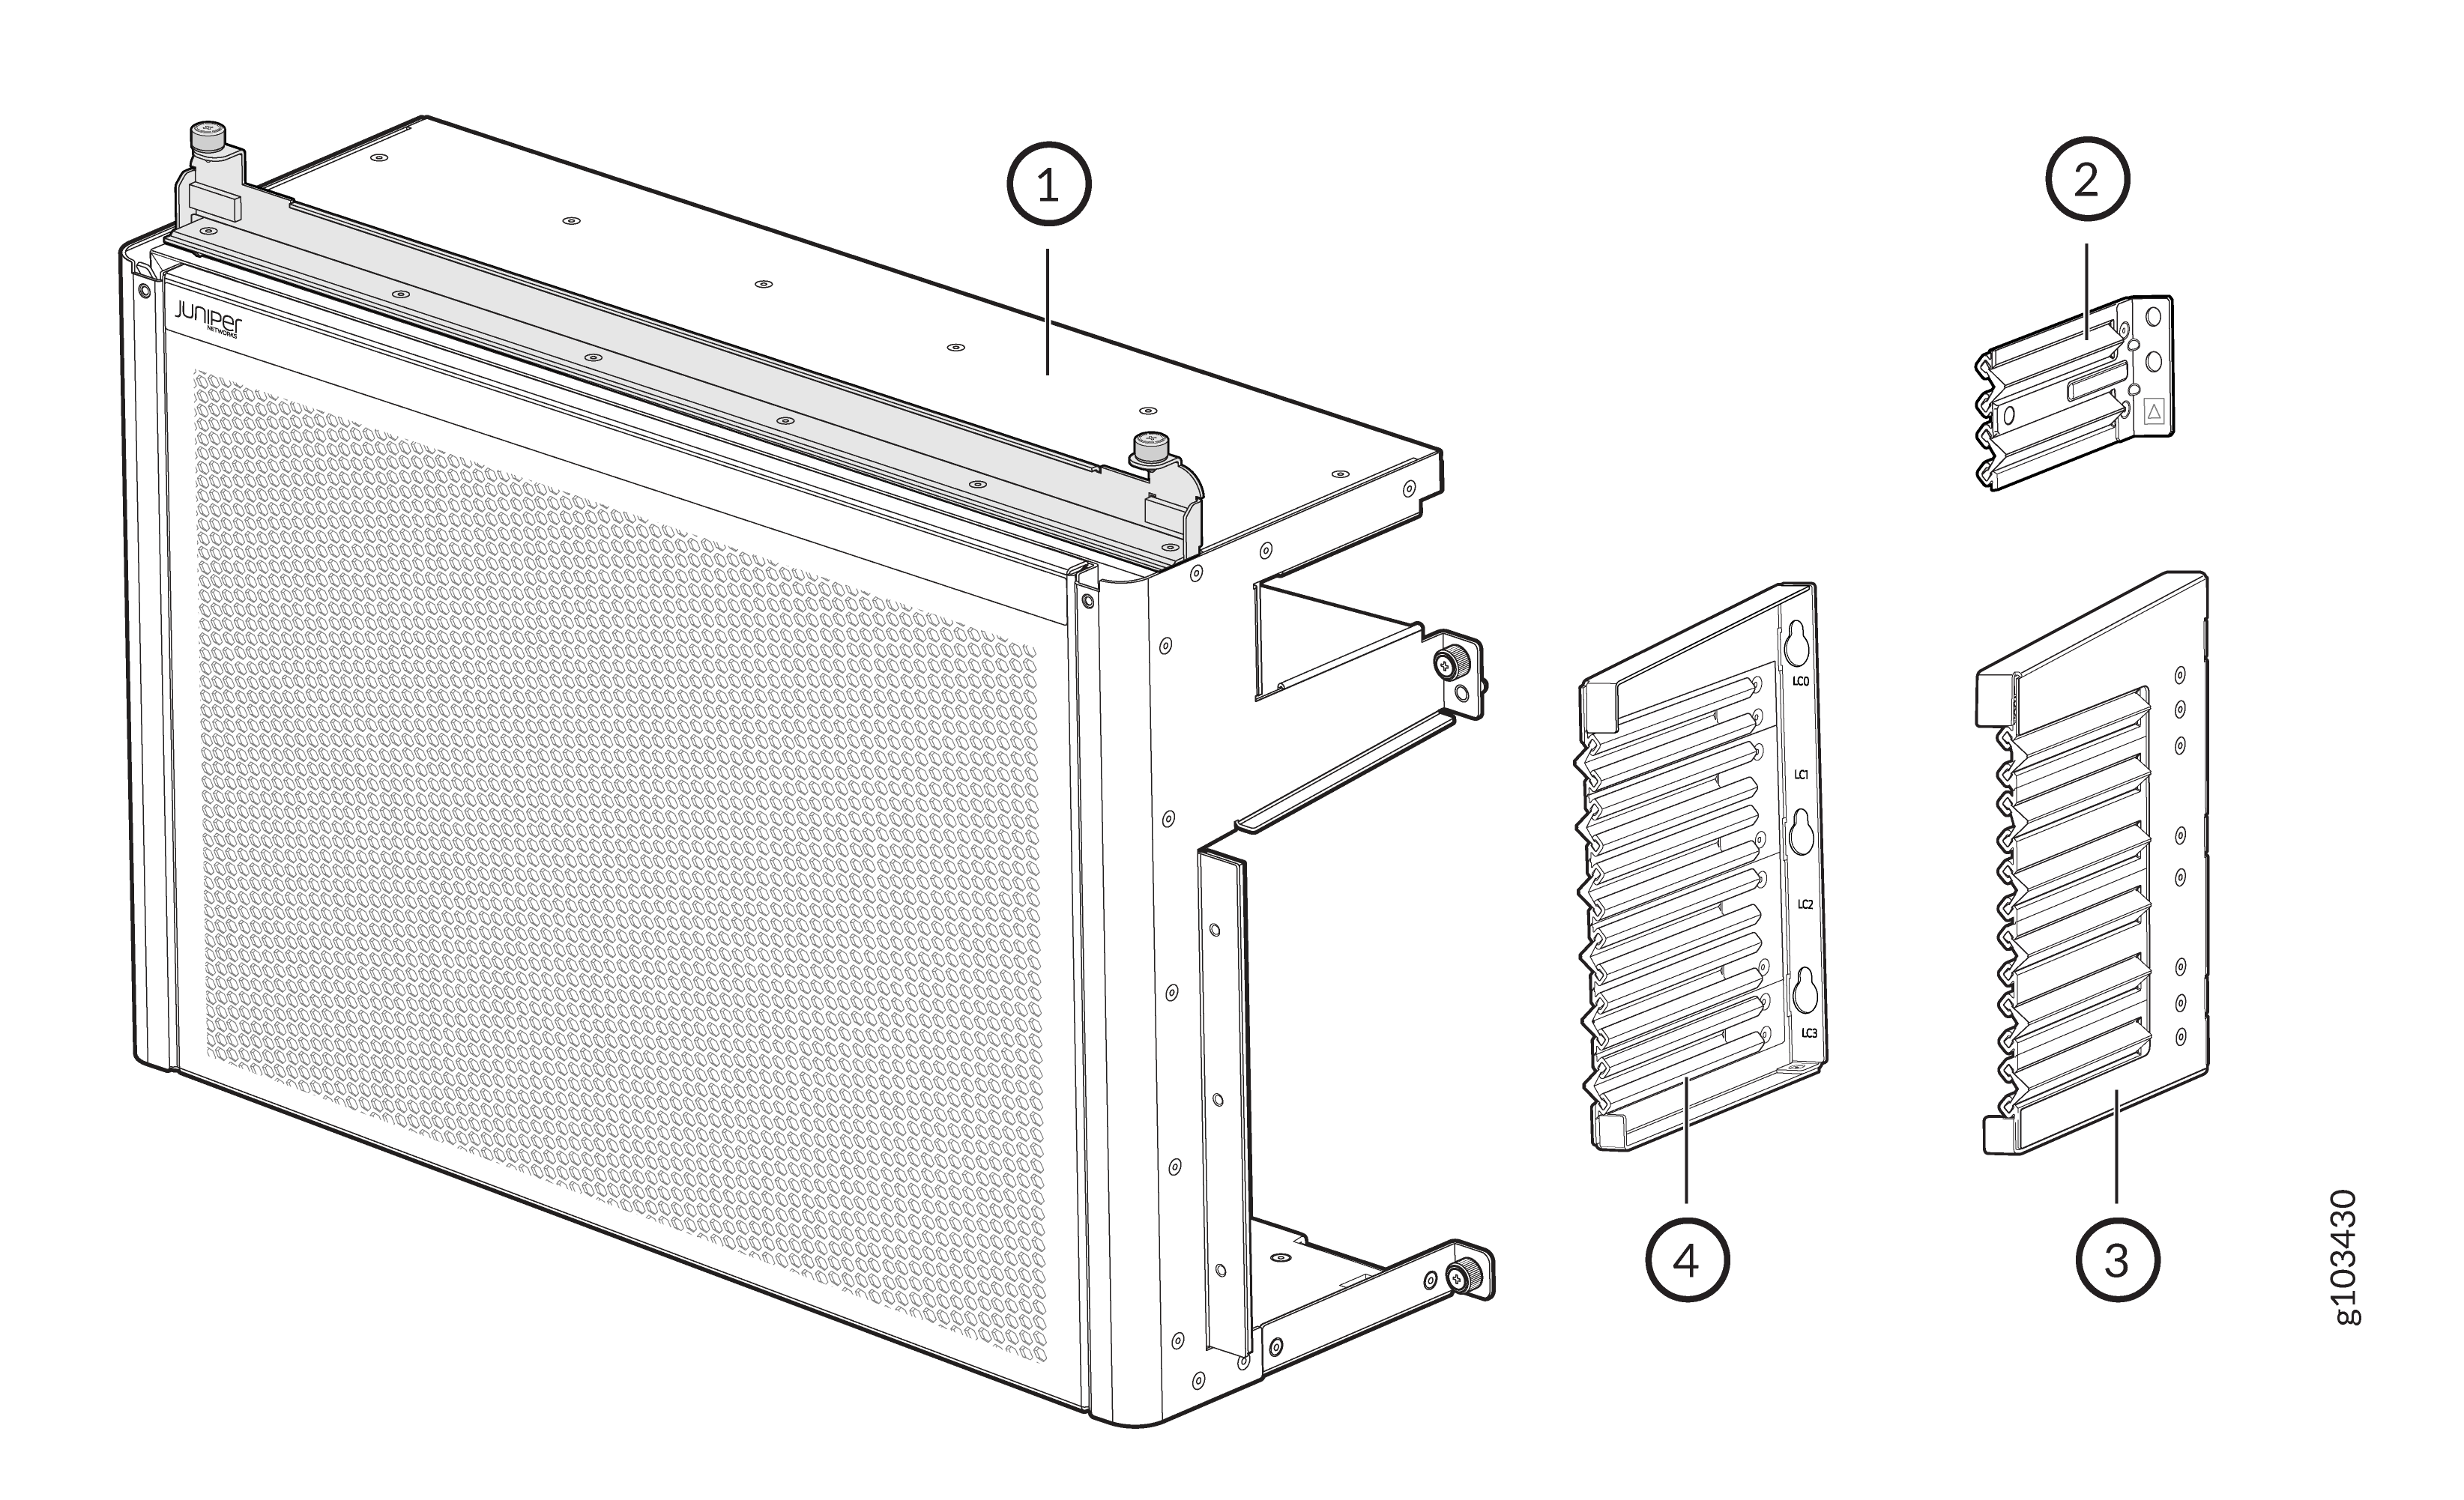
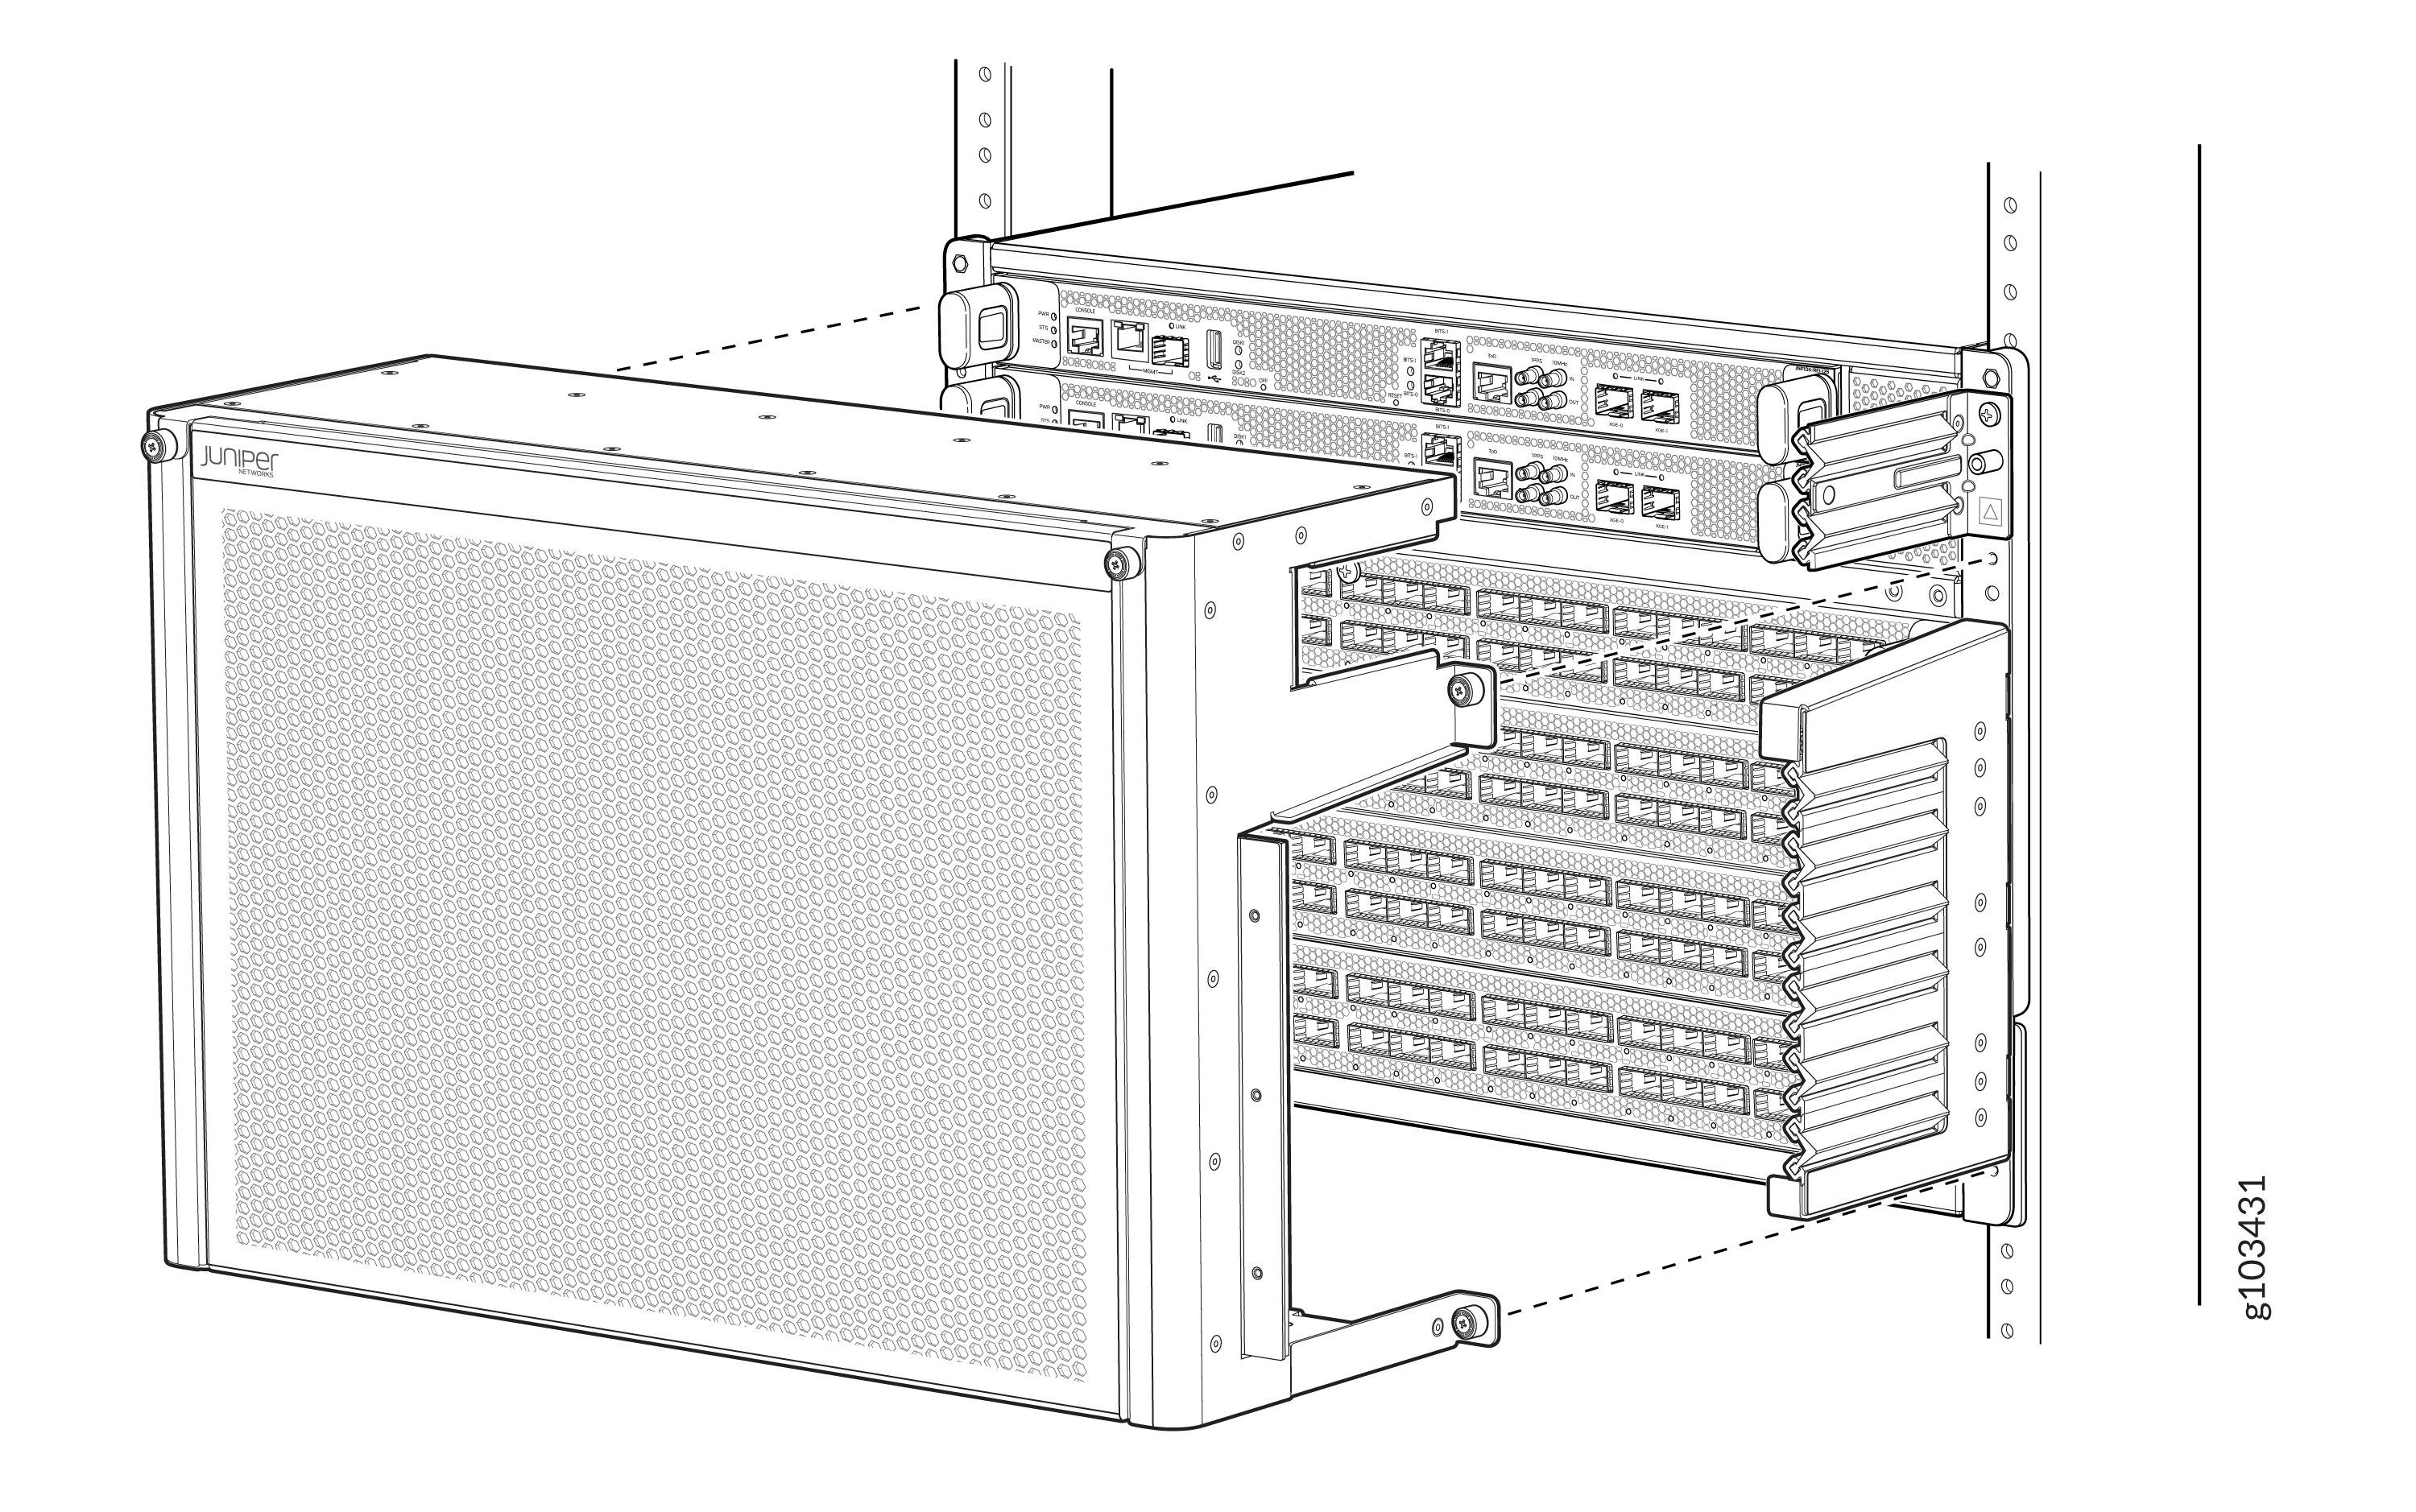
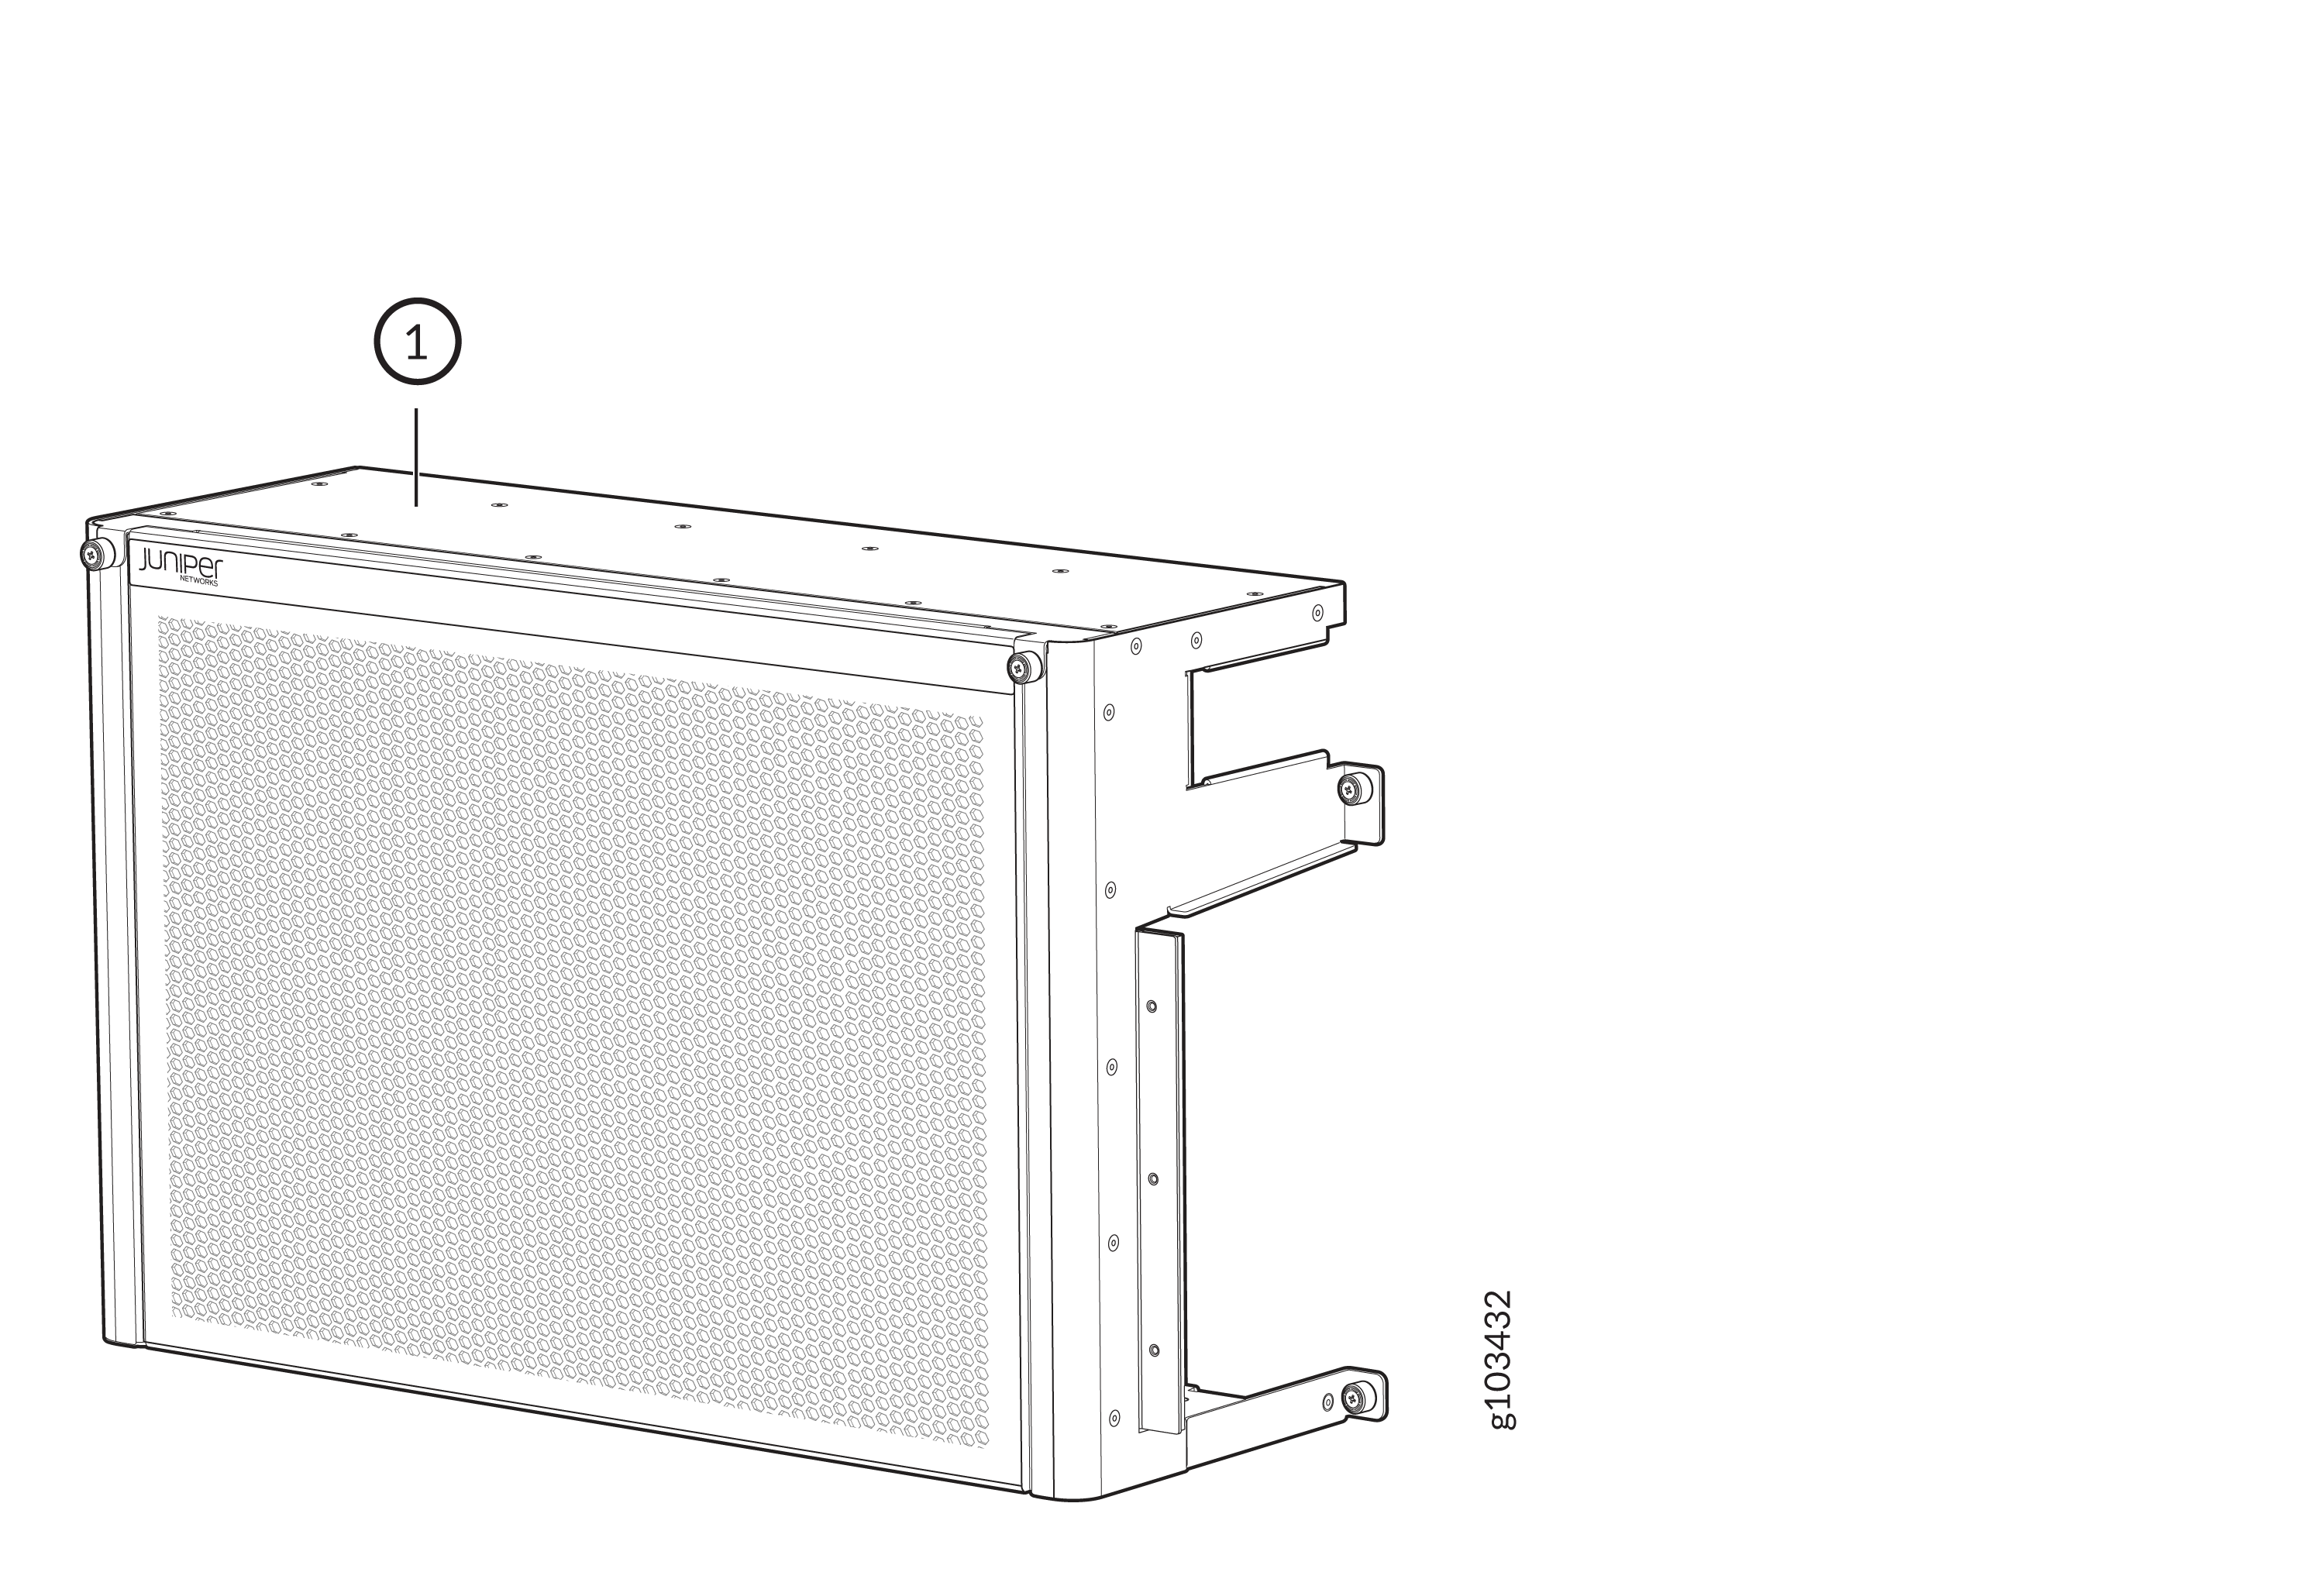
1 — Front door with air filter frame | 3 — Right cable seal |
2 — Routing Control Board (RCB) cable seal | 4 — Left cable seal |
The JNP10004-FRPNL1 EMI front door has an air filter. We recommend that you replace the air filter every six months. The order number for a spare filter is JNP10004-FLTR.
To install the front door with air filter:
-
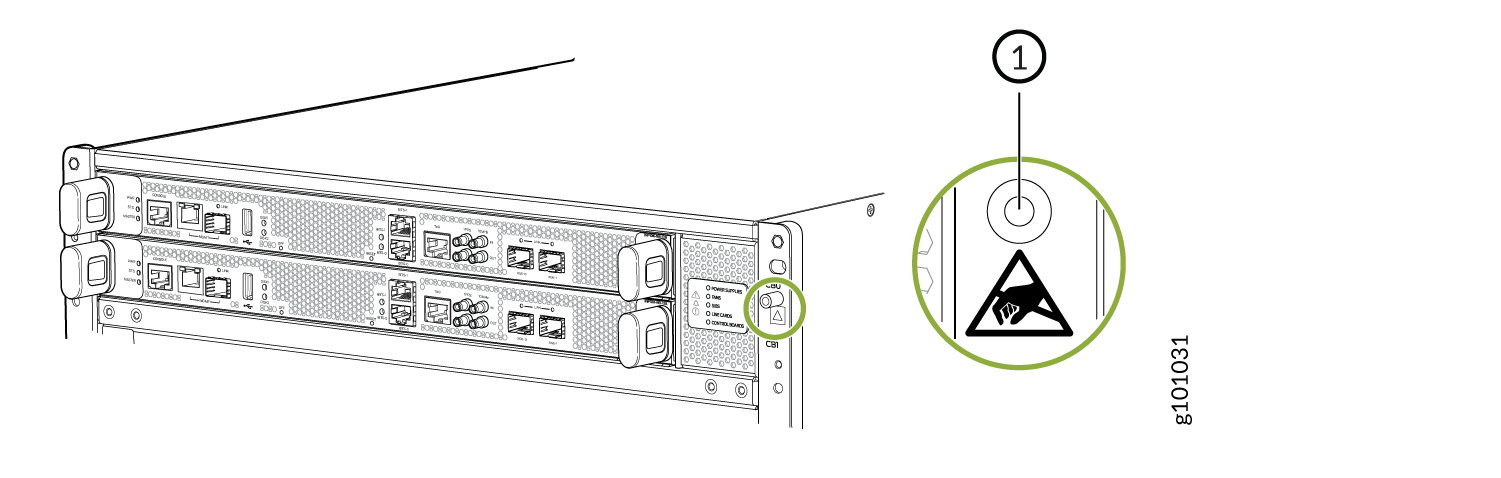
Wrap and fasten one end of the ESD grounding strap around your bare wrist and connect
the other end of the strap to the ESD point on the front of the chassis.
Figure 2: ESD Point on the Front of the Chassis
-
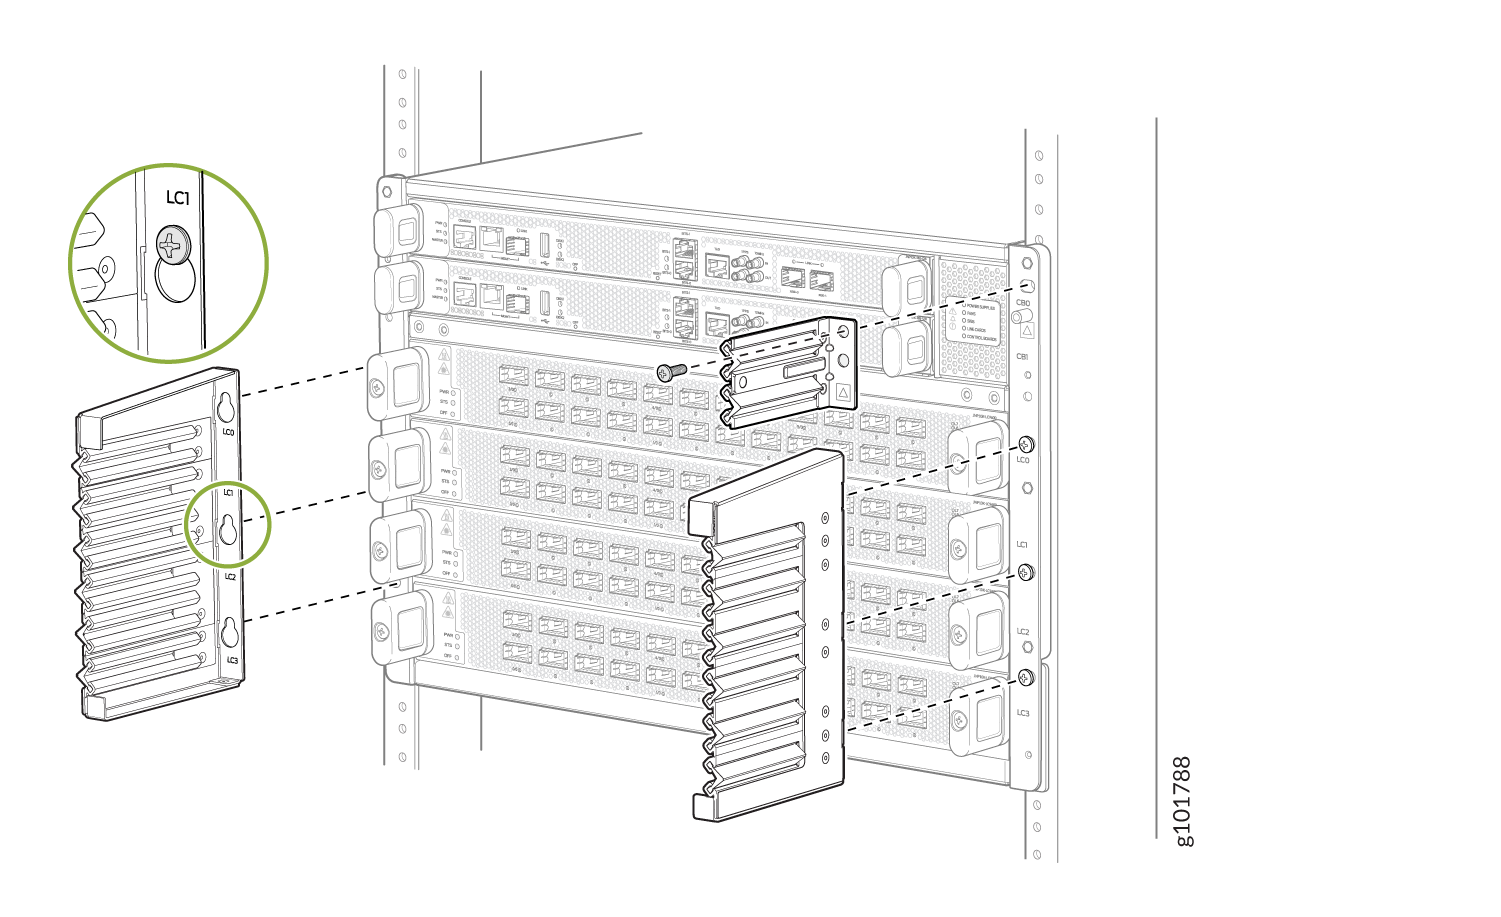
Install the cable seals.
-
Position the keyhole slots of one of the long cable seals over the mounting screws.
The long cable seals are not interchangeable; there is a right seal and a left seal.
Install the seals so that the keyhole slots are on the inside, next to the line
card.
Figure 3: Install the Cable Seals
-
Position the keyhole slots of one of the long cable seals over the mounting screws.
The long cable seals are not interchangeable; there is a right seal and a left seal.
Install the seals so that the keyhole slots are on the inside, next to the line
card.
-
Install optics and attach the front door.
-
Lift the front door, and align the captive screws in the door with holes in the
chassis flange below the cable seals. Fasten the door to the chassis and rack, and
hand tighten.
Figure 4: Install the Front Door
-
Lift the front door, and align the captive screws in the door with holes in the
chassis flange below the cable seals. Fasten the door to the chassis and rack, and
hand tighten.
Install the Front Door Without Air Filter
Before you install the front door, ensure that you have the following tools and parts available:
-
Front door—JNP10004-FRNT-PNL (provided)
-
An Electrostatic discharge (ESD) grounding strap
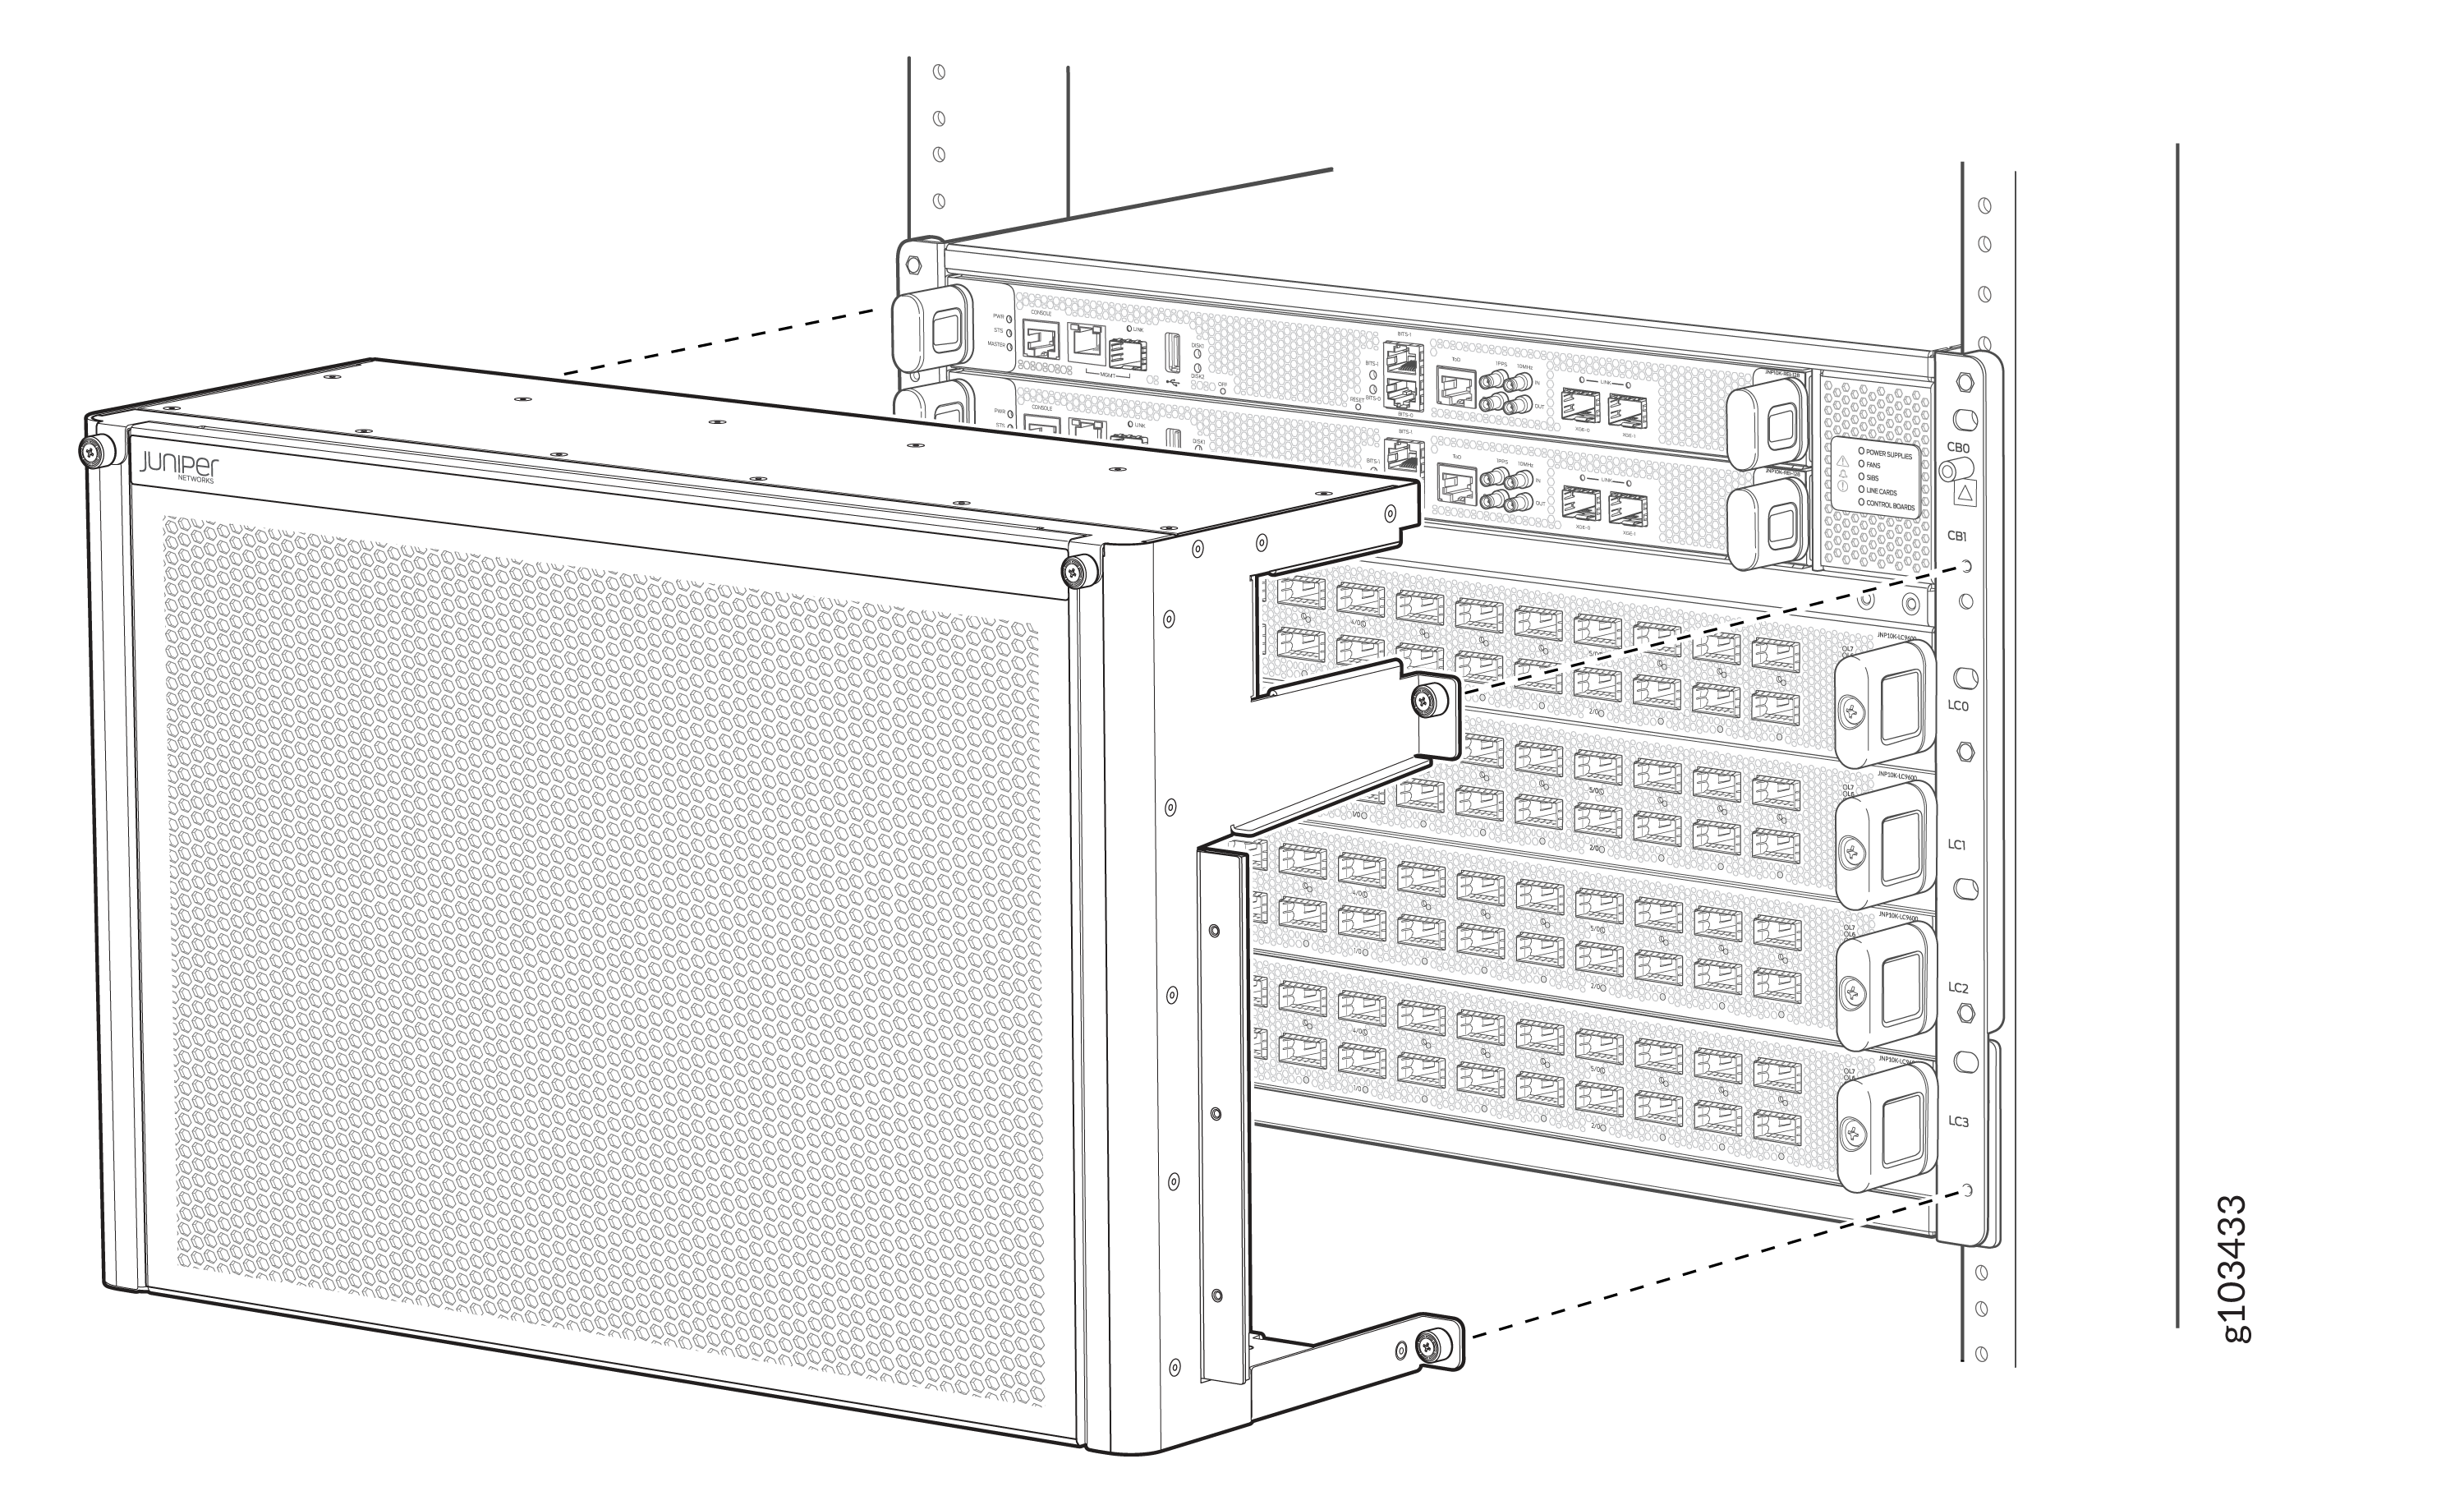
1 — Front door |
To install the front door without air filter.
-
Wrap and fasten one end of the ESD grounding strap around your bare wrist and connect
the other end of the strap to the ESD point on the front of the chassis.
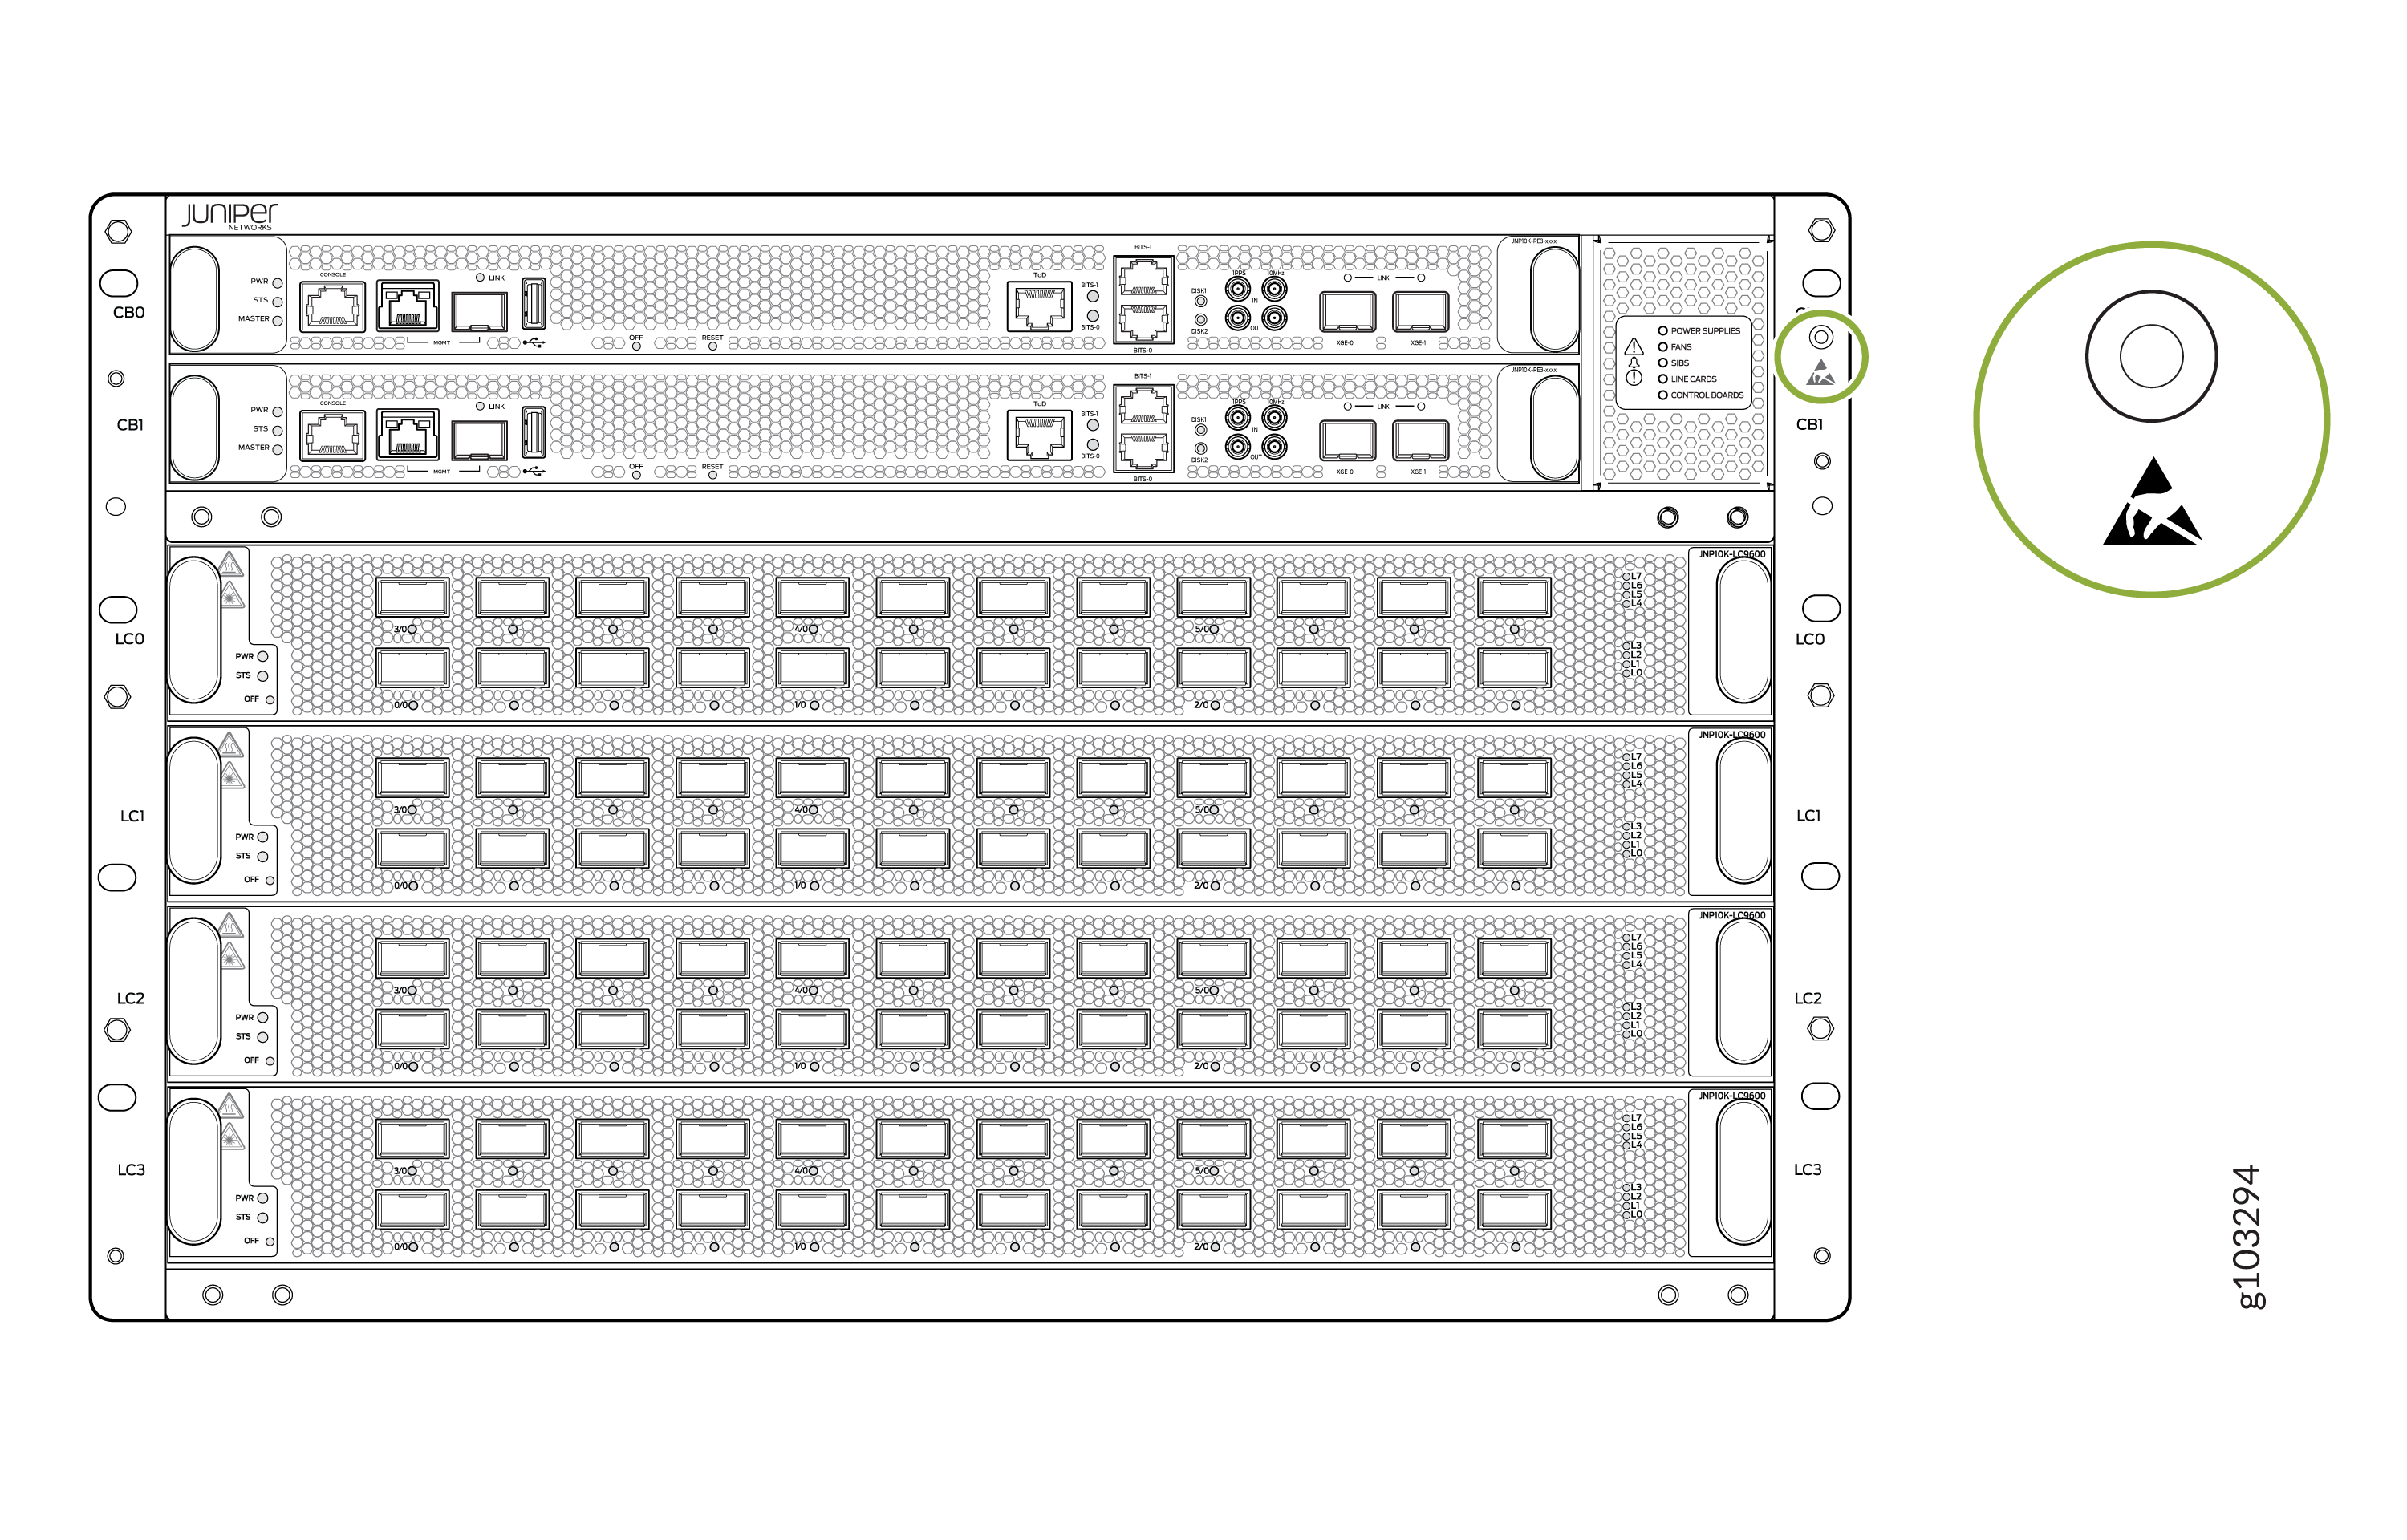
Figure 6: ESD Point on the Front of the Chassis
1—
ESD Point
-
Lift the front door and align the captive screws in the door with holes in the chassis
flange. Fasten the door to the chassis and rack using the captive screws, and hand
tighten.
Figure 7: Attach Front Door Using the Captive Screws
Maintain the Air Filter
Be sure you have the replaceable air filter (JNP10004-FLTR) before you begin.
We recommend that you replace the air filter every six months. The order number for a spare filter is JNP10004-FLTR.
- Remove the Air Filter from the JNP10004-FRPNL1 Front Door
- Install the Air Filter in the JNP10004-FRPNL1 Front Door
Remove the Air Filter from the JNP10004-FRPNL1 Front Door
-
Turn the knobs on both sides of the air filter frame counter-clockwise and flip the frame cover up to uncover the top of the front door.
-
Grasp the air filter with both hands and lift the air filter out through the top of the front door.
Figure 8: Lift the Air Filter Out of the Front Door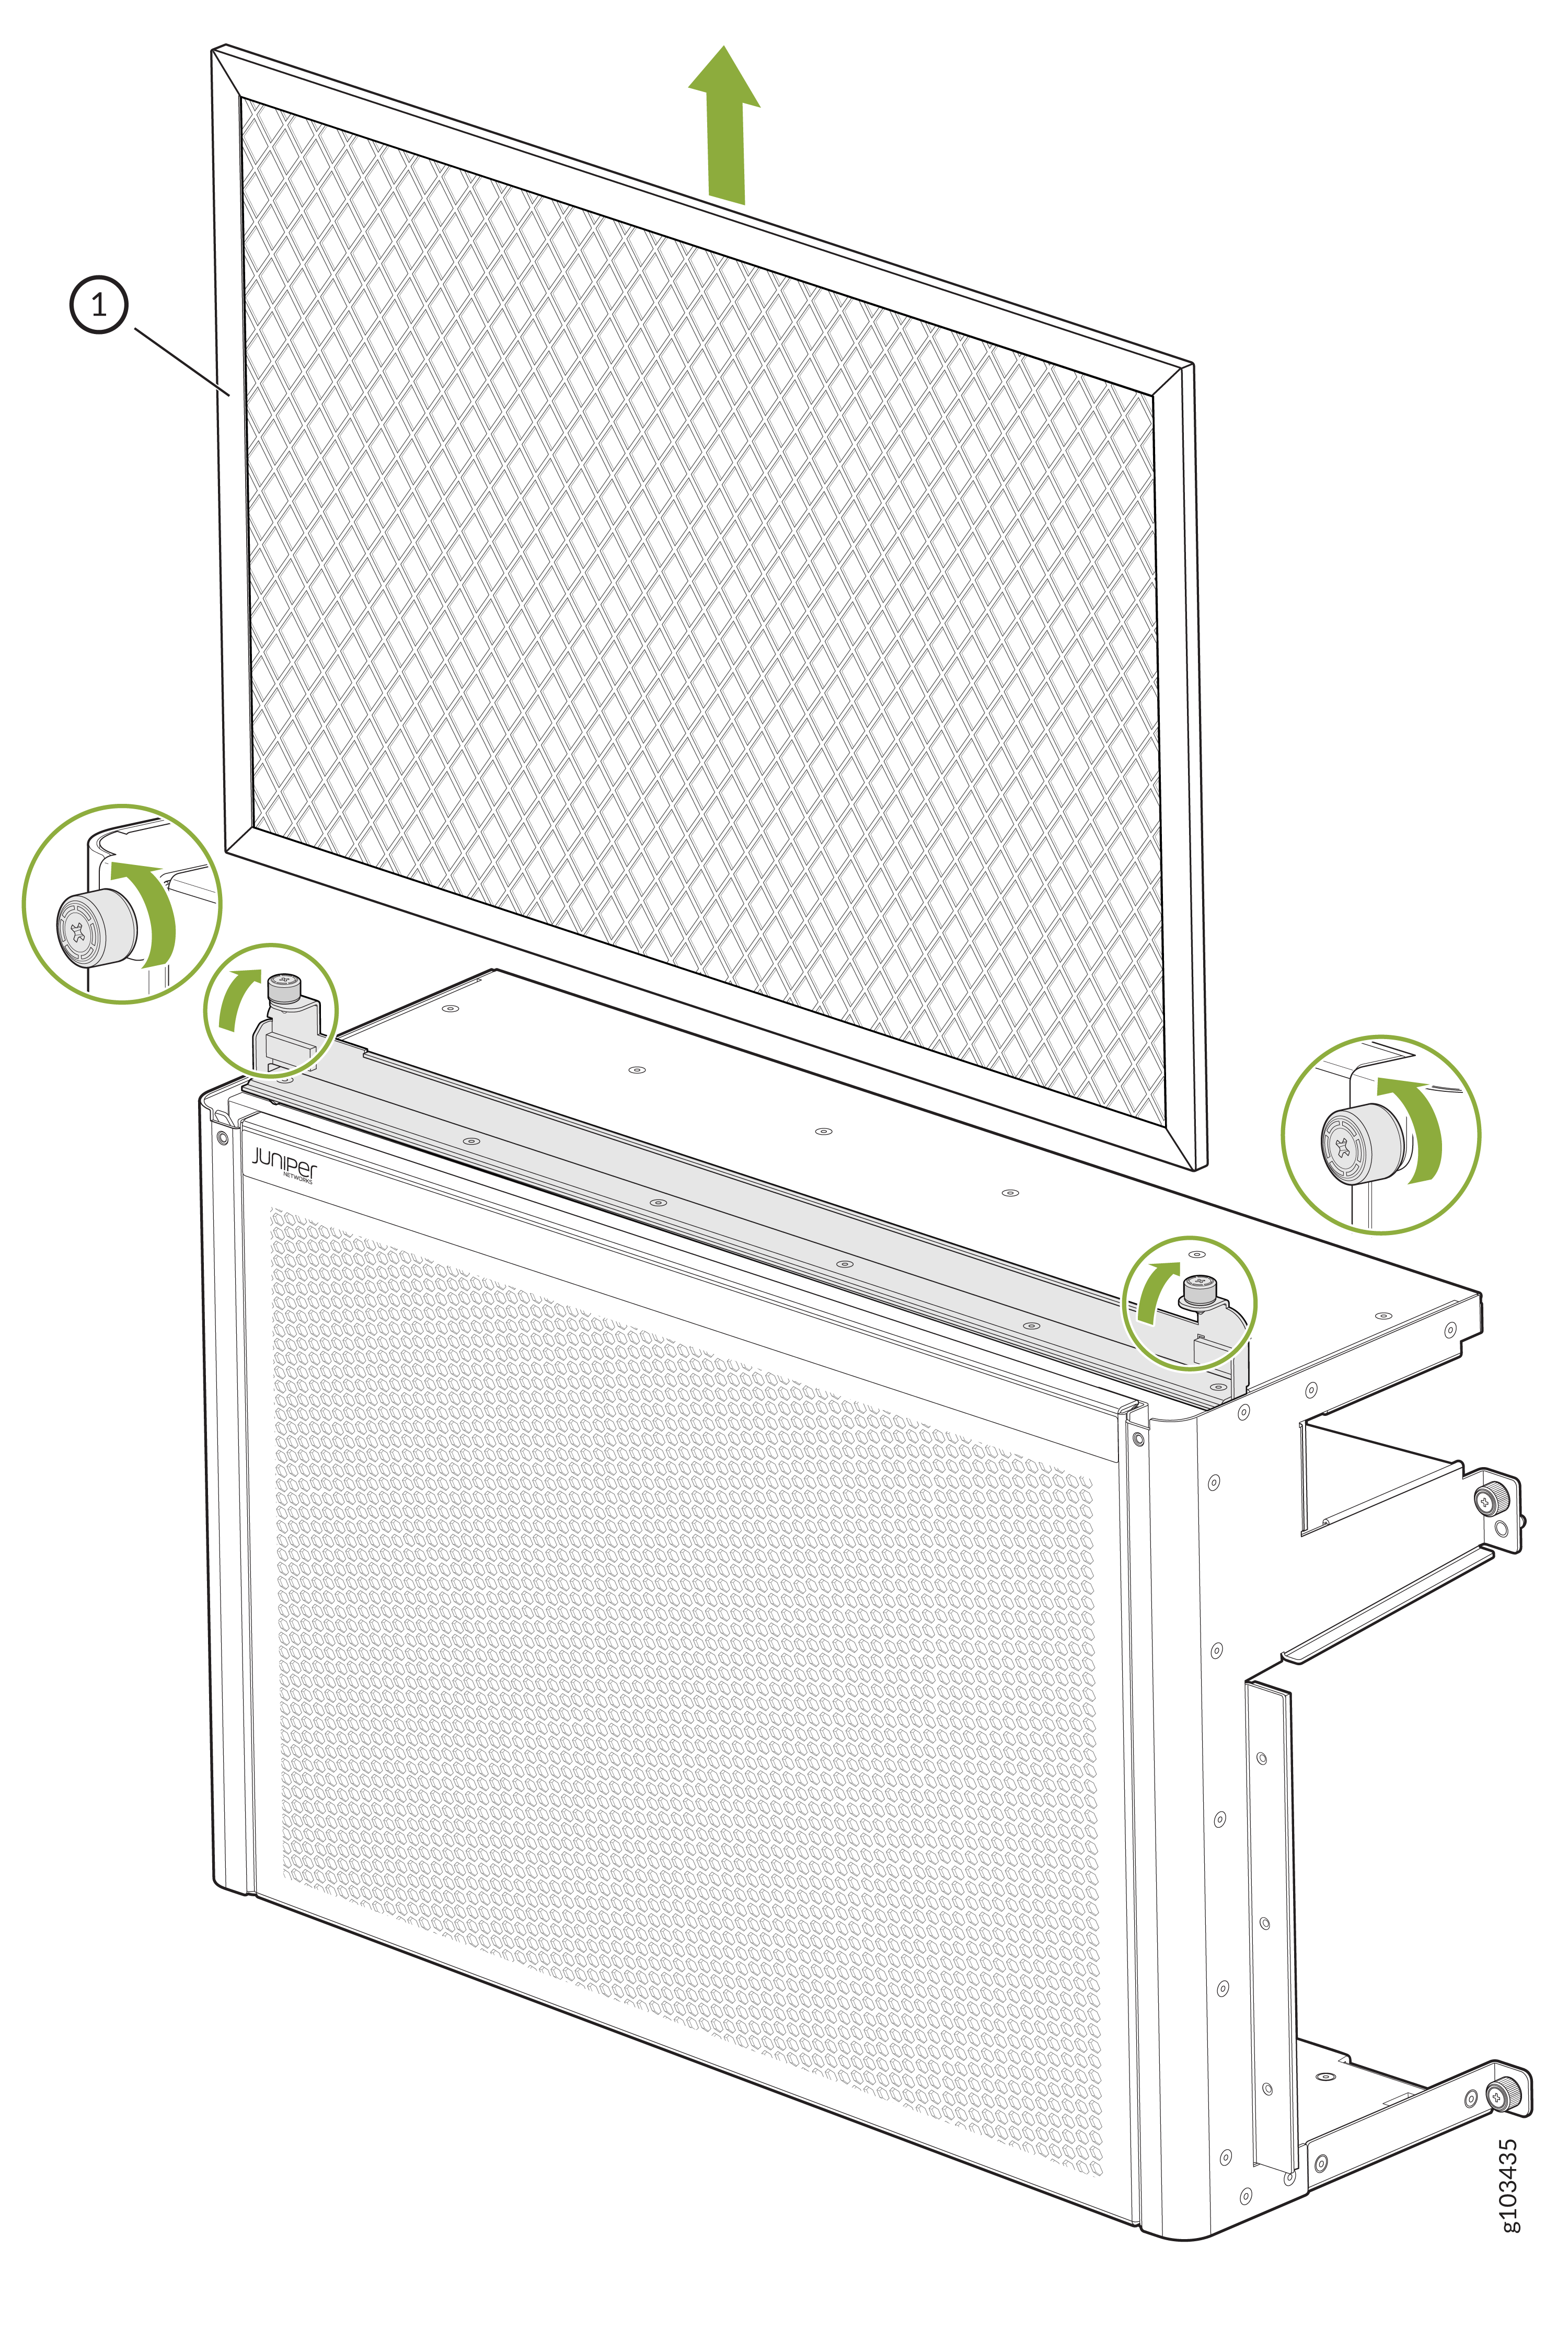 1—
1—Air filter
Install the Air Filter in the JNP10004-FRPNL1 Front Door
Turn the knobs on the air filter frame counter-clockwise, and flip the frame cover up to uncover the top of the front door.
CAUTION:Juniper Networks recommends installing the air filter to prevent harmful debris from entering the chassis.
Hold the air filter with both hands and insert it through the top of the front door until it stops.
Figure 9: Install the Air Filter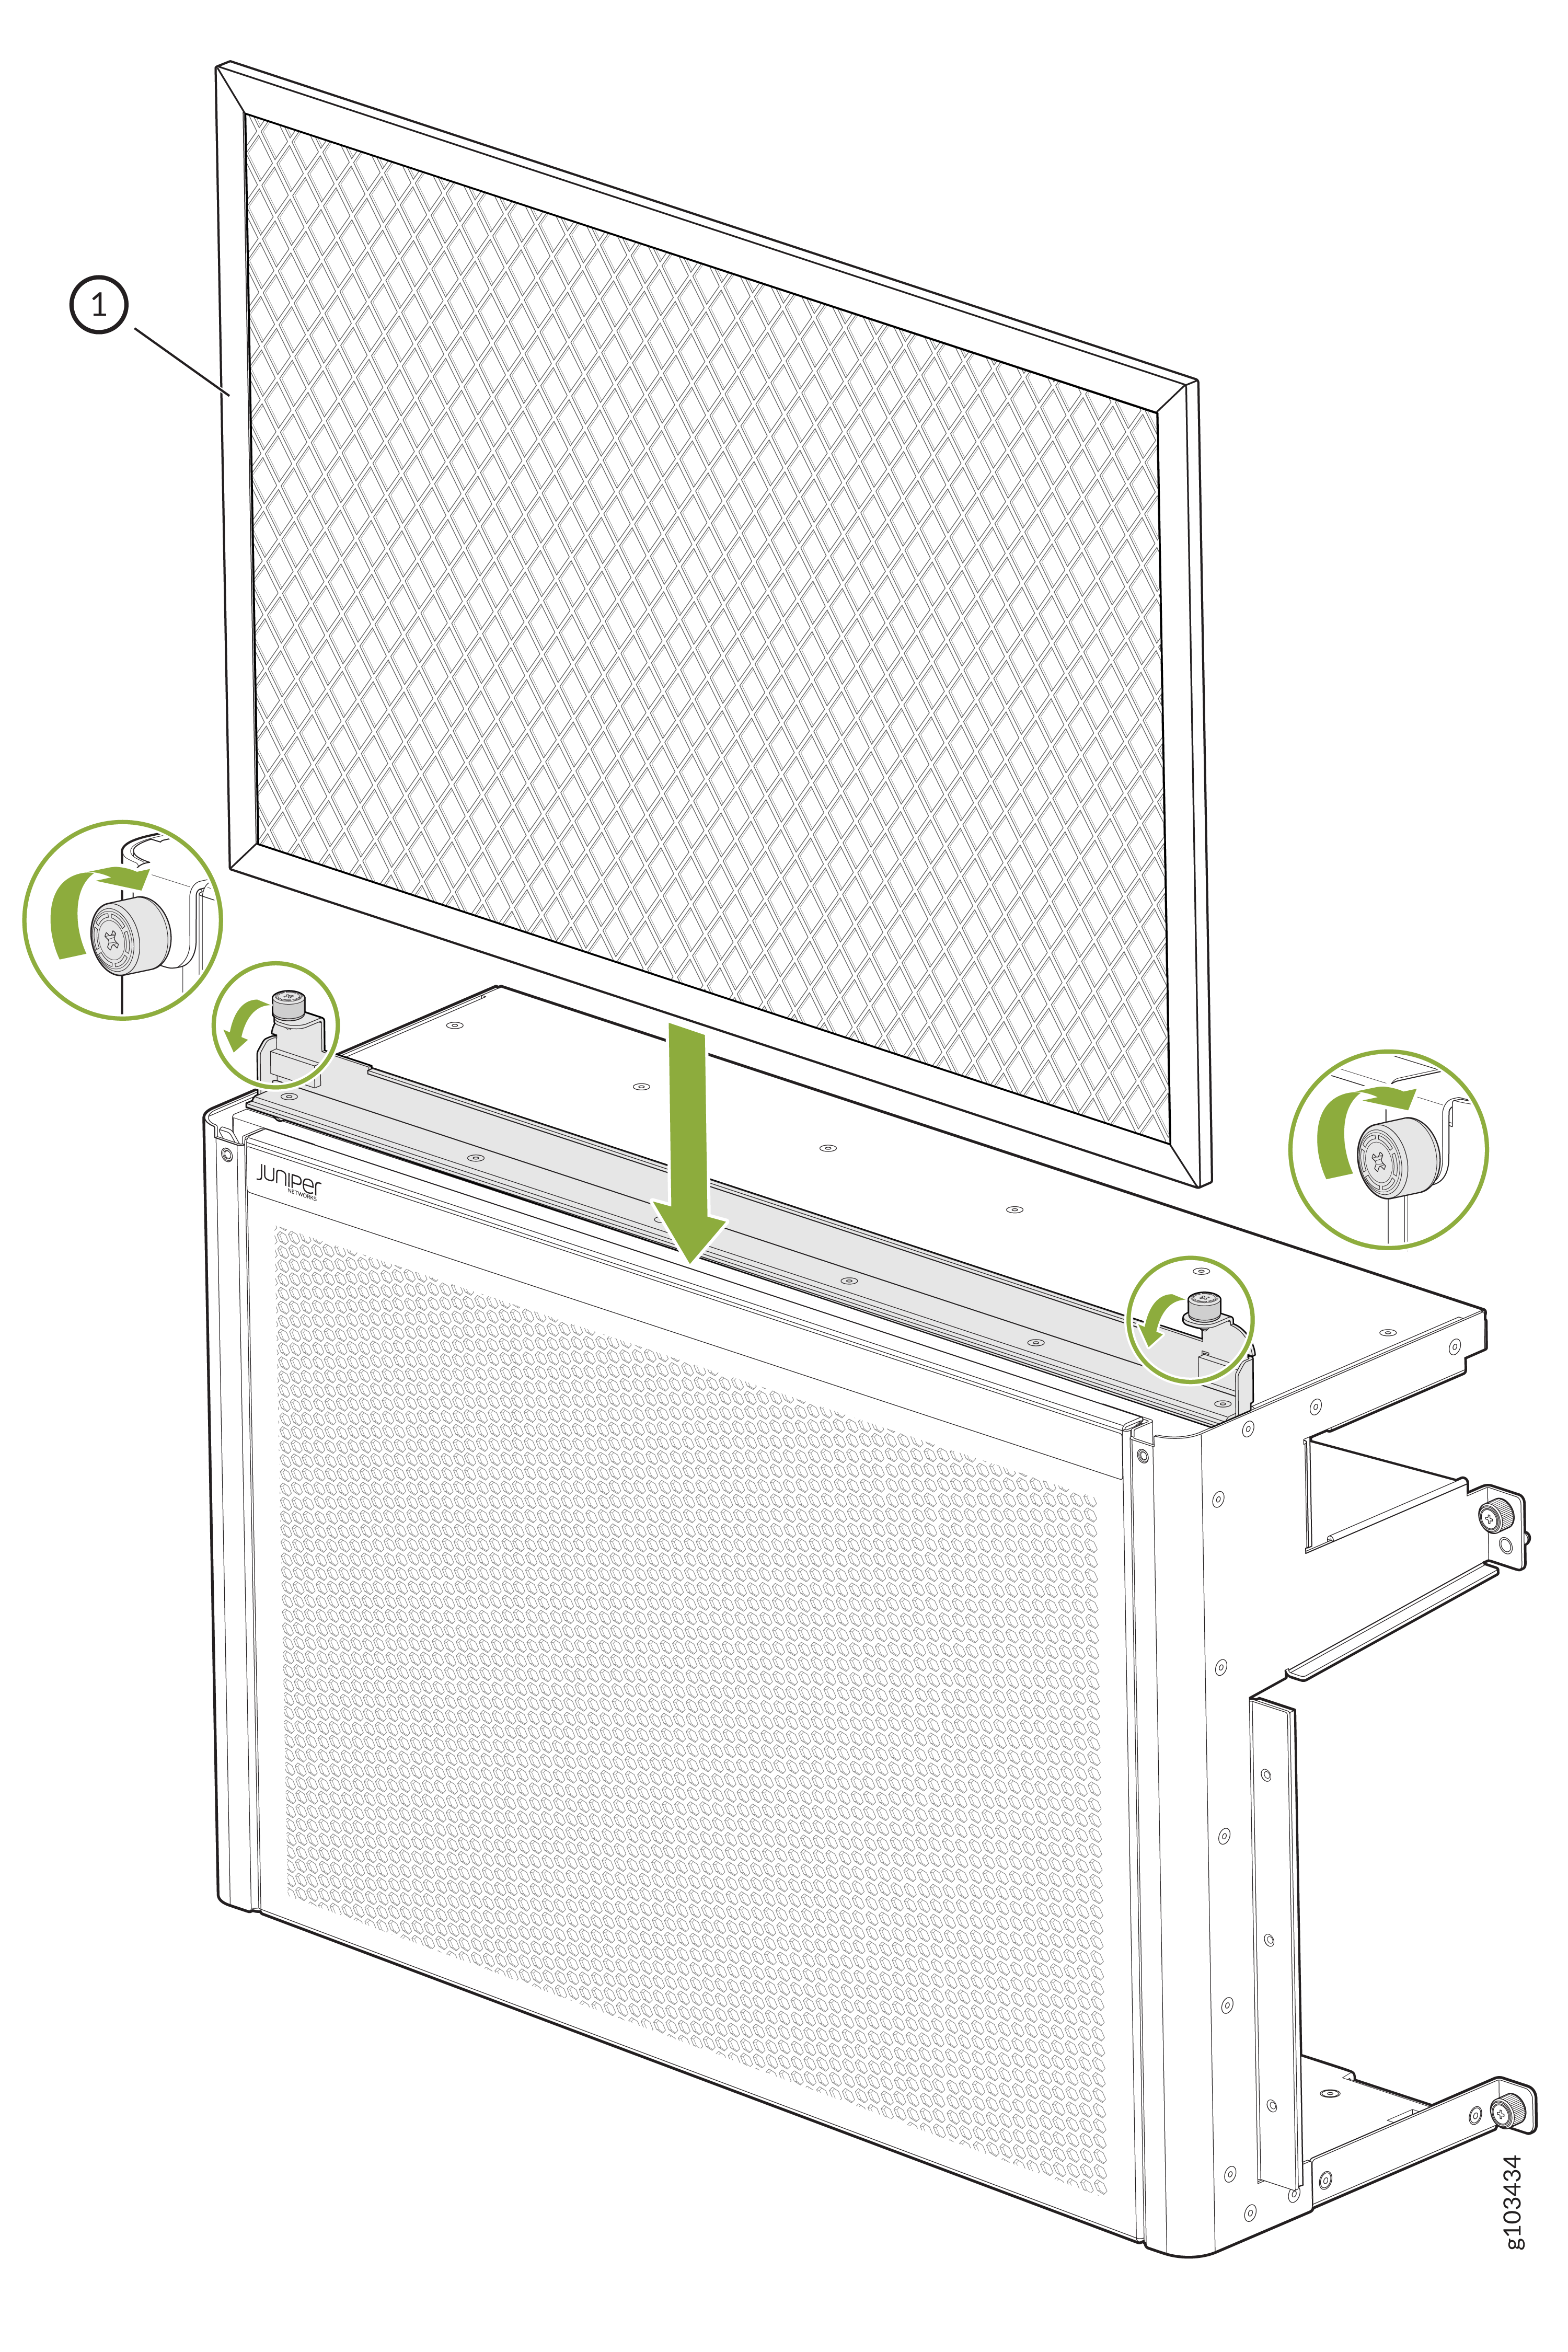
Flip the air filter frame down, over the front door, and turn the knobs on the air filter frame clockwise to secure the frame over the air filter.