Maintaining the PTX10003 Fan Modules
Removing a Fan Module from the PTX10003
Before you remove a fan module from a PTX10003, ensure that you have taken the necessary precautions to prevent electrostatic discharge (ESD) damage (see Prevention of Electrostatic Discharge Damage).
Ensure that you have the following parts and tools available:
-
ESD grounding strap
-
Antistatic bag or an antistatic mat
-
Phillips (+) screwdriver, number 1
The fan modules in a PTX10003 are hot-removable and hot-insertable field-replaceable units (FRUs); you can remove and replace them without powering off the PTX10003 or disrupting routing functions.
Before removing the fan module, ensure you have a replacement fan module at hand. After removing a failed fan module, you must install a new fan module as quickly as possible to prevent chassis overheating. The PTX10003 cooling system shuts down if a single fan tray is out of the chassis for more than 240 seconds. The cooling system shuts down immediately if you remove more than one fan tray from the chassis.
To remove a fan module from a PTX10003:
-
Place the fan module in the antistatic bag or on the antistatic
mat placed on a flat, stable surface. Refer to Figure 1.
Figure 1: Removing a PTX10003 Fan Module

When a fan module is removed, the CLI message Fan/Blower is Absent is logged in
the system log, and the system raises a major alarm.
Installing a Fan Module in the PTX10003
Before you install a fan module in a PTX10003, ensure that you have taken the necessary precautions to prevent electrostatic discharge (ESD) damage (see Prevention of Electrostatic Discharge Damage).
Ensure that you have the following parts and tools available:
-
ESD grounding strap
-
Phillips (+) screwdriver, number 1
The fan modules in a PTX10003 are hot-removable and hot-insertable field-replaceable units (FRUs); you can remove and replace them without powering off the PTX10003 or disrupting routing functions.
Before removing the fan module, ensure you have a replacement fan module at hand. After removing a failed fan module, you must install a new fan module as quickly as possible to prevent chassis overheating. The PTX10003 cooling system shuts down if a single fan tray is out of the chassis for more than 240 seconds. The cooling system shuts down immediately if you remove more than one fan tray from the chassis.
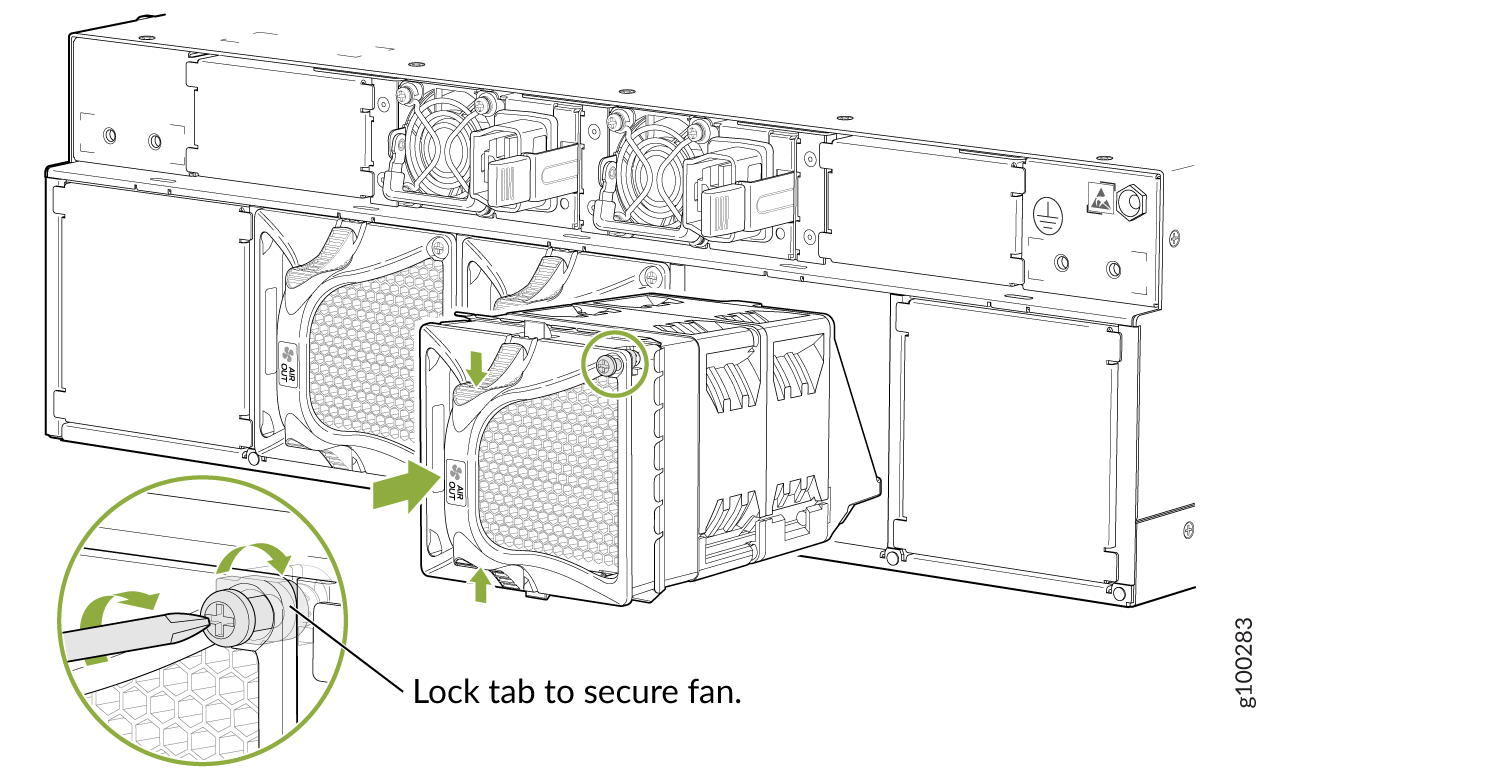
To install a fan module in a PTX10003 (see Figure 2):
-
Using the Phillips screwdriver, tighten the locking screw
(3 or 4 turns). See Figure 2.
Figure 2: Installing a PTX10003 Fan Module