
Replace Power Supply Units on the PTX10002-60MR
Maintaining the PTX10002-60MR includes removing and installing the power supply units.
Power supply units (PSUs) in the PTX10002-60MR are hot-removable and hot-insertable field-replaceable units (FRUs). You can remove and replace the PSUs without powering off the PTX10002-60MR or disrupting the device functions.
Ensure that you have the following parts and tools:
-
An electrostatic discharge (ESD) grounding strap
-
An antistatic bag or an antistatic mat
-
A replacement PSU
-
A blank cover panel (in case you're not replacing the PSU)
Ensure that you understand how to prevent electrostatic discharge (ESD) damage.
Remove a Power Supply Unit from the PTX10002-60MR
We ship the router with 1+1 redundant power supply units (PSUs) preinstalled in the rear panel. The PSUs are hot-removable and hot-insertable field-replaceable units (FRUs): you can remove and replace them without powering off the router or disrupting router functions.
Before you remove a PSU, ensure that you have taken the necessary precautions to prevent electrostatic discharge (ESD) damage (see Prevention of Electrostatic Discharge Damage).
Ensure that you have the following parts and tools available:
-
An ESD grounding strap—not provided
-
An antistatic bag or an antistatic mat—not provided
-
A Phillips (+) screwdriver, number 1—not provided
-
If you are removing a DC PSU, a wrench to loosen the hex nuts that secure the power cable lugs to the PSU—not provided
Replace the PSU within 30 seconds of removal to prevent chassis overheating. Before removing the PSU, ensure you have a replacement PSU available. Both the PSUs must be present in the chassis for the normal operation of the router.
To remove a PSU:
-
Remove the power source cable from the PSU faceplate:
-
AC, HVAC, or HVDC PSU—Gently pull out the socket end of the power plug connected to the PSU faceplate.
Figure 1: Remove Power Cord from an AC, HVAC, or HVDC PowerSupply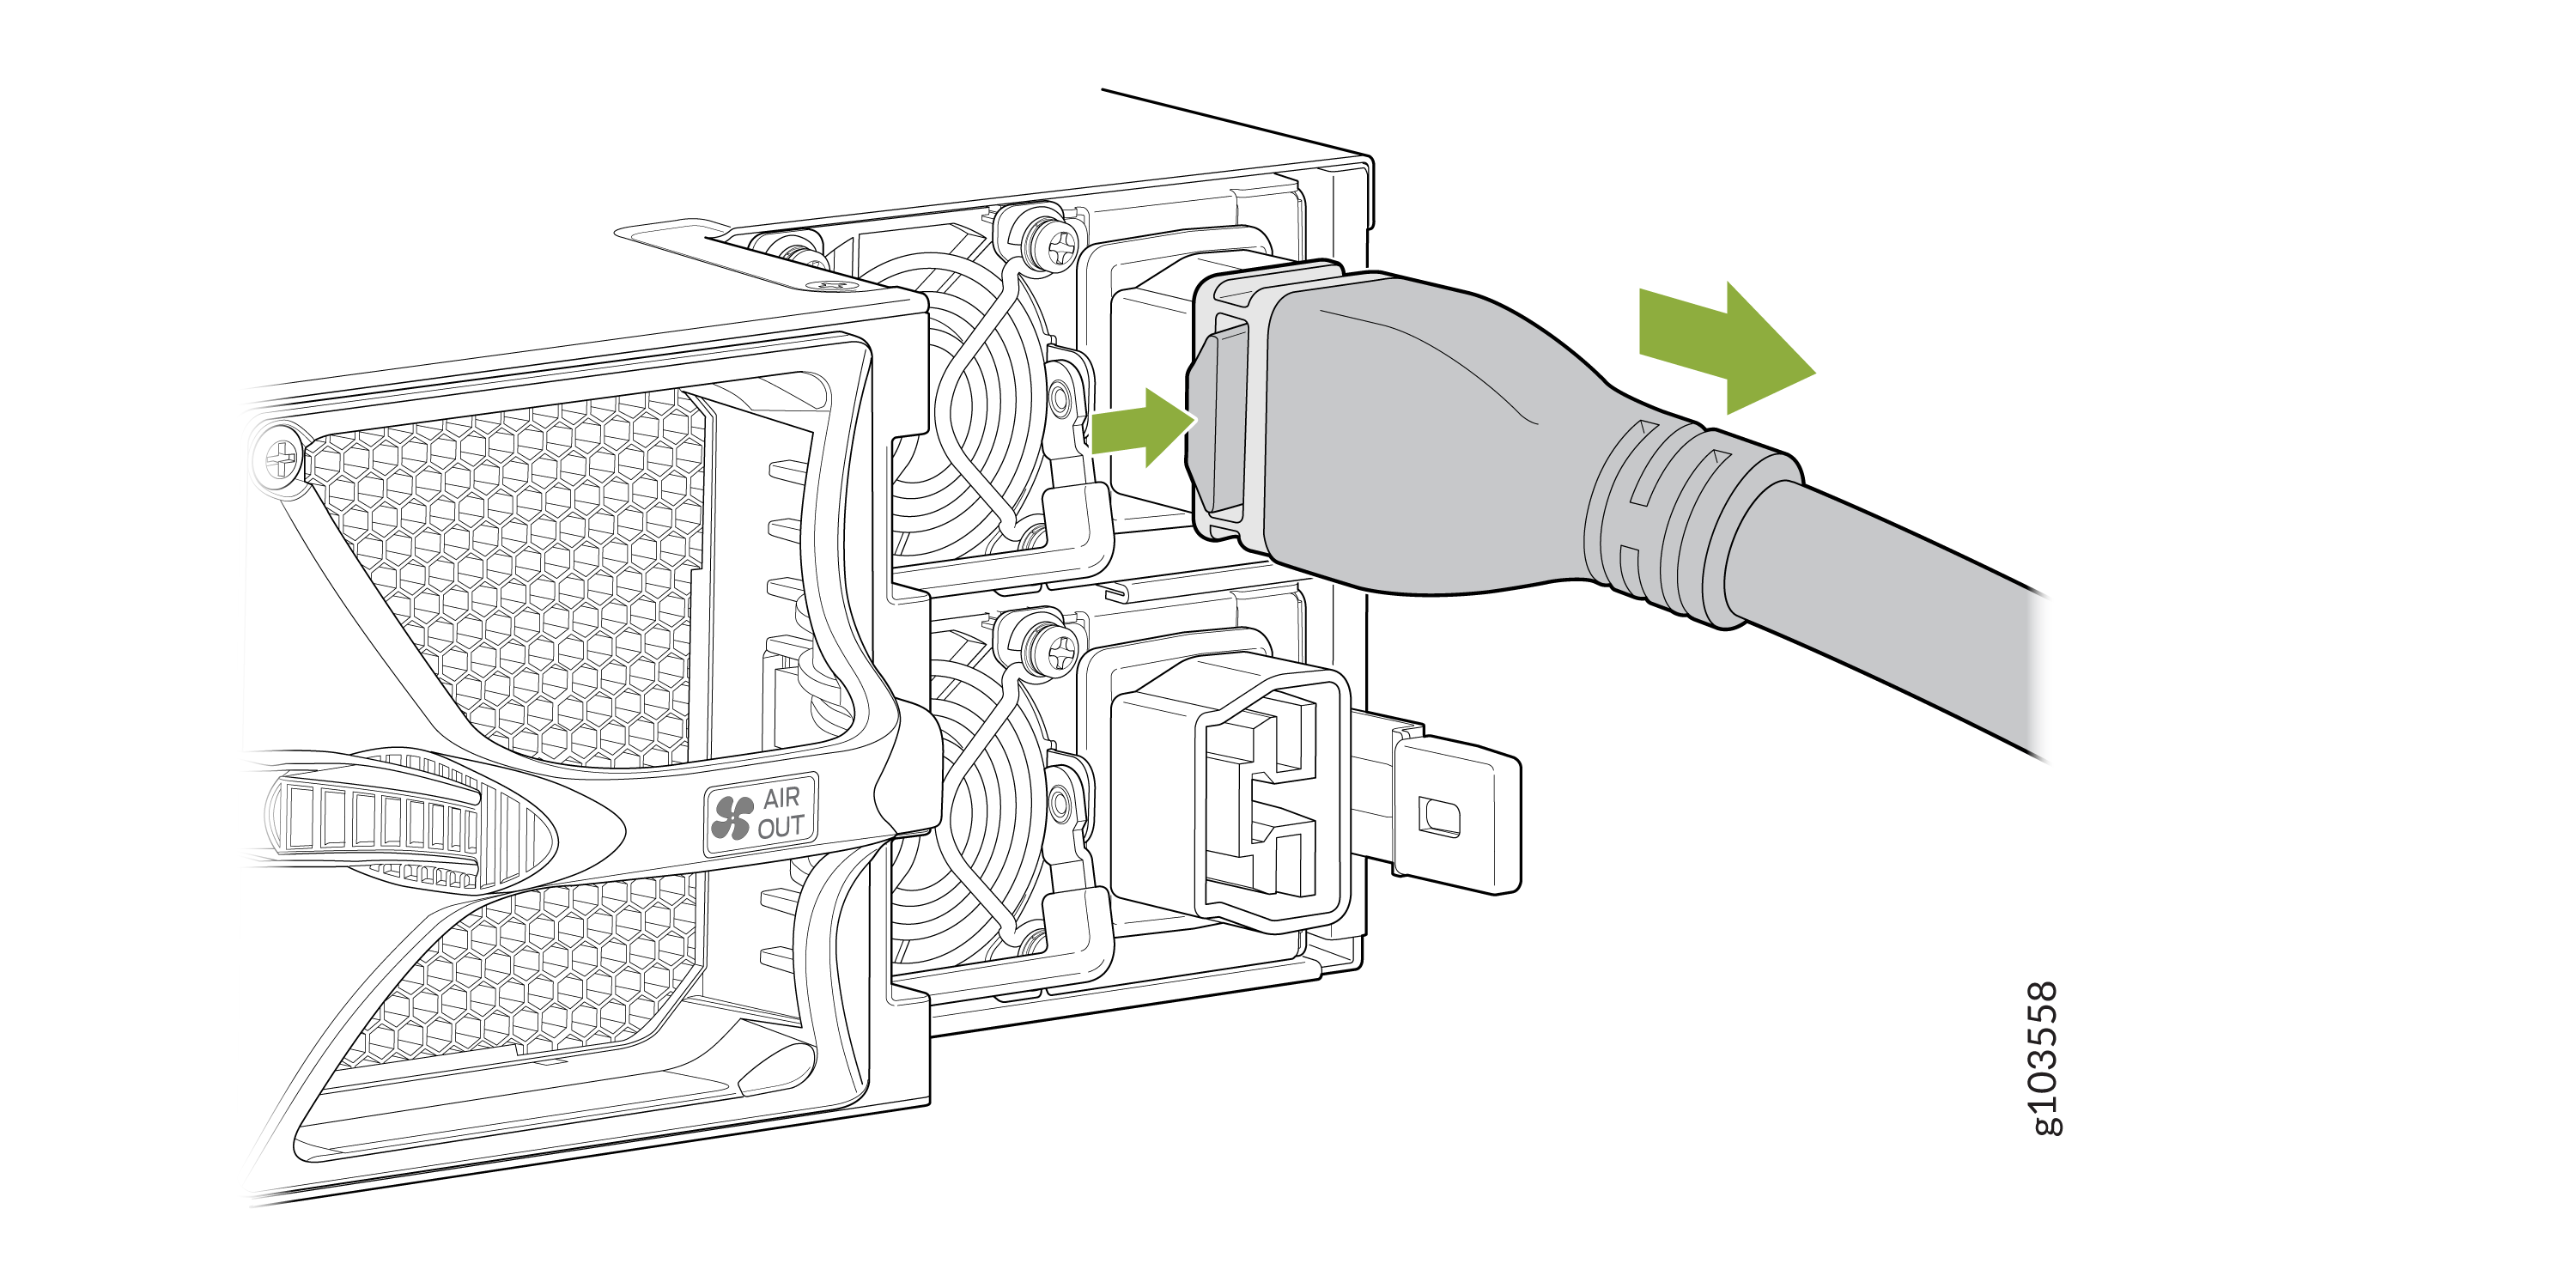
-
DC PSU
-
Use a Phillips (+) screwdriver, number 1 to loosen the screws that secure the cable manager bracket to the PSU. Gently move the bracket to the right and pull it out.
Figure 2: Remove Cable Manager Bracket from a DC Power Supply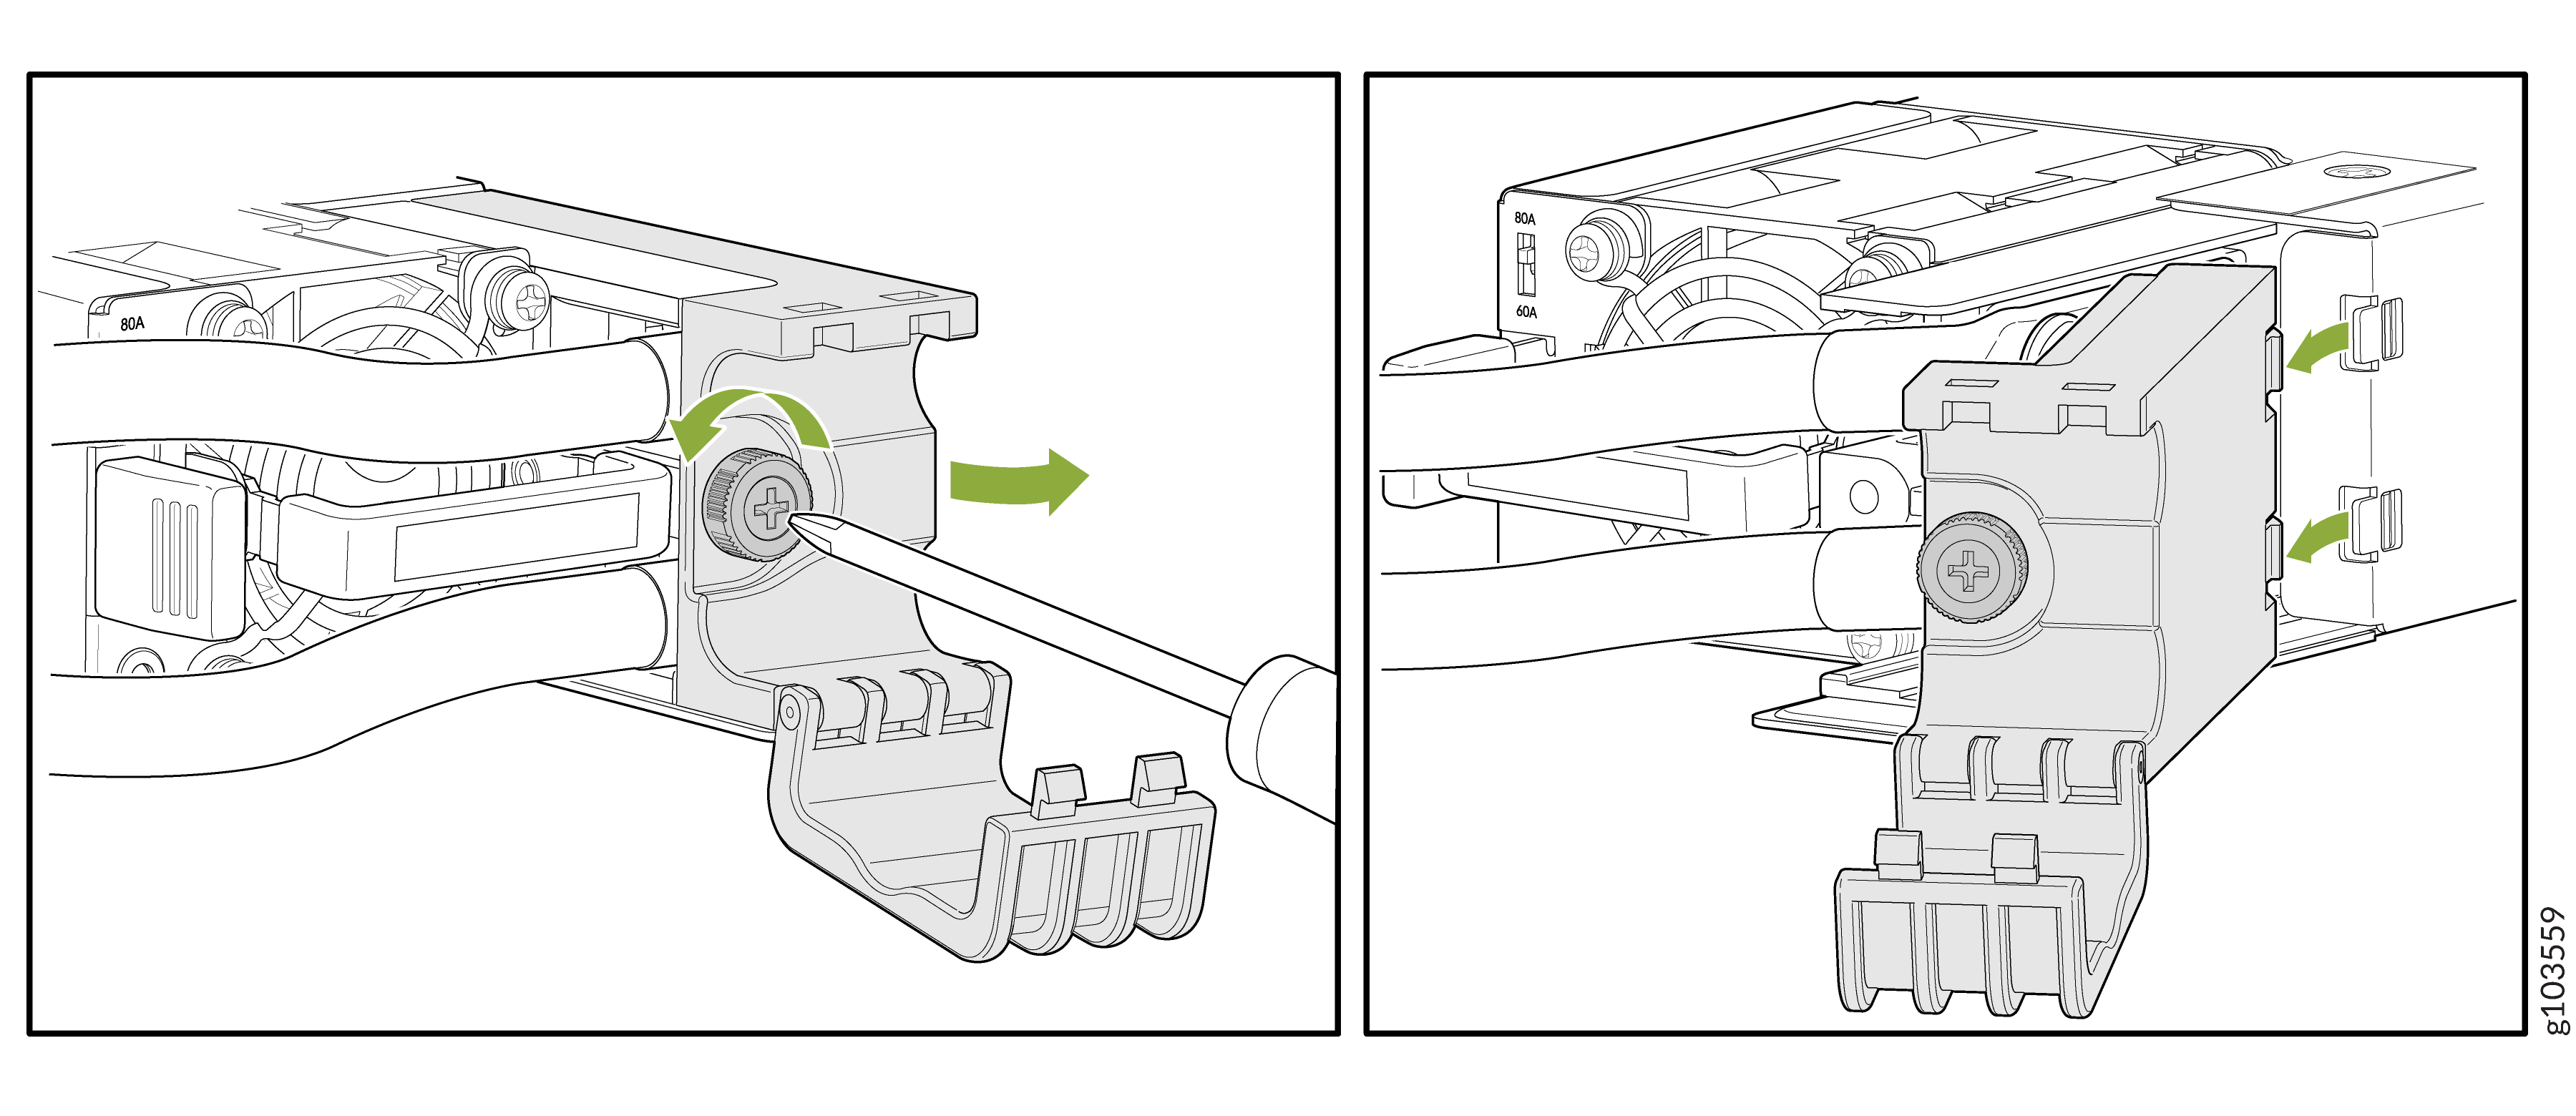
-
Use a wrench to loosen the hex nuts that secure the power cable lugs to the PSU and remove the cables.
Figure 3: Remove DC Power Cables from a DC Power Supply Unit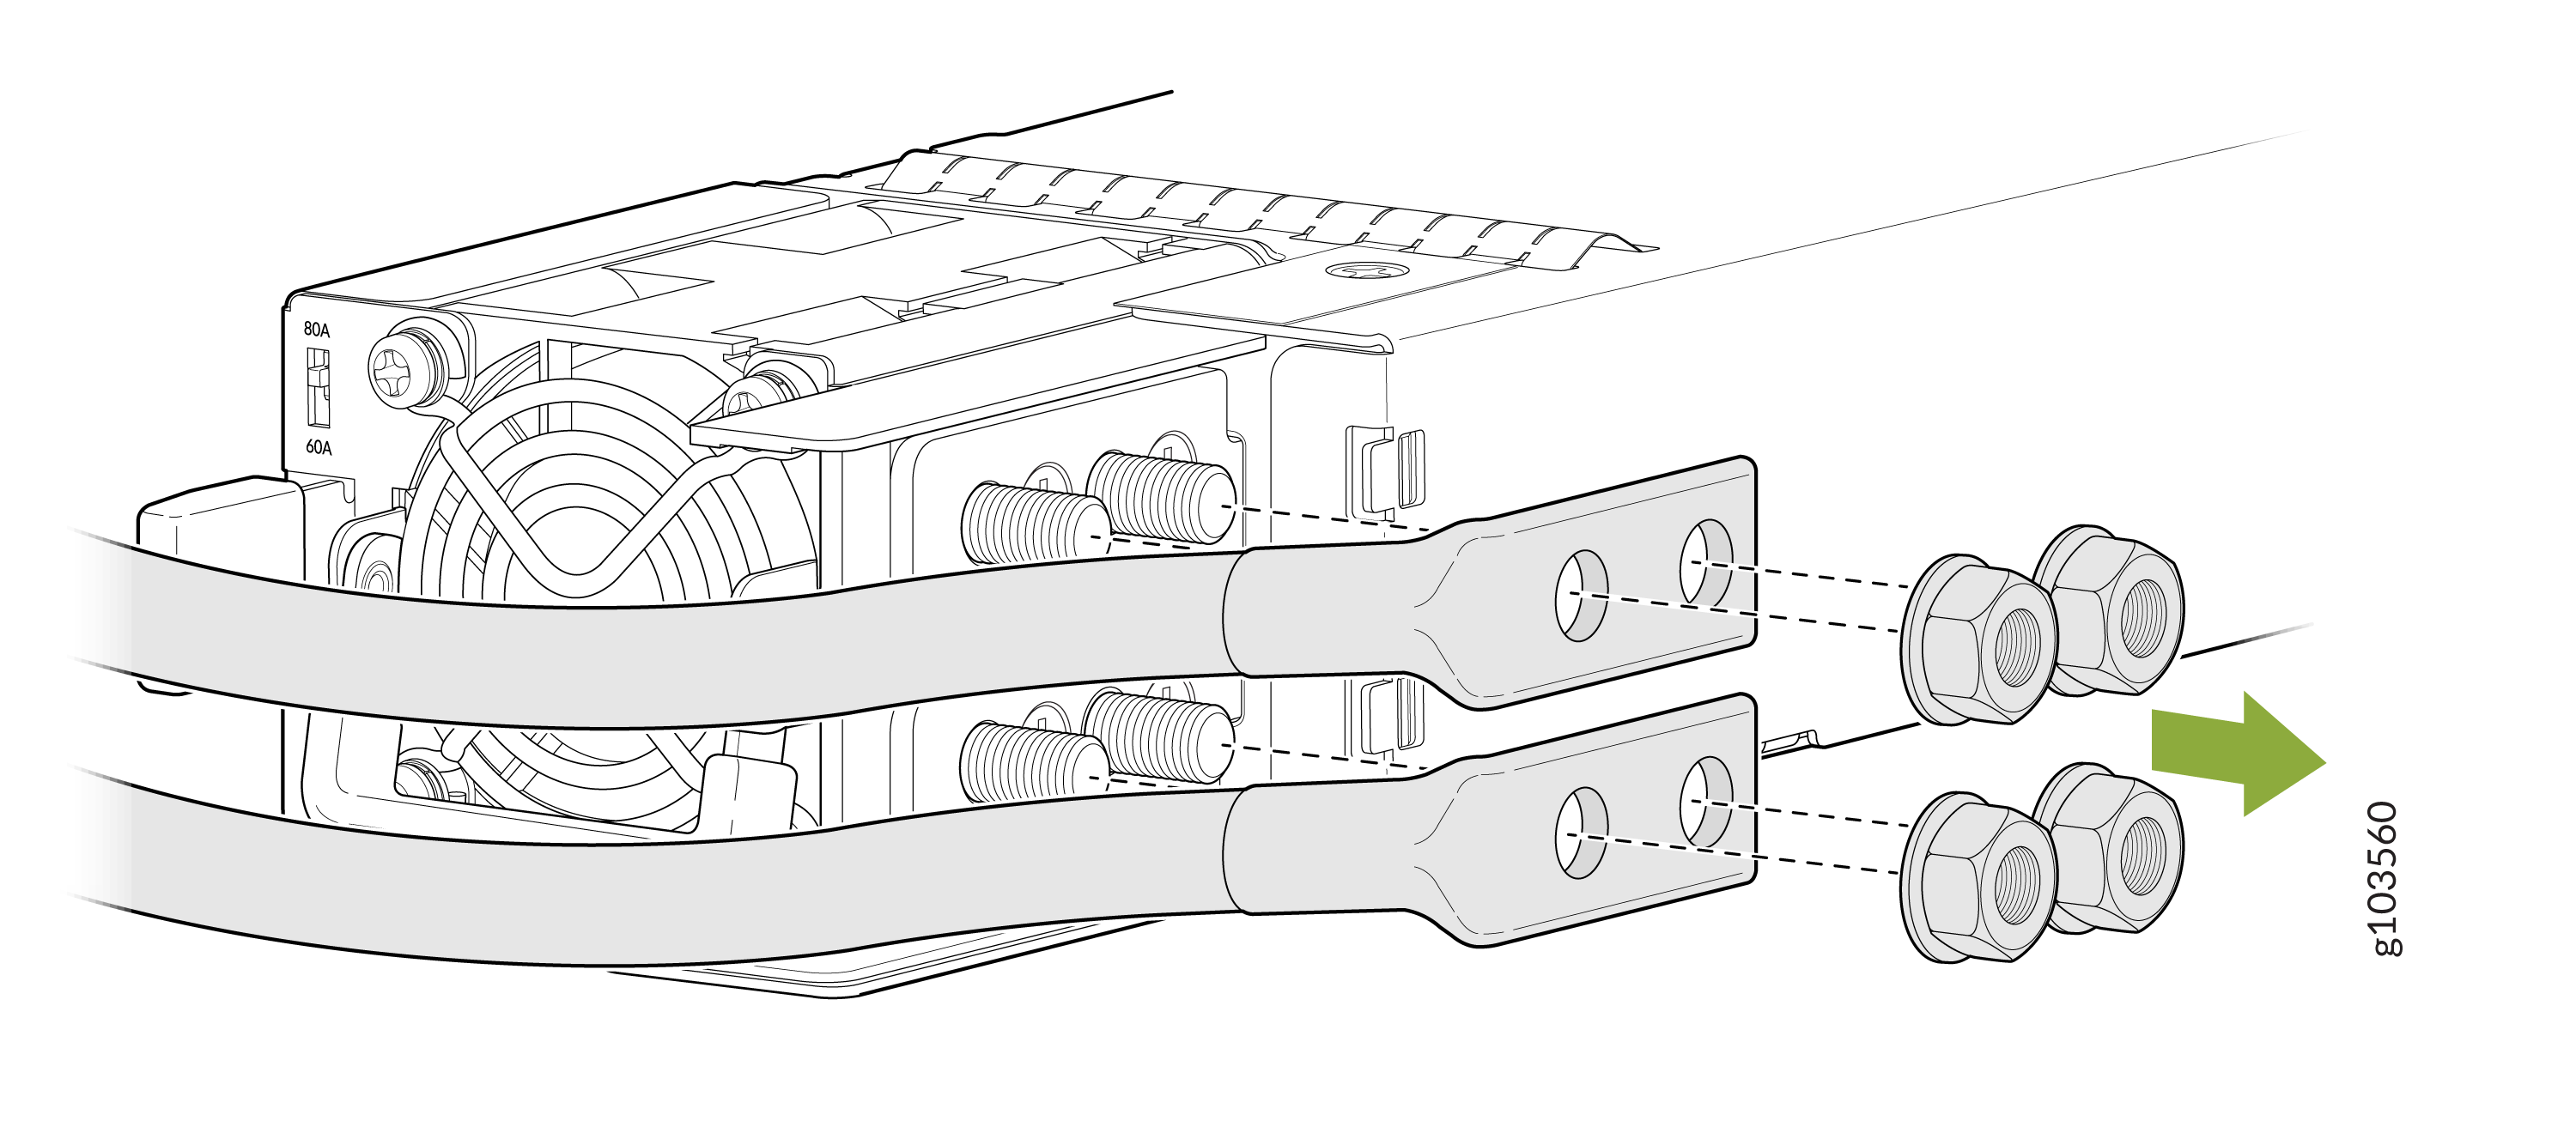
-
-
-
Pull the PSU out of the chassis:
-
AC, HVAC, or HVDC PSU—Push the locking lever toward the handle. Grasp the PSU handle and pull firmly to slide the PSU halfway out of the chassis.
Figure 4: Remove an AC, HVAC, or HVDC Power Supply From the Router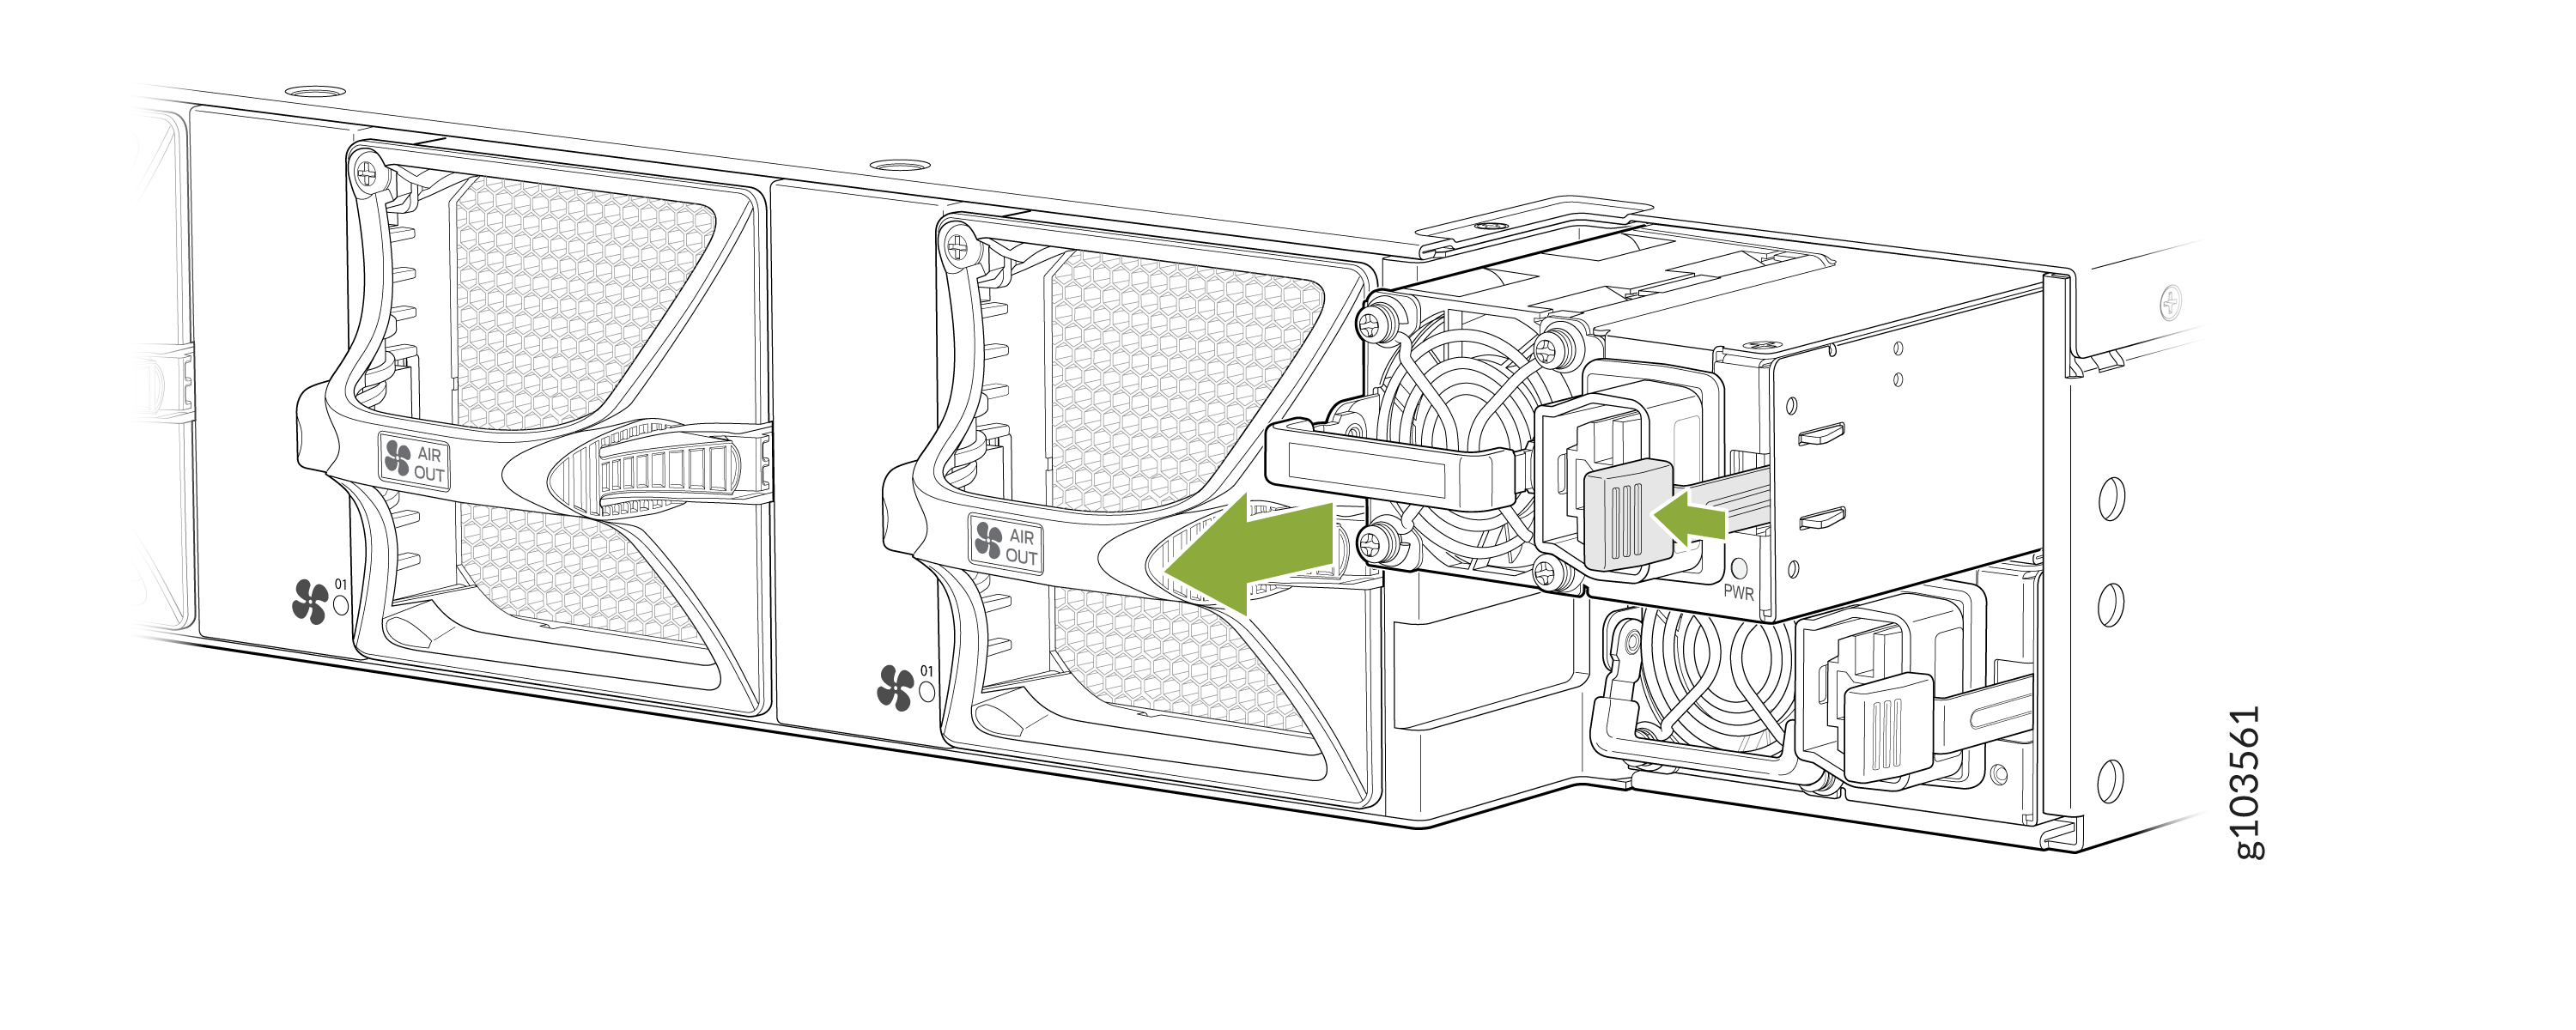
-
DC PSU—Push the locking lever toward the handle. Grasp the PSU handle and pull firmly to slide the PSU halfway out of the chassis.
Figure 5: Remove a DC Power Supply Unit from the Router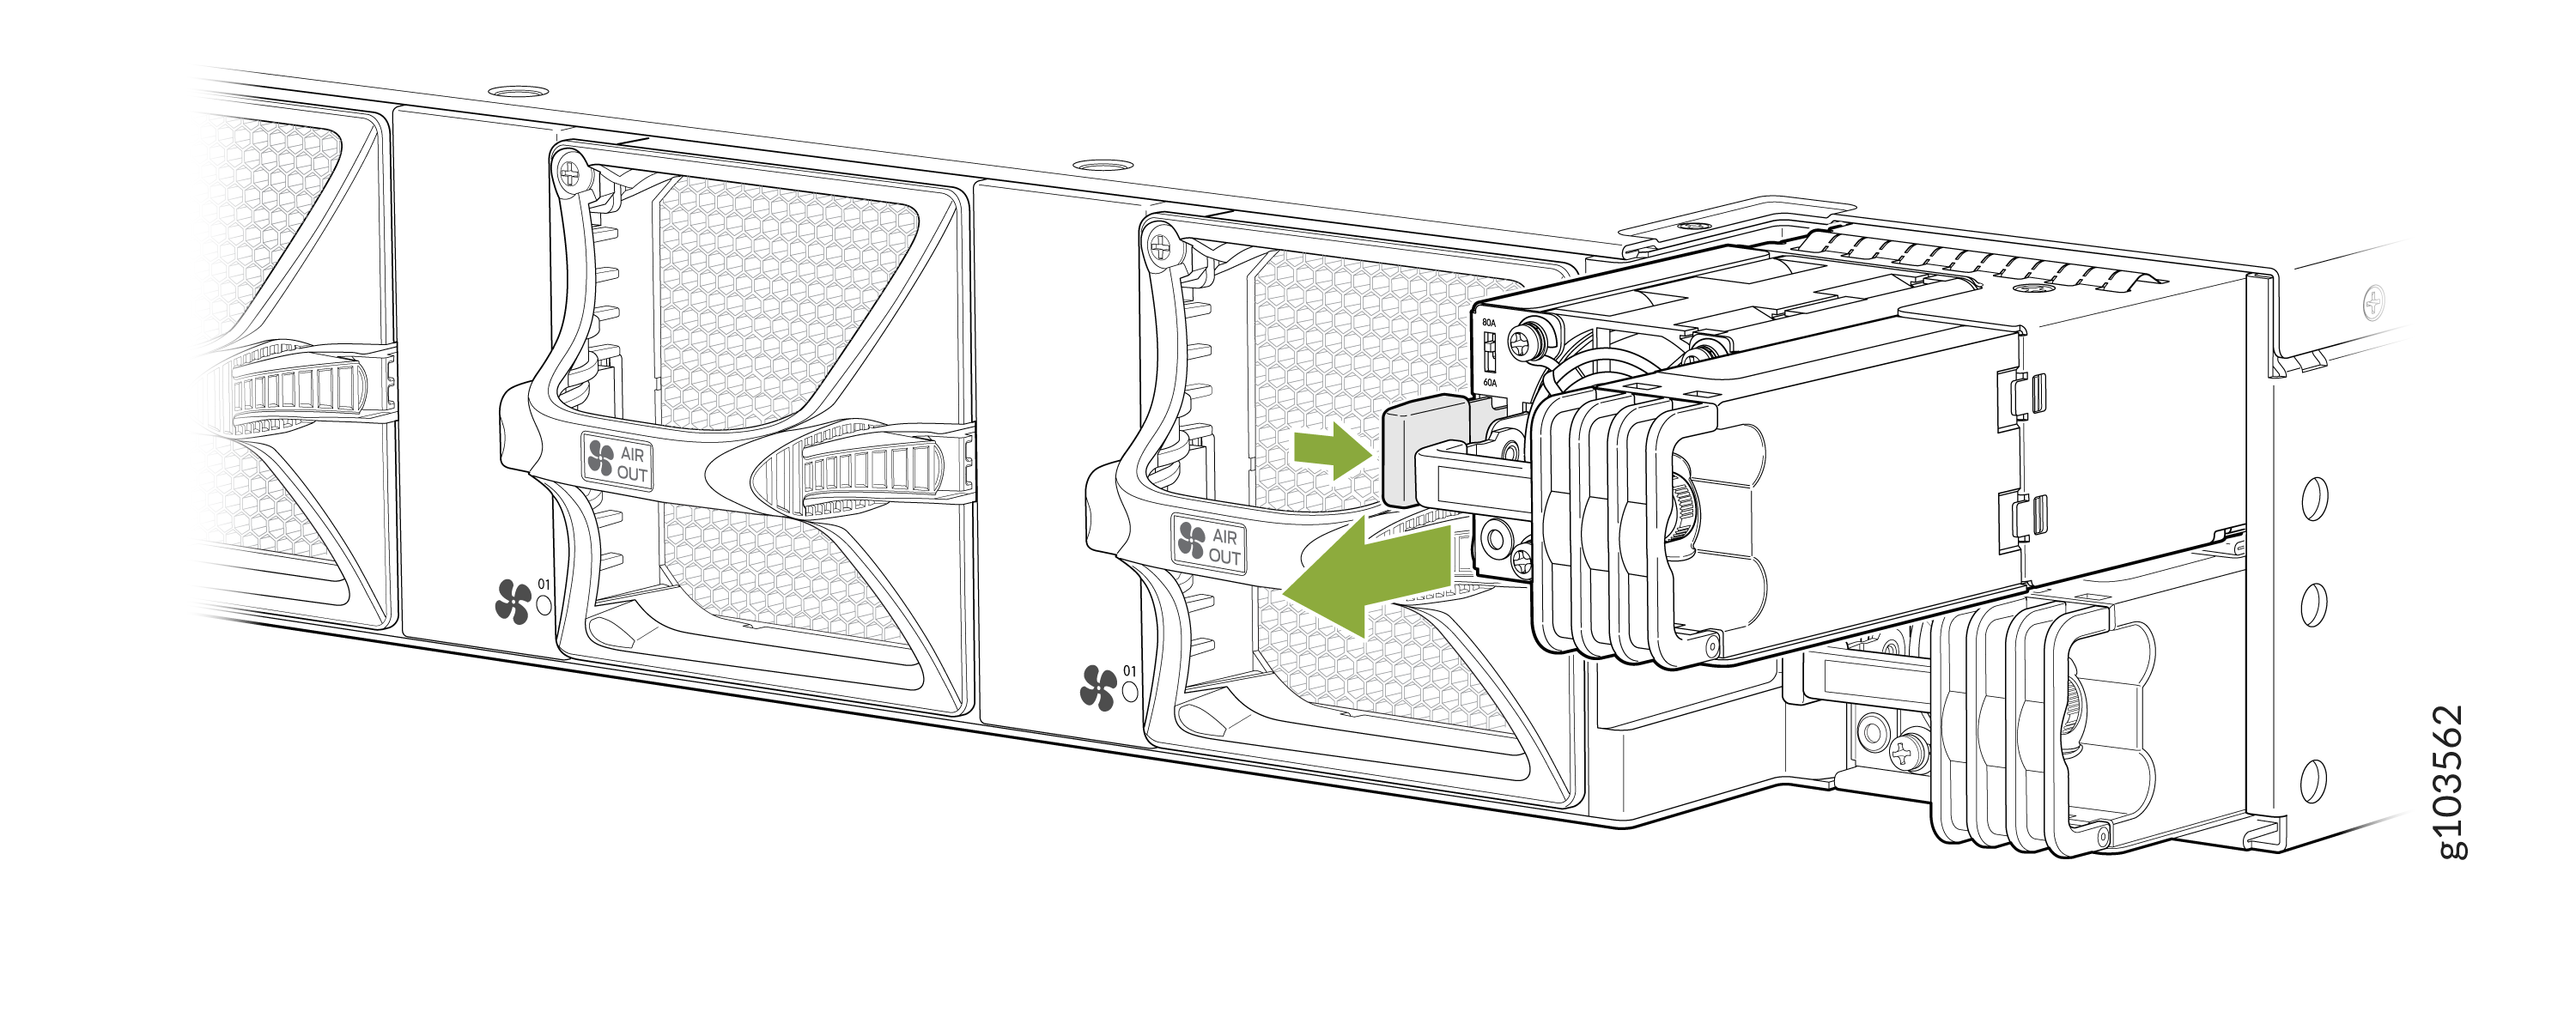
-
Install a Power Supply Unit in the Router
We ship the router with 1+1 redundant PSUs preinstalled in the rear panel. The PSUs are hot-removable and hot-insertable field-replaceable units (FRUs): You can remove and replace them without powering off the router or disrupting router functions.
-
Before you remove a PSU, ensure that you have taken the necessary precautions to prevent electrostatic discharge (ESD) damage (see Prevention of Electrostatic Discharge Damage).
-
Ensure that you have an ESD grounding strap.
-
If the PSU has protective plastic wrap, peel and remove the plastic wrap from all sides of the PSU.
You must not mix:
-
AC/HVAC/HVDC and DC PSUs in the same chassis.
You must install the router in a restricted-access location and ensure that the chassis is always properly grounded.
To install a PSU:
-
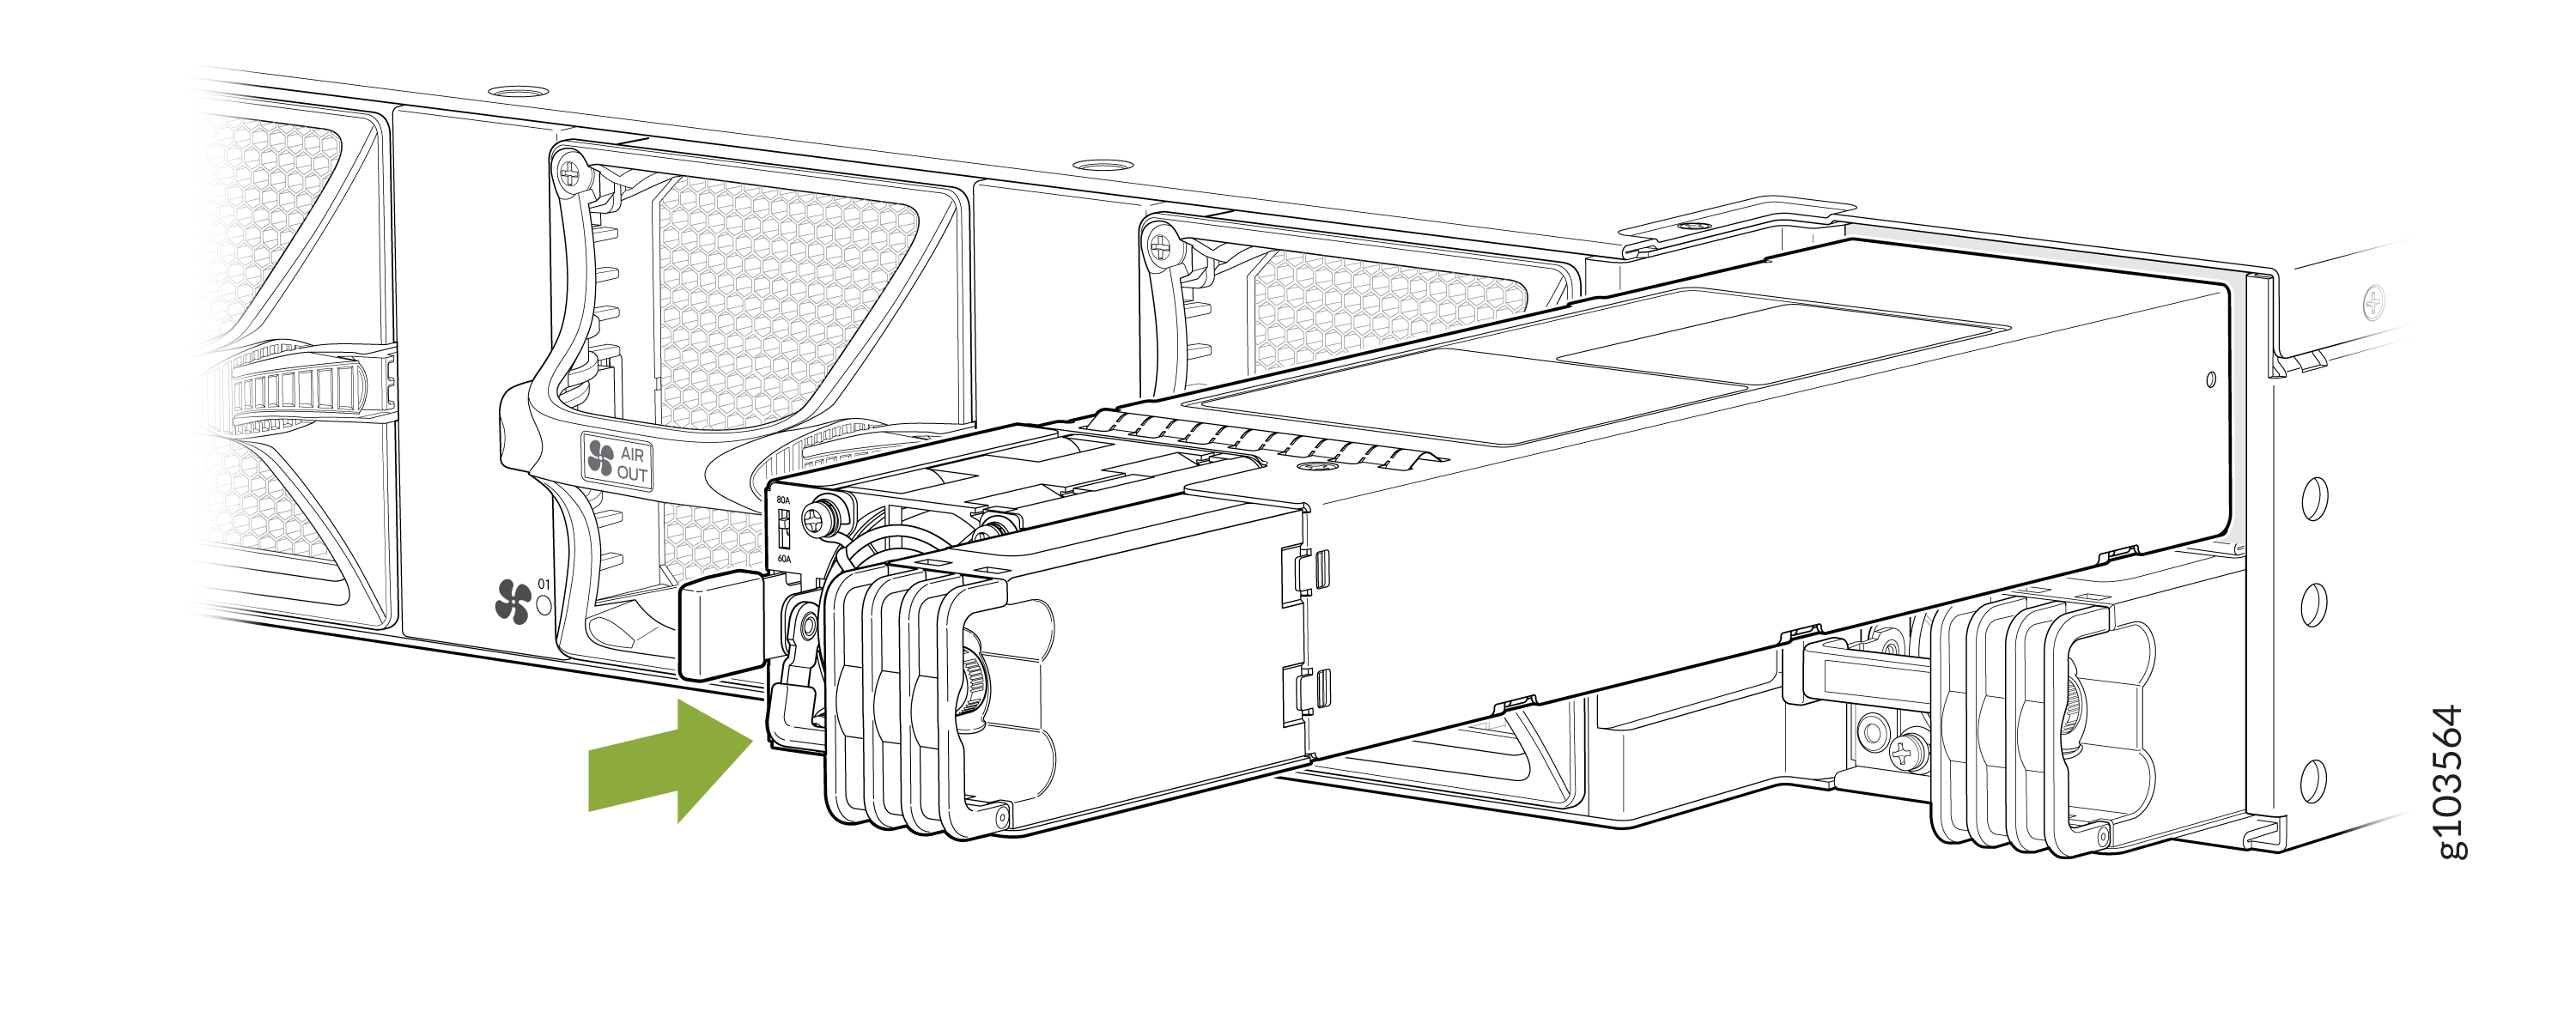
Using both hands, place the PSU in PSU slot on the rear panel and slide it
in until it is fully seated and the locking lever slides into place.
Figure 6: Install an AC/HVAC/HVDC PSU
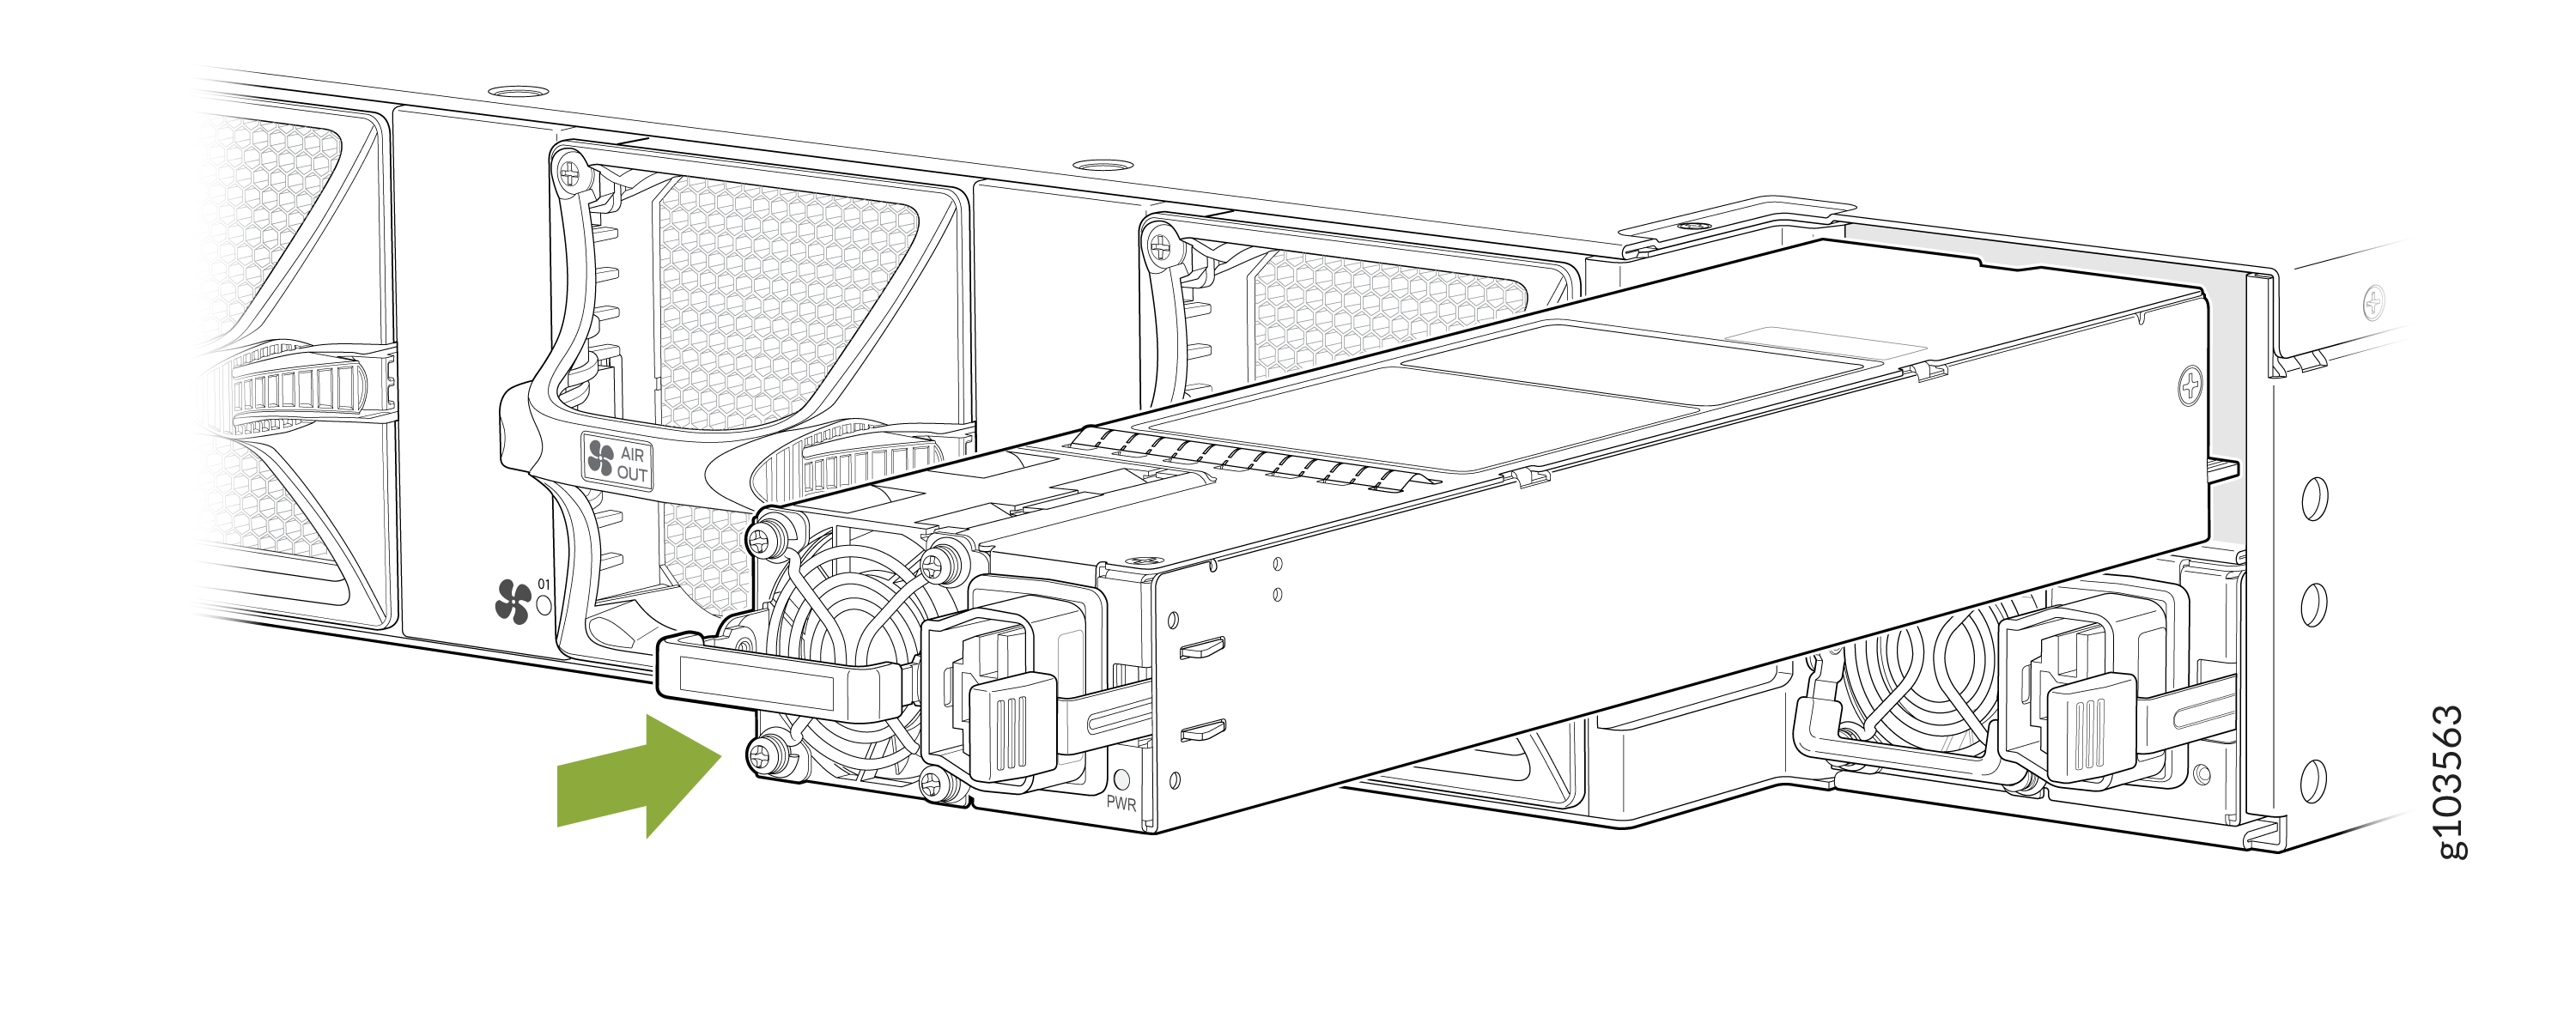 Figure 7: Install a DC PSU
 Note:
Note:You must connect each PSU to a dedicated power source outlet.
Note:If you have a Juniper Care service contract, register any addition, change, or upgrade of hardware components at Juniper support . Failure to do so can result in significant delays if you need replacement parts. This note does not apply if you replace existing components with the same type of component.