
Maintain the PTX10002-60MR Solid-State Drive
Remove a Solid-State Drive
We ship the router with two solid-state drives (SSDs) preinstalled.
Before you remove an SSD from the router, ensure that you have taken the necessary precautions to prevent electrostatic discharge (ESD) damage (see Prevention of Electrostatic Discharge Damage).
Ensure that you have the following parts and tools available:
-
An ESD grounding strap—not provided
-
An antistatic bag or an antistatic mat—not provided
-
A Phillips (+) screwdriver, number 1—not provided
To remove an SSD:
-
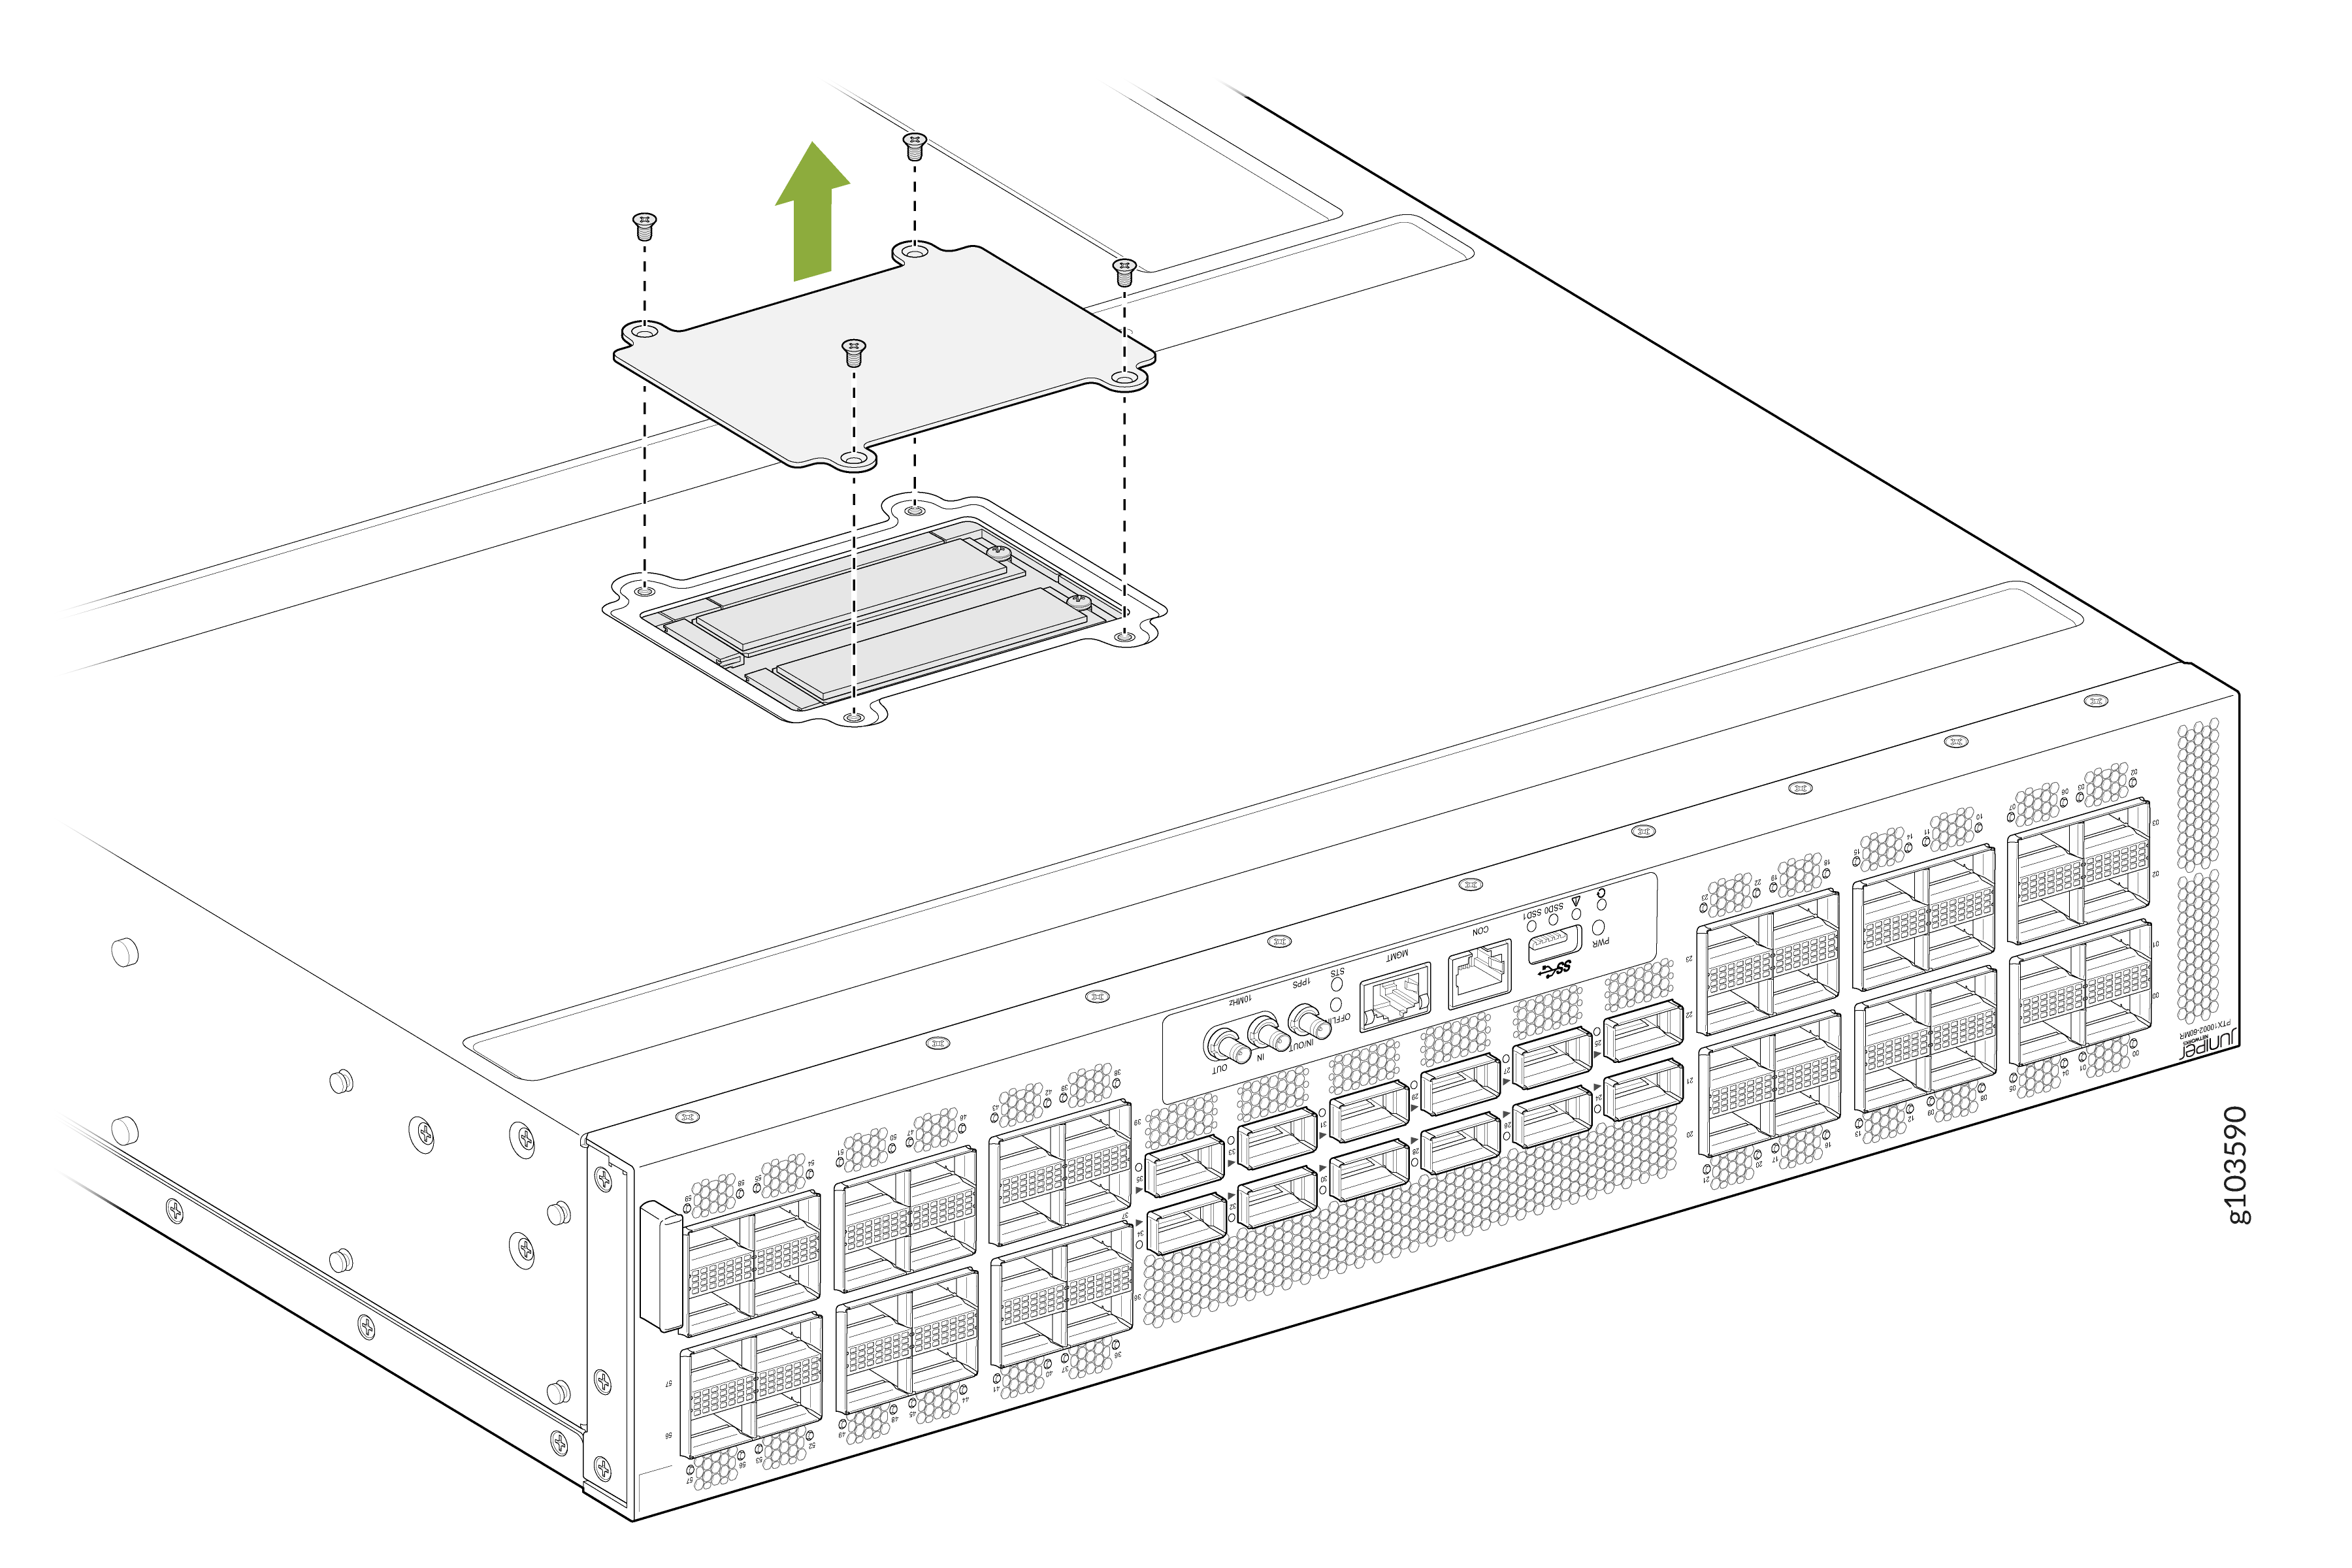
Using the Phillips screwdriver, loosen the screws (3 or 4 turns to the left)
that secure the SSD slot cover on the top panel of the chassis.
Figure 1: Remove the SSD Slot Cover
-
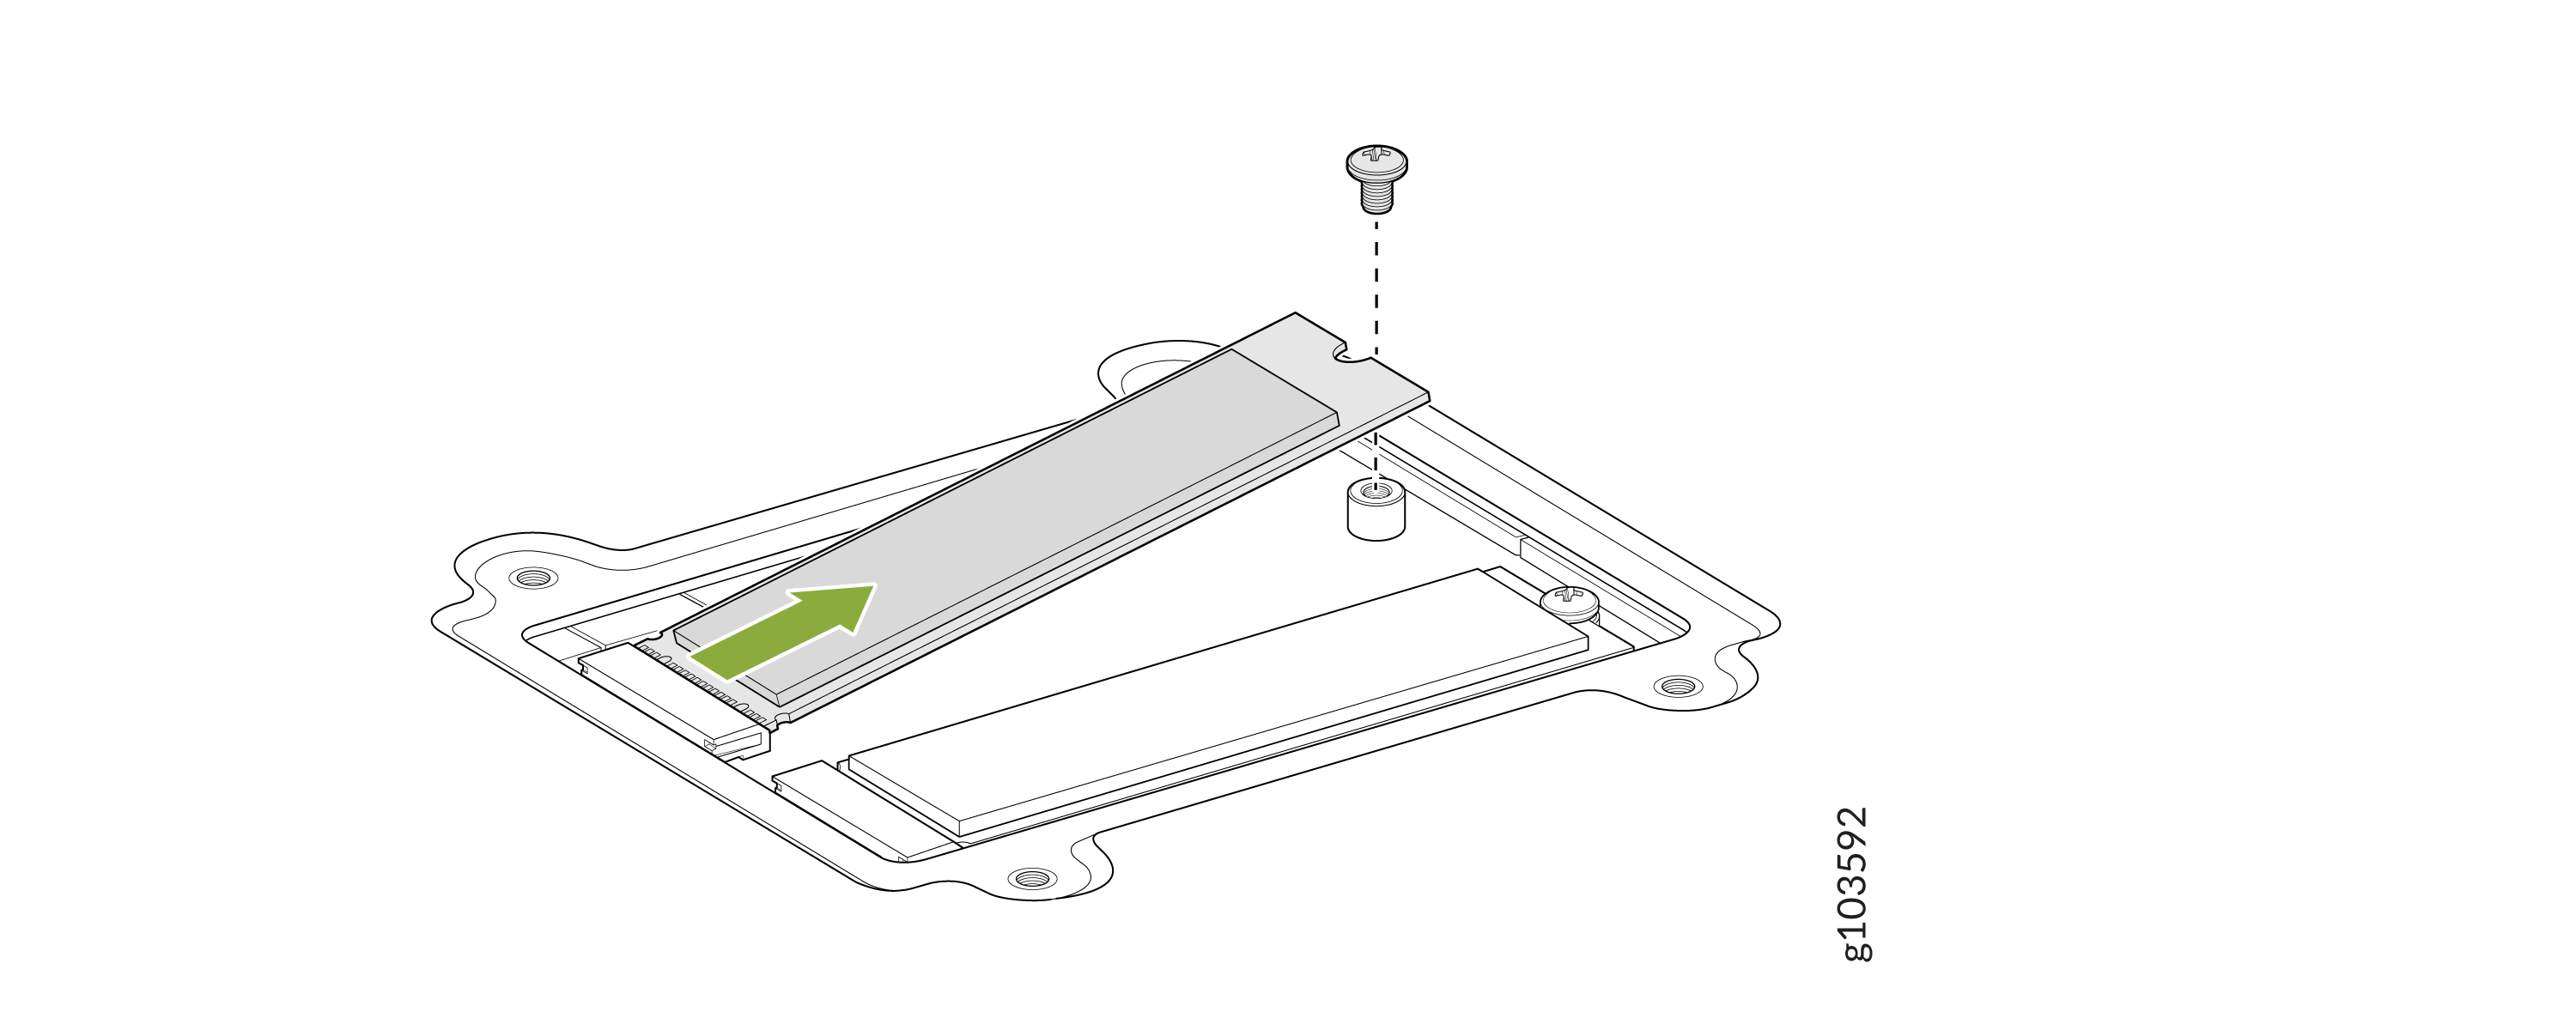
Using the Phillips screwdriver, loosen the screw (3 or 4 turns to the left) that
secures the SSD.
Figure 2: Remove the SSD
-
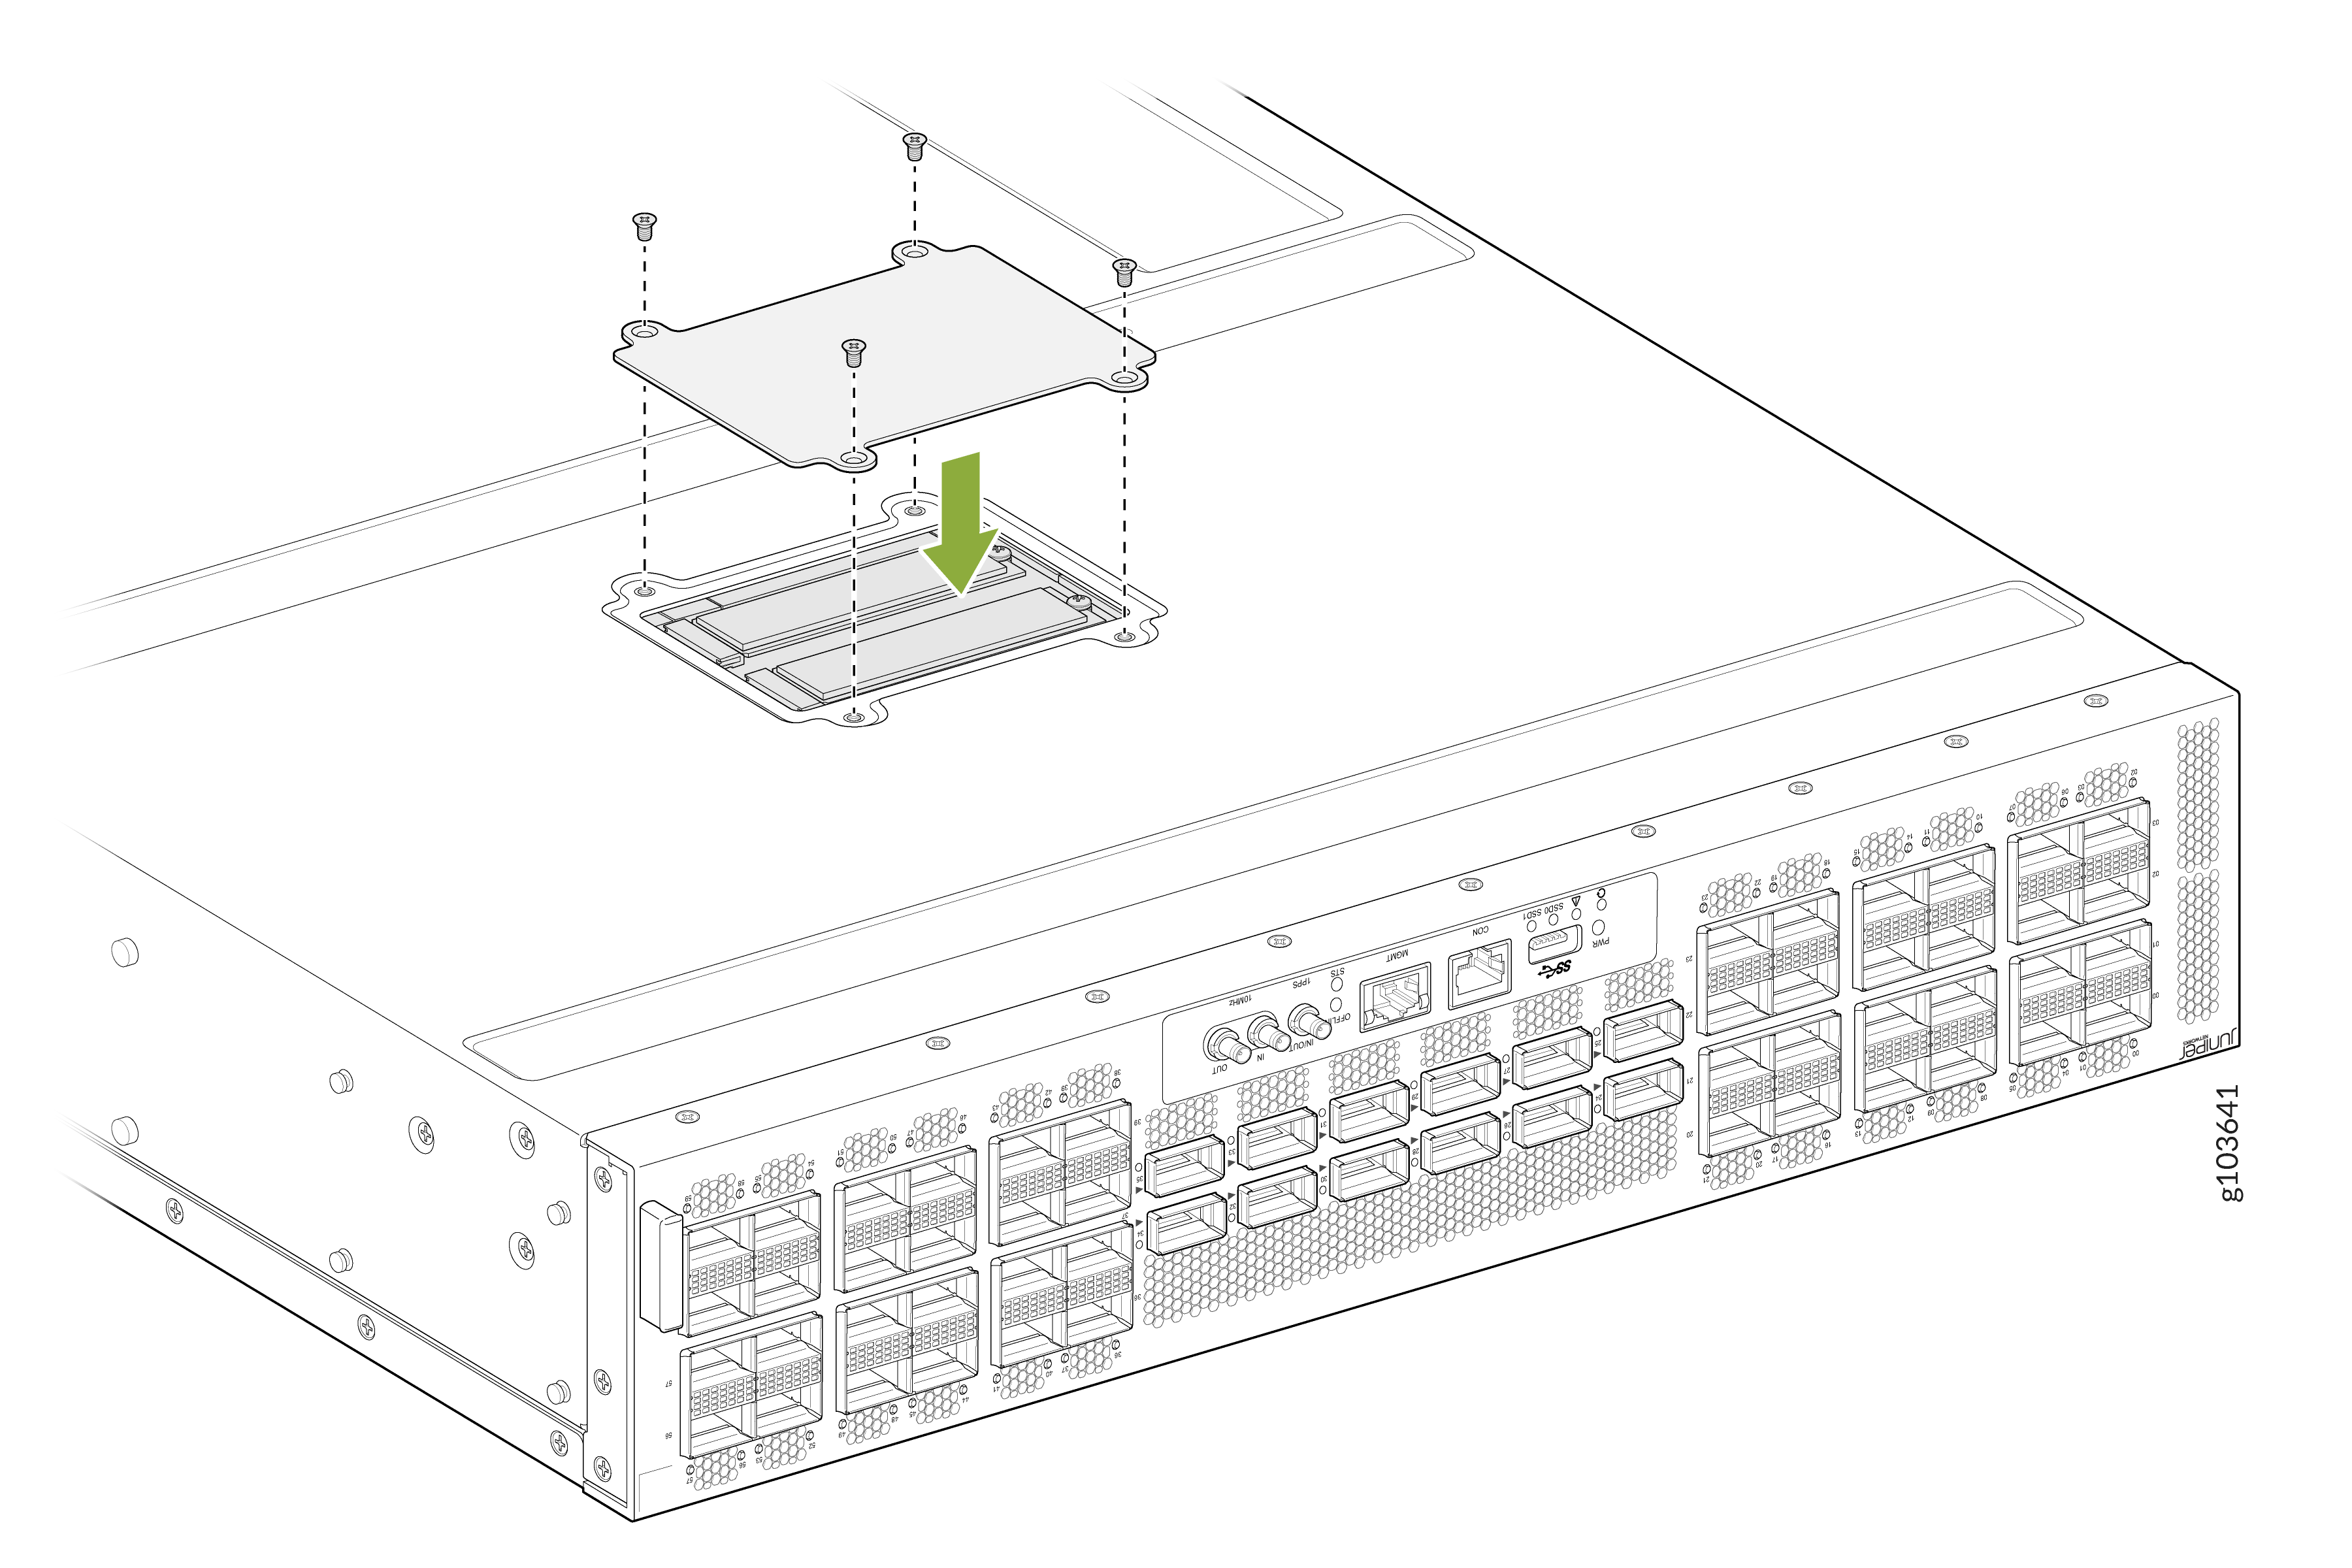
If you do not plan to replace the SSD, replace the SSD slot cover.
Figure 3: Replace the SSD Slot Cover
Install a Solid-State Drive in the Router
Before you install an SSD, ensure that you have taken the necessary precautions to prevent electrostatic discharge (ESD) damage (see Prevention of Electrostatic Discharge Damage).
Ensure that you have the following parts and tools available:
-
An ESD grounding strap—not provided
-
A Phillips (+) screwdriver, number 1—not provided
To install an SSD:
-
Using the Phillips screwdriver, loosen the screws (3 or 4 turns to the left)
that secure the SSD slot cover on the top panel of the chassis.
Figure 4: Remove the SSD Slot Cover
-
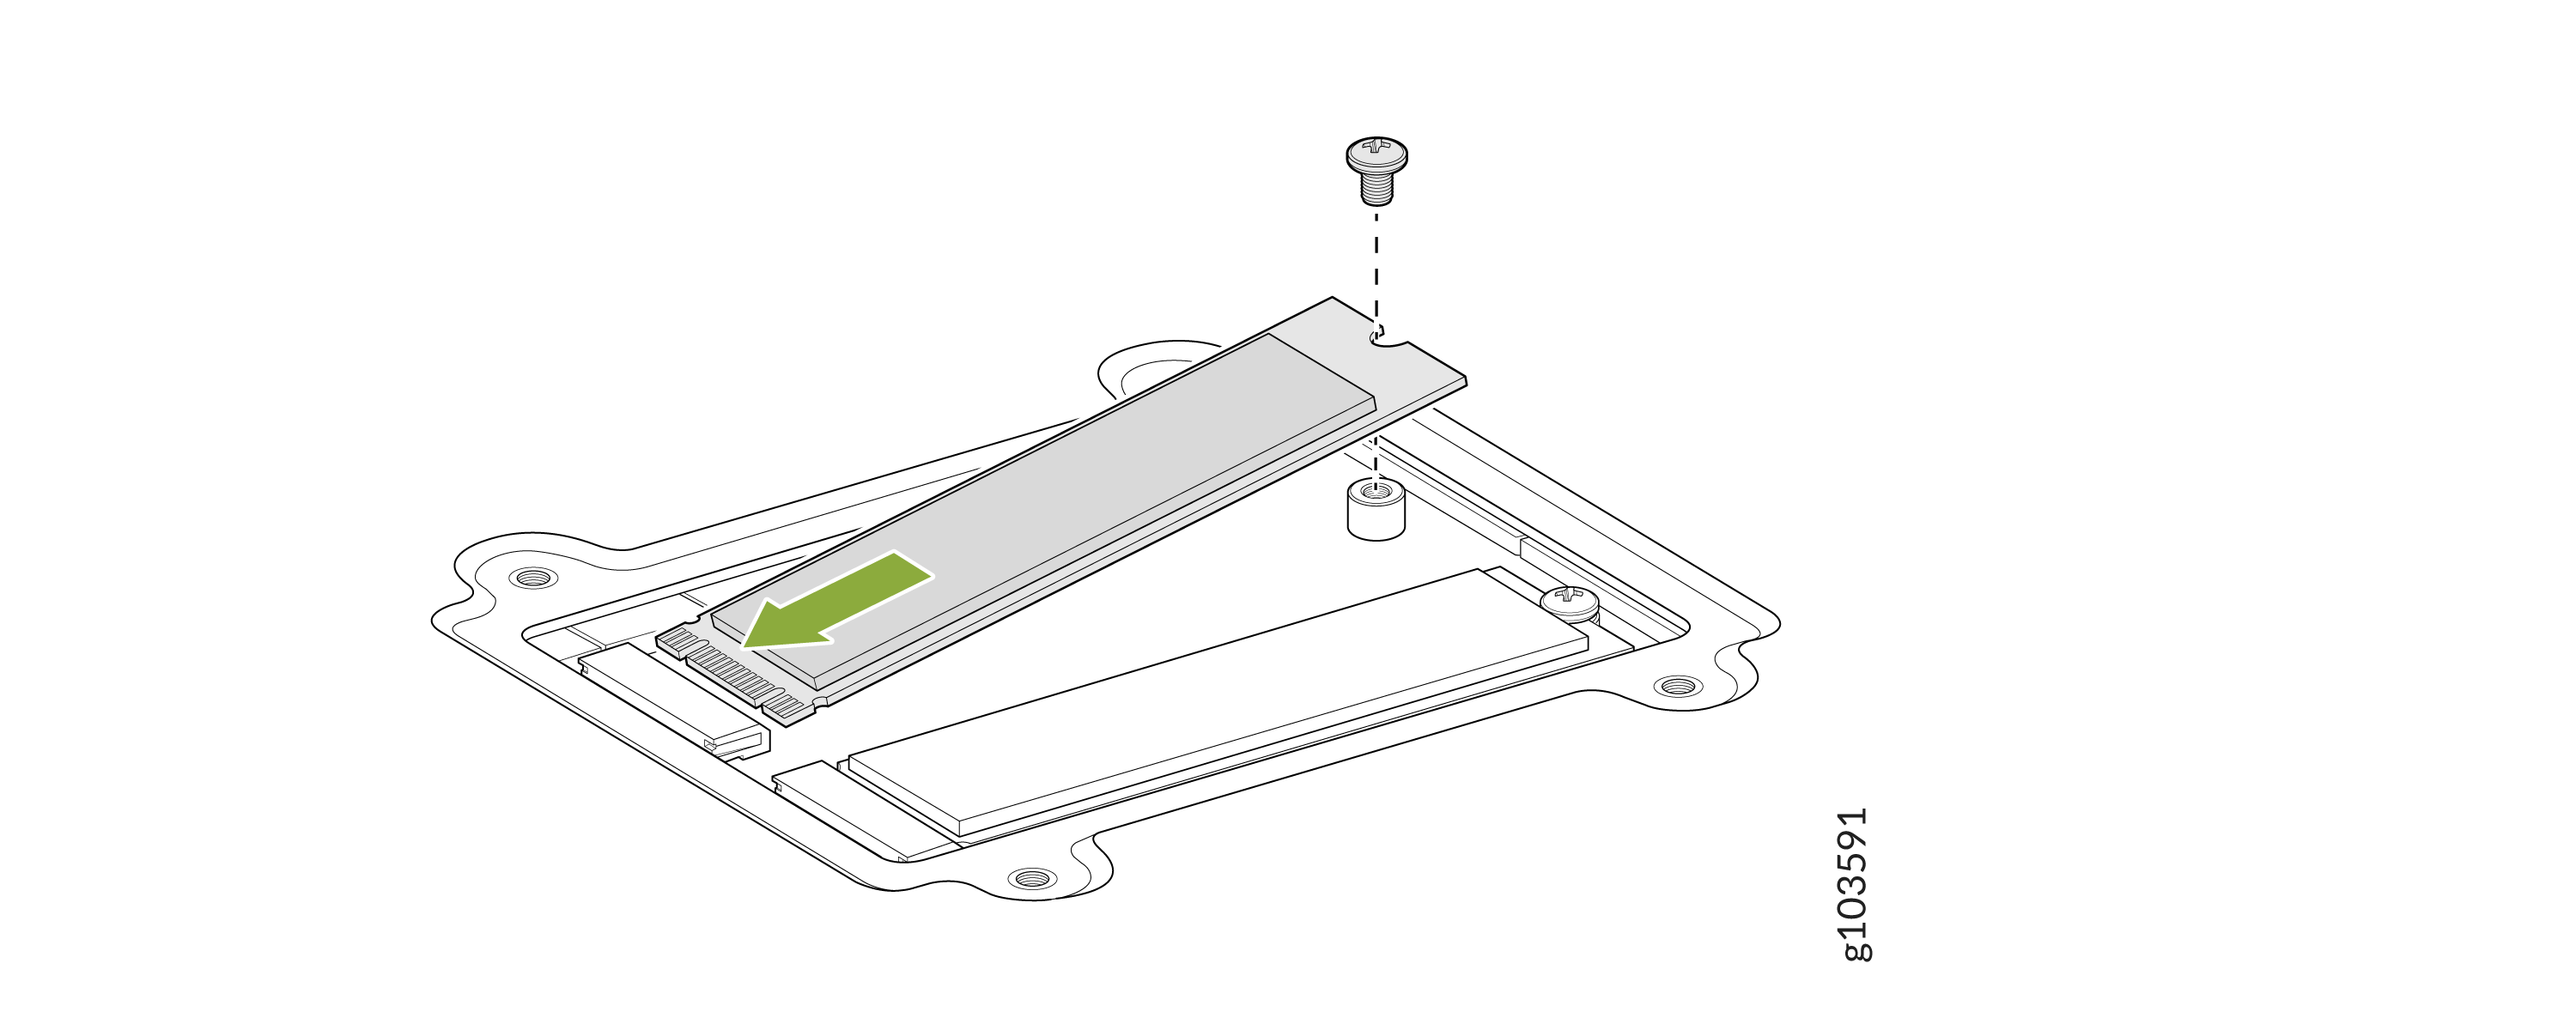
Align the SSD with the open slot in the PTX10002-60MR top panel and slide in the
SSD until it is fully seated.
Figure 5: Install an SSD
-
Replace the SSD cover slot cover.
Figure 6: Replace the SSD Slot Cover