Maintain the PTX10001-36MR Fan Modules
Remove a Fan Module from the PTX10001-36MR
Before you remove a fan module from a PTX10001-36MR, ensure that you have taken the necessary precautions to prevent electrostatic discharge (ESD) damage (see Prevention of Electrostatic Discharge Damage).
Ensure that you have the following parts and tools available:
-
ESD grounding strap
-
Antistatic bag or an antistatic mat
-
Phillips (+) screwdriver, number 1
The fan modules in a PTX10001-36MR are hot-removable and hot-insertable field-replaceable units (FRUs); you can remove and replace them without powering off the PTX10001-36MR or disrupting routing functions.
Before removing the fan module, ensure you have a replacement fan module at hand. If one fan is absent, the chassis will operate for four minutes, and then shut down. If two fans are absent, the chassis will shut down immediately.
To remove a fan module from a PTX10001-36MR:
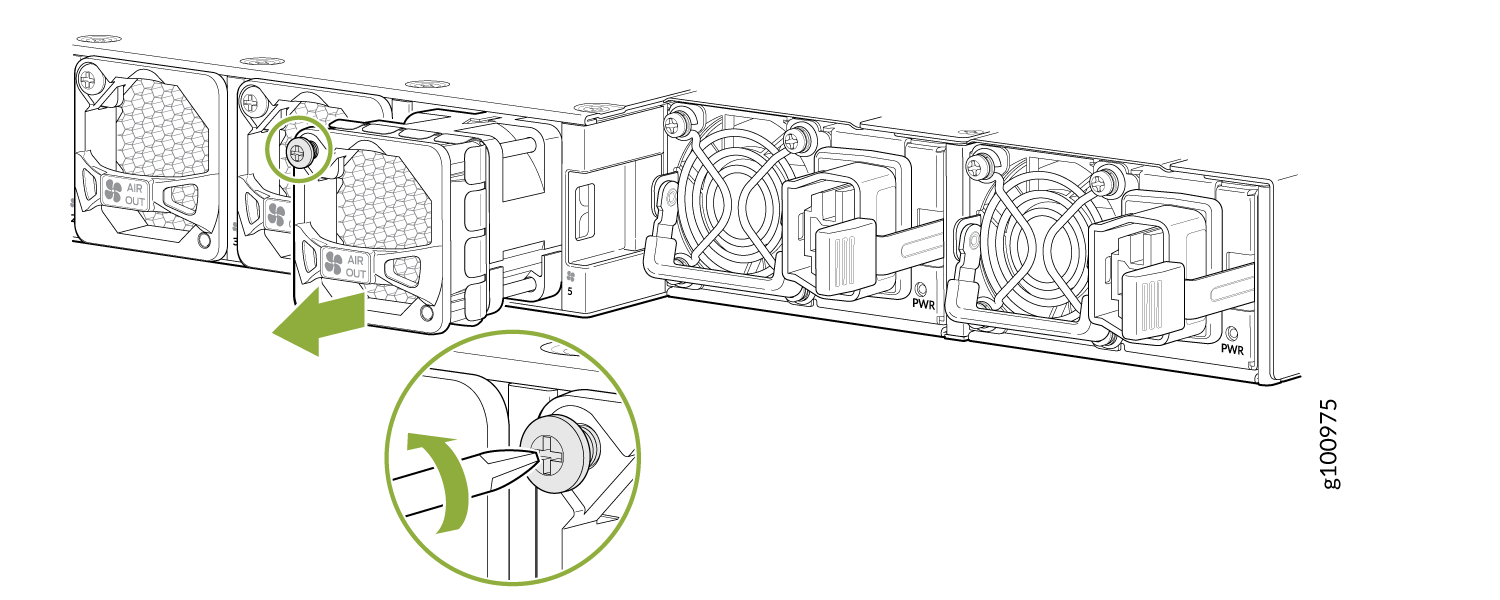
When a fan module is removed, the CLI message Fan/Blower is Absent is logged in the system log,
and the system raises a minor alarm.
Install a Fan Module in the PTX10001-36MR
Before you install a fan module in a PTX10001-36MR, ensure that you have taken the necessary precautions to prevent electrostatic discharge (ESD) damage (see Prevention of Electrostatic Discharge Damage).
Ensure that you have the following parts and tools available:
-
ESD grounding strap
-
Phillips (+) screwdriver, number 1
The fan modules in a PTX10001-36MR are hot-removable and hot-insertable field-replaceable units (FRUs)—you can remove and replace them without powering off the PTX10001-36MR or disrupting routing functions.
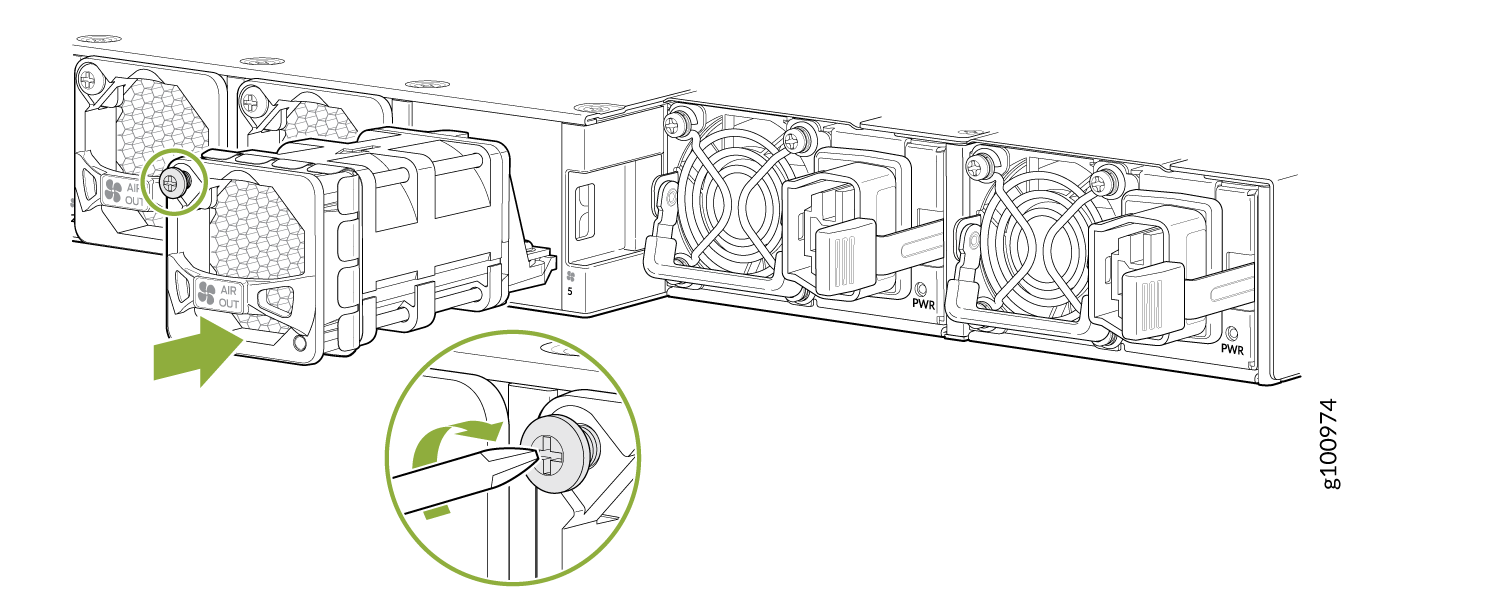
To install a fan module in a PTX10001-36MR:
- To prevent damage to the equipment caused by static discharge, attach an electrostatic discharge (ESD) grounding strap to your bare wrist, and connect the strap to one of the ESD points on the chassis.
- Taking care not to touch the connectors, remove the fan module from its bag.
- Align the module with the open slot on the FRU end of the PTX10001-36MR and slide it in until it is fully seated.
- Using the Phillips screwdriver, tighten the locking screw (3 or 4 turns). See Figure 2.