Help us improve your experience.

Let us know what you think.

Do you have time for a two-minute survey?


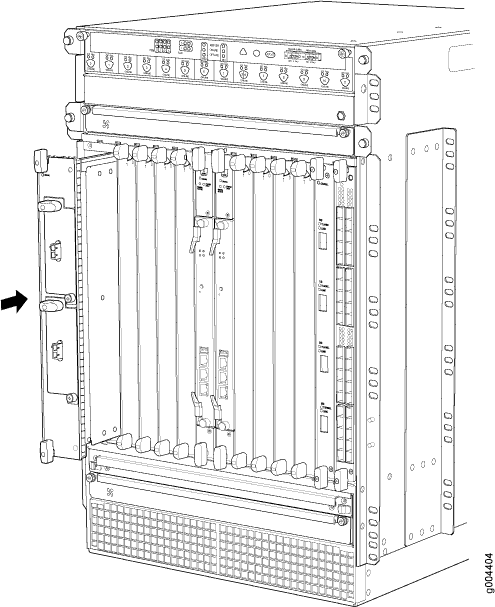
Installing an MX960 FPC

An FPC takes up two DPC slots on the MX960 router. Up to six FPCs can be installed vertically in the front of the router. The FPCs are hot-insertable and hot-removable. An empty FPC3 weighs 14 lb (6.5 kg). A fully configured FPC can weigh up to 18 lb (8.2 kg). Be prepared to accept its full weight.

To install an FPC (see Figure 1):

  1. Attach an ESD grounding strap to your bare wrist, and connect the other end of the strap to an ESD grounding point.
  2. Place the FPC on an antistatic mat.
  3. Take each PIC to be installed in the replacement FPC out of its electrostatic bag, and identify the slot on the FPC where it will be connected.
  4. Verify that each fiber-optic PIC has a rubber safety cap covering the PIC transceiver. If it does not, cover the transceiver with a safety cap.
  5. Install each PIC into the appropriate slot on the FPC.
  6. Locate the two slots in the card cage in which you plan to install the FPC.
  7. Orient the FPC so that the faceplate faces you.
  8. Lift the FPC into place, and carefully align the sides of the FPC with the guides inside the card cage.
    CAUTION:

    When the FPC is out of the chassis, do not hold it by the ejector handles, bus bars, or edge connectors. They cannot support its weight.

  9. Slide the FPC all the way into the card cage until you feel resistance.
  10. Grasp both ejector handles, and rotate them clockwise simultaneously until the FPC is fully seated.
  11. If any of the PICs on the FPC connect to fiber-optic cable, remove the rubber safety cap from each transceiver and cable.
    Laser Warning:

    Do not look directly into a fiber-optic transceiver or into the ends of fiber-optic cables. Fiber-optic transceivers and fiber-optic cables connected to a transceiver emit laser light that can damage your eyes.

  12. Insert the appropriate cable into the cable connector ports on each PIC on the FPC.
  13. Arrange the cable in the standard or extended cable manager to prevent it from dislodging or developing stress points. Secure the cable so that it is not supporting its own weight as it hangs to the floor. Place excess cable out of the way in a neatly coiled loop. Placing fasteners on the loop helps to maintain its shape.
    CAUTION:

    Do not let fiber-optic cables hang free from the connector. Do not allow the fastened loops of a cable to dangle, which stresses the cable at the fastening point.

    CAUTION:

    Avoid bending a fiber-optic cable beyond its minimum bend radius. An arc smaller than a few inches in diameter can damage the cable and cause problems that are difficult to diagnose.

  14. Use one of the following methods to bring the FPC online:
    • Press and hold the FPC online/offline button until the green OK LED next to the button lights steadily, in about 5 seconds. The LEDs and online/offline button for each FPC are located directly above it on the craft interface.

    • Issue the following CLI command:

      For more information about the command, see the CLI Explorer.

    CAUTION:

    After the OK LED lights steadily, wait at least 30 seconds before removing the FPC again, removing an FPC from a different slot, or inserting an FPC in a different slot.

You can also verify correct FPC and PIC functioning by issuing the show chassis fpc and show chassis fpc pic-status commands described in Maintaining MX960 FPCs and Maintaining MX960 PICs.

Figure 1: Installing an FPCInstalling an FPC