Maintain the MX304 Routing Engine
Maintain the Routing Engine
Purpose
For optimum router performance, verify the condition of the Routing Engine on regular basis.
Action
On a regular basis:
Check the LEDs on the front panel to view information about the status of the Routing Engine.
To check the status of the Routing Engine, issue the
show chassis routing-enginecommand. The output is similar to the following:user@host> show chassis routing-engine Routing Engine status: Slot 0: Current state Master Election priority Master (default) Temperature 33 degrees C / 91 degrees F CPU temperature 34 degrees C / 93 degrees F DRAM 98250 MB (98304 MB installed) Memory utilization 3 percent 5 sec CPU utilization: User 0 percent Background 0 percent Kernel 0 percent Interrupt 0 percent Idle 99 percent 1 min CPU utilization: User 0 percent Background 0 percent Kernel 0 percent Interrupt 0 percent Idle 99 percent 5 min CPU utilization: User 0 percent Background 0 percent Kernel 0 percent Interrupt 0 percent Idle 95 percent 15 min CPU utilization: User 0 percent Background 0 percent Kernel 0 percent Interrupt 0 percent Idle 63 percent Model RE 2700 8C 128G Serial ID BCDA4069 Start time 2022-09-06 11:27:31 IST Uptime 17 minutes, 49 seconds Last reboot reason 0x1:power cycle/failure Load averages: 1 minute 5 minute 15 minute 0.43 0.35 0.37 ...
Replace an MX304 Routing Engine
Remove an MX304 Routing Engine
The MX304 host subsystem has up to two Routing Engines.
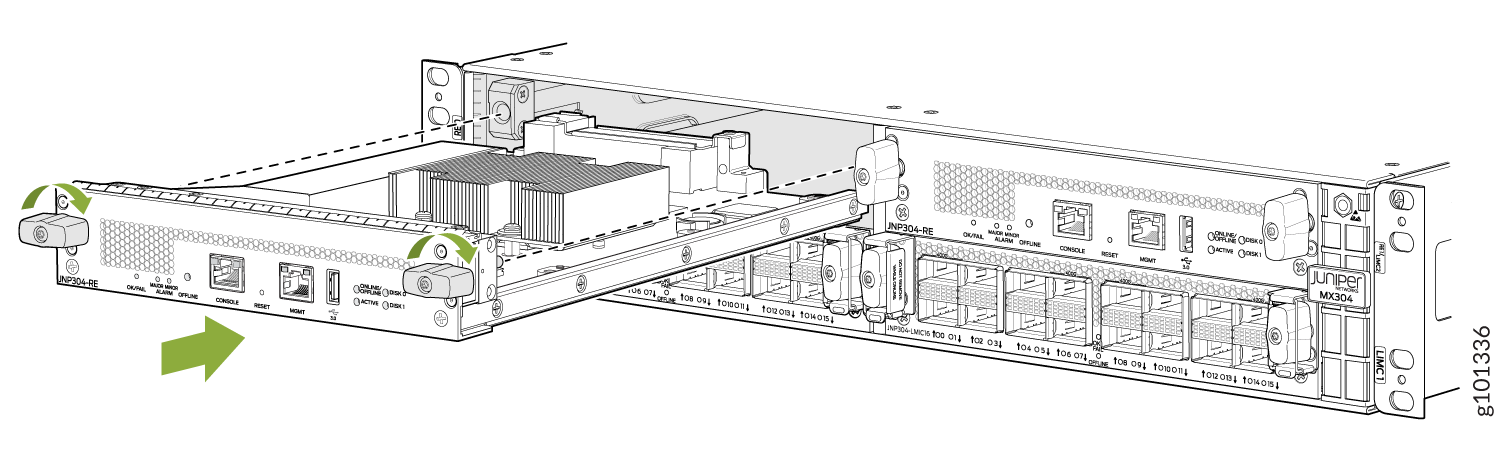
To remove a Routing Engine (see Figure 1 ):
Before removing a Routing Engine, make sure you know how to properly use the ejector handles to avoid damage to the equipment.
Before you replace a Routing Engine, you must take the host subsystem offline. If there's only one host subsystem, the router shuts down when you take it offline.
-
Grasp the ejector handle, and slide the Routing Engine about halfway out of the
chassis. See Figure 1.
Figure 1: Removing an Routing Engine
Install an MX304 Routing Engine
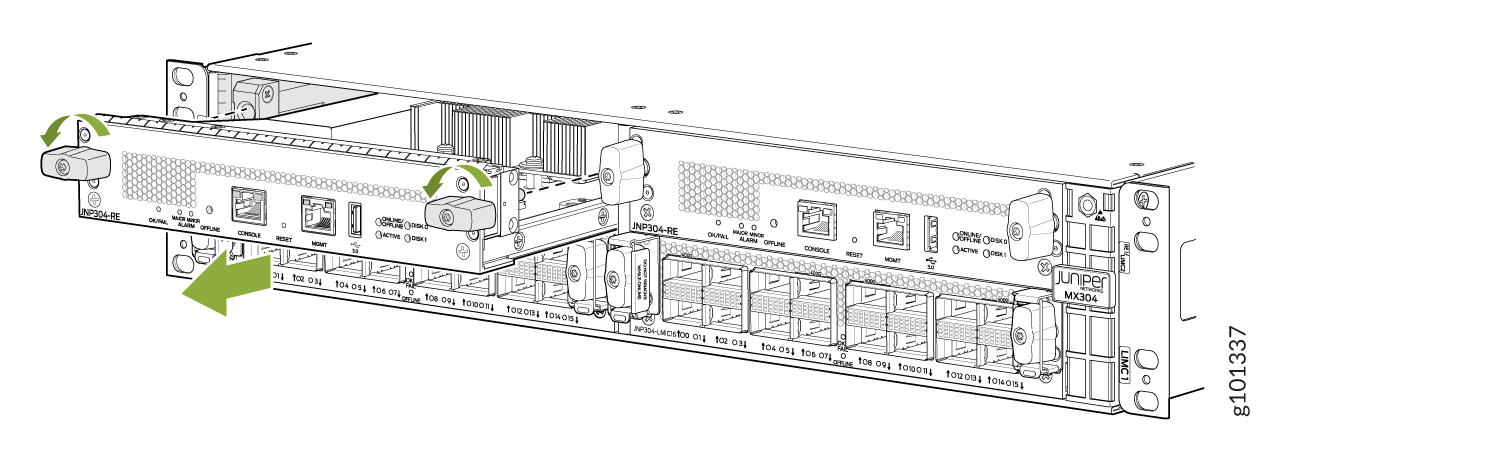
To install an MX304 Routing Engine (see Figure 2):
-
Grasp the ejector handles, and gently close them simultaneously until the Routing
Engine is fully seated. Turn the ejector handles clockwise until they lock.
Figure 2: Installing an MX304 Routing Engine