Installing an MX2020 Air Filter
The MX2020 router has four air filters: a lower air filter, middle card cage cable manager air filter, and two Power Supply Module (PSM) air filters. These filters are included in the MX2020 Filter Kit (MX2020-FLTR-KIT-S).
Use these procedures to install the air filters.
To install the lower air filter:
- Attach an electrostatic discharge (ESD) grounding strap to your bare wrist, and connect the strap to one of the ESD points on the chassis.
- Ensure that the air filter is right side up.
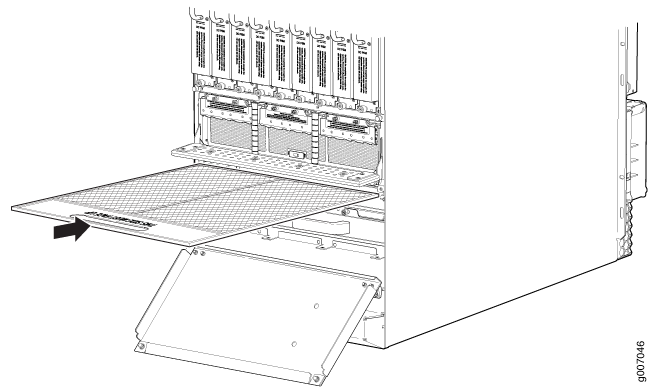
- Open the fan tray and air filter access door, located at the bottom of the chassis.
- Grasp the handle on the air filter and insert into the chassis until it stops, (see Figure 1).
- Close the access door and tighten the two captive screws to secure.
- Lower the cable manager back into position, and rearrange the cables in the cable manager.
To install the middle card cage cable manager air filter:
-
Attach an electrostatic discharge (ESD) grounding strap to your bare wrist, and connect the strap to one of the ESD points on the chassis.
-
Move the cables from the middle card cage cable manager, if necessary.
-
Loosen the two captive screws located on the front of the middle card cage cable manager door, and open.
CAUTION:Do not run the router for more than 2 minutes without the air filter in place.
-
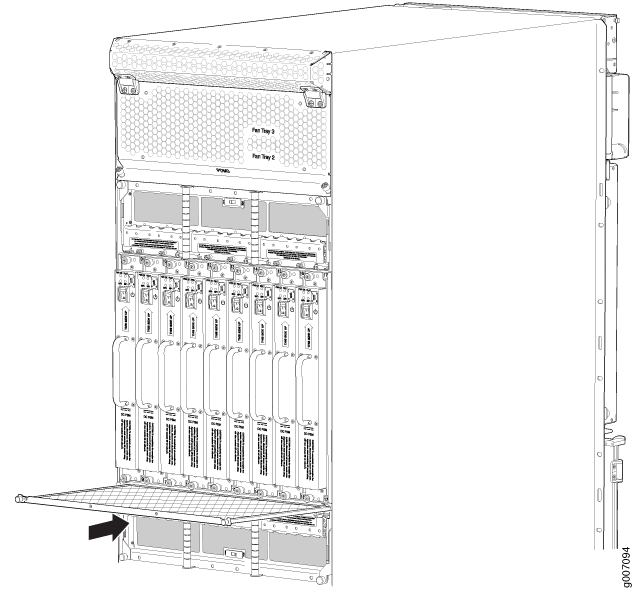
Grasp the air filter, and slide the bottom of the air filter into the channel of the access door, (see Figure 2).
Figure 2: Installing the Middle Card Cage Cable Manager Air Filter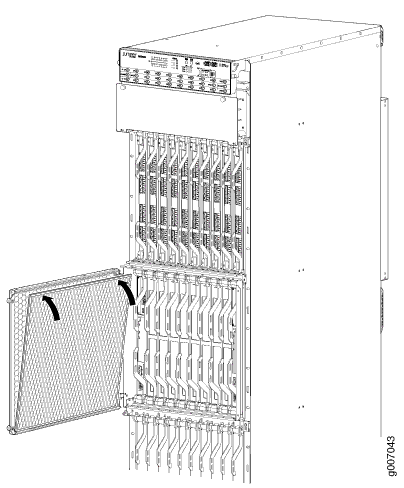
-
Push the air filter in place, close the door, and tighten the two captive screws.
-
Replace the cables in the middle card cage cable manager, if necessary.
To install the PSM air filter:
The MX2020 has two PSM air filters - one under each PSM section.
-
Attach an electrostatic discharge (ESD) grounding strap to your bare wrist, and connect the strap to one of the ESD points on the chassis.
-
Ensure that the air filter is right side up.
-
Grasp the PSM air filter and insert into the chassis until it stops, (see Figure 3).
-
Tighten the two captive screws to secure.
To install the PSM air filter for chassis with 240 V China power supplies and universal (HVAC/HVDC) power supplies:
-
Attach an electrostatic discharge (ESD) grounding strap to your bare wrist, and connect the strap to one of the ESD points on the chassis.
-
Unscrew the mechanical interlock bracket from the PDM (see Figure 4 and Figure 5).
Figure 4: Removing the Bracket from the PDM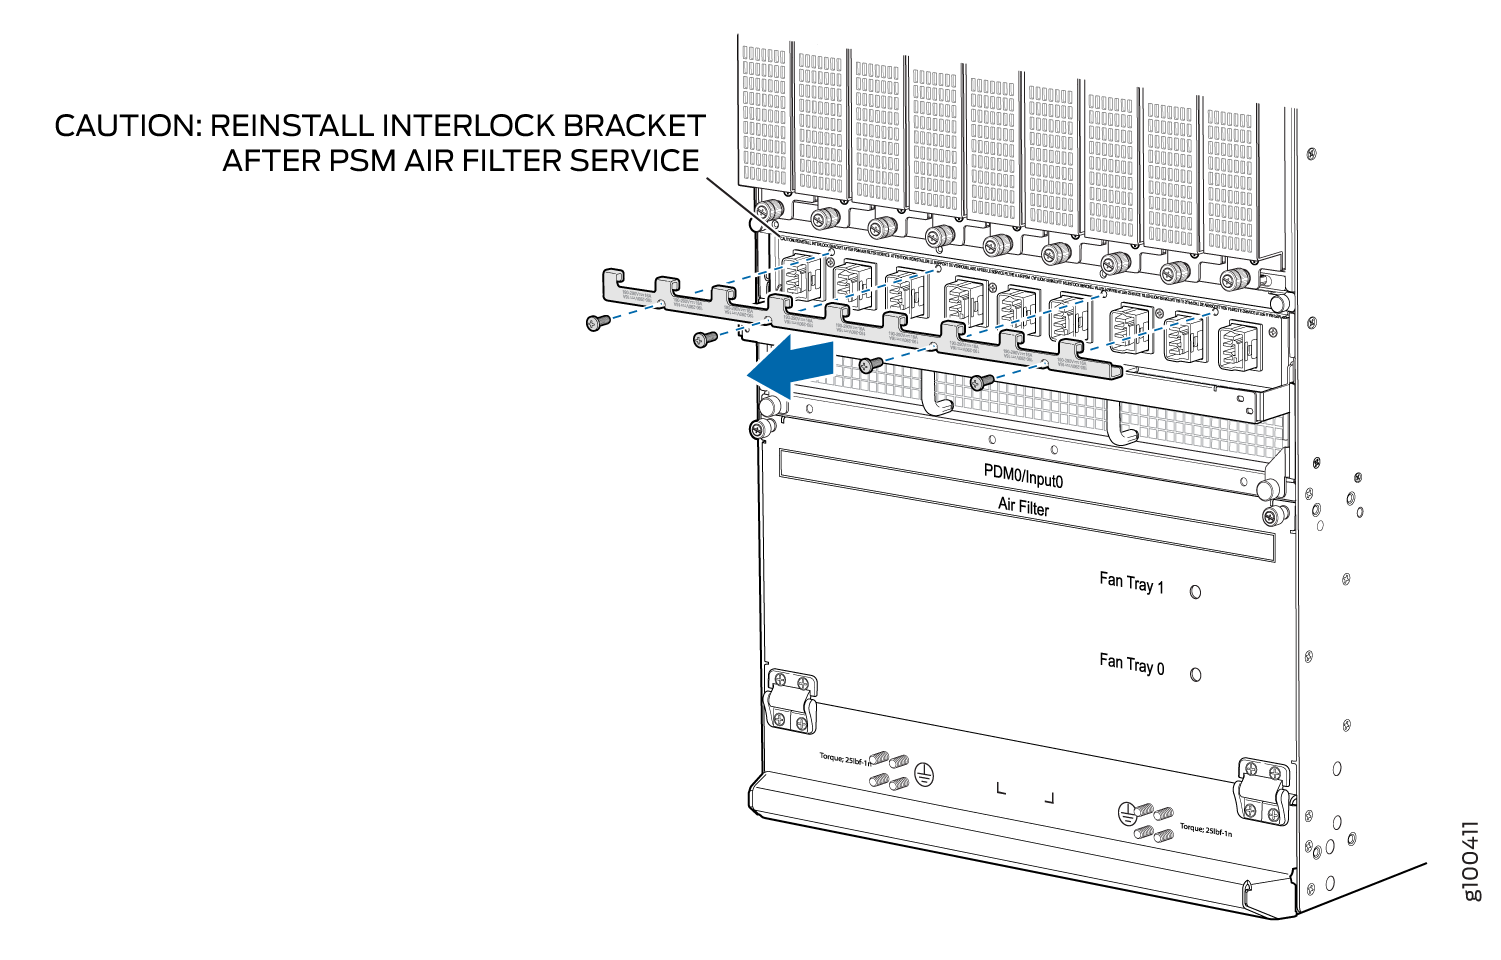 Figure 5: Removing the Bracket from the Universal (HVAC/HVDC) PDM
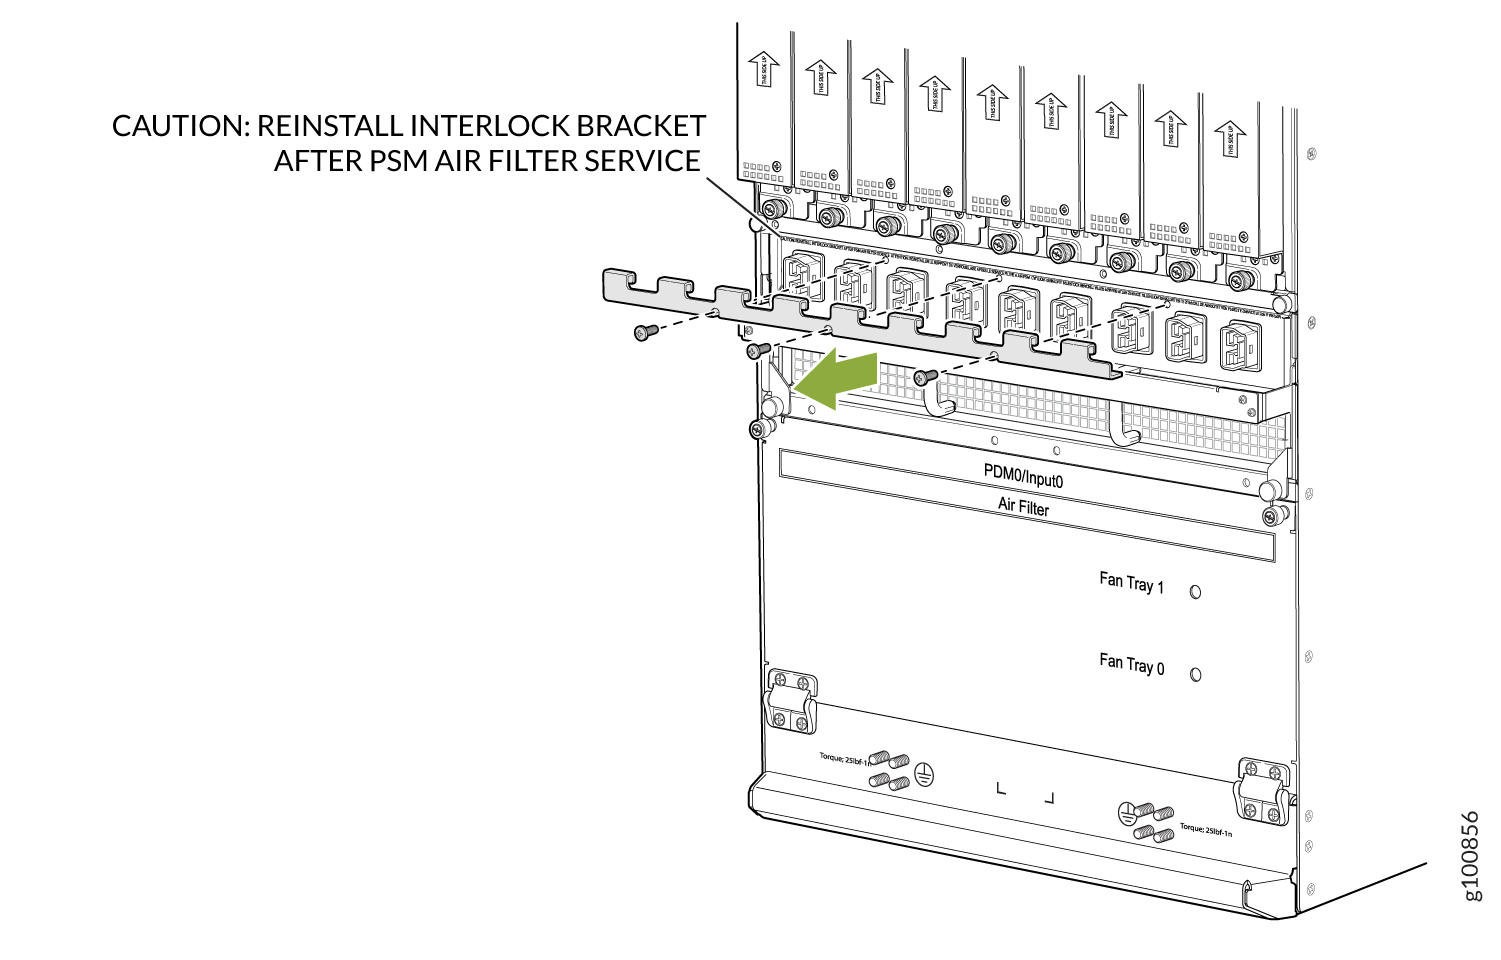
-
Ensure that the air filter is right side up.
-
Grasp the PSM air filter and insert into the chassis until it stops, (see Figure 6 and Figure 7).
-
Tighten the two captive screws to secure.
Figure 6: Installing the PSM Filter
Figure 7: Installing the PSM Filter for the Universal (HVAC/HVDC) PSM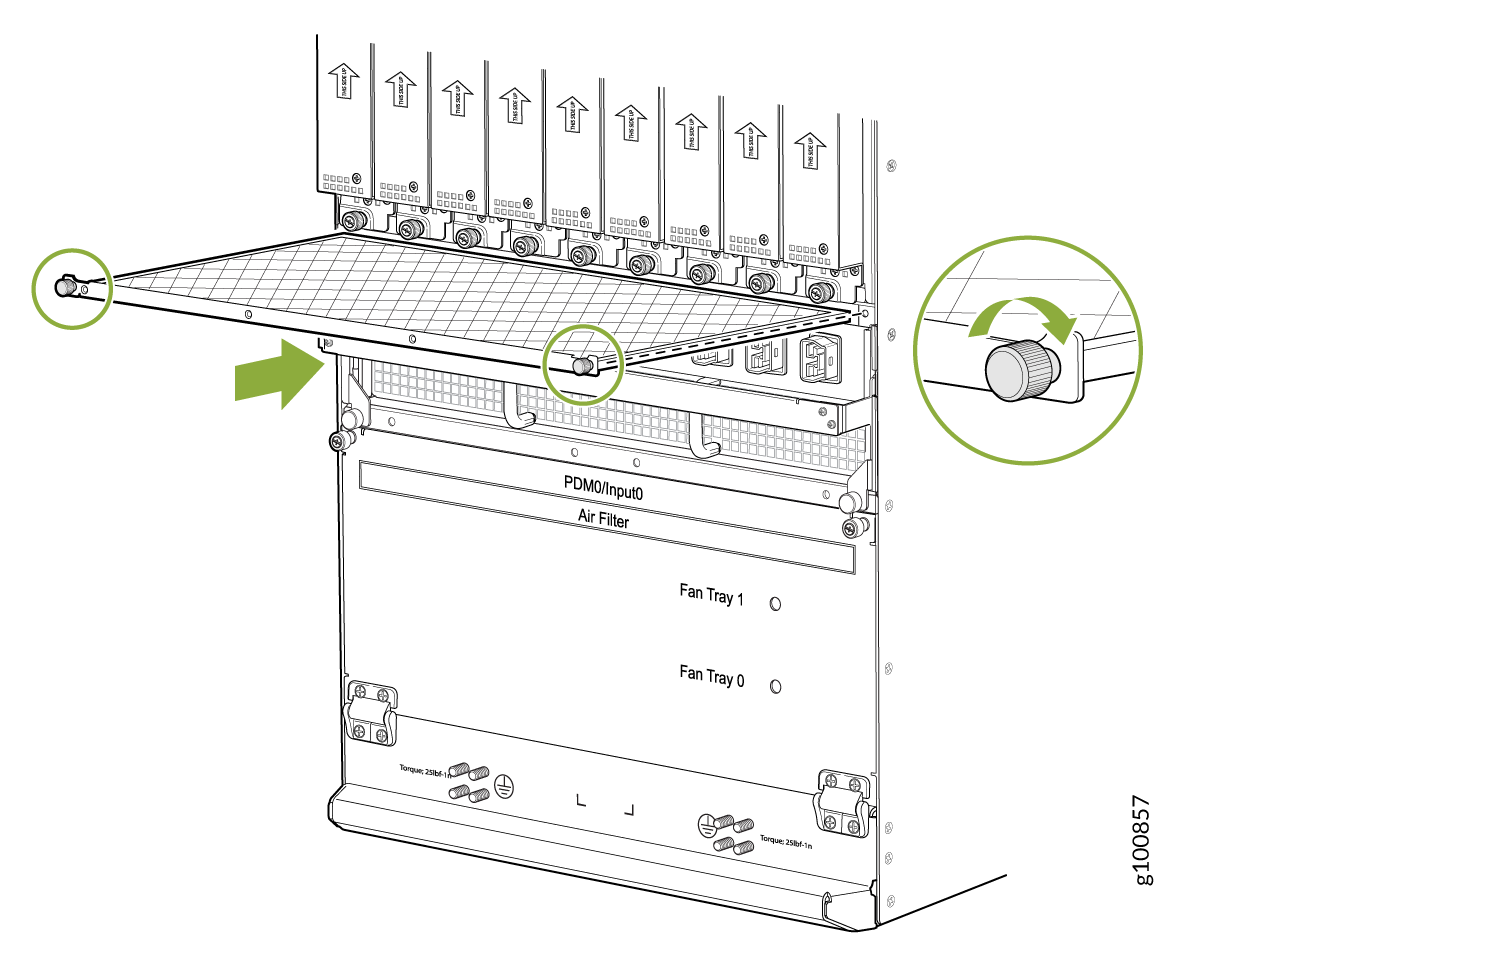
-
Install the mechanical interlock bracket and tighten the screws. See Figure 8 and Figure 9.
Figure 8: Installing the Bracket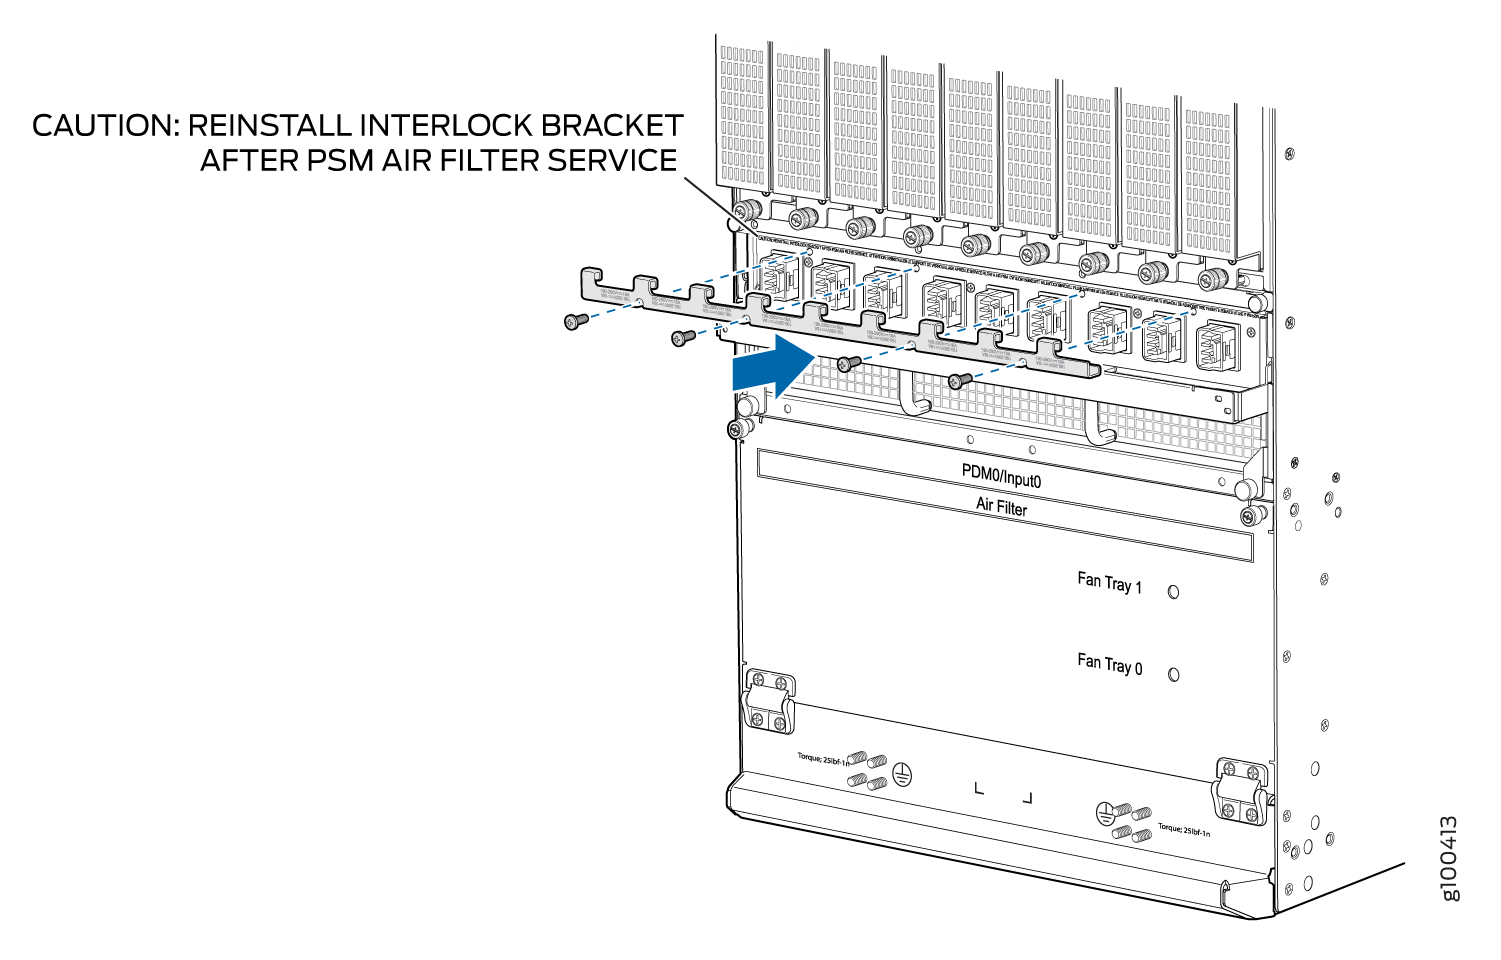 Figure 9: Installing the Mechanical Interlock Bracket (with Universal HVAC/HVDC PSM Installed)