Help us improve your experience.

Let us know what you think.

Do you have time for a two-minute survey?


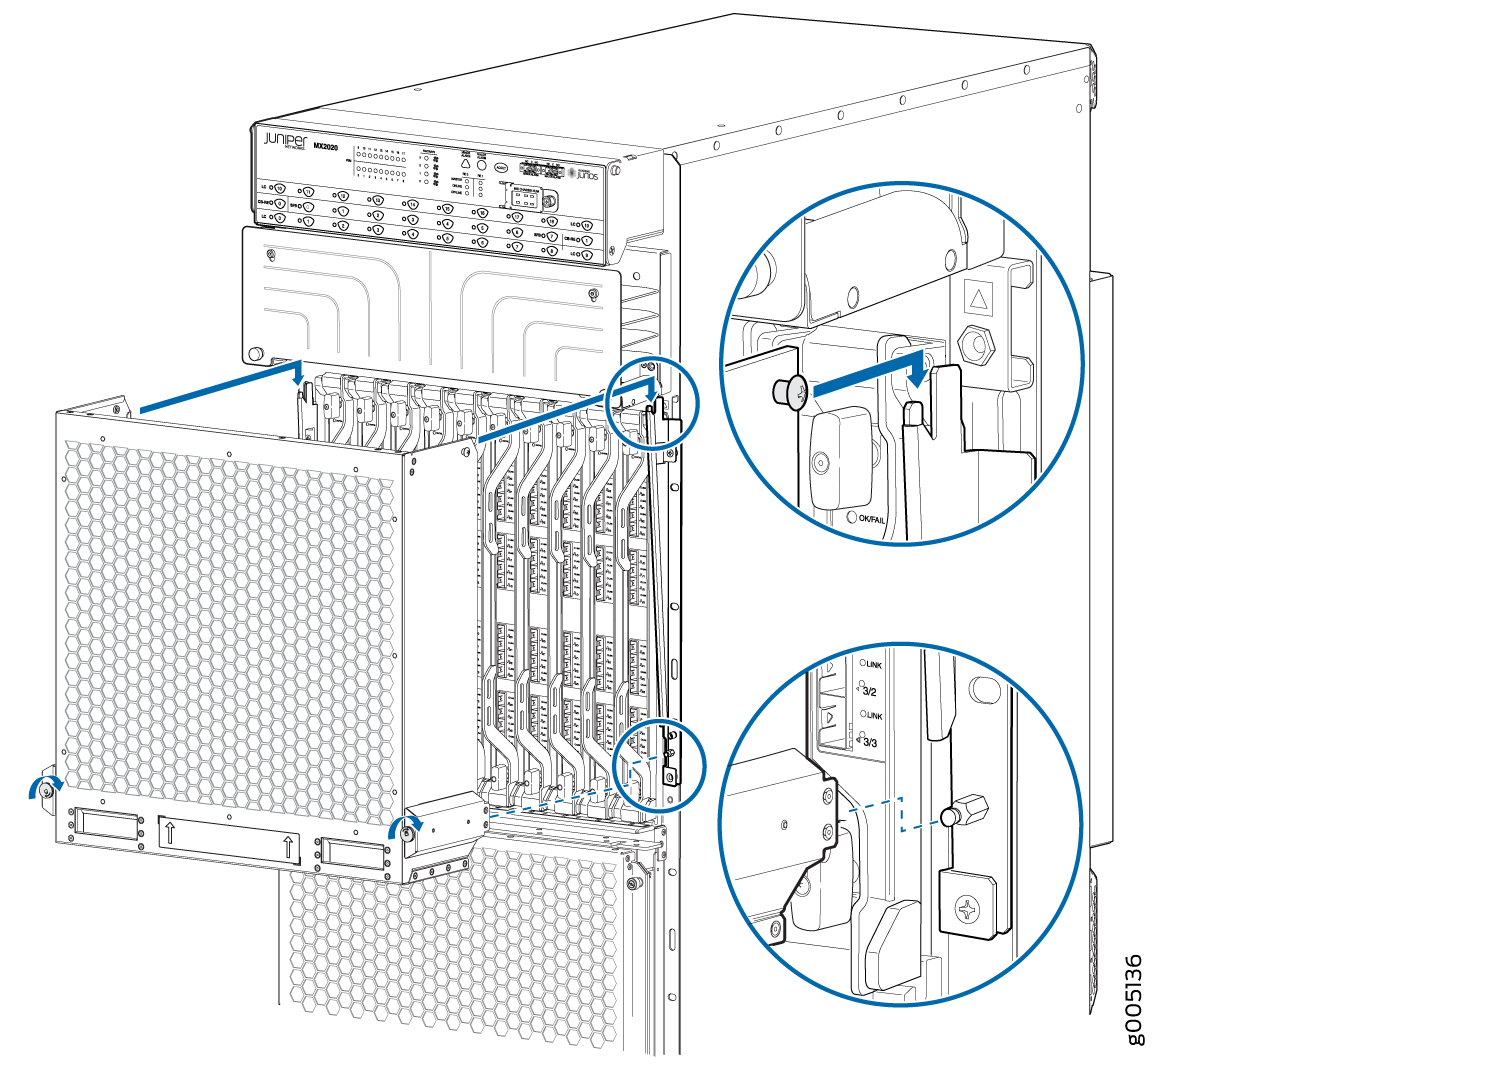
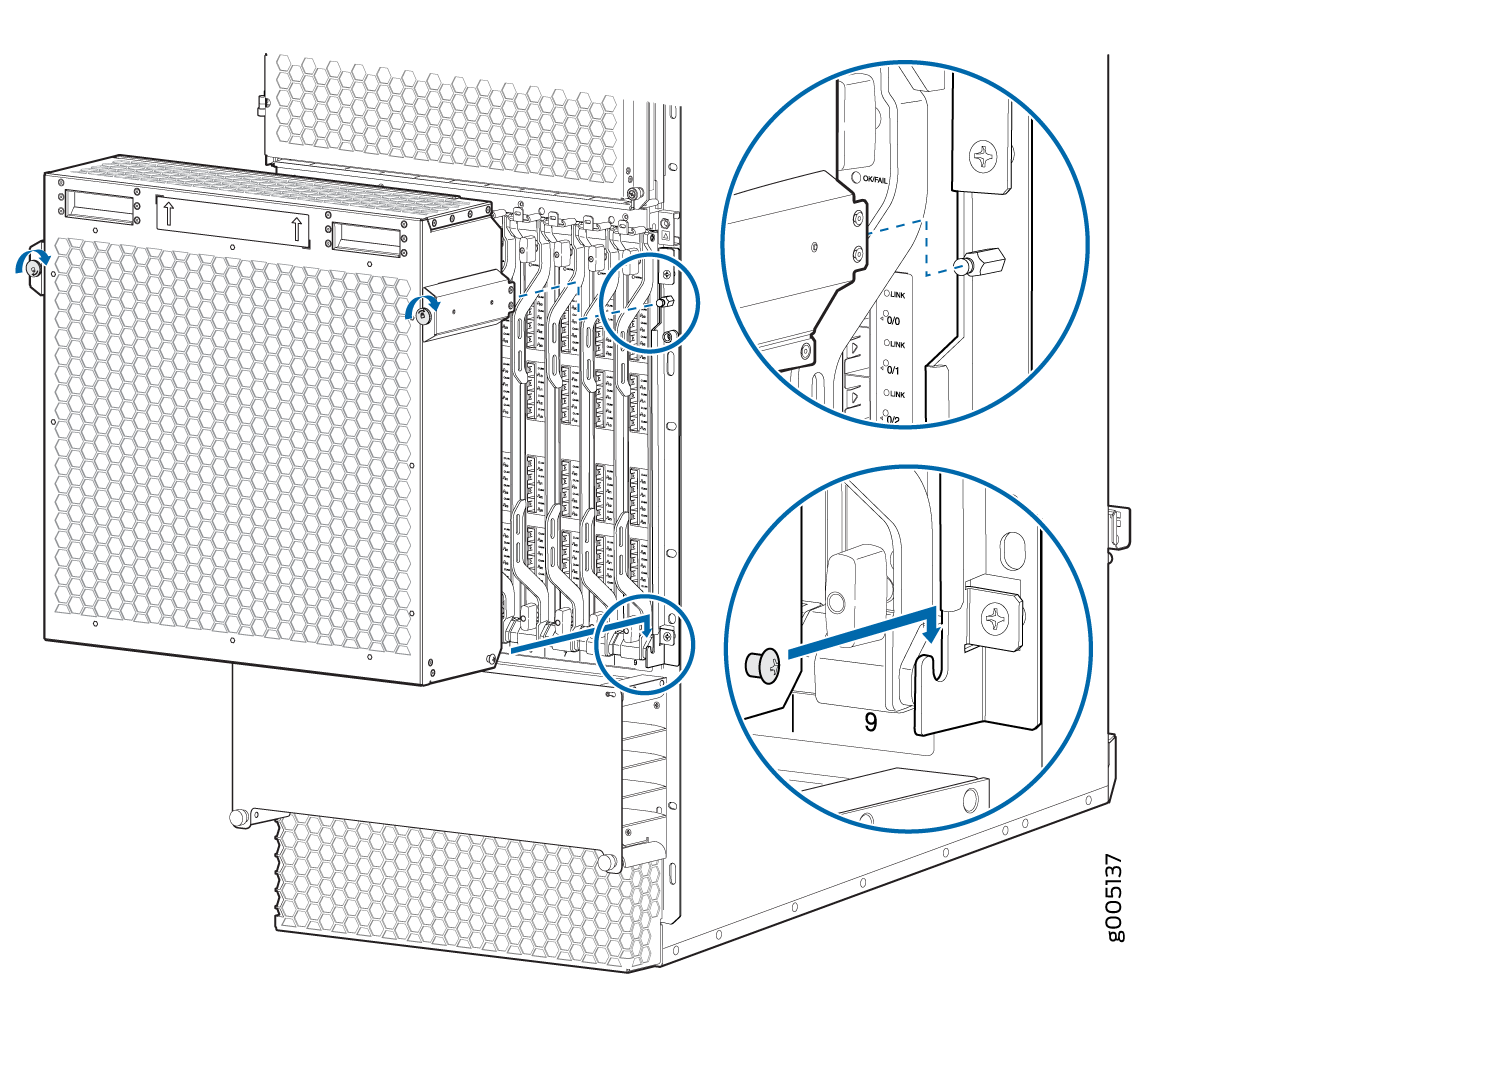
Installing the MX2020 Extended EMI Cover

Two extended electromagnetic interference (EMI) covers attach to the router over the upper and lower card cages.

  1. Attach an electrostatic discharge (ESD) grounding strap to your bare wrist, and connect the strap to one of the ESD points on the chassis.
  2. On each side of the upper and lower card cage, orient the extended EMI cover mounting brackets so that they line up with the mounting holes.
    • For the upper extended EMI card cover, the groove that holds the points on the cover should be at the top.

    • For the lower extended EMI card cover, the groove that holds the points on the cover should be at the bottom.

  3. Secure the extended EMI cover mounting brackets using the four screws provided (two on each side) (see Figure 1).
    Figure 1: Installing the Extended EMI Cover Mounting BracketsInstalling the Extended EMI Cover Mounting BracketsInstalling the Extended EMI Cover Mounting Brackets

  4. Orient the cover so that the arrows point up in front of the card cage.
  5. Angle the cover so that the points on each side of the extended EMI cover fit into the grooves on the EMI cover mounting brackets.
  6. Tilt the extended EMI cover into place and press firmly until the sides contact the EMI cover mounting brackets:
    • The upper extended EMI cover tilts from the top.

    • The lower extended EMI cover tilts from the bottom.

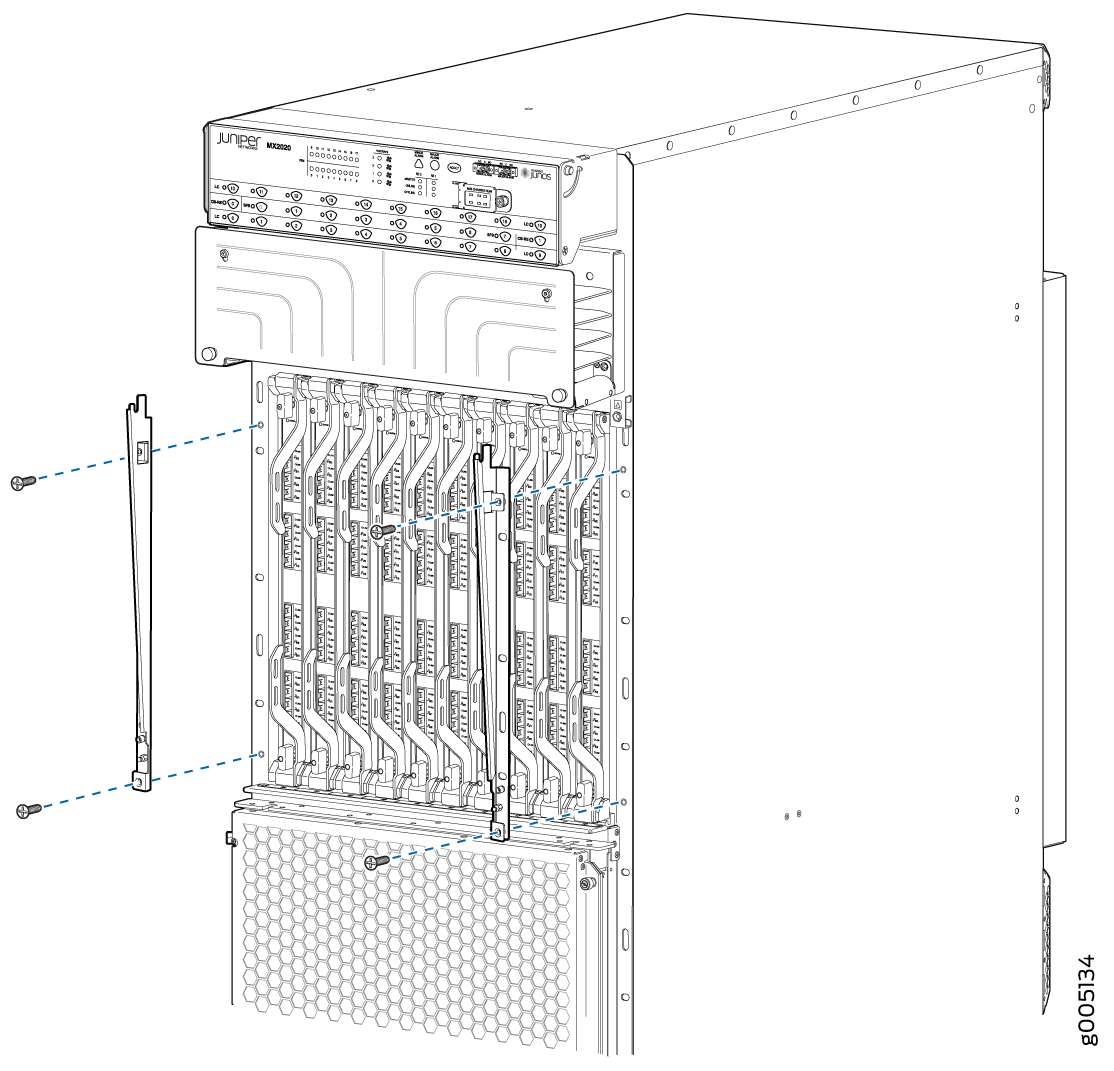
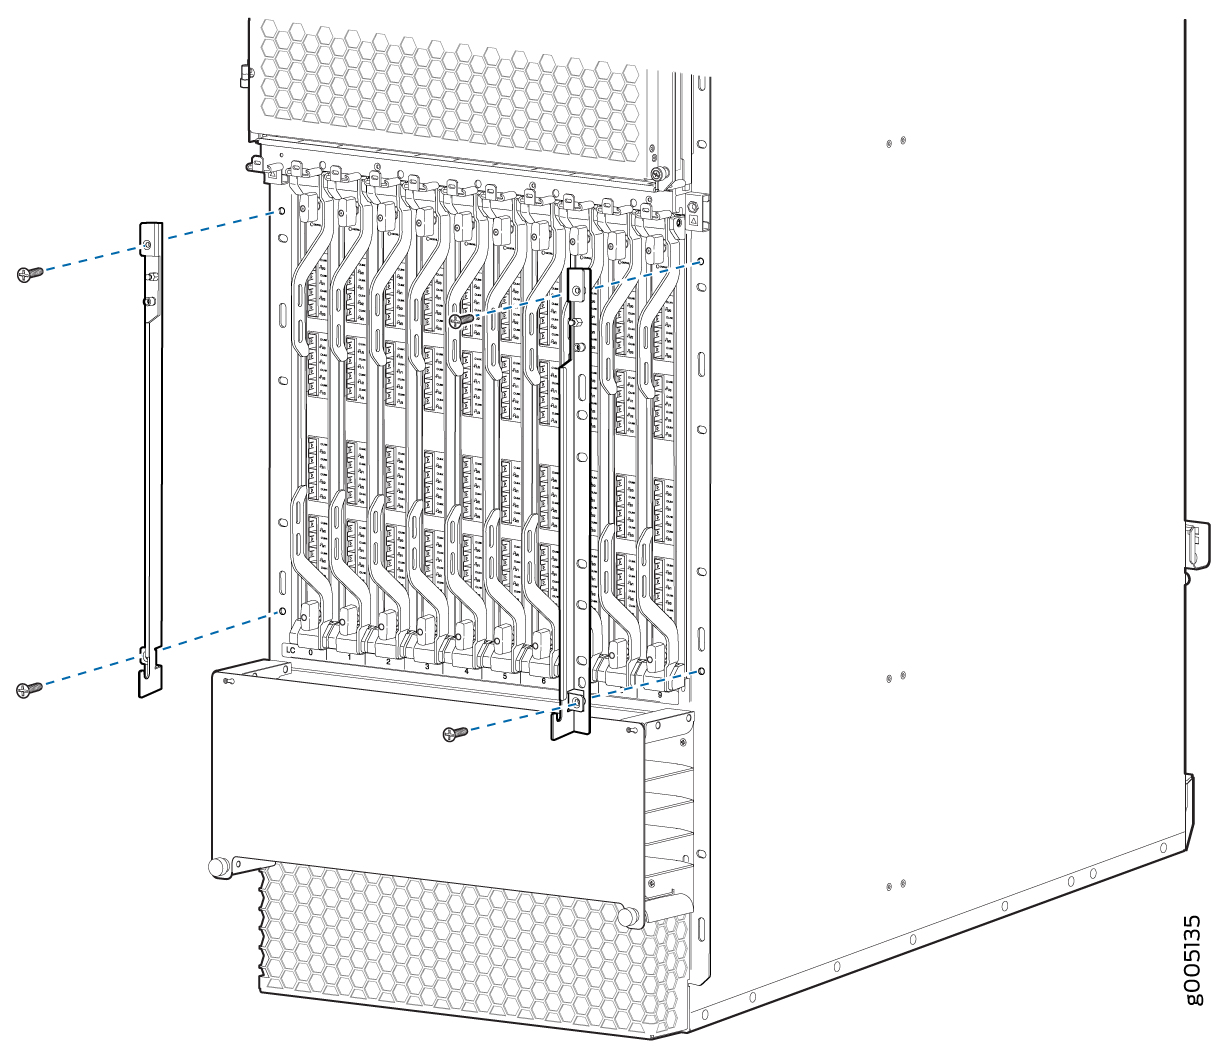
Figure 2: Installing the Extended EMI Card Cage CoverInstalling the Extended EMI Card Cage CoverInstalling the Extended EMI Card Cage Cover