Help us improve your experience.

Let us know what you think.

Do you have time for a two-minute survey?


Using the Router Transport Kit to Install the MX2010 Router in an Open-Frame Rack

Note:

Four persons are needed to install the router into a rack.

CAUTION:

Before front-mounting the router in a rack, have a qualified technician verify that the rack is strong enough to support the router's weight and is adequately supported at the installation site.

To install the MX2010 in an open-frame rack by using a router transport kit:

  1. Using the router transport platform, position the router in front of the rack or cabinet, centering it in front of the rack.
  2. Using a four-person team, transport the router to the rack installation location and center it in front of the rack.
    Note:

    A minimum of 38 in. (96.5 cm) of clearance is required to roll the chassis sideways.

    Note:

    A minimum of 42 in. (106.7 cm) of circular space is required to rotate the chassis.

    Note:

    The router transport kit handles can be removed to accommodate aisle width.

  3. Adjust the height of the router by turning the handles clockwise until the router transport platform is approximately 0.75 in. above the bottom of the rack opening (see Figure 1).
    Note:

    Because of the short lift capability of the router transport kit, we recommend that you install the router on the bottom of the rack.

    Note:

    Make sure that the bubbles within the T-shaped levels are between the lines, indicating that the router is level.

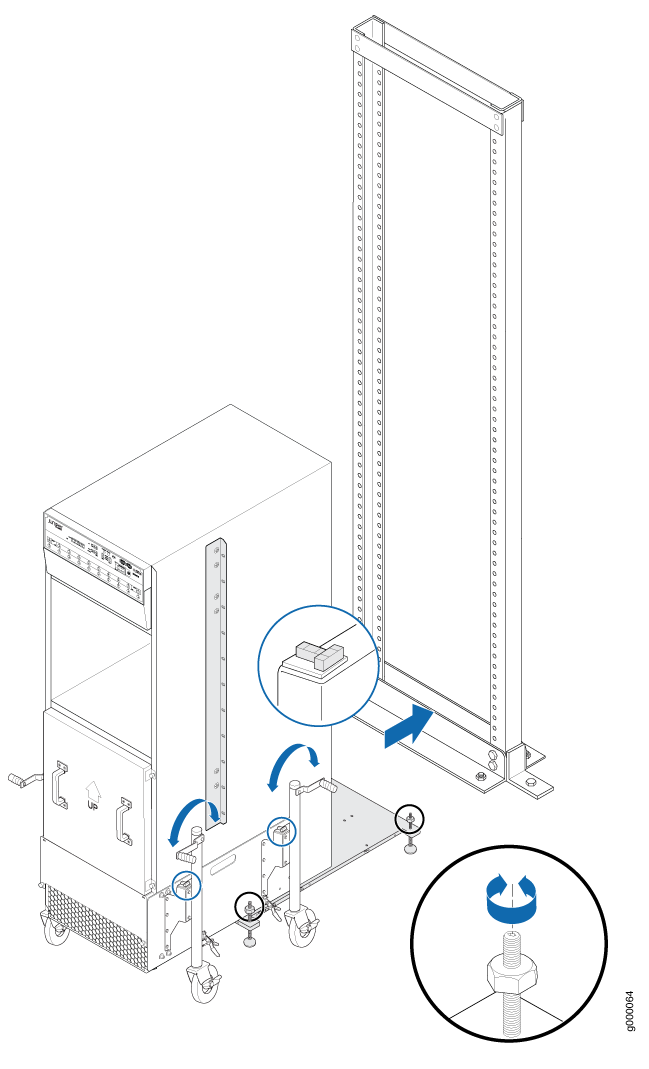
  4. Adjust the four leveling mounts on the router transport platform until all four leveling mounts rest firmly on the ground (see Figure 1).
    Figure 1: Align the MX2010 Router with the RackAlign the MX2010 Router with the Rack
  5. Unlock the four toggle latches that secure the router transport platform to the router transport mounting plate and wheel assembly.
  6. Lift the wheels up by turning the handles counterclockwise so that the weight of the router is on the router transport platform.
  7. Using a number 3 Phillips screwdriver, loosen the captive screws that secure the router transport mounting plates and wheel assembly to the chassis, and set them aside (see Figure 2).
    Figure 2: Remove Router Transport Mounting Plate and Wheel AssemblyRemove Router Transport Mounting Plate and Wheel Assembly
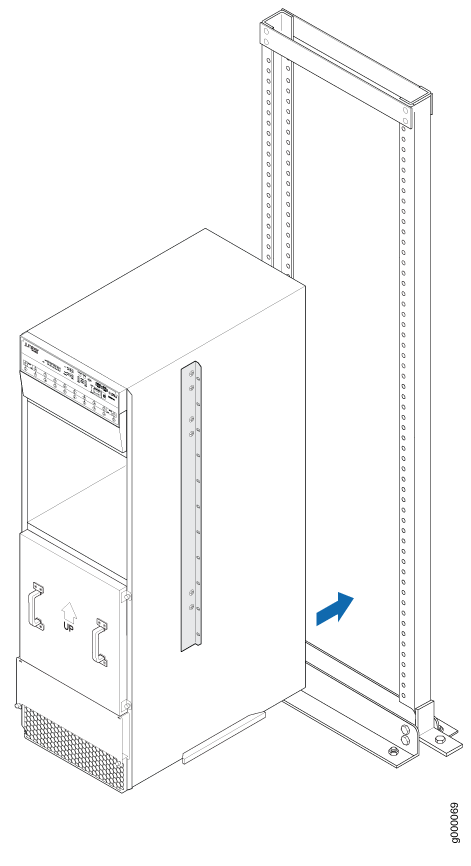
  8. Grasping the handles on the shipping covers, carefully slide the router into the rack until the center-mounting brackets contact the rack rails (see Figure 3).
    Figure 3: Sliding the MX2010 into the Open-Frame RackSliding the MX2010 into the Open-Frame Rack
    Note:

    A four-person team is needed to carefully guide the router into the rack.

    Note:

    There must be a minimum of 45-U of usable rack space when installing the MX2010 into a 45-U rack.

  9. Remove the router transport platform, and set the platform aside.
  10. Insert twelve mounting screws (six on each side) into the mounting holes to secure the router to the rack.
  11. Visually inspect the alignment of the router. To verify that the router is installed properly in the rack, see that all the mounting screws on one side of the rack are aligned with the mounting screws on the opposite side and the router is level.
  12. Reassemble the router transport kit, and set aside.