Help us improve your experience.

Let us know what you think.

Do you have time for a two-minute survey?


Installing an MX2010 Fan Tray

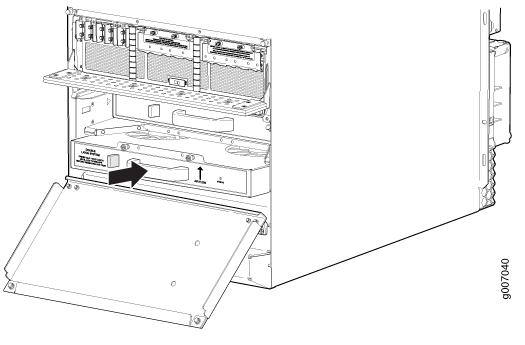
This topic describes how to install the upper or lower fan trays in a MX2010. This procedure applies to both the standard fan tray and the optimized power fan tray. To install the upper or lower fan tray (see Figure 1 and Figure 2):

  1. Attach an electrostatic discharge (ESD) grounding strap to your bare wrist, and connect the strap to one of the ESD points on the chassis.
  2. Reposition the DC cable manager, if necessary, before installing the upper or lower fan tray:
    • Unwrap any cables on the DC cable manager and remove the cables from the tray. Arrange the cables so that they do not block the front of the cable manager, and tray and secure them with temporary fasteners so that they are not supporting their own weight as they hang from the connector.

  3. Loosen the two captive screws on the access panel and open.
  4. Remove the fan tray from the antistatic mat or ESD bag.
  5. Grasp the fan tray by the handle, and place one hand under the fan tray for support. Insert the fan tray partially into the chassis while pressing the latch.
    Note:

    When inserting the fan tray, observe the correct orientation by the "this side up" label on the fan tray.

  6. Press and hold the latch again while carefully pushing the fan tray into the chassis.
    Note:

    The fan tray has a double-locking safety mechanism that allows you to safely install the fan tray in a two-stage process.

  7. Tighten the two captive screws on the fan tray faceplate.
  8. Close the access panel and secure the two captive screws on either side of the access panel.
  9. Reinstall the DC cable manager back into position, if necessary.
Figure 1: Installing Upper Fan TraysInstalling Upper Fan Trays

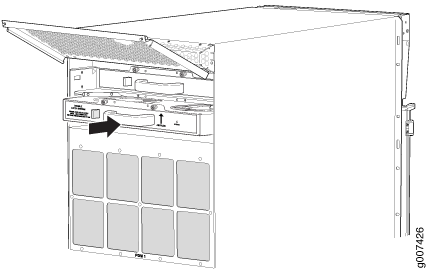
Figure 2: Installing Lower Fan TraysInstalling Lower Fan Trays