Installing the MX2010 Craft Interface
Here’s how to install the MX2010 craft interface:
- Attach an electrostatic discharge (ESD) grounding strap to your bare wrist, and connect the strap to one of the ESD points on the chassis.
- Grasp the craft interface with one hand, and hold the bottom edge of the craft interface with the other hand to support its weight.
- Orient the ribbon cable so that it plugs into the connector socket. The connector is keyed and can be inserted only one way. The pin on the right side of the craft interface indicates the positioning.
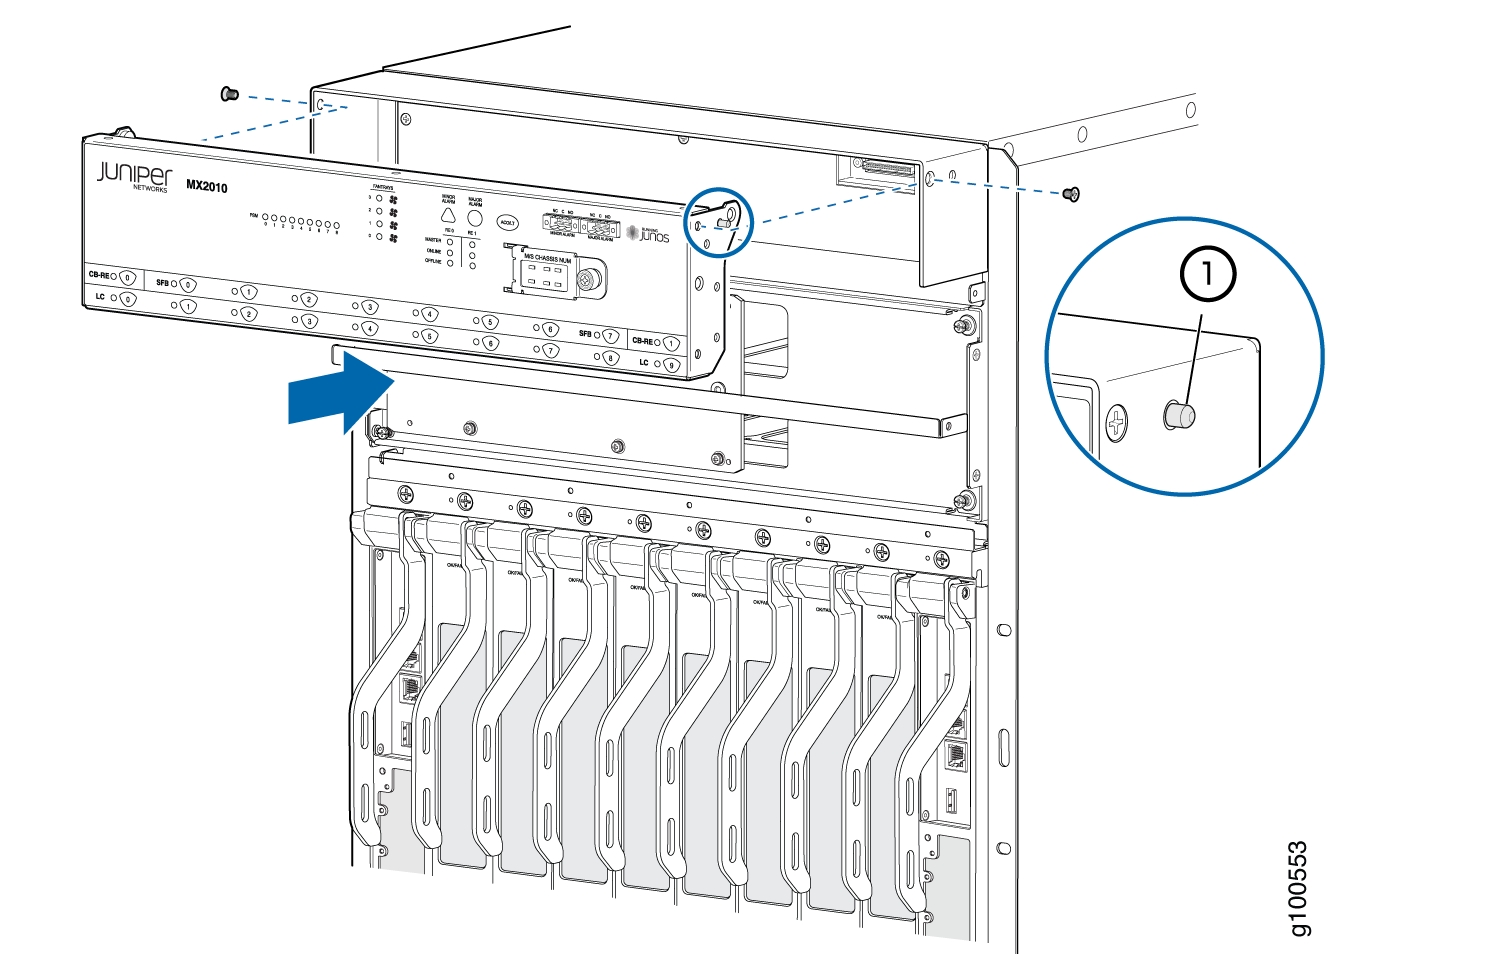
- Align the pin on the right side of the craft interface
with the dedicated hole in the housing and gently slide the craft
interface into the housing. See Figure 1.Figure 1: Installing the Craft Interface into the Housing
- Reattach the craft interface faceplate by positioning it in place and then tightening the two screws on the left and right sides using the Torx (T10) screwdriver.
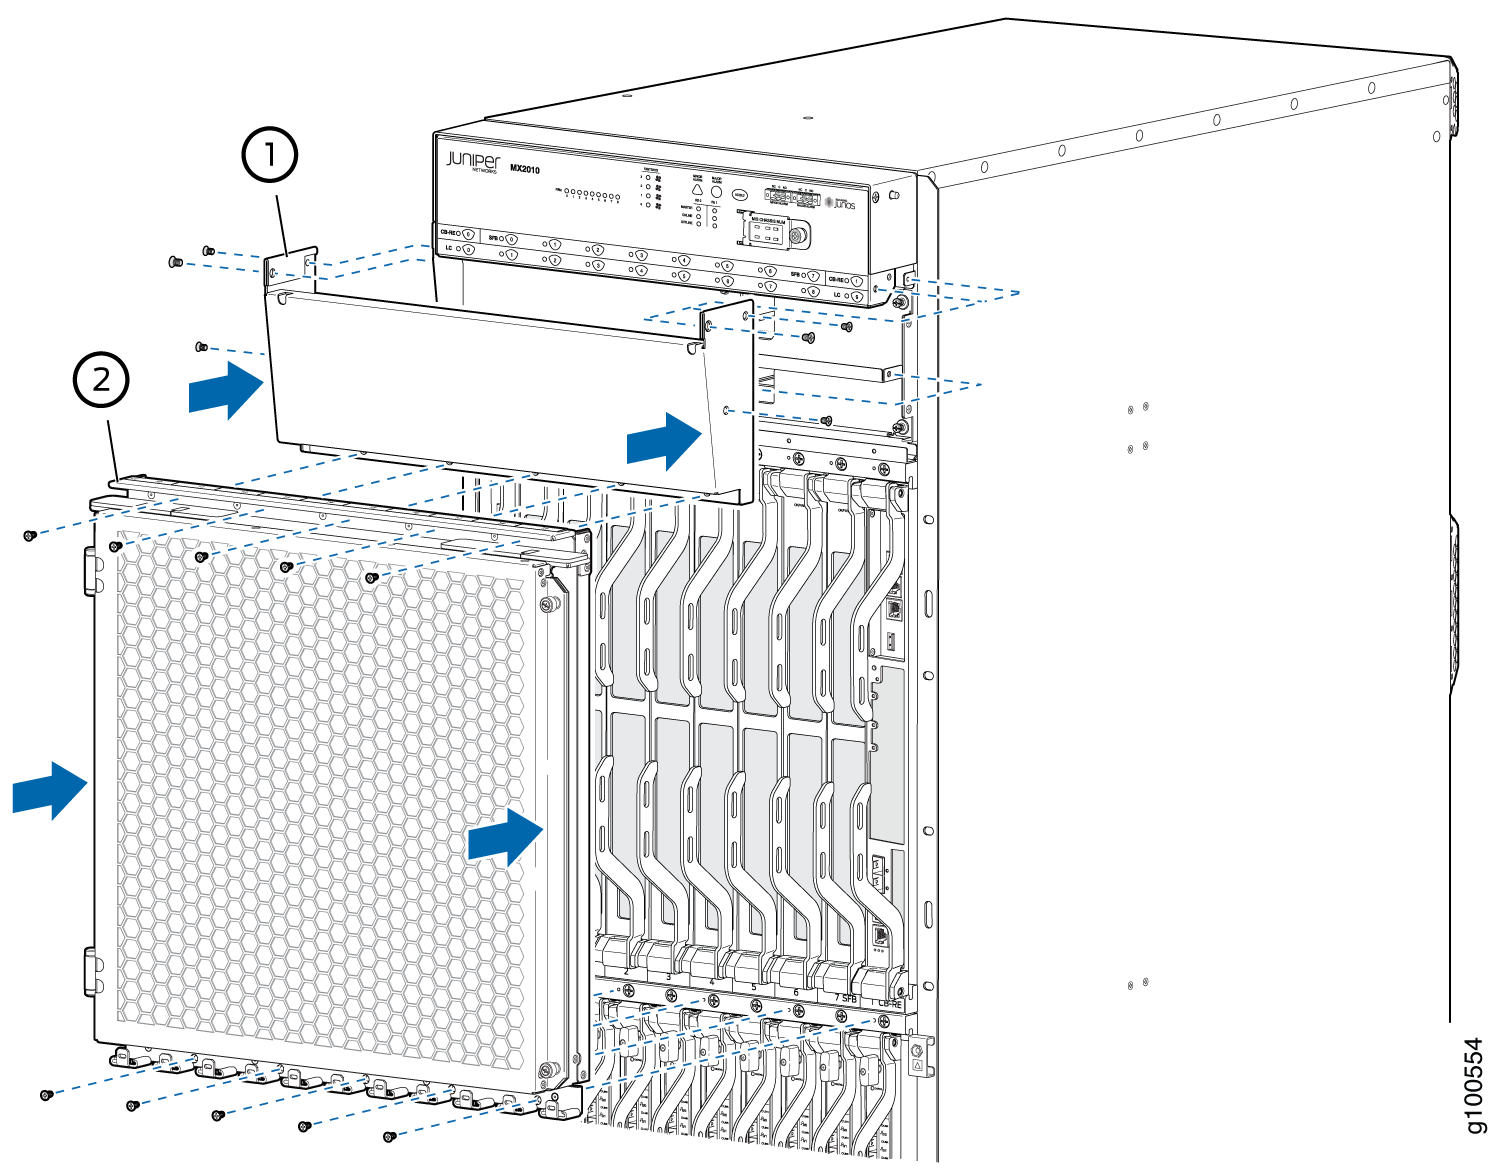
- Reattach the sheet metal cover and EMI door by positioning
them in place and then tightening the screws using a Torx (T10) screwdriver.
See Figure 2.Figure 2: Reattaching the Sheet Metal Cover and EMI Door
- Reattach any external devices connected to the craft interface.