Help us improve your experience.

Let us know what you think.

Do you have time for a two-minute survey?


Reseat the Storage Drive

The storage drives on the ME-X6 are not field-replaceable components. If the storage drive on your device needs to be replaced, follow the Return Material Authorization (RMA) procedure.

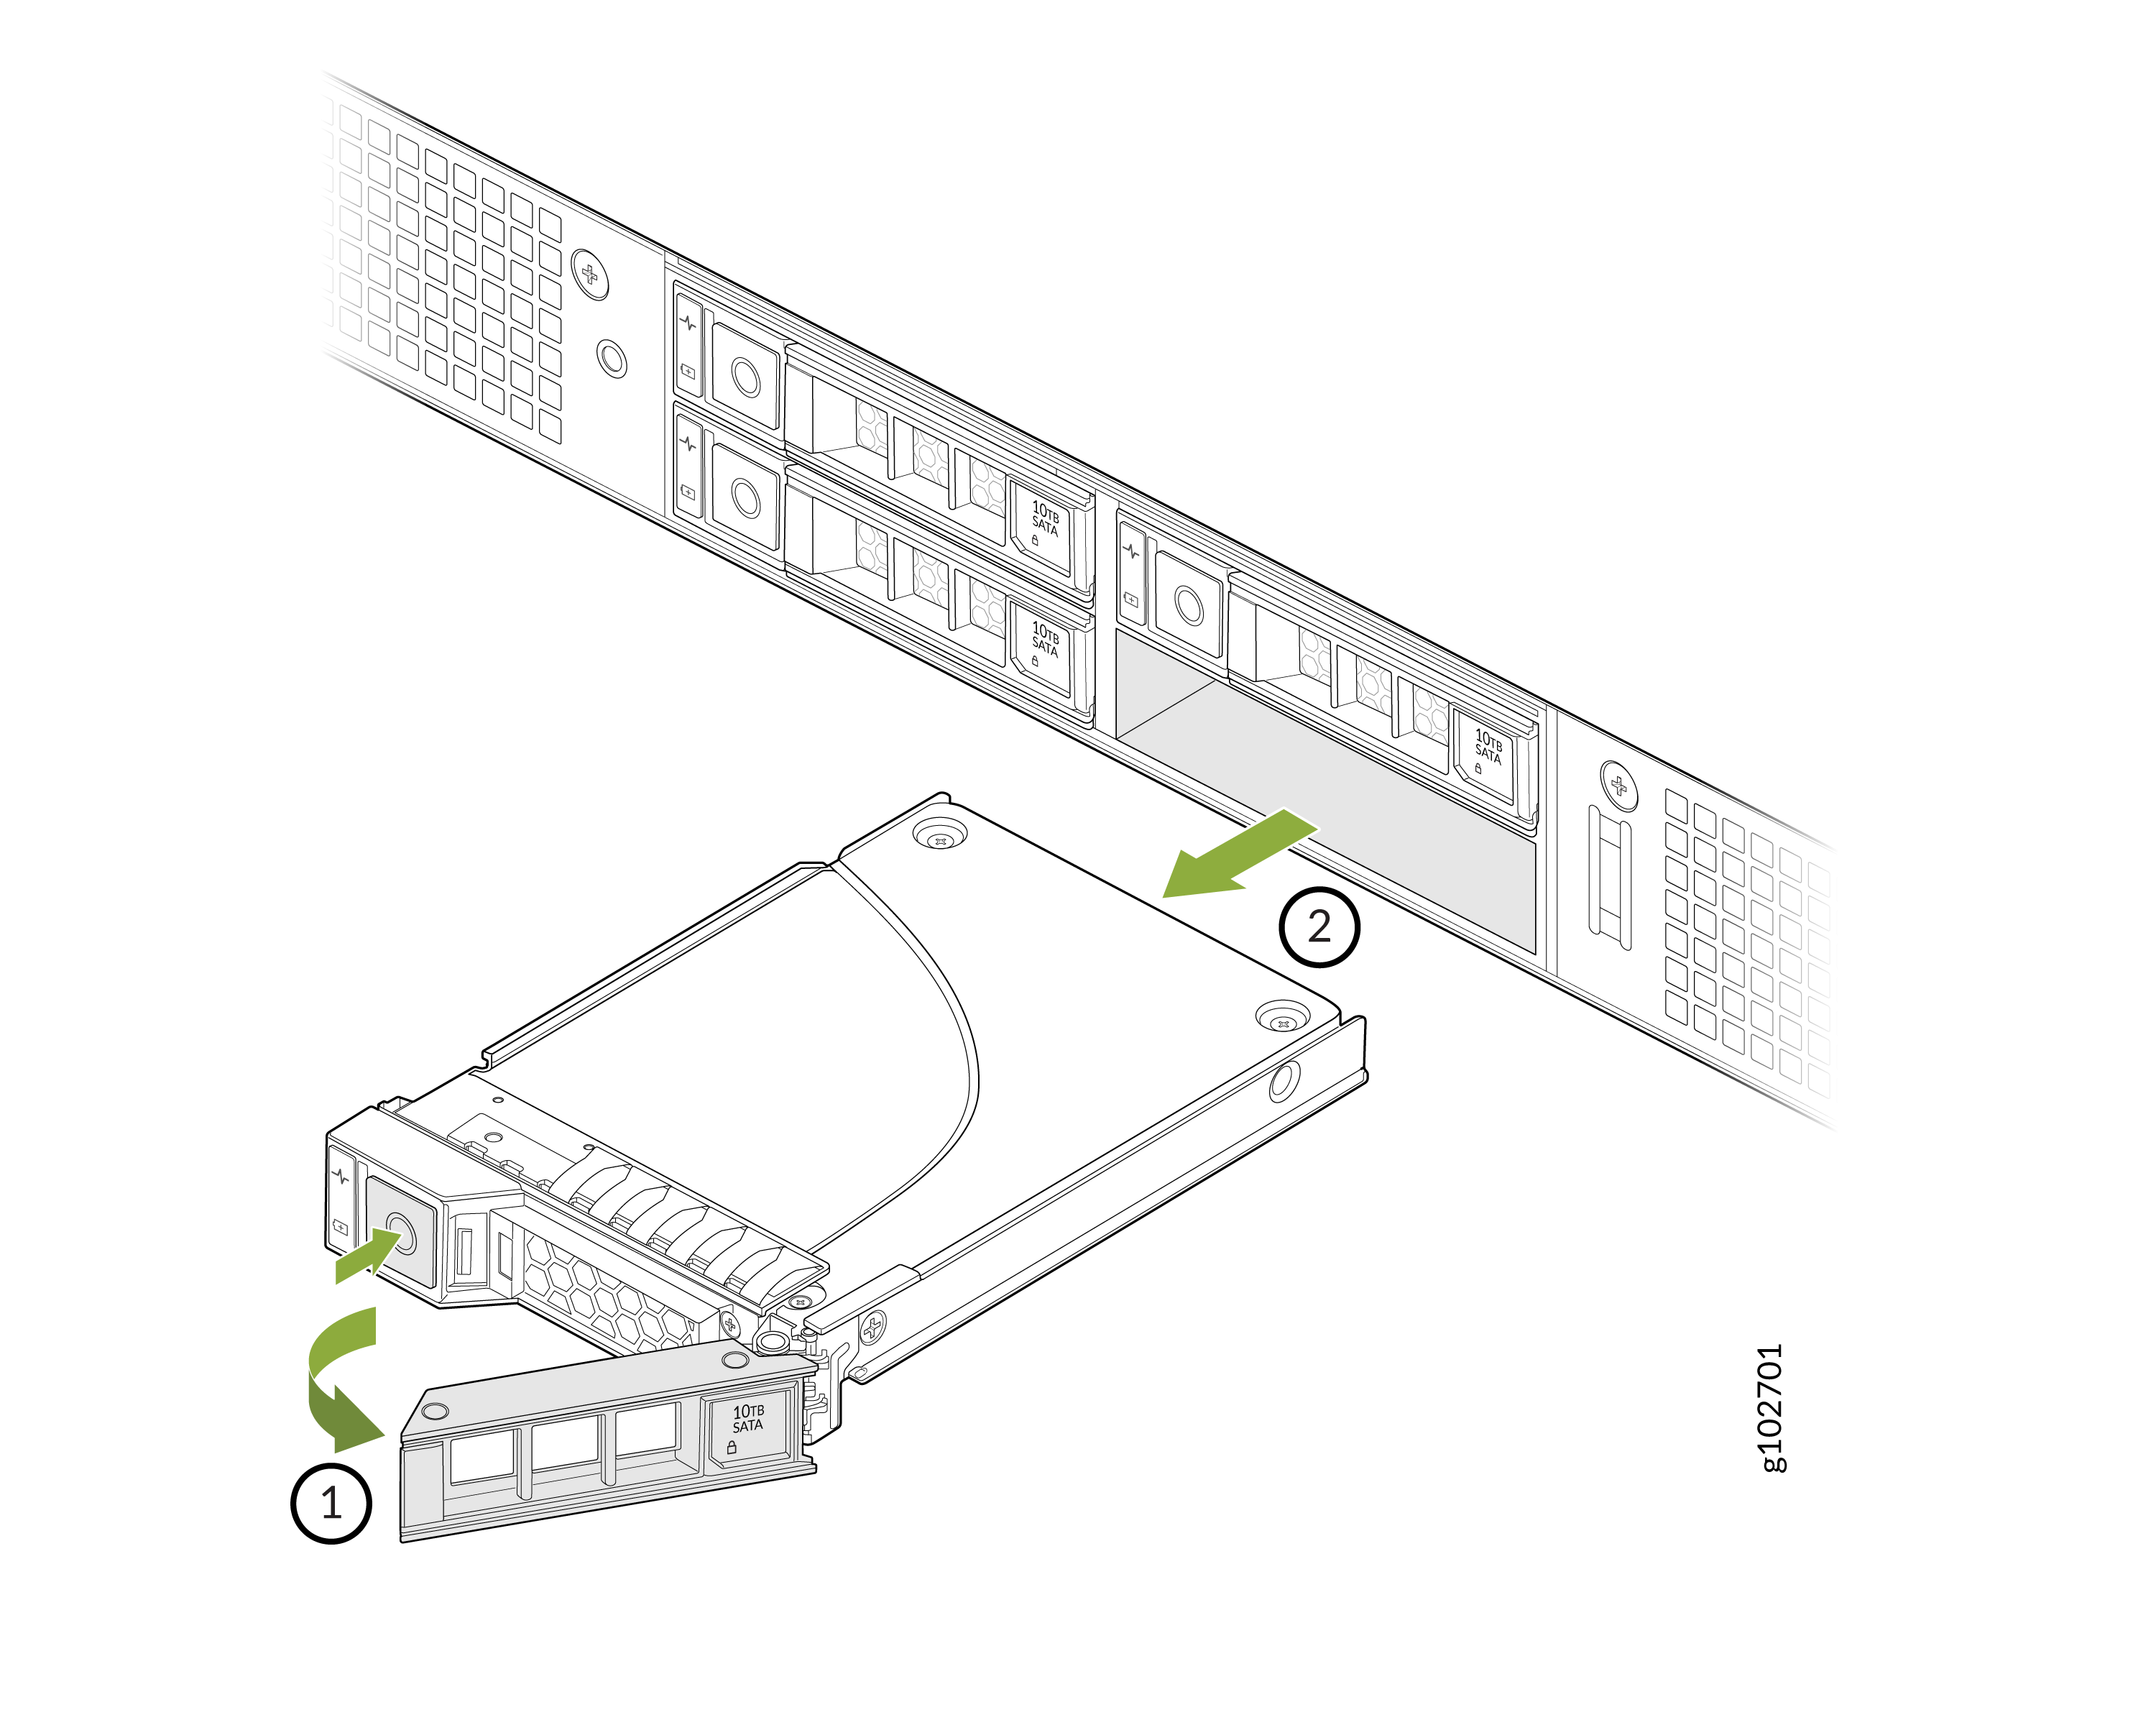
Remove a Storage Drive

Remove the front bezel before accessing the storage drives.

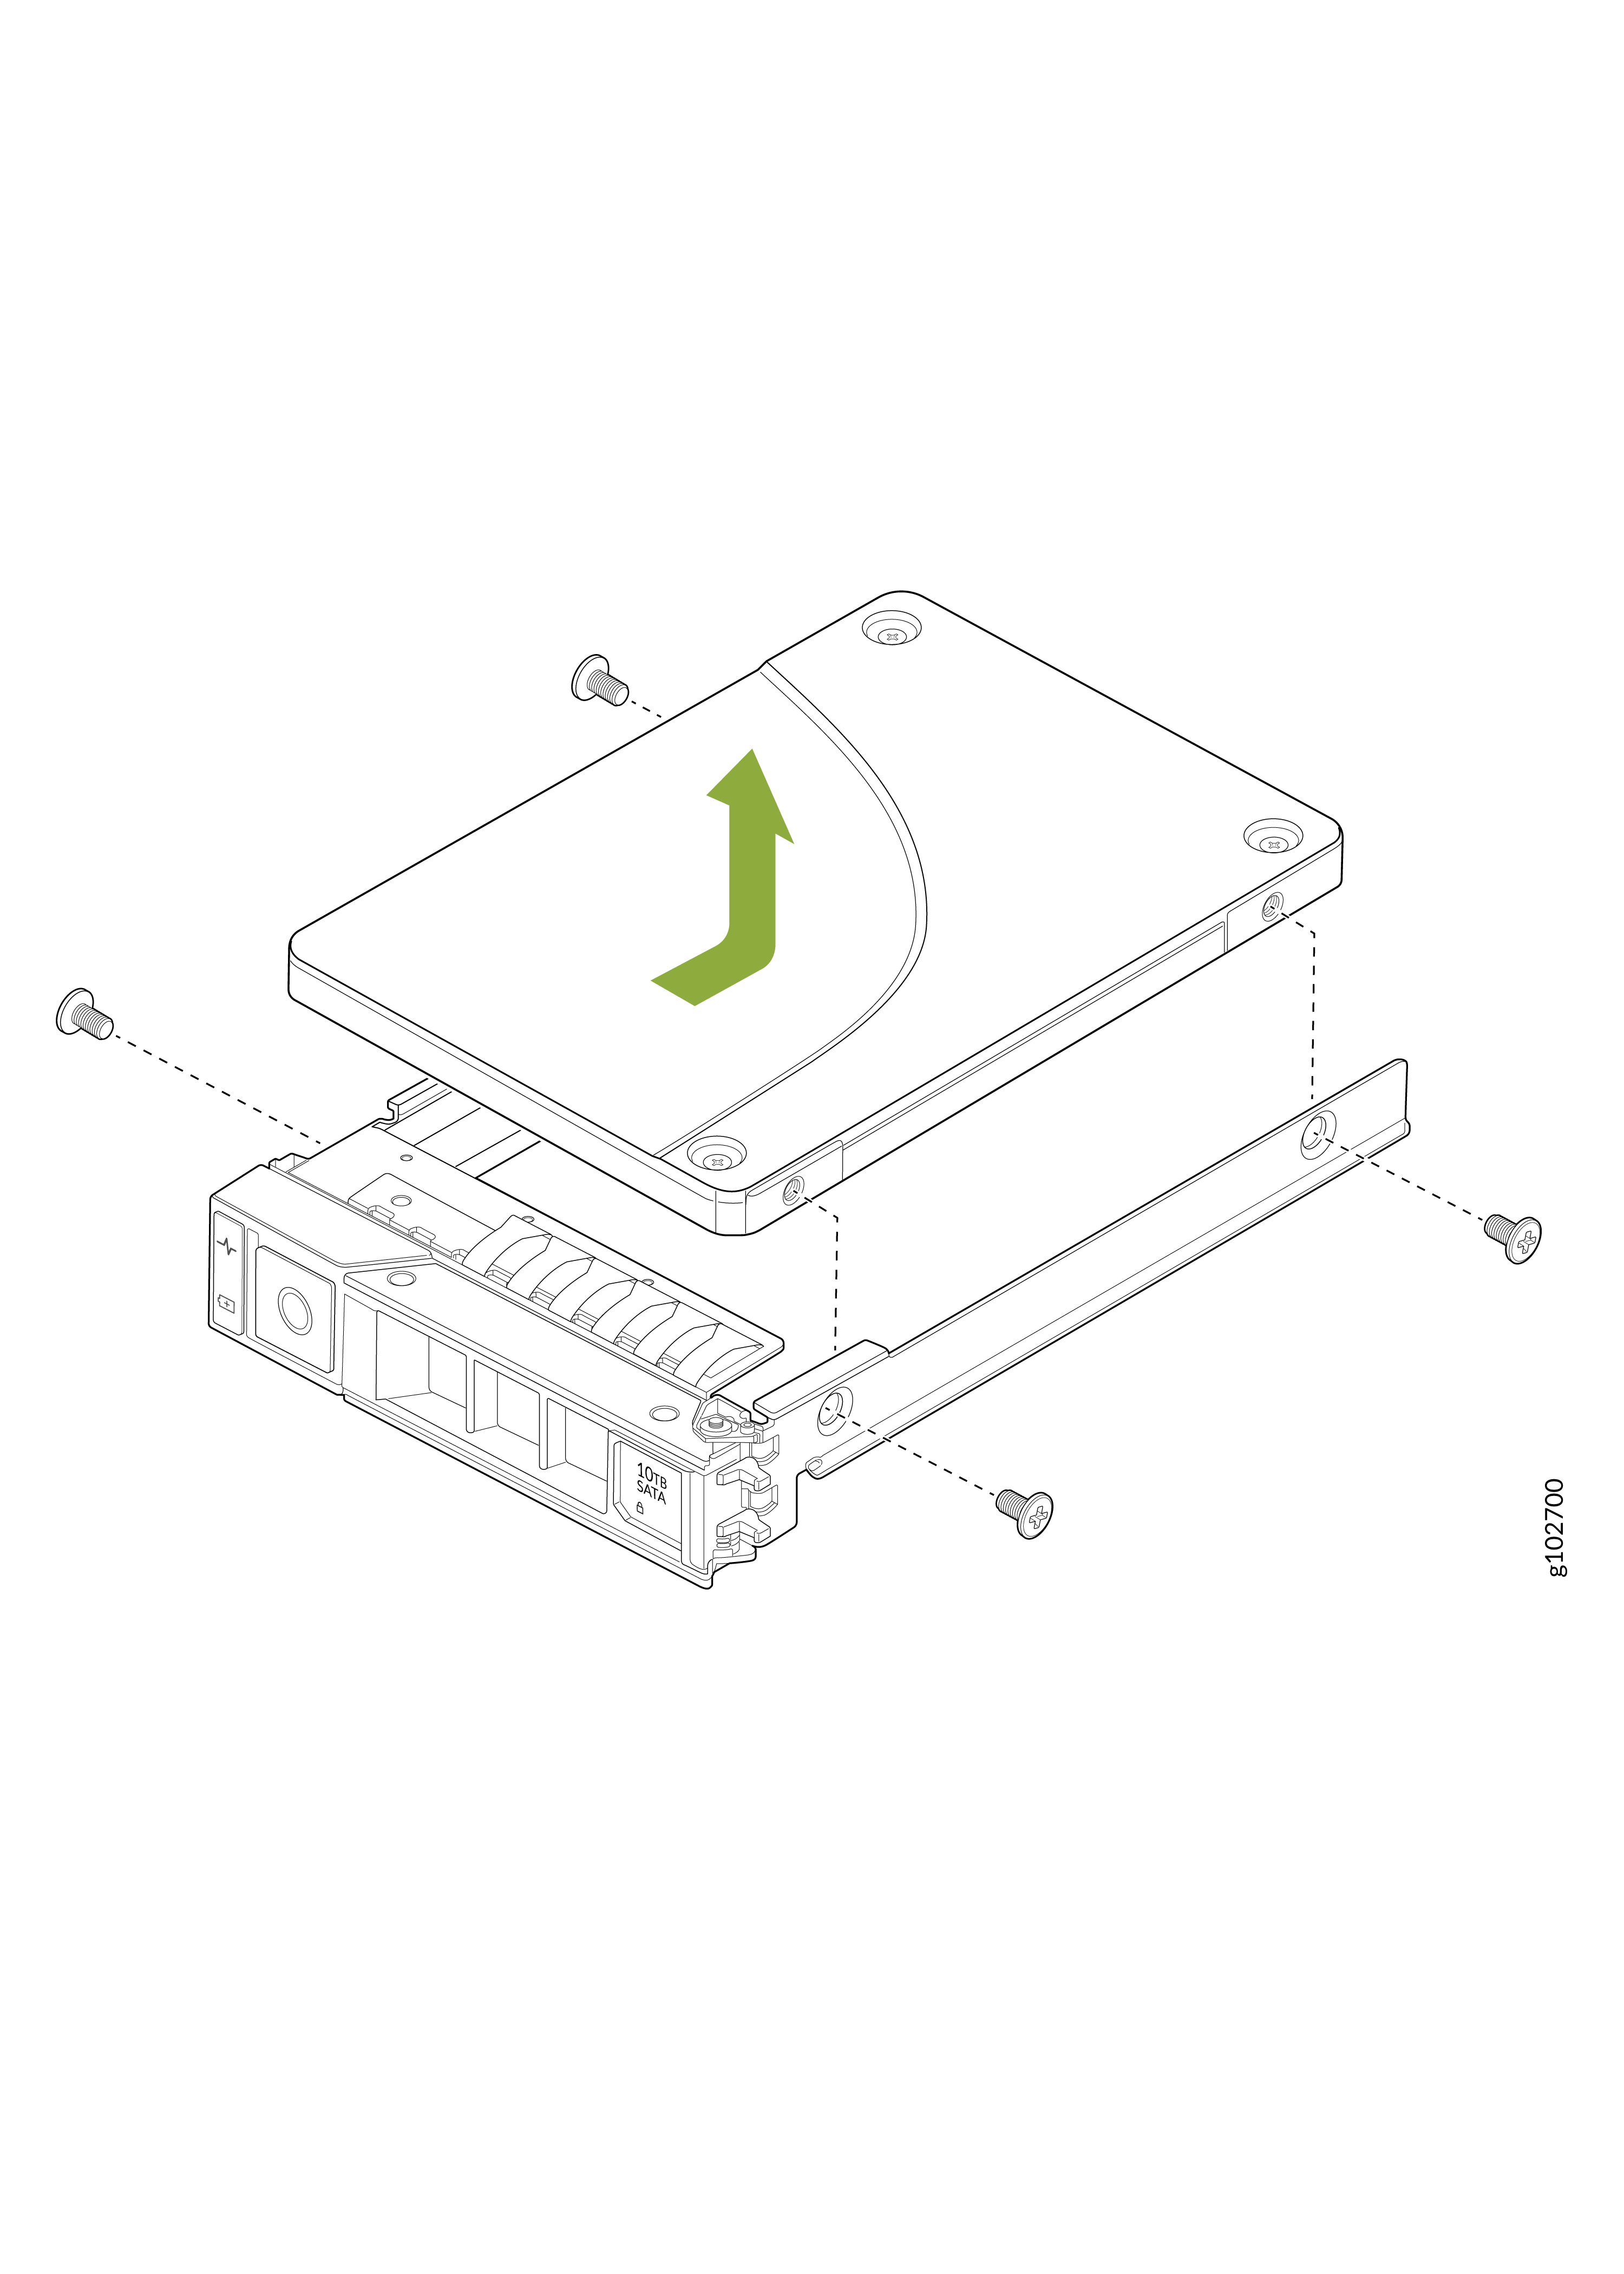
To remove the drive carrier and storage drive:
  1. Prepare the drive for removal using the management software.
    Ensure that the drive indicators are off before removing the drive.
  2. Press the release button to open the drive carrier release handle.
  3. Hold the drive carrier release handle and slide the drive carrier out of the slot.
    Inserting a hard drive into a server; hard drive with handle aligned into drive bay, steps shown with numbered arrows.
  4. Remove the screws from each of the sliding rails on the drive carrier using a screwdriver.
  5. Lift the drive out of the drive carrier.
    Exploded diagram showing hard drive installation in a tray; green arrow indicates lifting direction; includes screws and brackets.

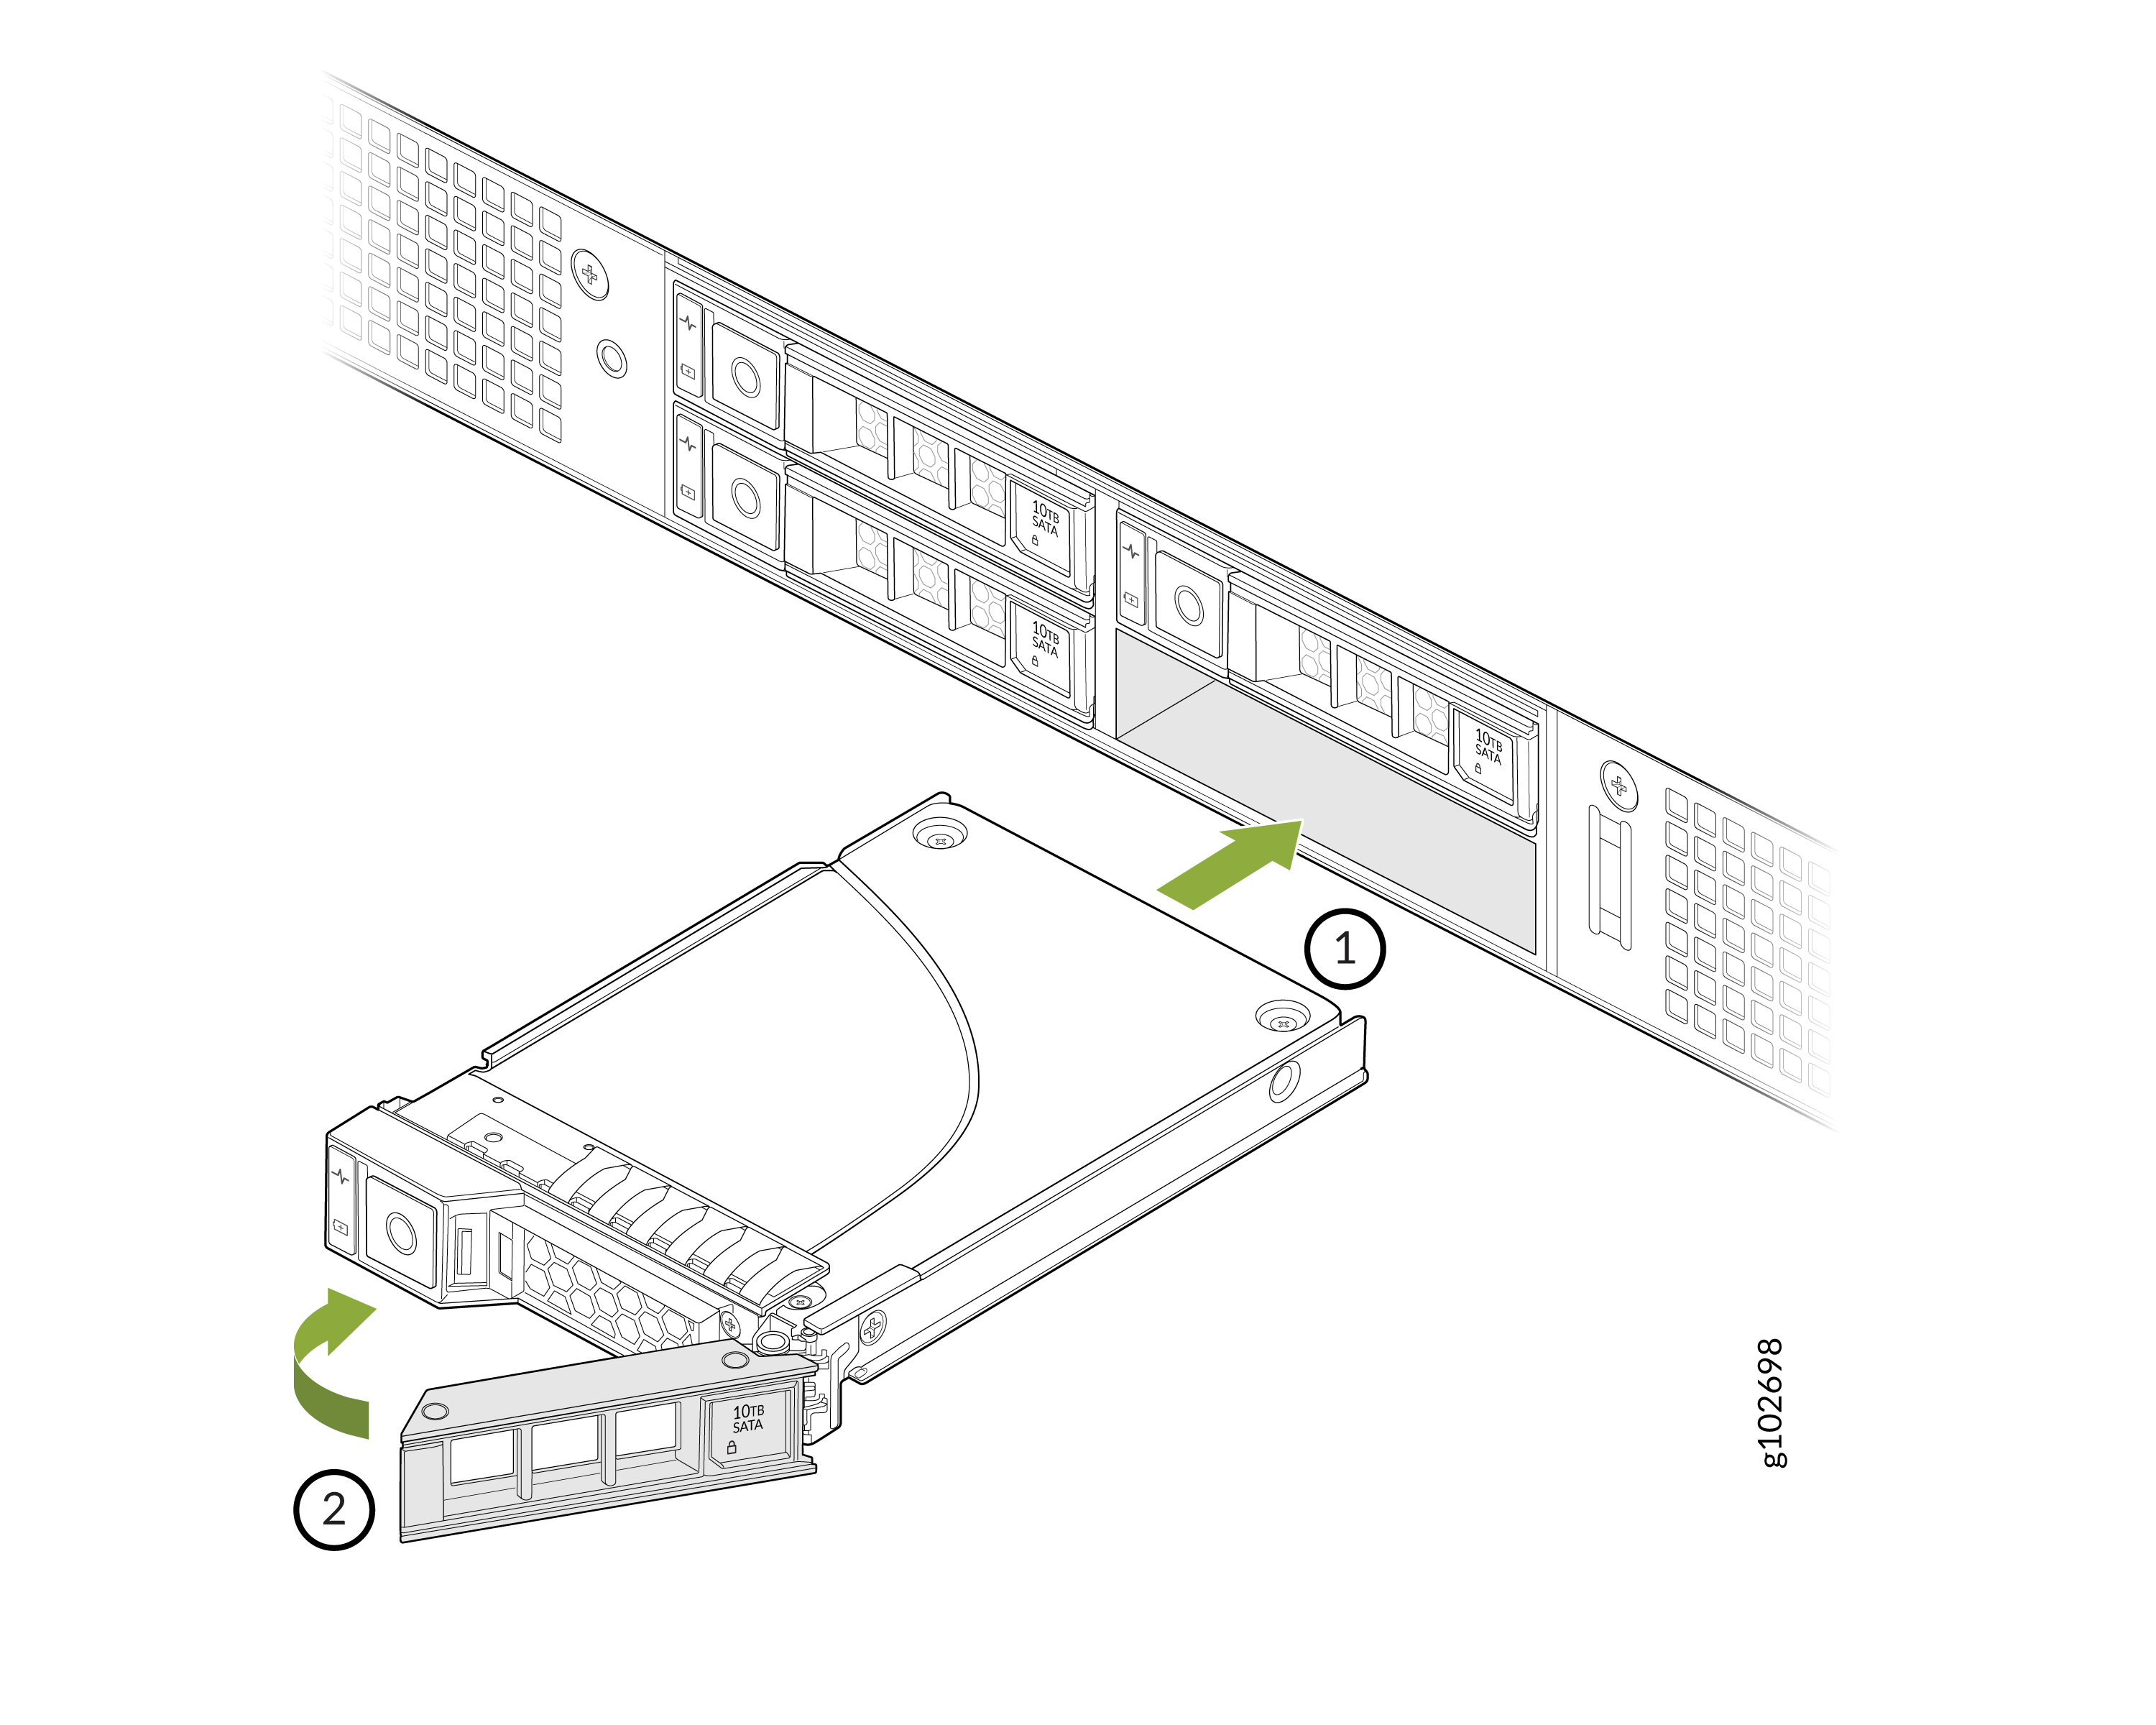
Install a Storage Drive

Remove the front bezel to access the storage drives.

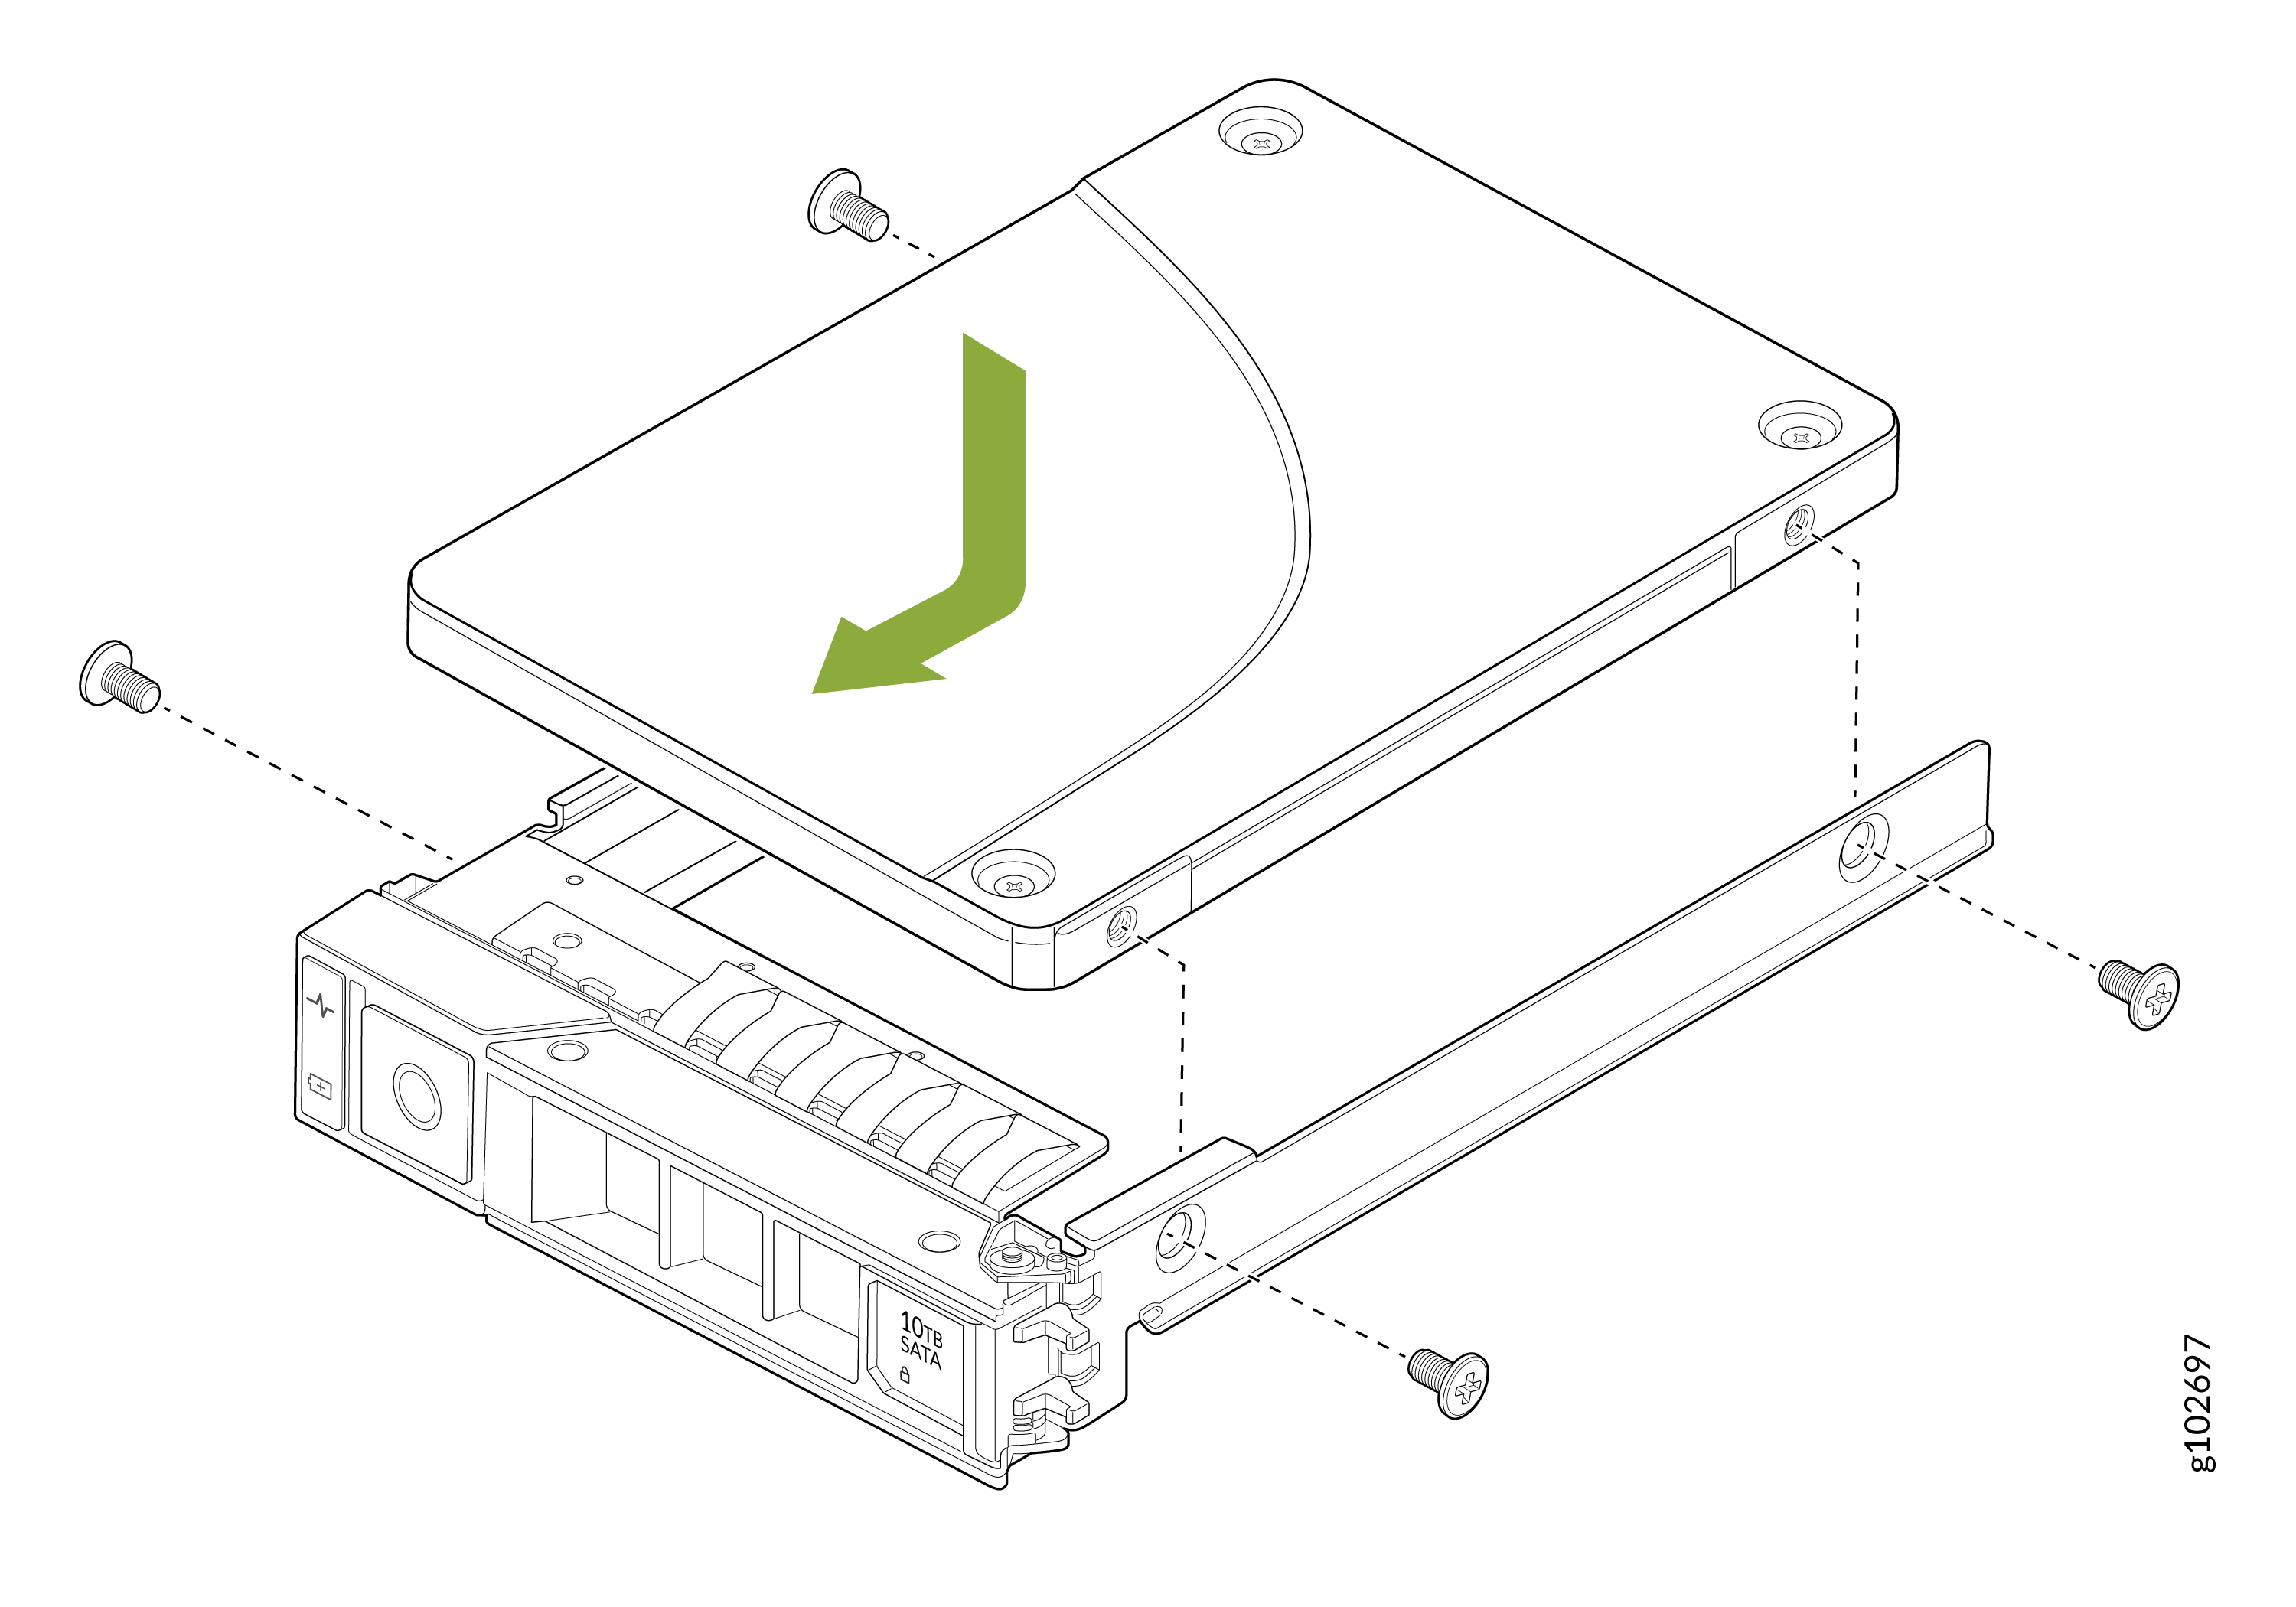
To install the drive carrier and storage drive:
  1. Insert the drive into the drive carrier with the drive connector facing toward the rear of the carrier.
  2. Align the screw holes on the drive with the screw holes on the drive carrier. Using a screwdriver, secure the drive to the drive carrier with screws.
    Installing a 10TB SATA hard drive into a tray with screws and a green arrow indicating alignment direction.
  3. Slide the drive carrier into the drive slot.
  4. Close the drive carrier release handle to lock the drive in place.
    Installing or removing a 10TB SATA hard drive in a server. Step 1: Align drive with bay. Step 2: Open or close latch to secure.