Help us improve your experience.

Let us know what you think.

Do you have time for a two-minute survey?


Replace the Front Bezel

Remove the Front Bezel

To remove the front bezel:
  1. Insert the bezel key into the slot on the front bezel and rotate the key clockwise to unlock the bezel.
  2. Press the release button to release the bezel.
  3. Remove the left end of the bezel.
  4. Slide the bezel to the left to release the right end of the bezel and remove the bezel.
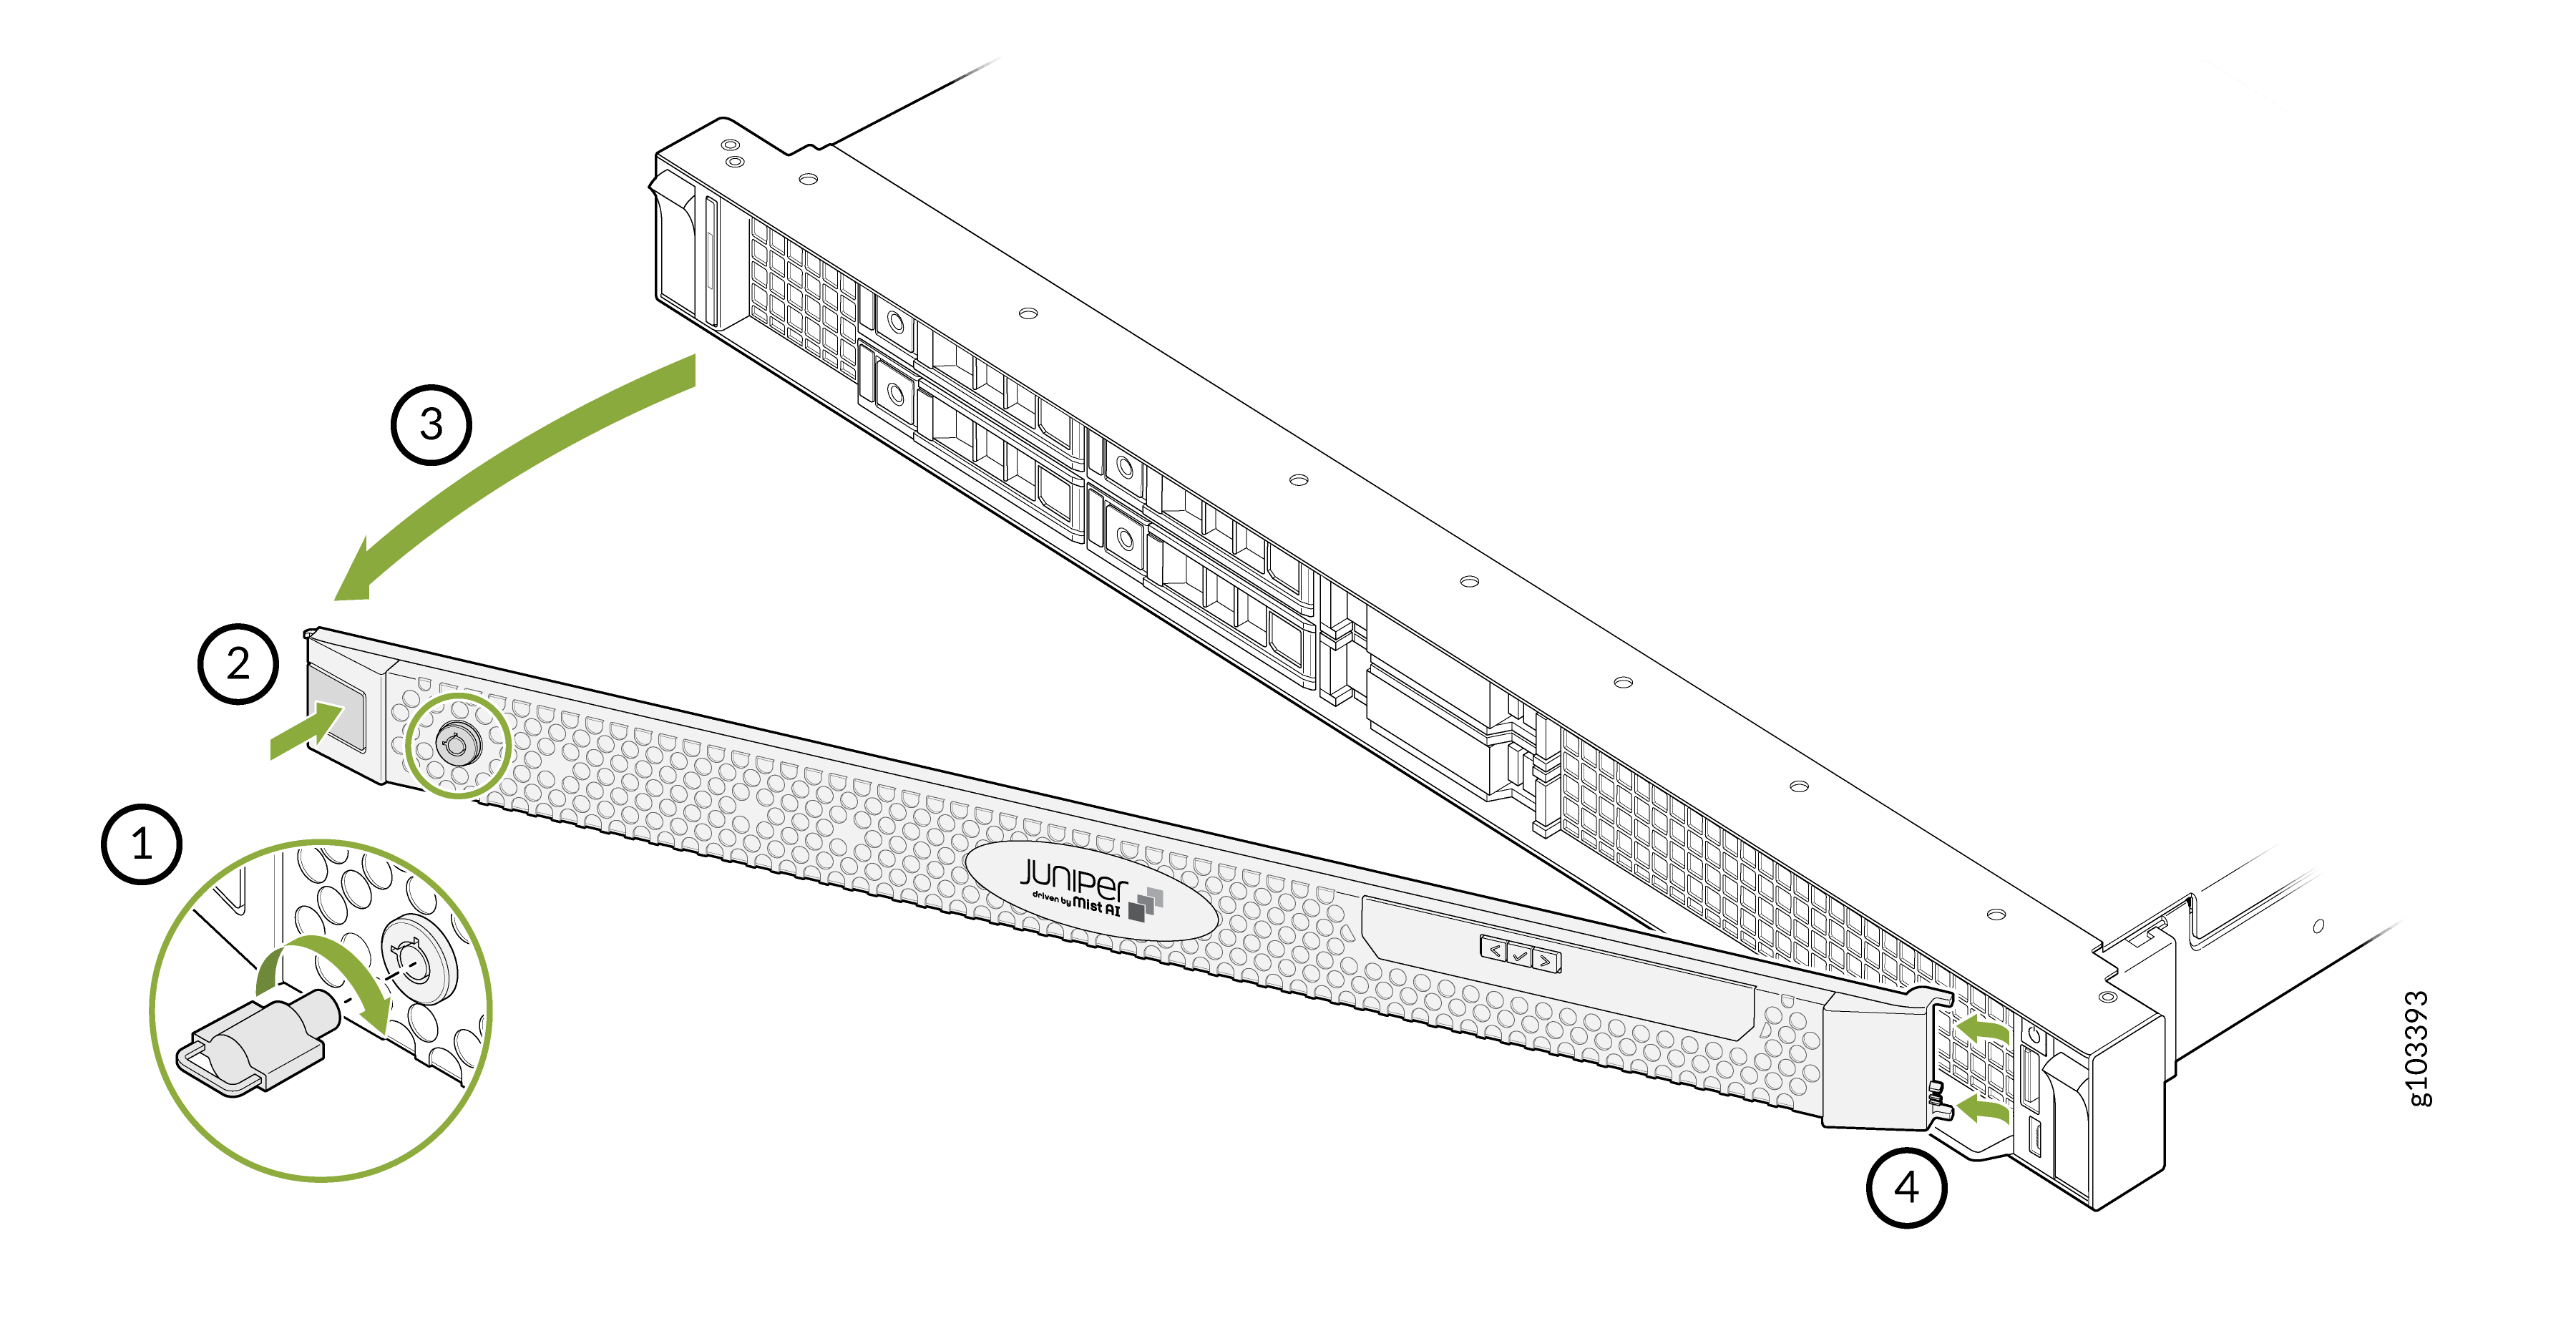
    Removing or installing a front panel on a Juniper device with steps to disengage latch, loosen screw, pull panel, and align points.

Install the Front Bezel

To install the front bezel:
  1. Align the tabs on the right end of the bezel and insert the tabs into the slots on the front panel.
  2. Press the left end of the bezel on to the front panel. You should hear a click when it locks into place.
  3. Insert the bezel key into the slot on the bezel. Rotate the key counterclockwise to lock the bezel.
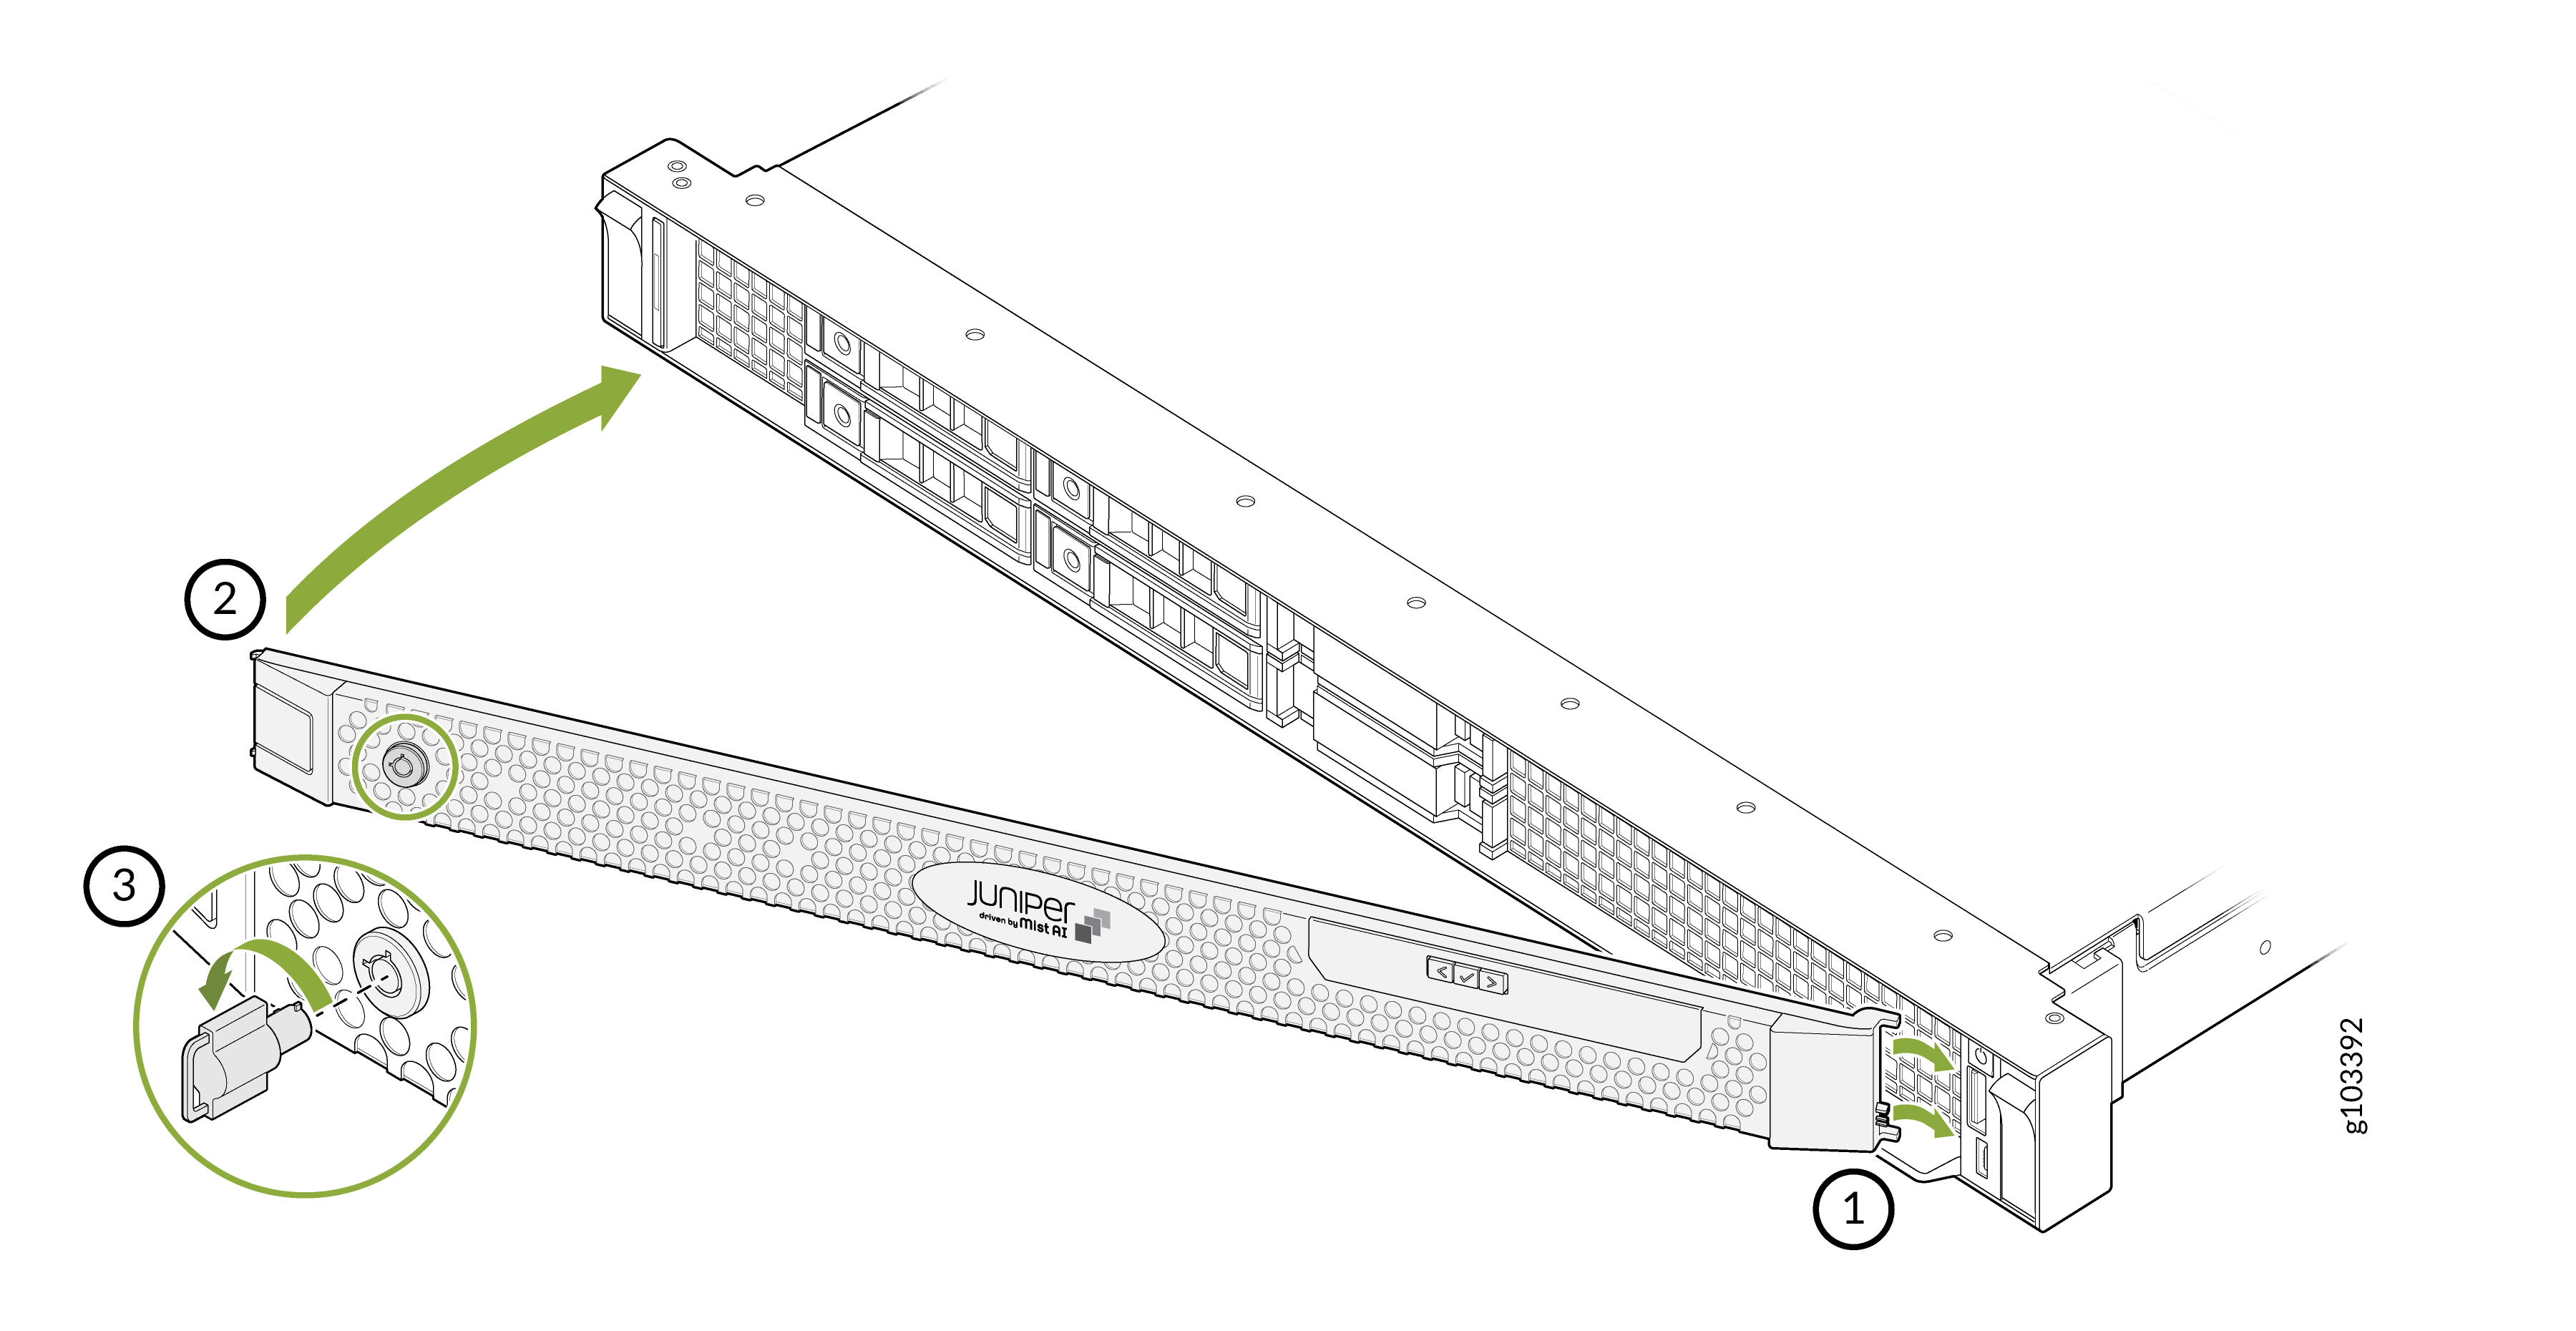
    Removing or installing the front panel of a Juniper Networks device in three steps: releasing latches, pulling the panel away, and a close-up of the latch mechanism.