Help us improve your experience.

Let us know what you think.

Do you have time for a two-minute survey?


Reseat the Fan

CAUTION:

The fans on the ME-X1-M are not field-replaceable components. If the fan on your device needs to be replaced, follow the Return Material Authorization (RMA) procedure.

Remove the Fan

Before you begin, remove the cover panel as described in Remove the Cover Panel.

To remove the fan:
  1. Remove the air shroud. Hold the air shroud at both ends and carefully lift it out of the system.
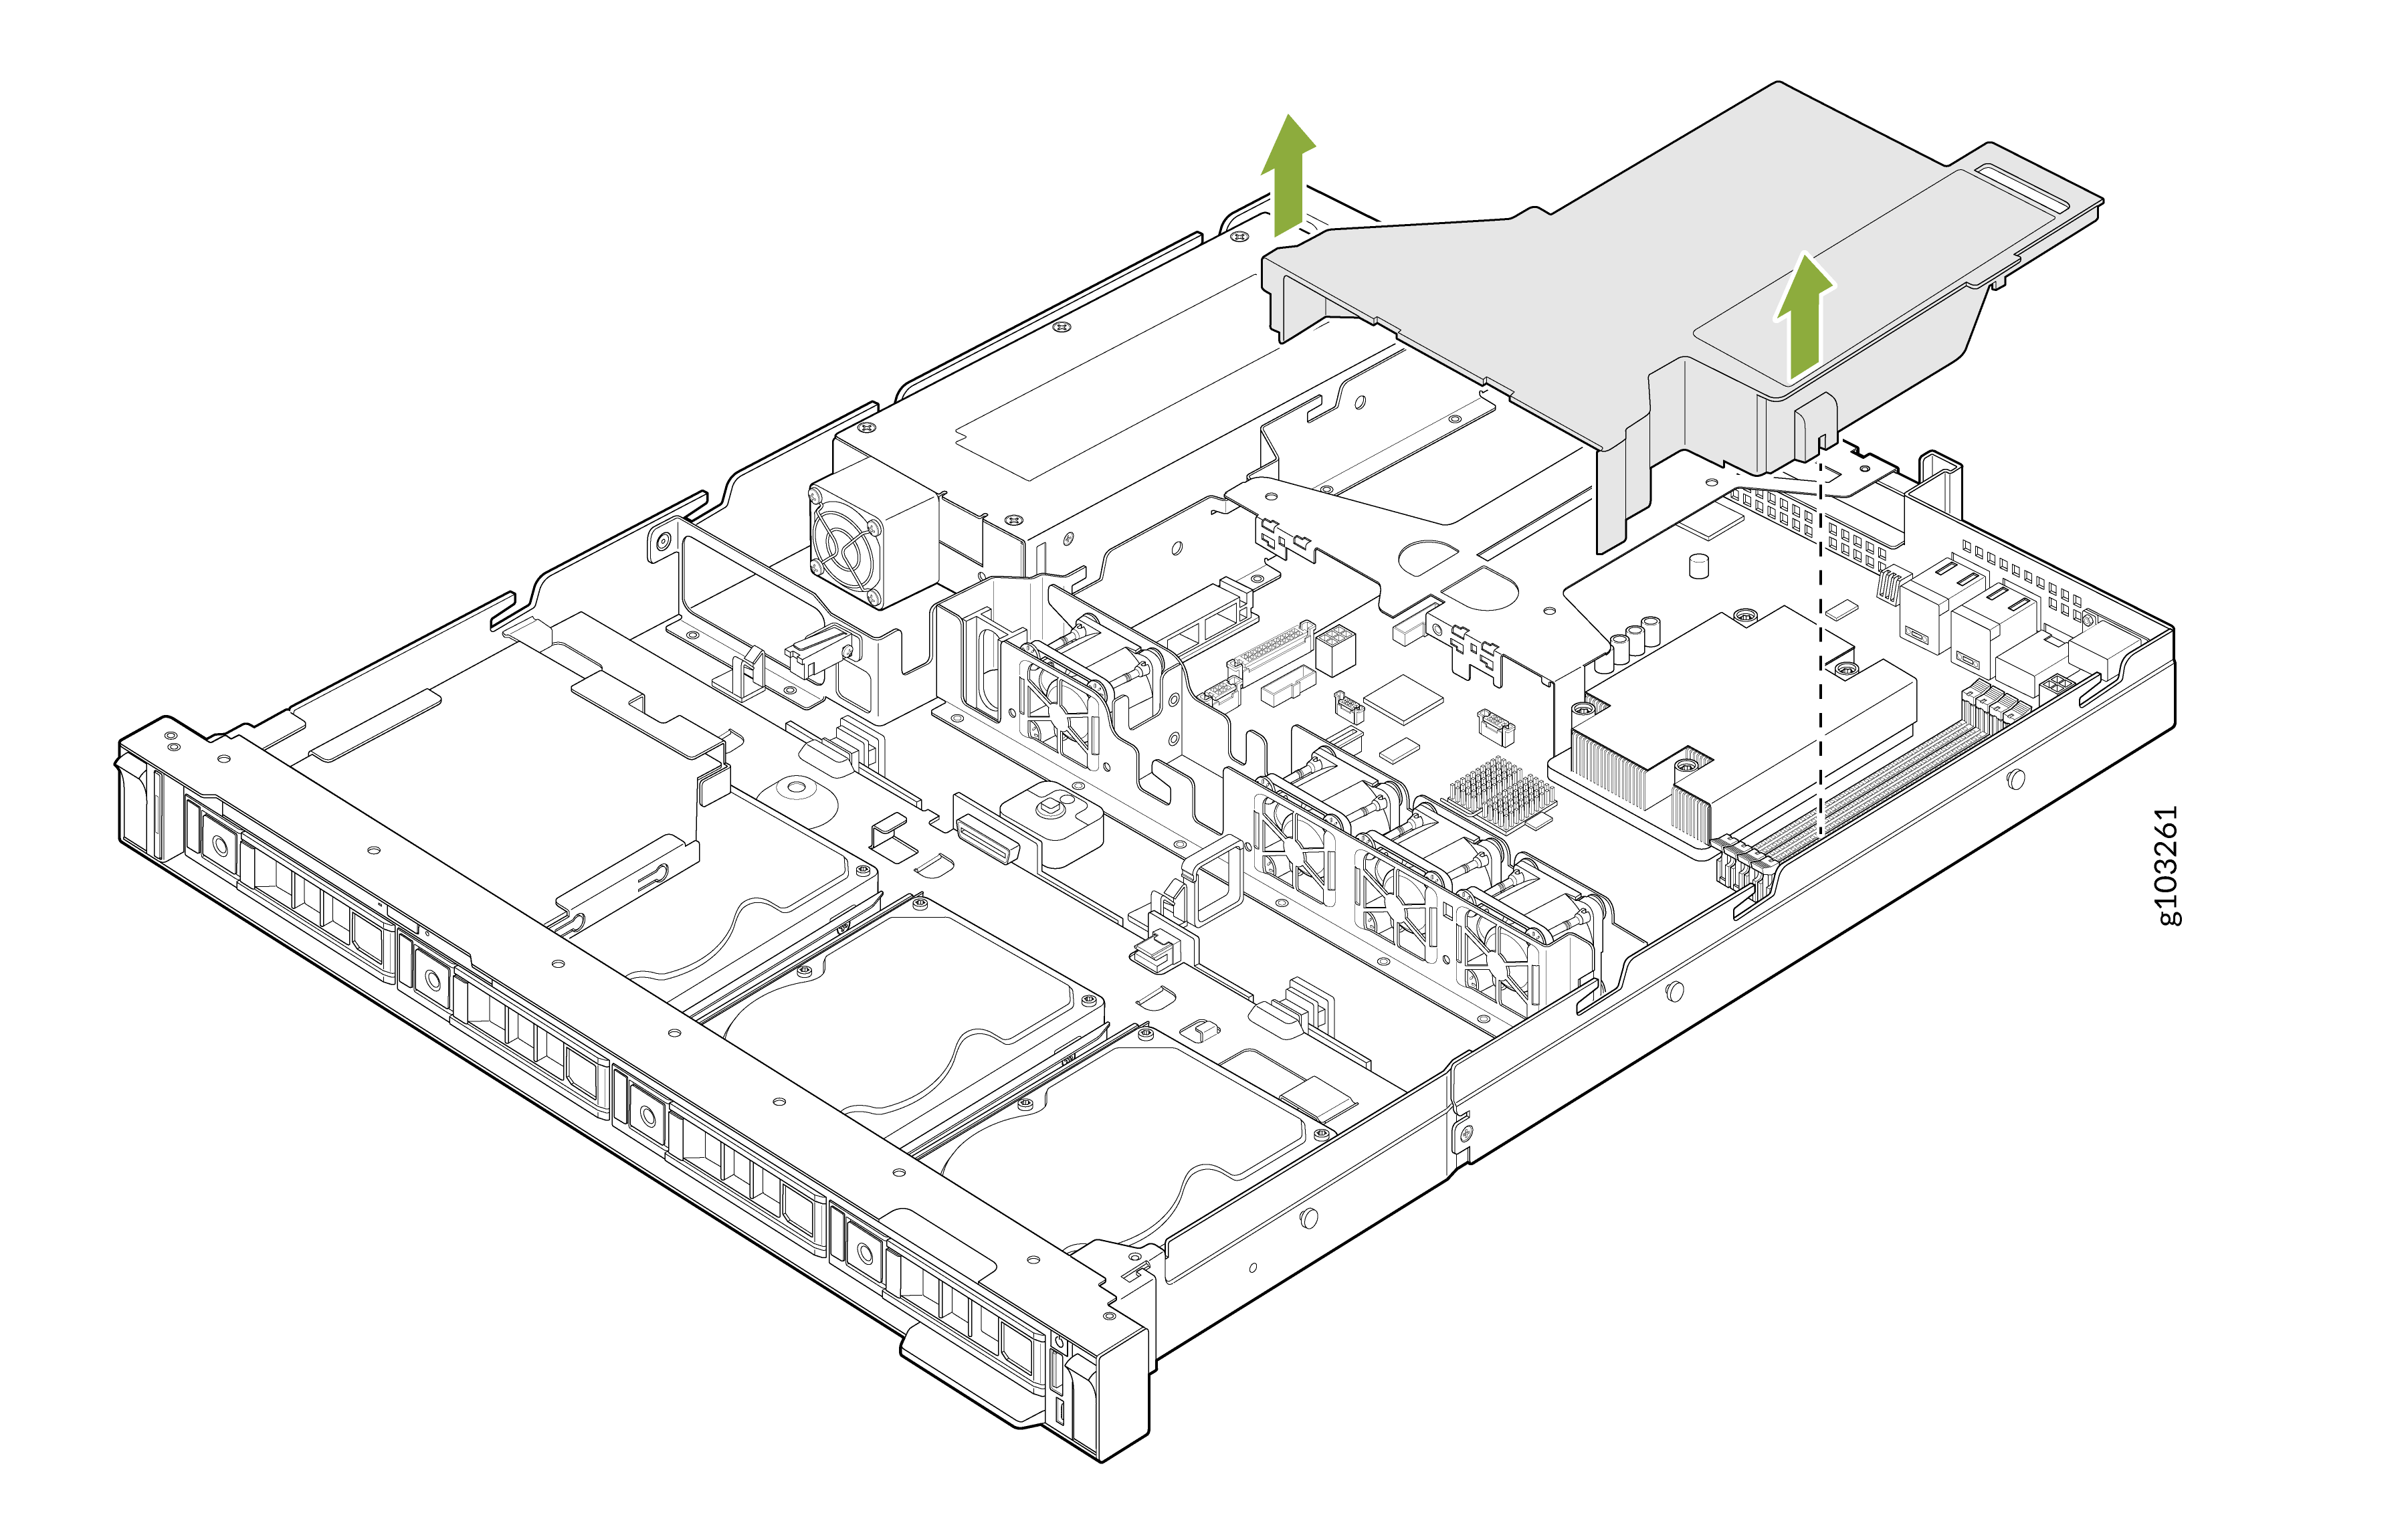
    Technical diagram showing server chassis with green arrows indicating removal of a cover to access internal components like fans, processors, and storage drives.
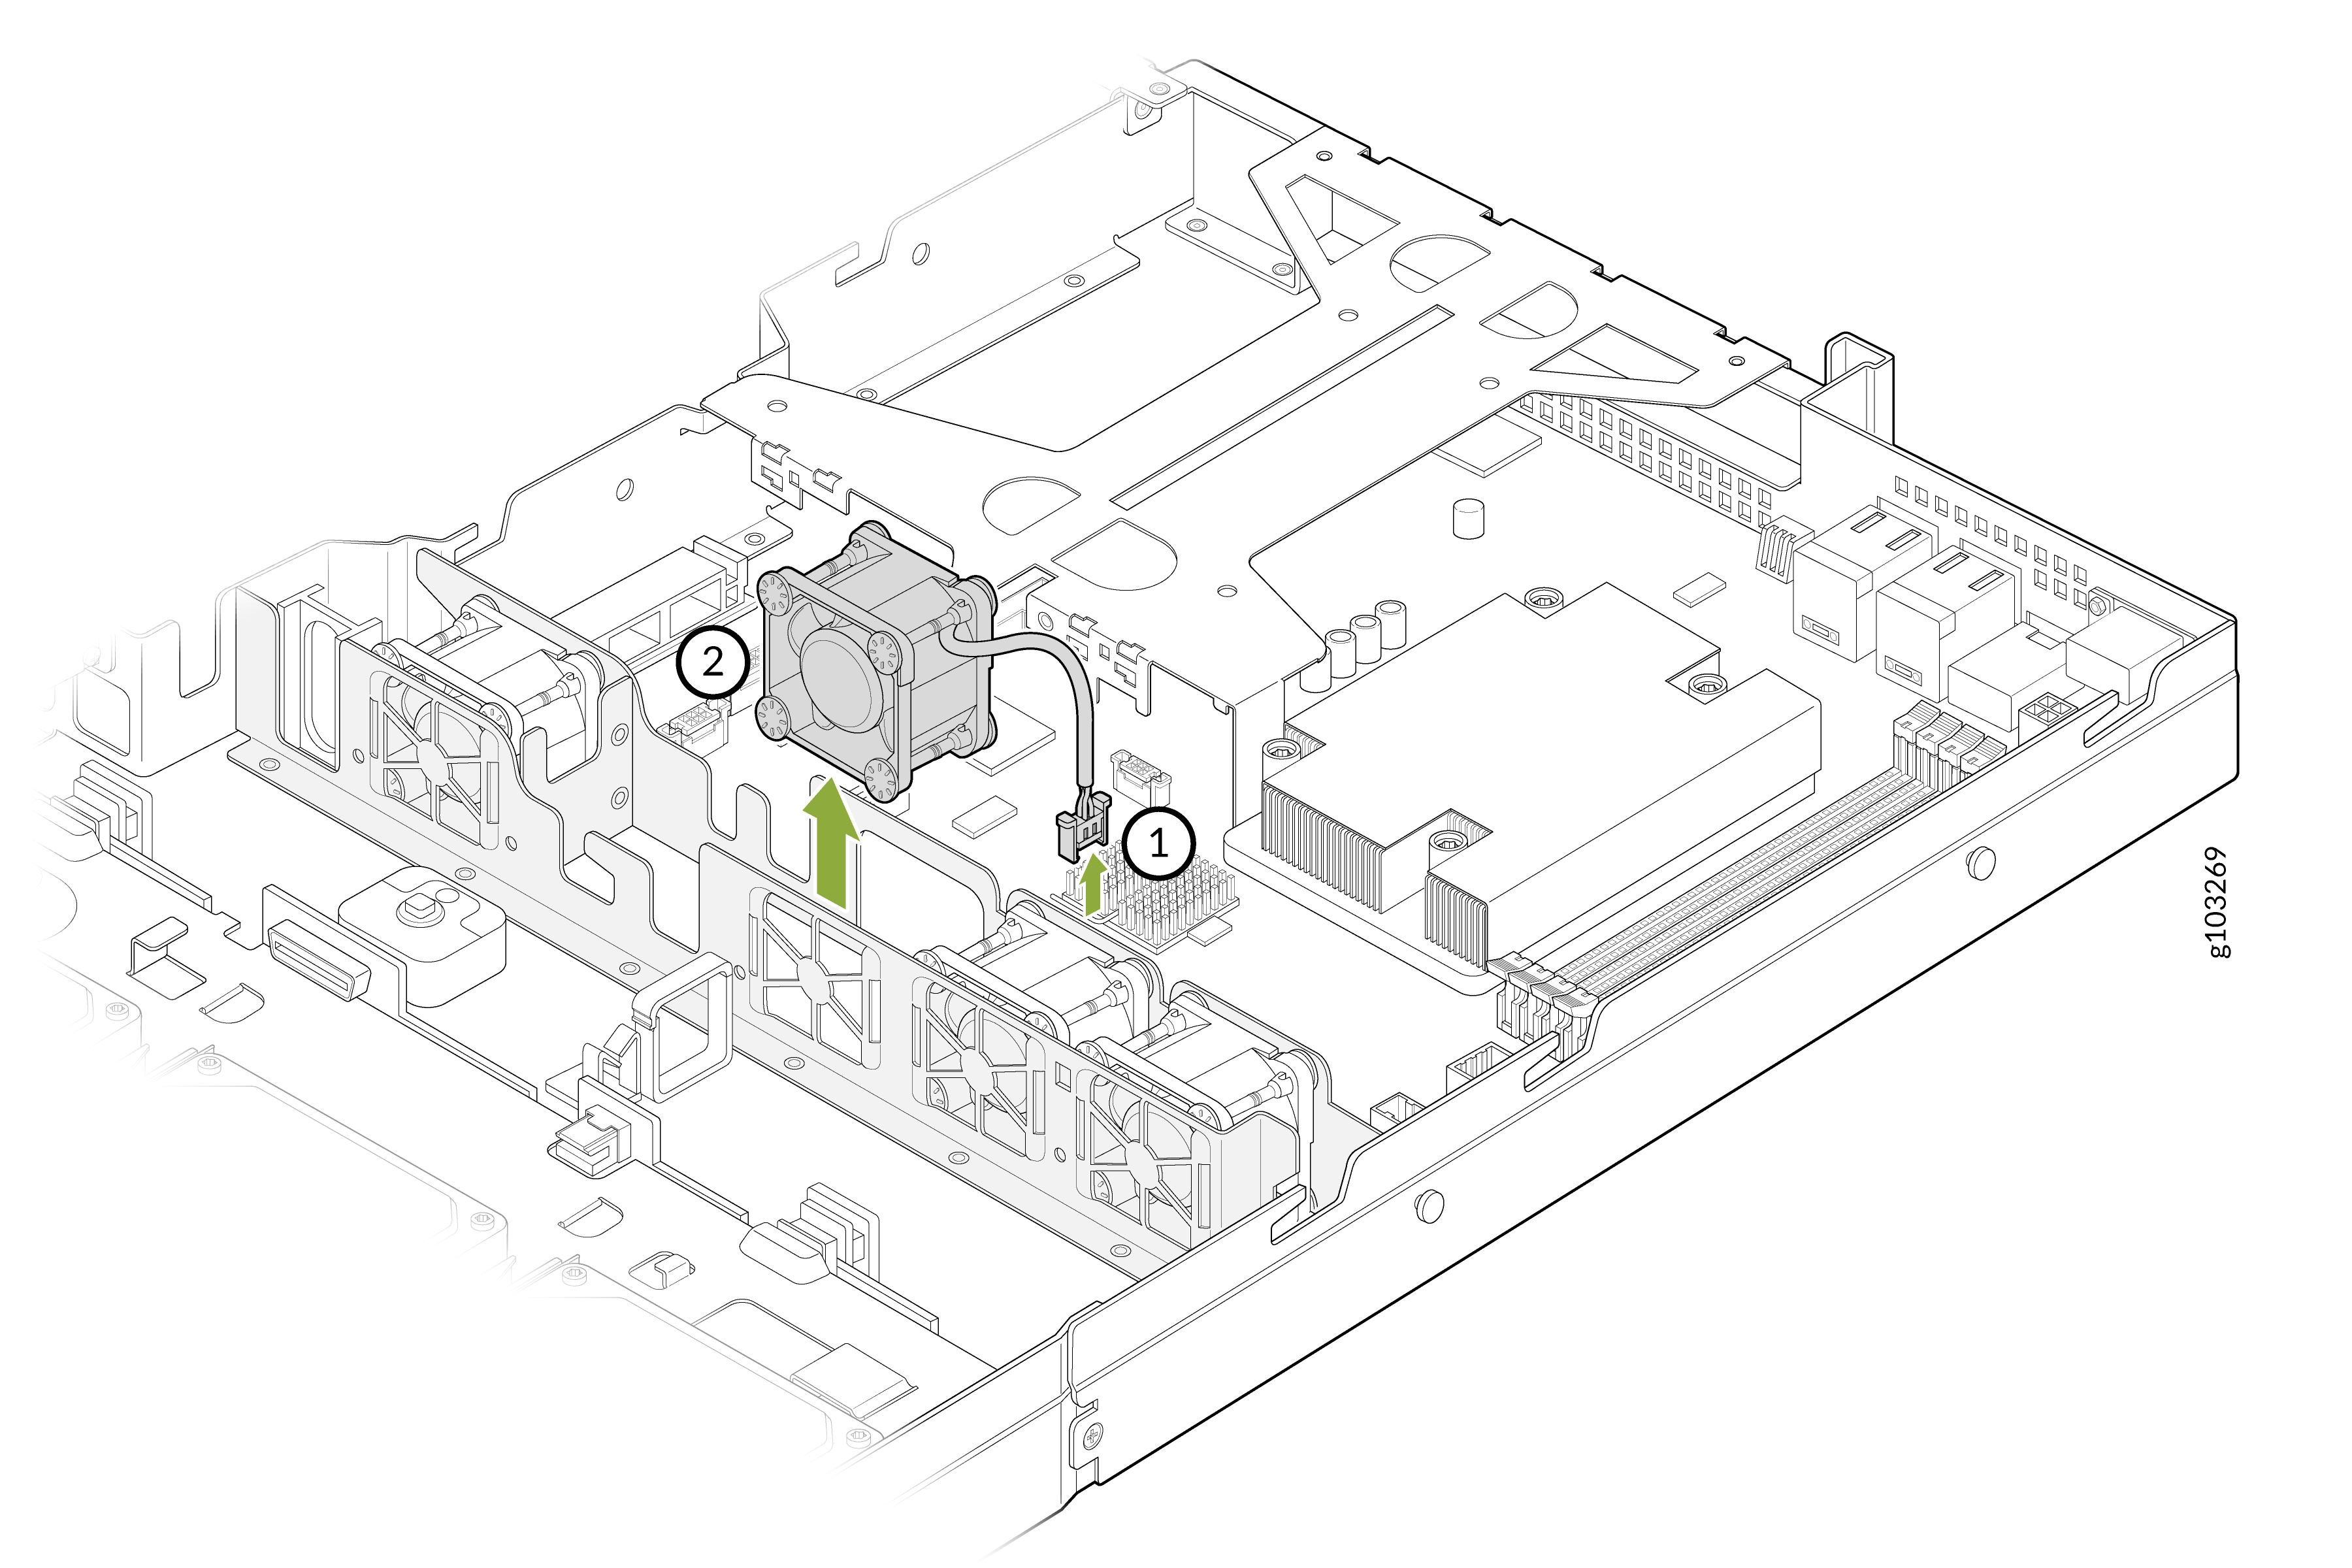
  2. Press the release tabs on the fan cable connector and disconnect the cable from the system board.
  3. Lift the fan out of the fan cage.
    Installing or removing cooling fan in computer case with arrows showing direction and numbered steps for guidance.

Install the Fan

To install the fan:
  1. Lower the fan into the cage until it is firmly seated.
  2. Route the fan cable properly so that it is not pinched or crimped.
  3. Press the release tabs on the cable connector and connect the cable to the system board.
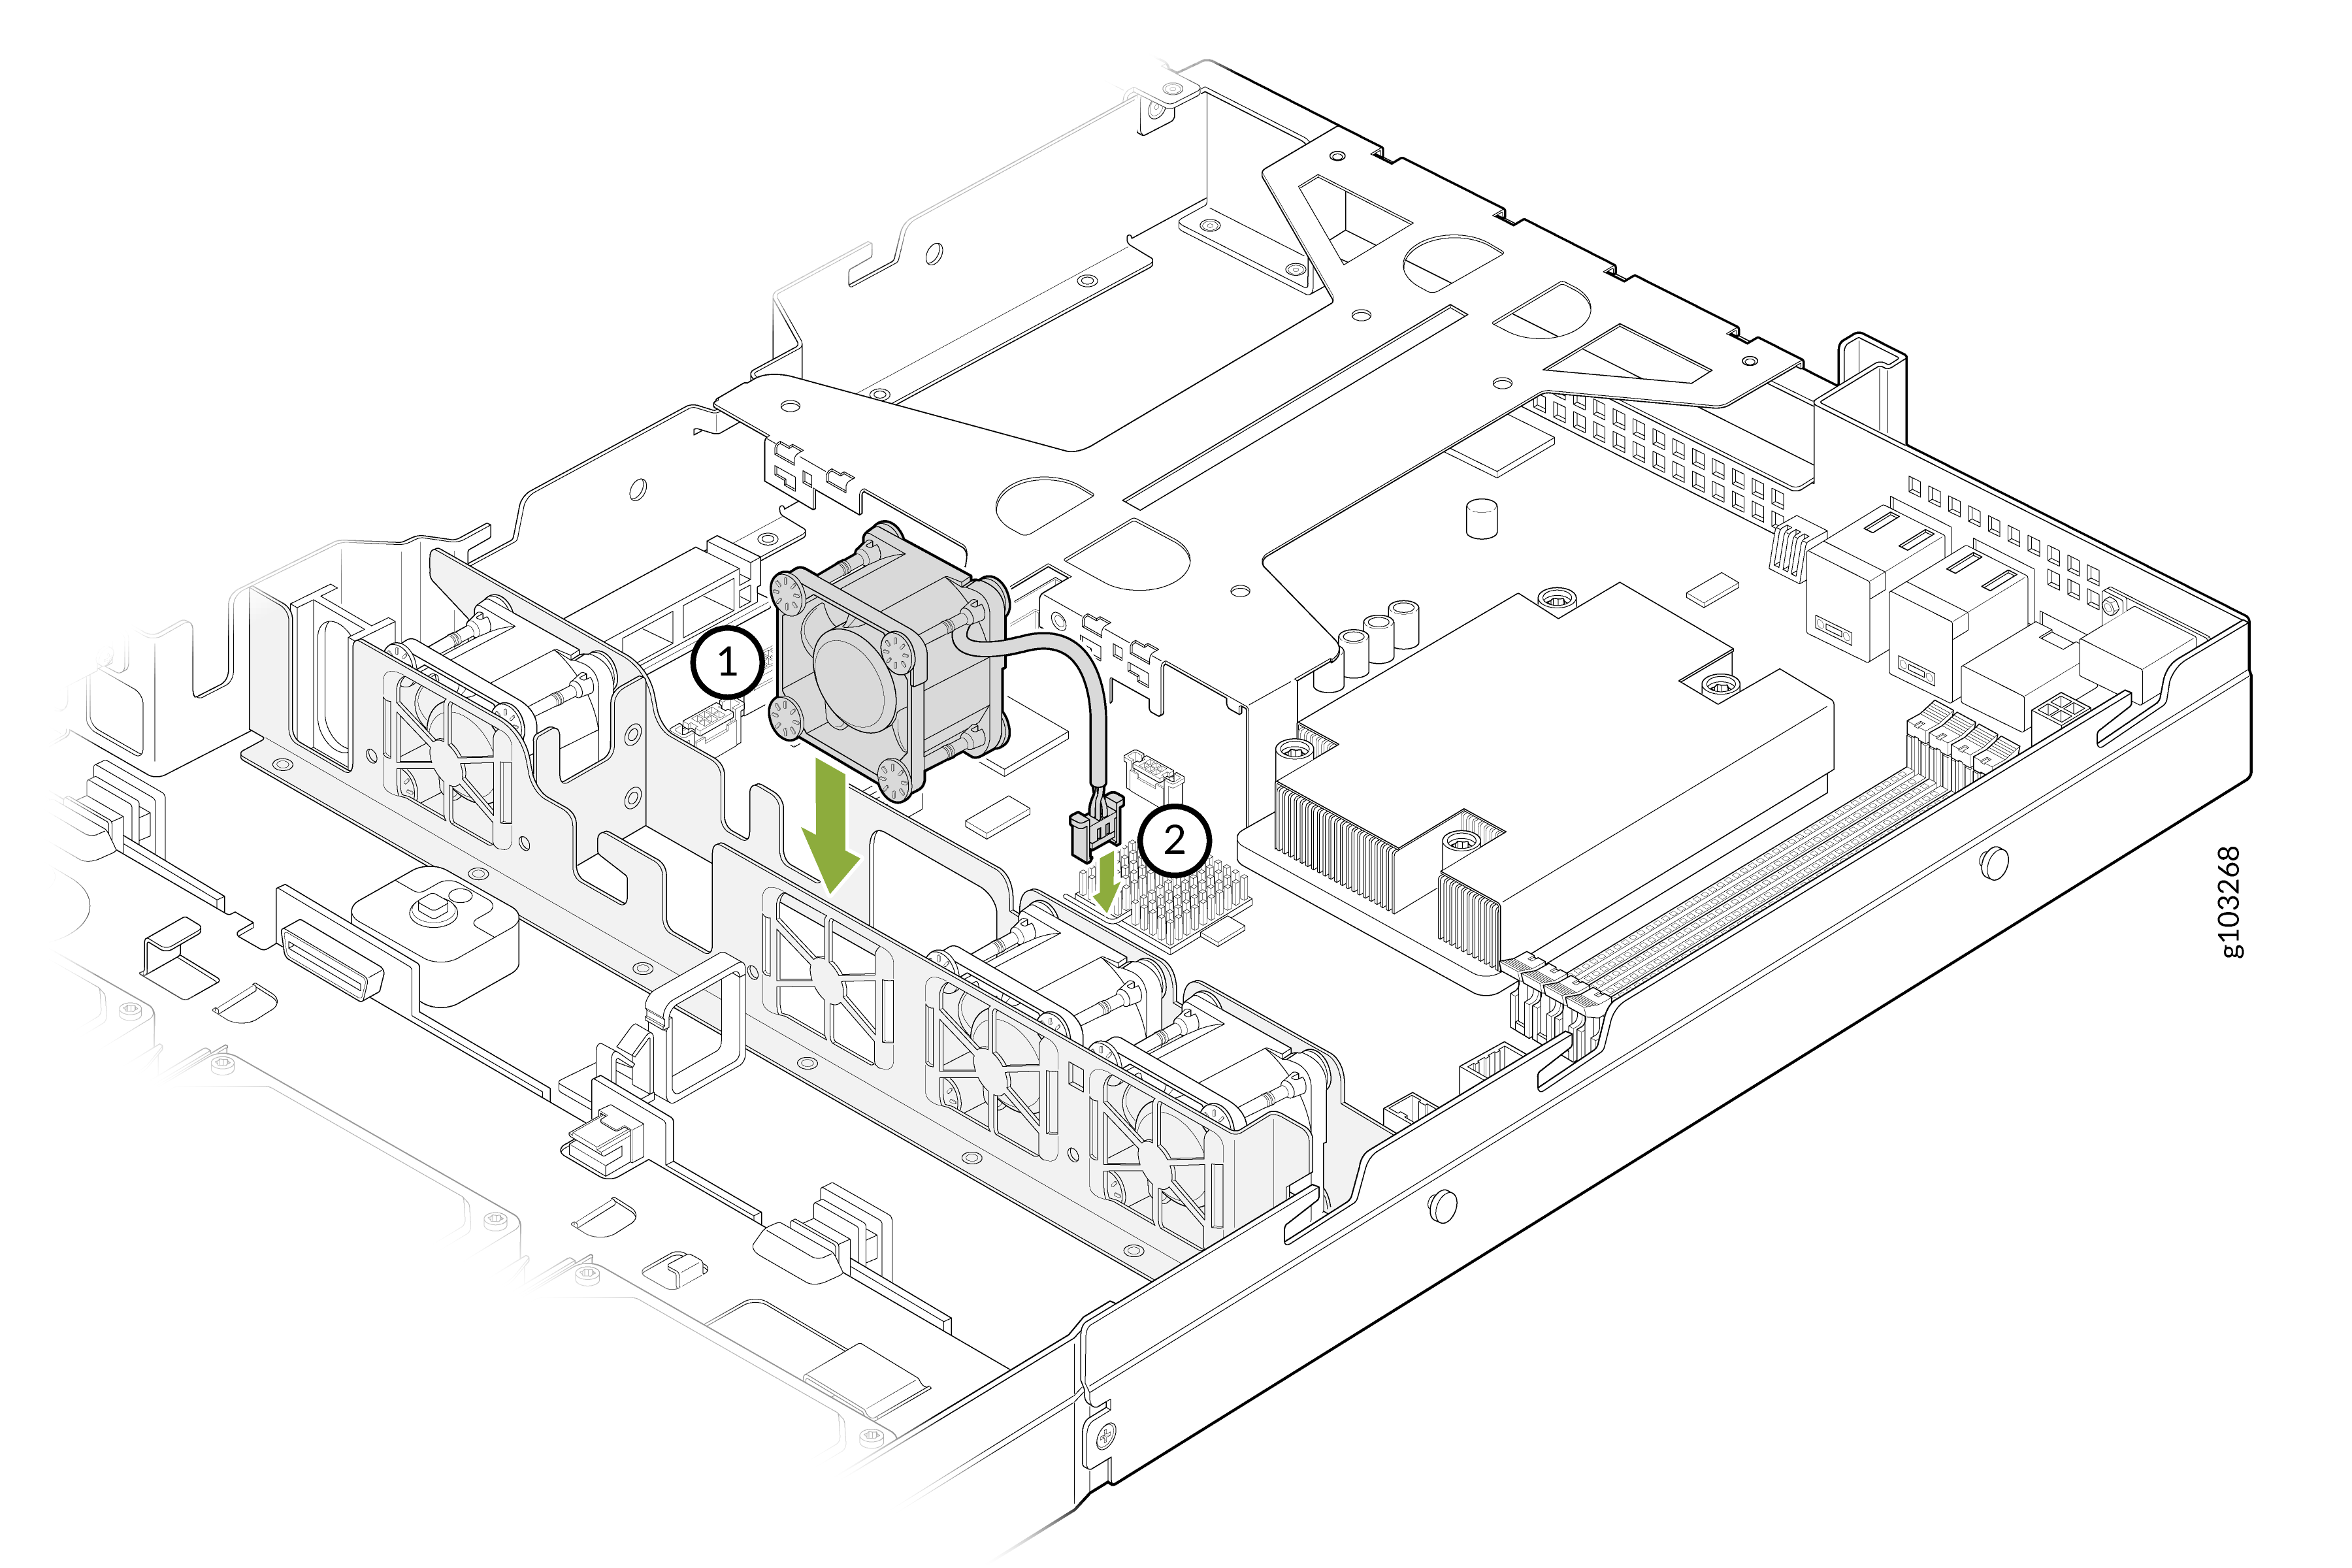
    Technical illustration showing the removal or installation of a cooling fan and its cable connection to a motherboard, with green arrows indicating movement direction.

After you have installed the fan:

  • Install the air shroud.

    Align the tabs on the air shroud with the slots on the system board and lower the air shroud until it is firmly seated.
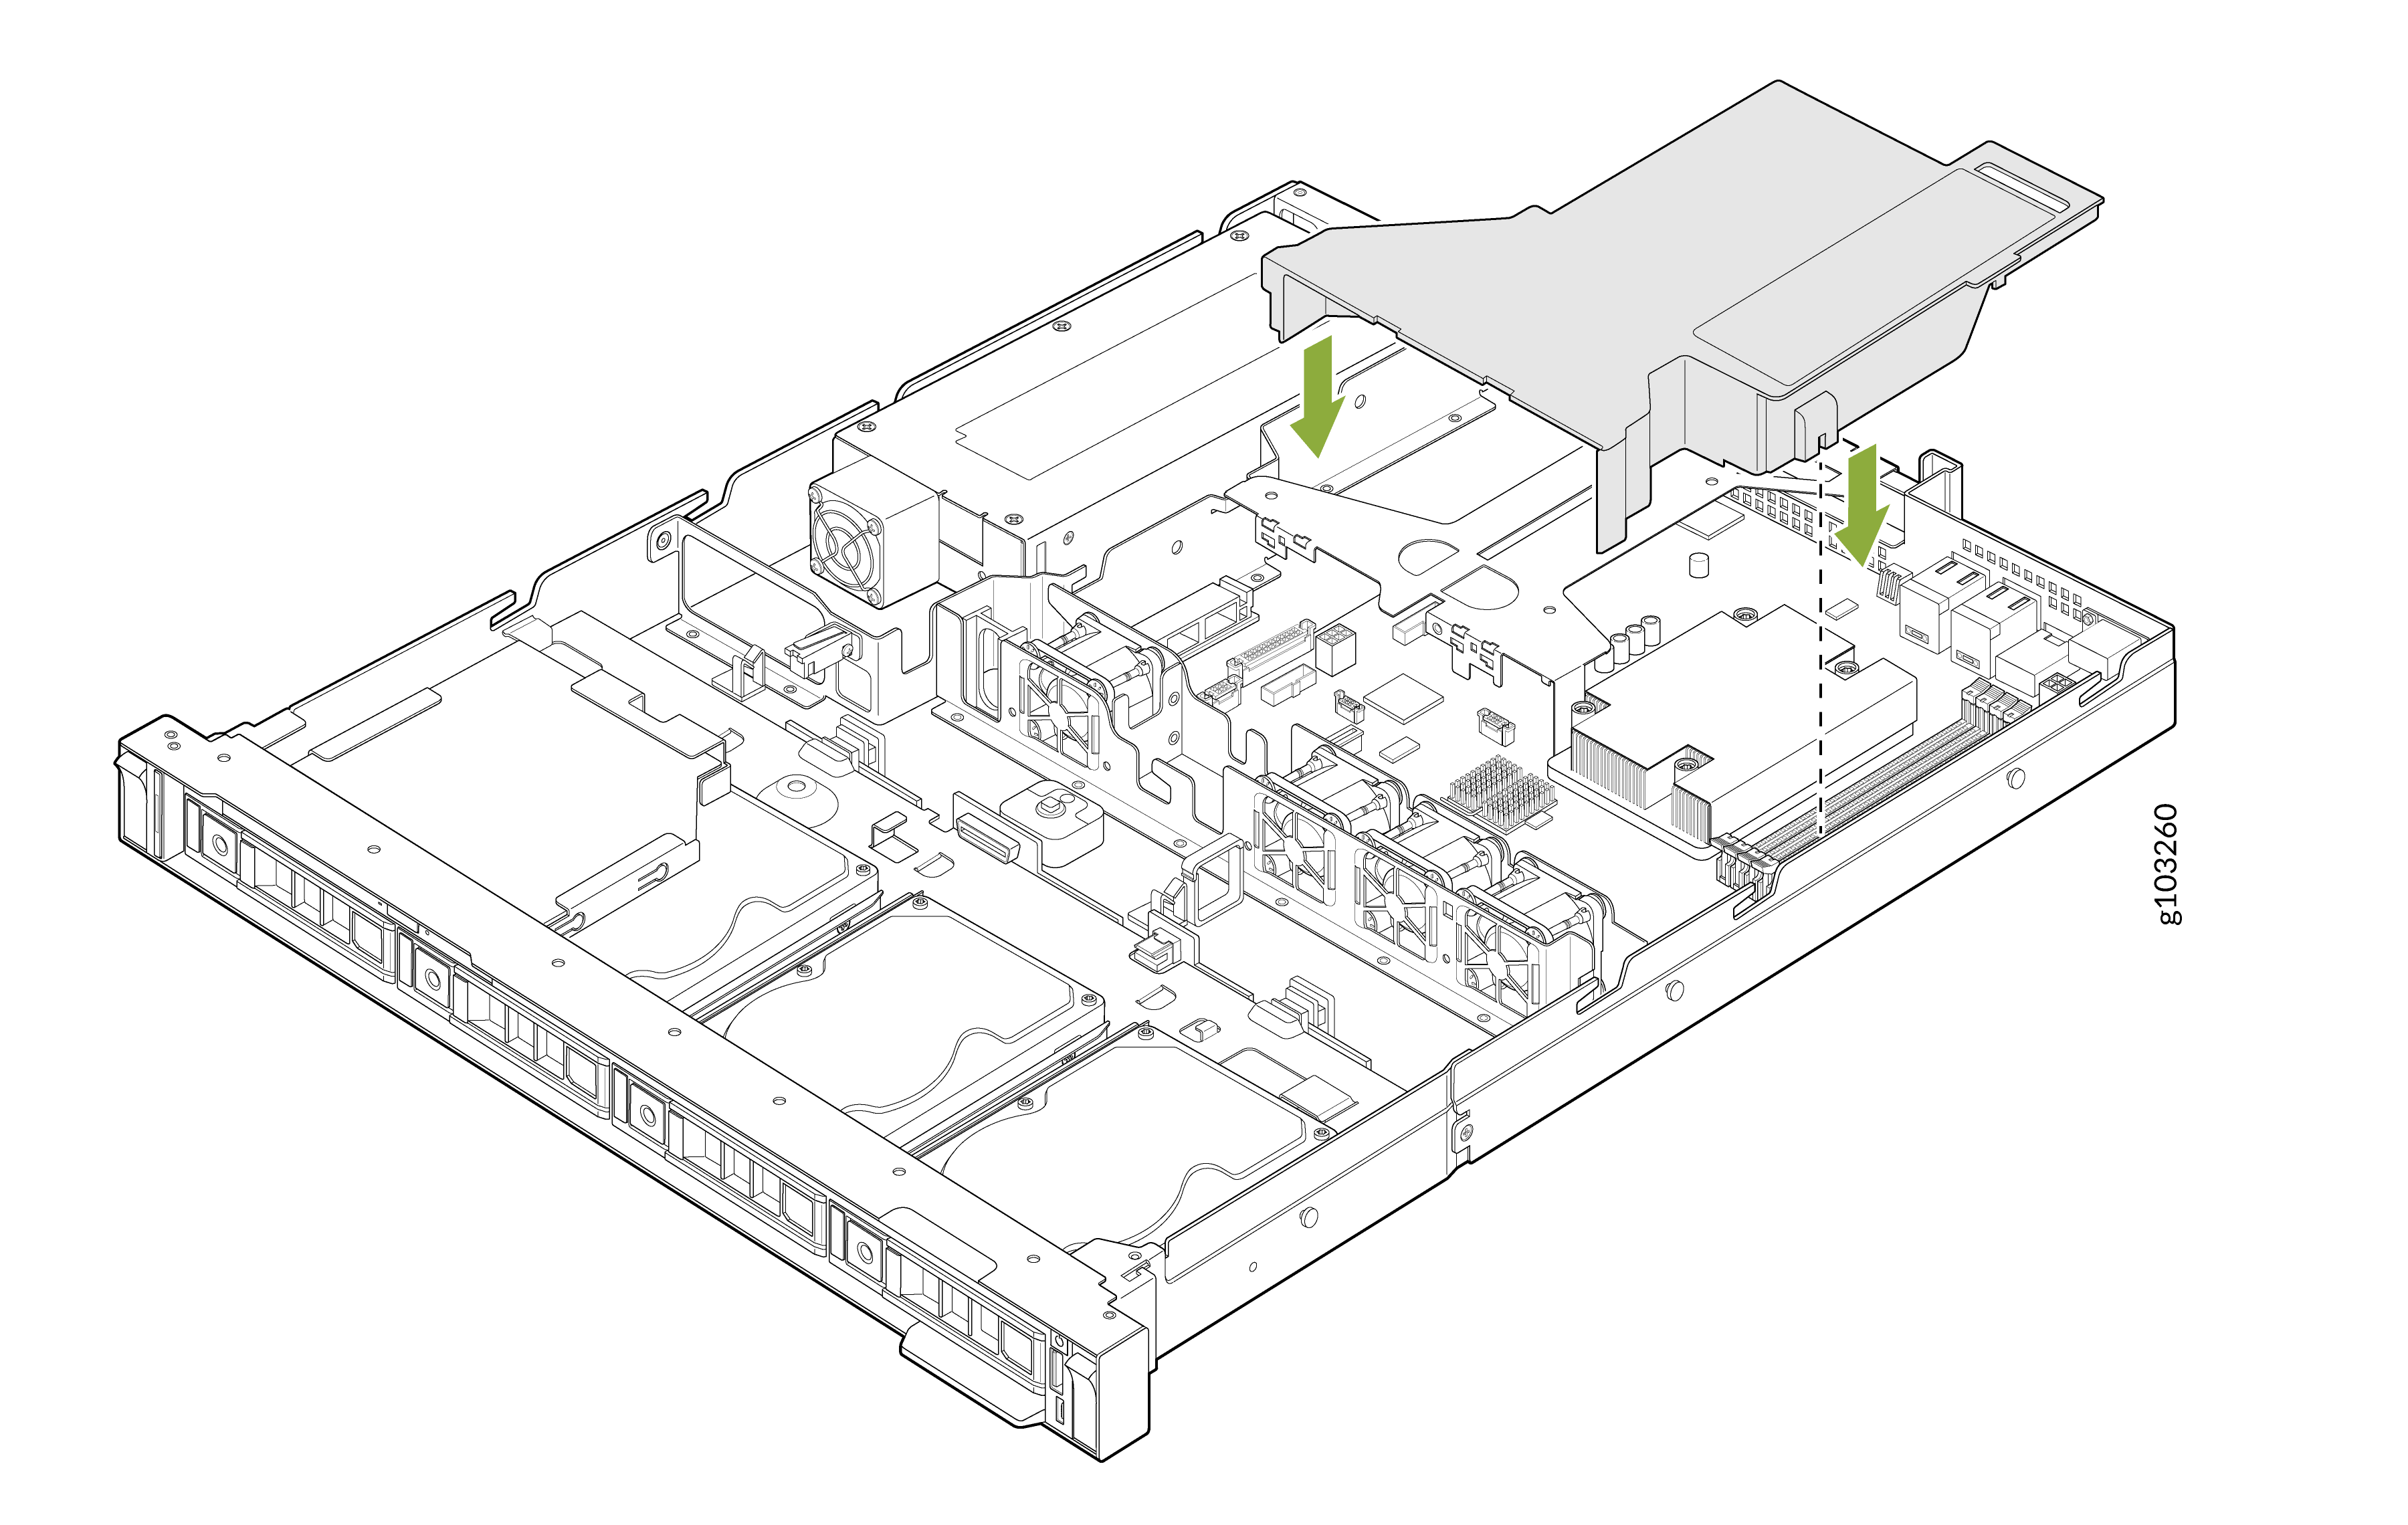
    Technical illustration of a server chassis showing internal components including areas for hard drives, cooling fans, and hardware connections marked by green arrows.
  • Install the system cover as described in Install the Cover Panel.