Step 1: Begin
In this guide, we provide a simple, three-step path, to quickly get you up and running with your new JSA7800. We’ve simplified and shortened the installation and configuration steps, and included how-to videos. You'll learn how to install an AC-powered JSA7800 in a rack, power it up, and configure basic settings.
Meet the JSA7800 Appliance
The JSA7800 provides highly–scalable security information and event management (SIEM) for large, globally distributed organizations. It consolidates security events collected from the thousands of network devices, endpoints, and applications distributed throughout your network. Using big data analysis, the JSA7800 distills that information into an actionable list of offenses, enabling you to shutdown malicious activities before they cause damage.
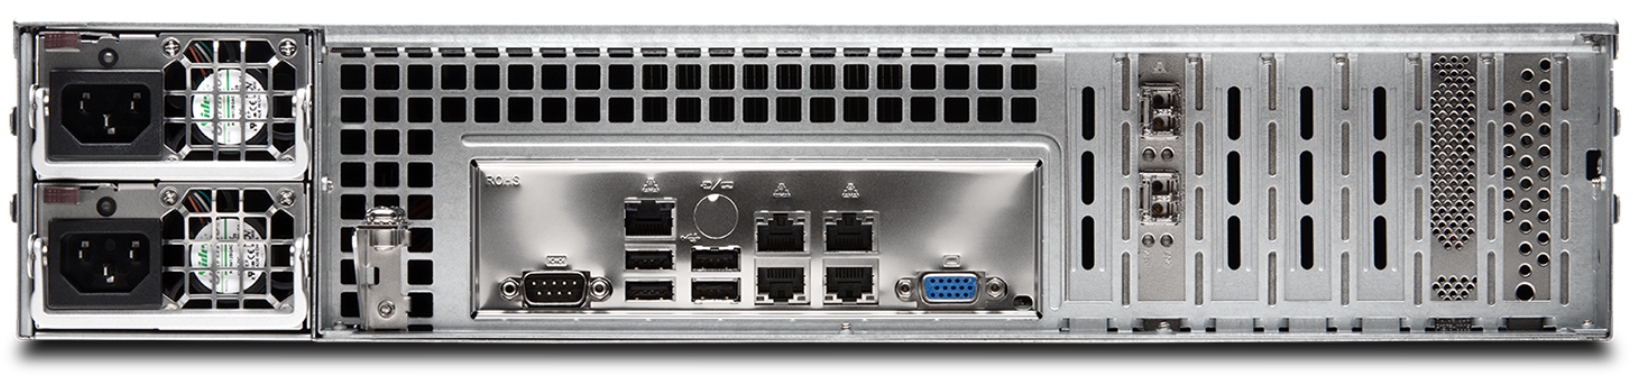
The JSA7800 is a 128-GB, 2-U rack mountable appliance with two 10-Gigabit SFP+ interfaces, four 1-Gigabit Ethernet interfaces, four USB 2.0 ports, and a DB-9 COM port. It comes preinstalled with hot-swappable dual-AC power supplies and 16 hot-swappable hard drives that support RAID. Optionally, you can order a DC-powered JSA7800. See the JSA7800 Hardware Guide for instructions on how to install a DC-powered JSA7800.
In this guide, we show you how to install the JSA7800 using front-and-rear-mounting flush to a rack.

Install the JSA7800
What's in the Box?
JSA7800
Two power cords appropriate for your geographical location
DB9 adapter
Rack mount kit which includes:
Rail adapters
One pair of rack rail assemblies
Mounting screws to attach the rails to the chassis
M5 screws to attach the rails to the rack
What Else Do I Need?
Someone to help you secure the appliance to the rack
Number 1 Phillips (+) screwdriver
Number 3 Phillips (+) screwdriver
Tie wrap
Electrostatic discharge (ESD) grounding strap for each component
Management host such as a laptop or desktop PC
Serial-to-USB adapter (if your laptop or desktop PC doesn’t have a serial port)
Electrostatic bag or antistatic mat
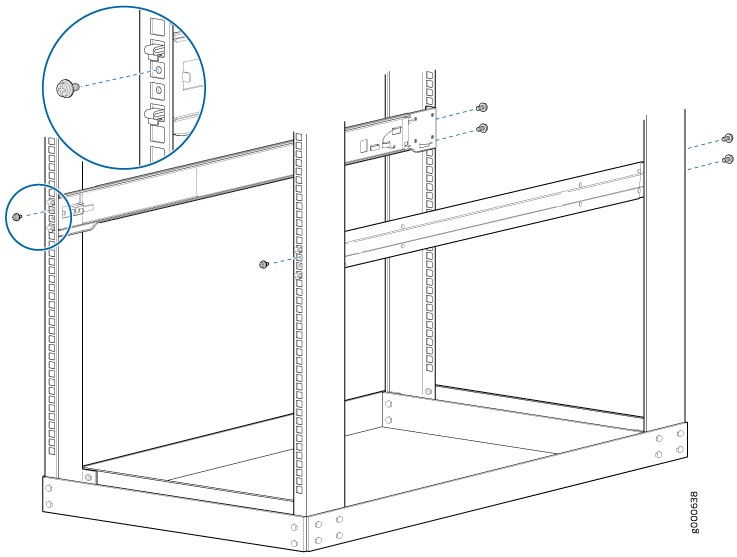
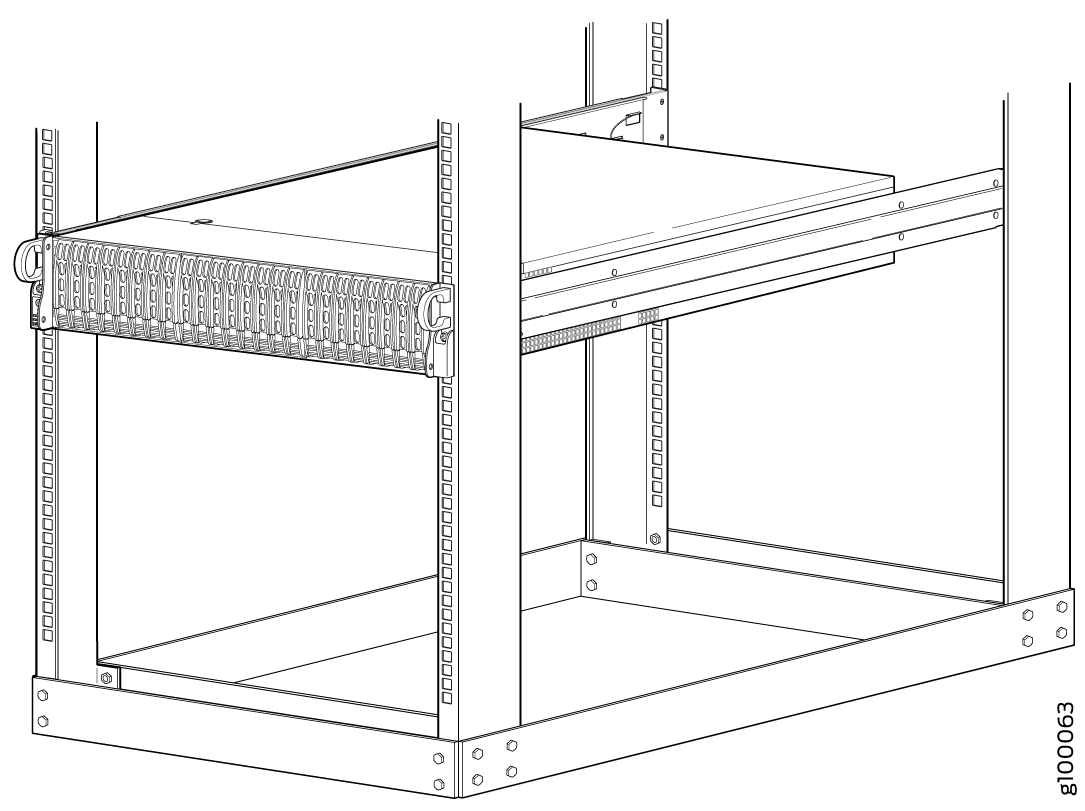
Install the JSA7800 in the Rack
- Place the shipping container on a flat surface and carefully
remove the hardware components.
The chassis package includes a pair of rack rail assemblies and mounting screws required to install the chassis in a rack. Each rail assembly has an inner, a middle, and an outer rail.
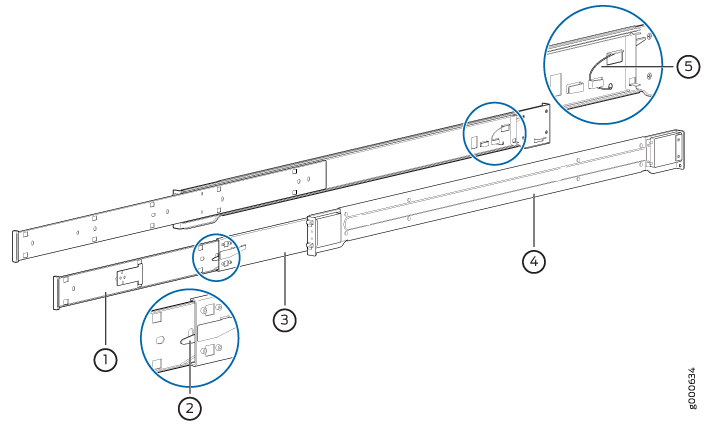
Callout
Component
1
Inner rail
2
Locking tab
3
Middle rail
4
Outer rail
5
Locking tab
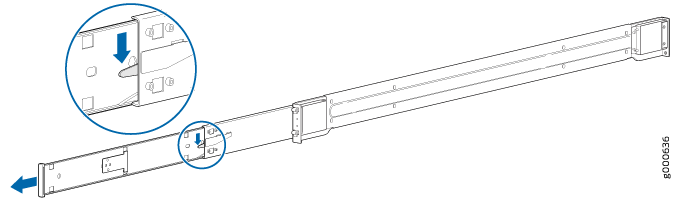
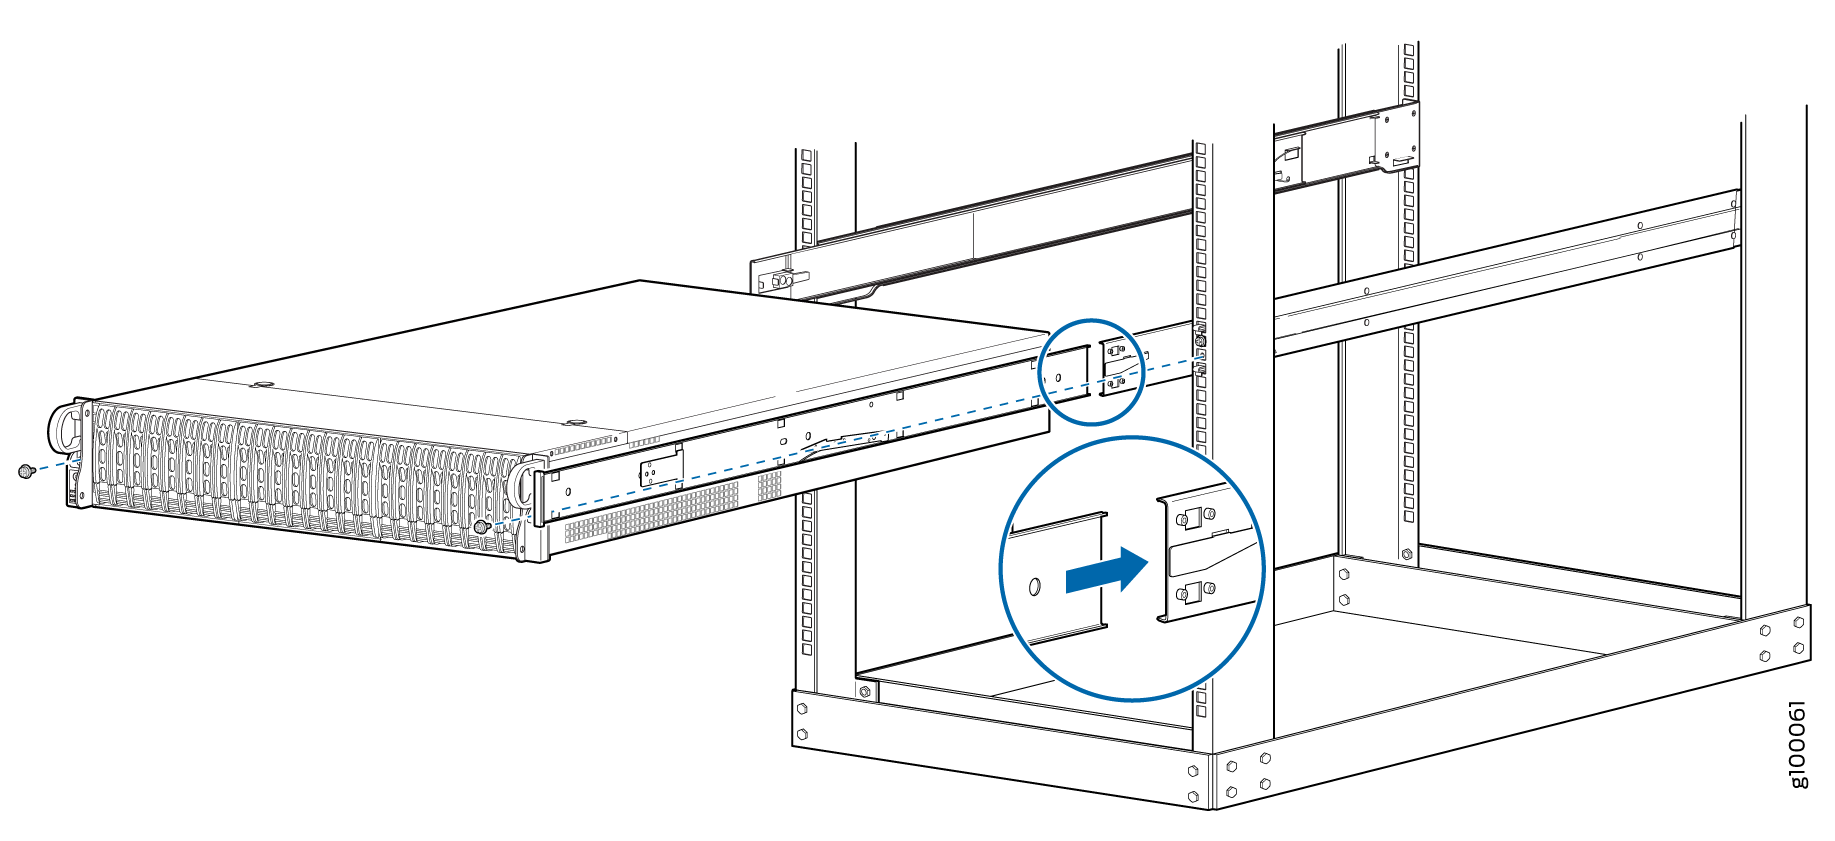
- Install the inner rail extensions.
Pull the inner rail out of the outer rail until it is fully extended as illustrated. Press the locking tab down to release the inner rail.
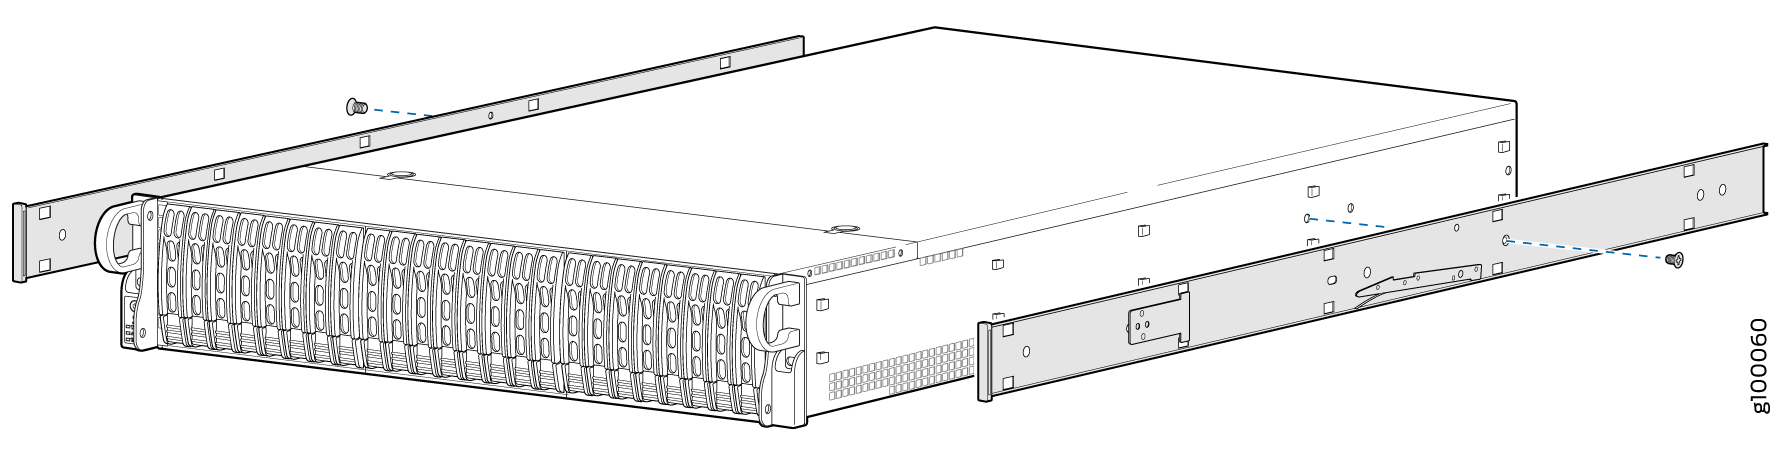
Place the inner rails against the sides of the chassis, aligning the chassis hooks with the holes in the inner rails.
Slide the inner rail toward the front of the chassis until the inner rail clicks into the locked position.
Secure the inner rails to the chassis with the screws provided.
Note:Each inner rail of the JSA7800 has a locking tab. The locking tabs secure the chassis when it’s either installed or completely extended from the rack.
- Install the outer rails:
- Insert the front hooks of the outer rails into the front
slots of the rack.
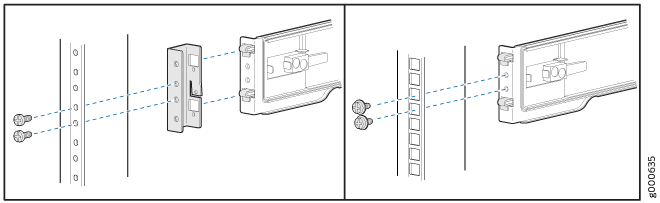
- Insert the rear hooks of the outer rails into the rear
slots of the rack.
- Insert the front hooks of the outer rails into the front
slots of the rack.
- Align the chassis inner rails with the ball-bearing shuttle.
- Secure the chassis handles to the four-post rack with
the mounting screws.
Power On
Now you’re ready to connect the JSA7800 to a dedicated AC power source. The switch comes with the AC power cord for your geographic location.
Here's how to connect the JSA7800 to AC power:
Before connecting the appliance to the power supply, attach an ESD strap to an ESD point and place the other end of the strap around your bare wrist.
Plug each AC power cord into the power sockets on the rear panel.

Plug the other end of each power cord into a wall socket.
Press the Power button on the front panel.
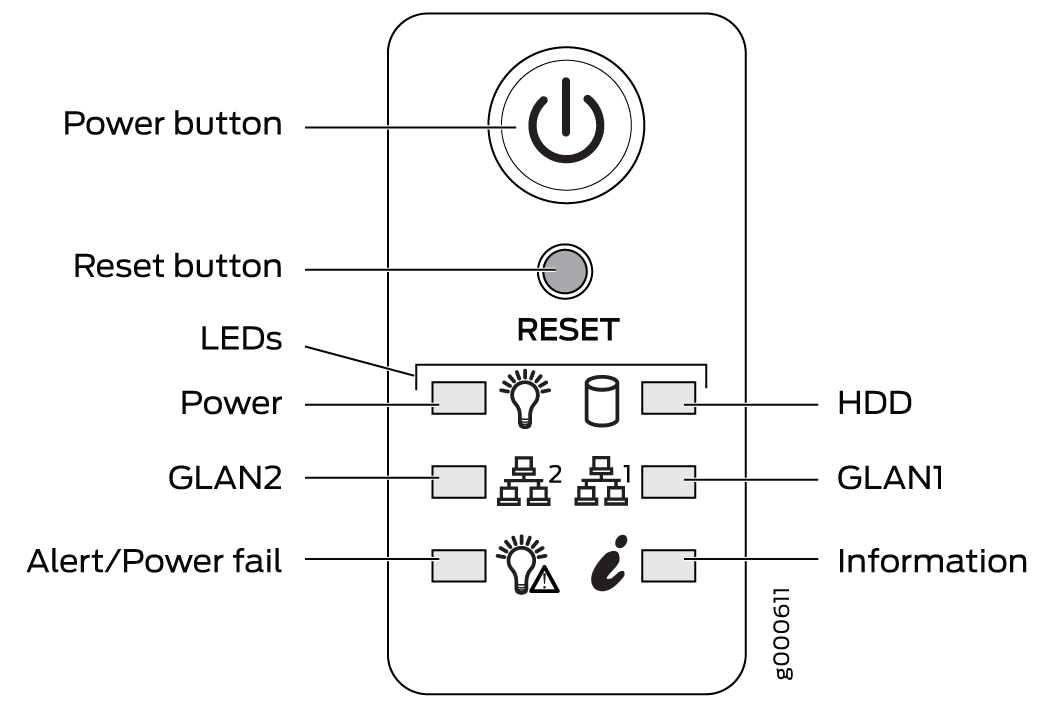
Familiarize yourself with the LEDs:
LED
State
Power
Solid green— Indicates that the appliance is receiving power.
Hard drive
Unused
LAN
LAN1— Indicates eno1 interface activity when blinking.
LAN2— Indicates eno2 interface activity when blinking.
Information
Red (blinking)— Indicates a fan failure.
Solid red— Indicates an overheat condition. Make sure there aren't any cables obstructing the system airflow and that the ambient room temperature isn't too warm.
Red (slowly blinking)— Indicates a power failure.
Solid blue —Indicates UID function is activated.
Alert/Power Fail
Solid red— Indicates a power supply failure.
Amber— Indicates that the appliance is operating normally.