Installing the JRR200 Route Reflector in a Rack
You can mount the route reflector on four posts in a 19-in. rack or cabinet by using the rack-mount kit shipped with the device. (The remainder of this topic uses rack to mean rack or cabinet.)
Before mounting the JRR200 route reflector on four posts in a rack:
-
Verify that the site meets the requirements described in Site Preparation Checklist for the JRR200 Route Reflector.
-
Place the rack or cabinet in its permanent location, allowing adequate clearance for airflow and maintenance, and secure it to the building structure.
-
Verify that the rack or cabinet meets the specific requirements described in JRR200 Rack and Cabinet Requirements.
-
Remove the JRR200 route reflector from the shipping carton (see Unpacking the JRR200).
Ensure that you have the following parts and tools available:
-
Electrostatic discharge (ESD) grounding strap
-
Screws to secure the mounting brackets to the chassis
-
Rack-mounting screws to secure the chassis to the four rack posts—not provided
-
Phillips (+) screwdriver, number 2
-
Two persons are required for mounting the JRR200 route reflector.
-
Ensure that the rack is in its permanent location, allowing adequate clearance for airflow and maintenance, and secured to the building structure.
-
If you are mounting multiple units in the rack, mount the heaviest unit at the bottom and mount the others from bottom to top in order of decreasing weight.
Wrap and fasten one end of the ESD grounding strap around your wrist and connect the other end to a site ESD point.
Ensure that the rear of the JRR200 route reflector is supported throughout the process of mounting the route reflector into the rack.
To mount the JRR200 route reflector on a four-post rack:
-
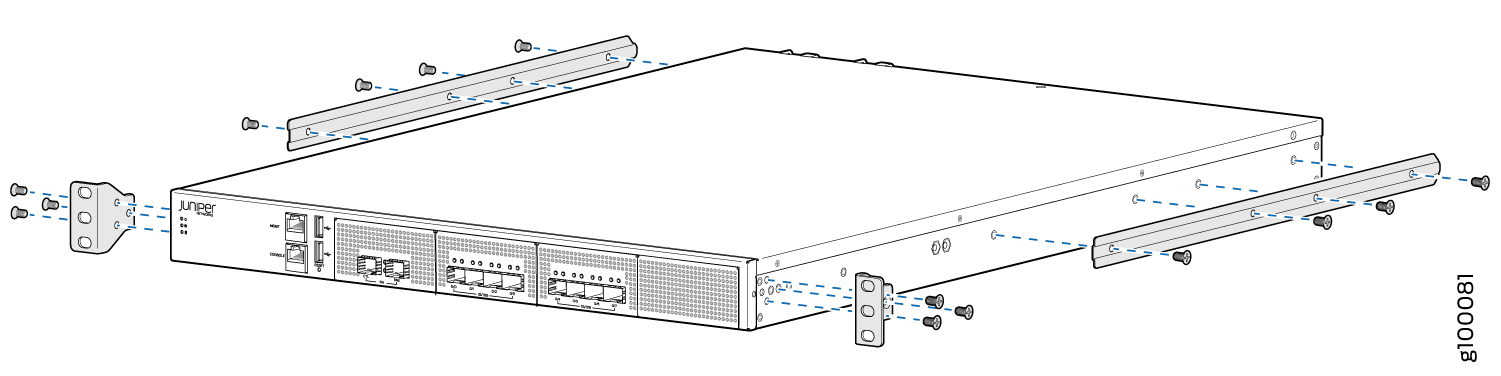
Attach the front-mounting brackets and the side mounting
rails to the chassis by using the flat-head screws.
Figure 1: Attaching the Mounting Ears and Fixed Brackets
 Note:
Note:Ensure that the rear of the device is supported throughout the process of mounting the device into the rack.
-
Have one person grasp both sides of the JRR200 route reflector,
lift it, and position it in the rack so that the front mounting bracket
holes align with the threaded holes in the rack rail and the second
person secure the front of the JRR200 route reflector to the rack
by using rack-mounting screws (and cage nuts and washers if your rack
requires them).
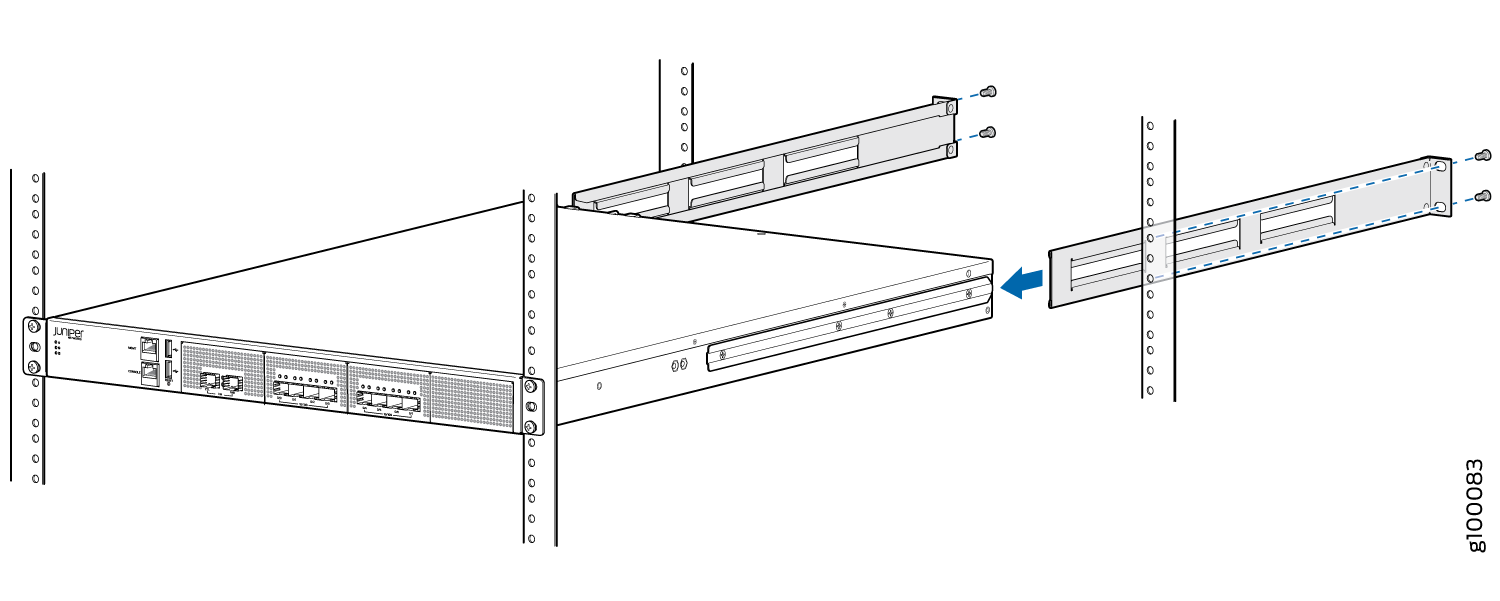
Figure 2: Securing the Mounting Ears to the Rack

-
Continue to support the JRR200 route reflector, and have
the second person slide the rear mounting blades into the channels
of the side mounting rails and secure the blades to the rack. Use
rack-mounting screws (and cage nuts and washers if your rack requires
them) to attach the sliding blades to the rack.
Figure 3: Attaching the Adjustable Brackets