Install or Remove Power Supplies
This topic provides instructions to install or remove PSUs to or from the EX4100-H-24MP or EX4100-H-24F switches.
Install Power Supply Units in an EX4100-H-24MP or EX4100-H-24F Switch
You can install up to two PSUs in the switch in an AC, DC, AC + AC, DC + DC or AC + DC configuration.
Before you install power supply in the switch:
-
Ensure that you understand how to prevent electrostatic discharge (ESD) damage. See Prevention of Electrostatic Discharge.
-
Ensure that you have the following parts and tools available to install the power supply:
-
ESD grounding strap
-
Phillips (+) screwdriver, number 2
-
Each PSU in an EX4100-H switch is a hot-removable and hot-insertable field-replaceable unit (FRU) installed in the rear panel of the switch. You can remove and replace the power supply without powering off the switch or disrupting switch functions.
You must connect each power supply to a dedicated power source outlet. The switch comes with one power supply preinstalled. Additional power supplies are separately orderable. You can install up to two power supplies in the switch.
The switch ships with a PSU dummy blank along with the PSU. The PSU dummy blank screws and AC or DC PSU screws can be removed or tightened with a torque of 7 +/- 0.5 Lb.in or screwdriver type Phillips #2.
To install PSUs in the switch :
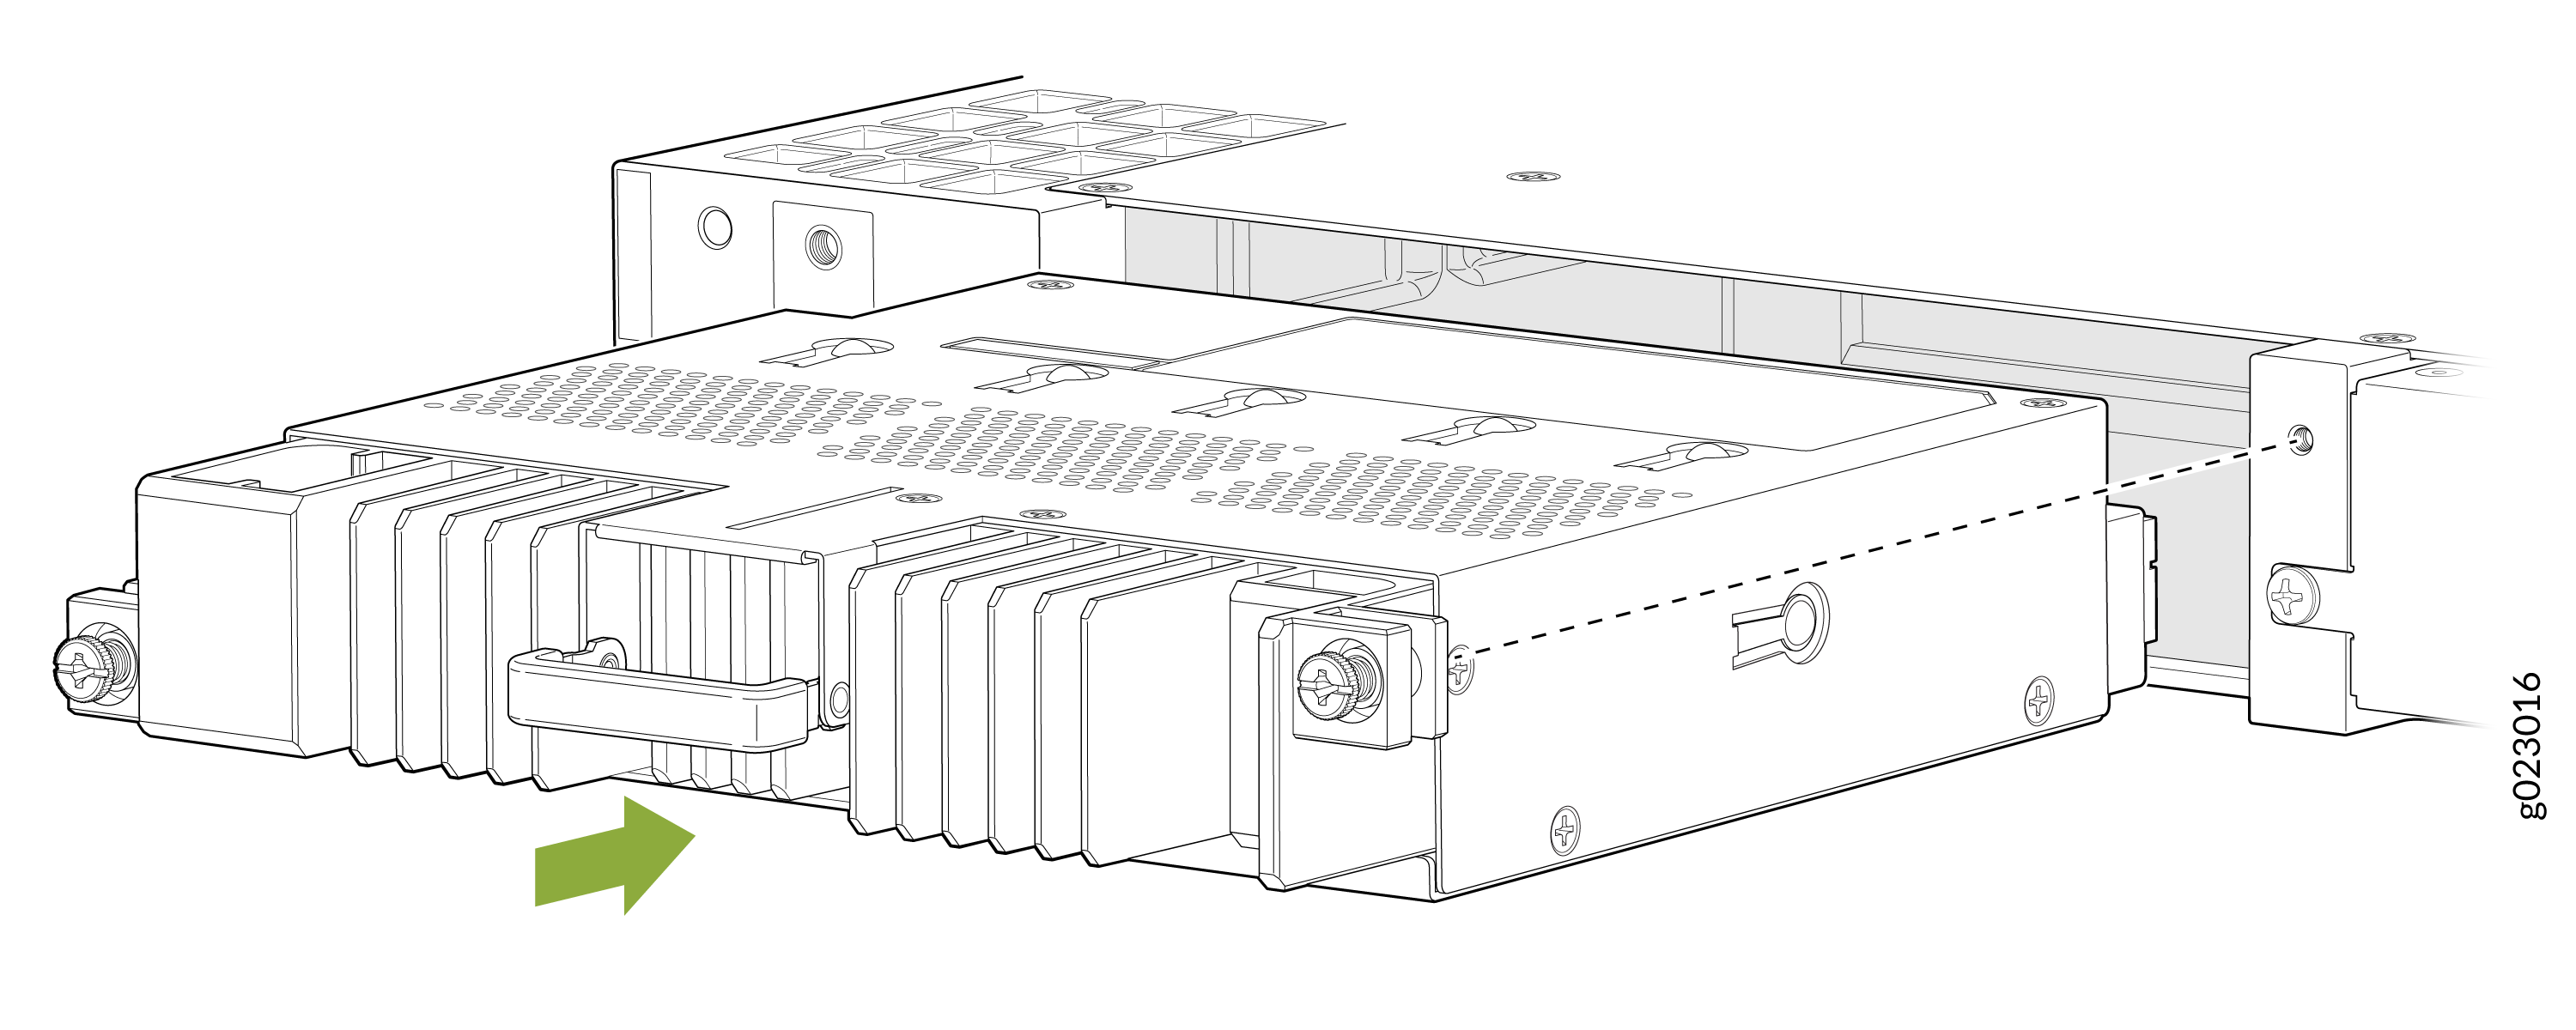
-
Insert the PSU into the PSU slot on the rear of the switch.
Figure 1: Insert the PSU
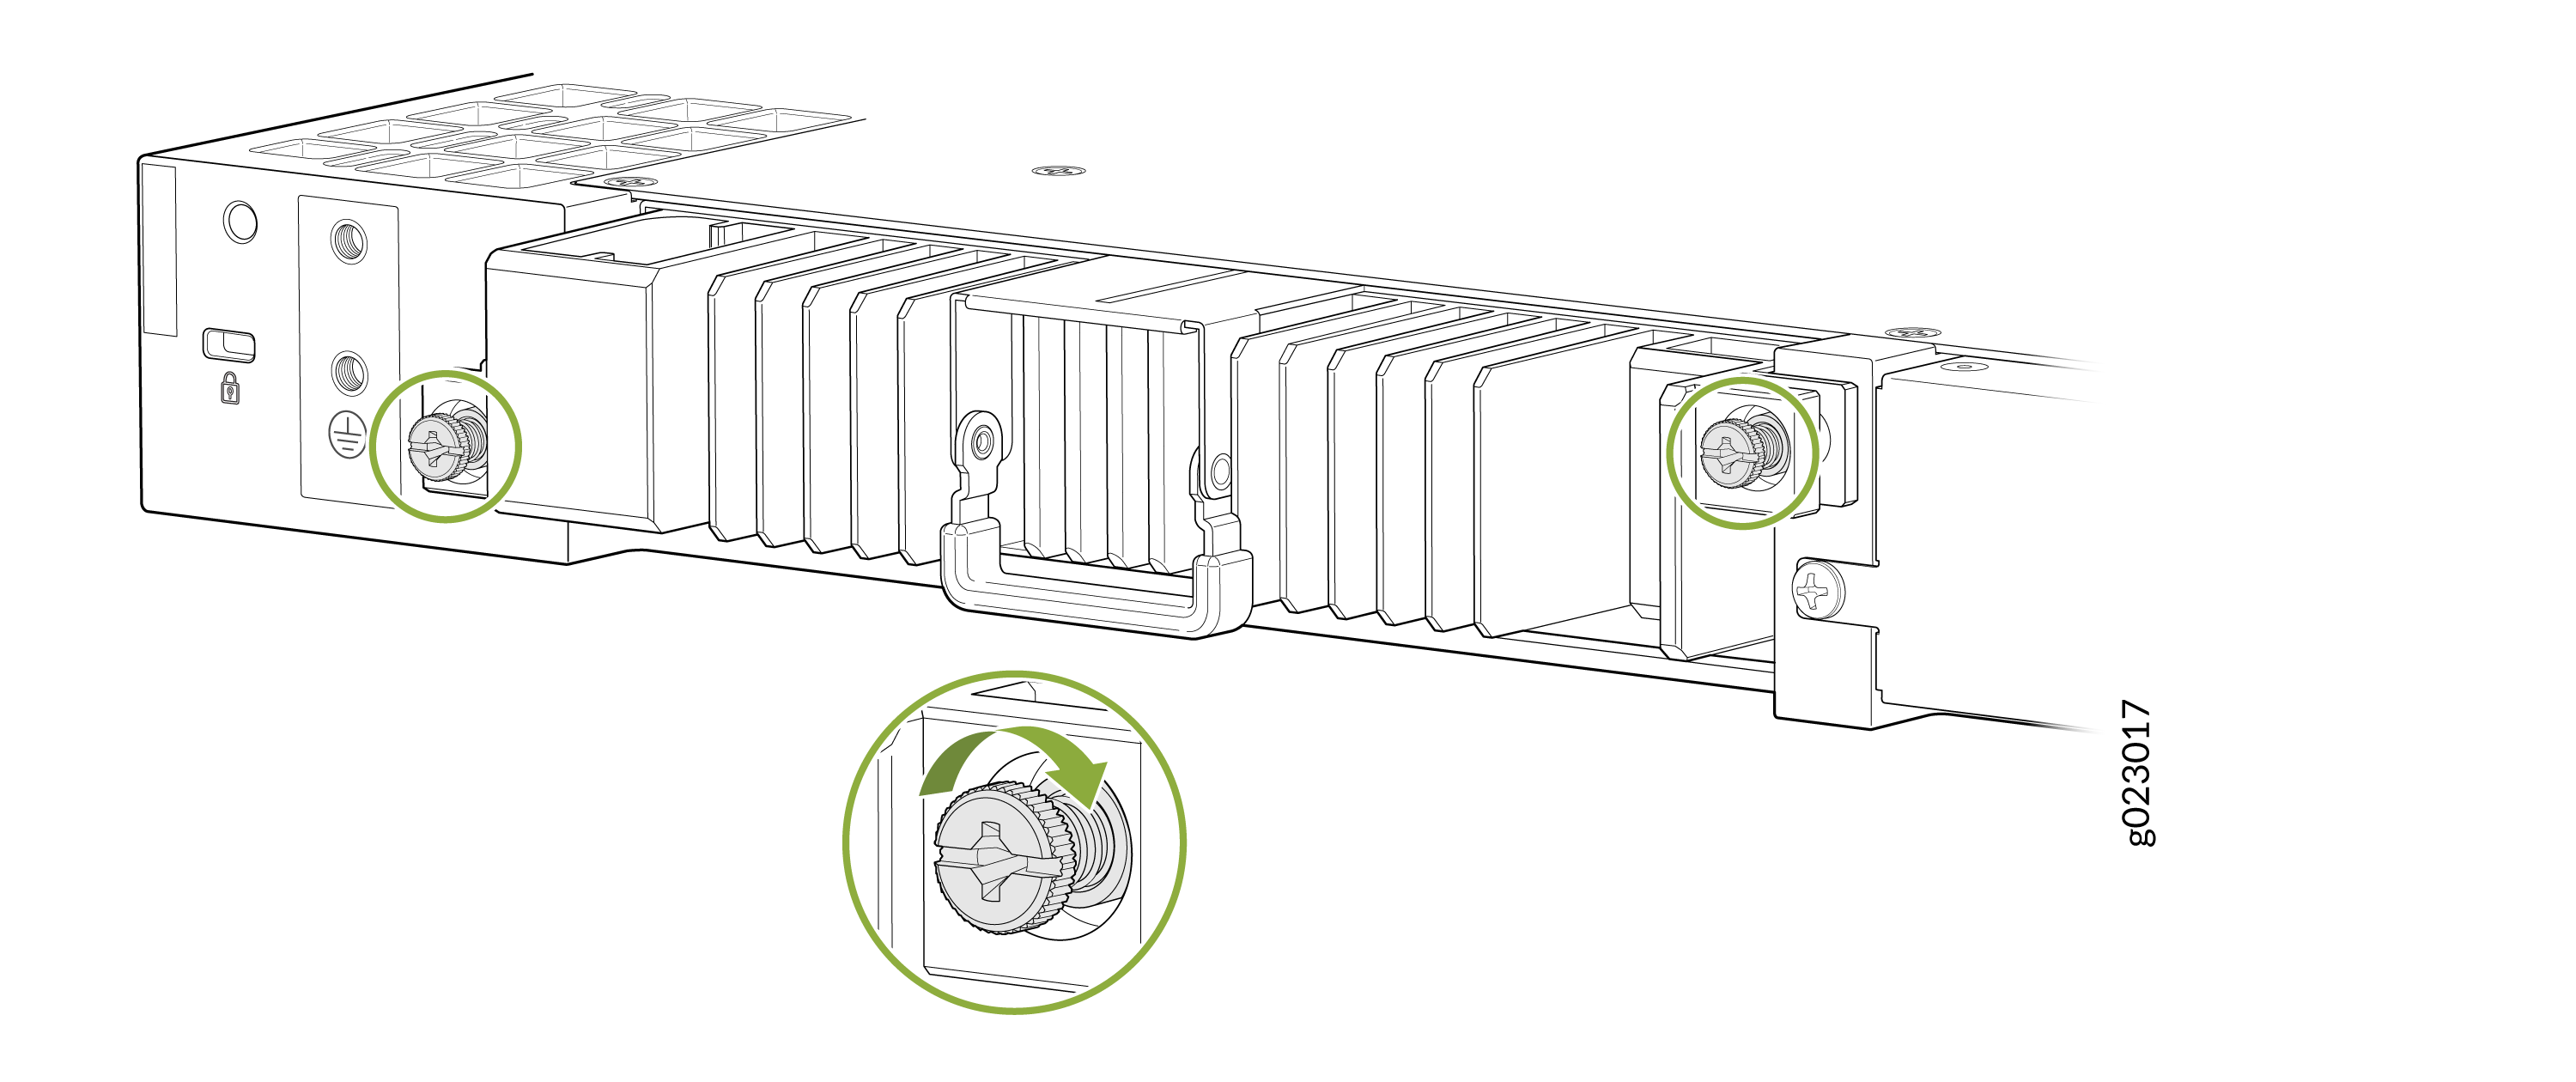
-
Insert the thumb screws and tighten the screws to secure the PSU into the
switch.
Figure 2: Insert and tighten the thumb screws
Remove Power Supply Units in an EX4100-H-24MP or EX4100-H-24F Switch
Before you remove a power supply from an EX4100-H switch, ensure that you have taken the necessary precautions to prevent electrostatic discharge (ESD) damage (see Prevention of Electrostatic Discharge Damage).
Ensure that you have the following parts and tools available to remove a power supply from an EX4100-H switch:
-
ESD grounding strap
-
Phillips (+) screwdriver, number 2 (not provided)
-
Antistatic bag or an antistatic mat
-
Replacement power supply or a cover panel for the power supply slot
The power supplies in EX4100-H switches are hot-removable and hot-insertable field-replaceable units (FRUs) installed in the rear panel of the switch. If two power supplies are installed, you can remove and replace them without powering off the switch or disrupting switch functions.
If only one power supply is installed in the switch, you must power off the switch before removing the power supply.
We recommend that you install either a replacement power supply or a cover panel in the empty power supply slot to prevent chassis overheating and dust accumulation.
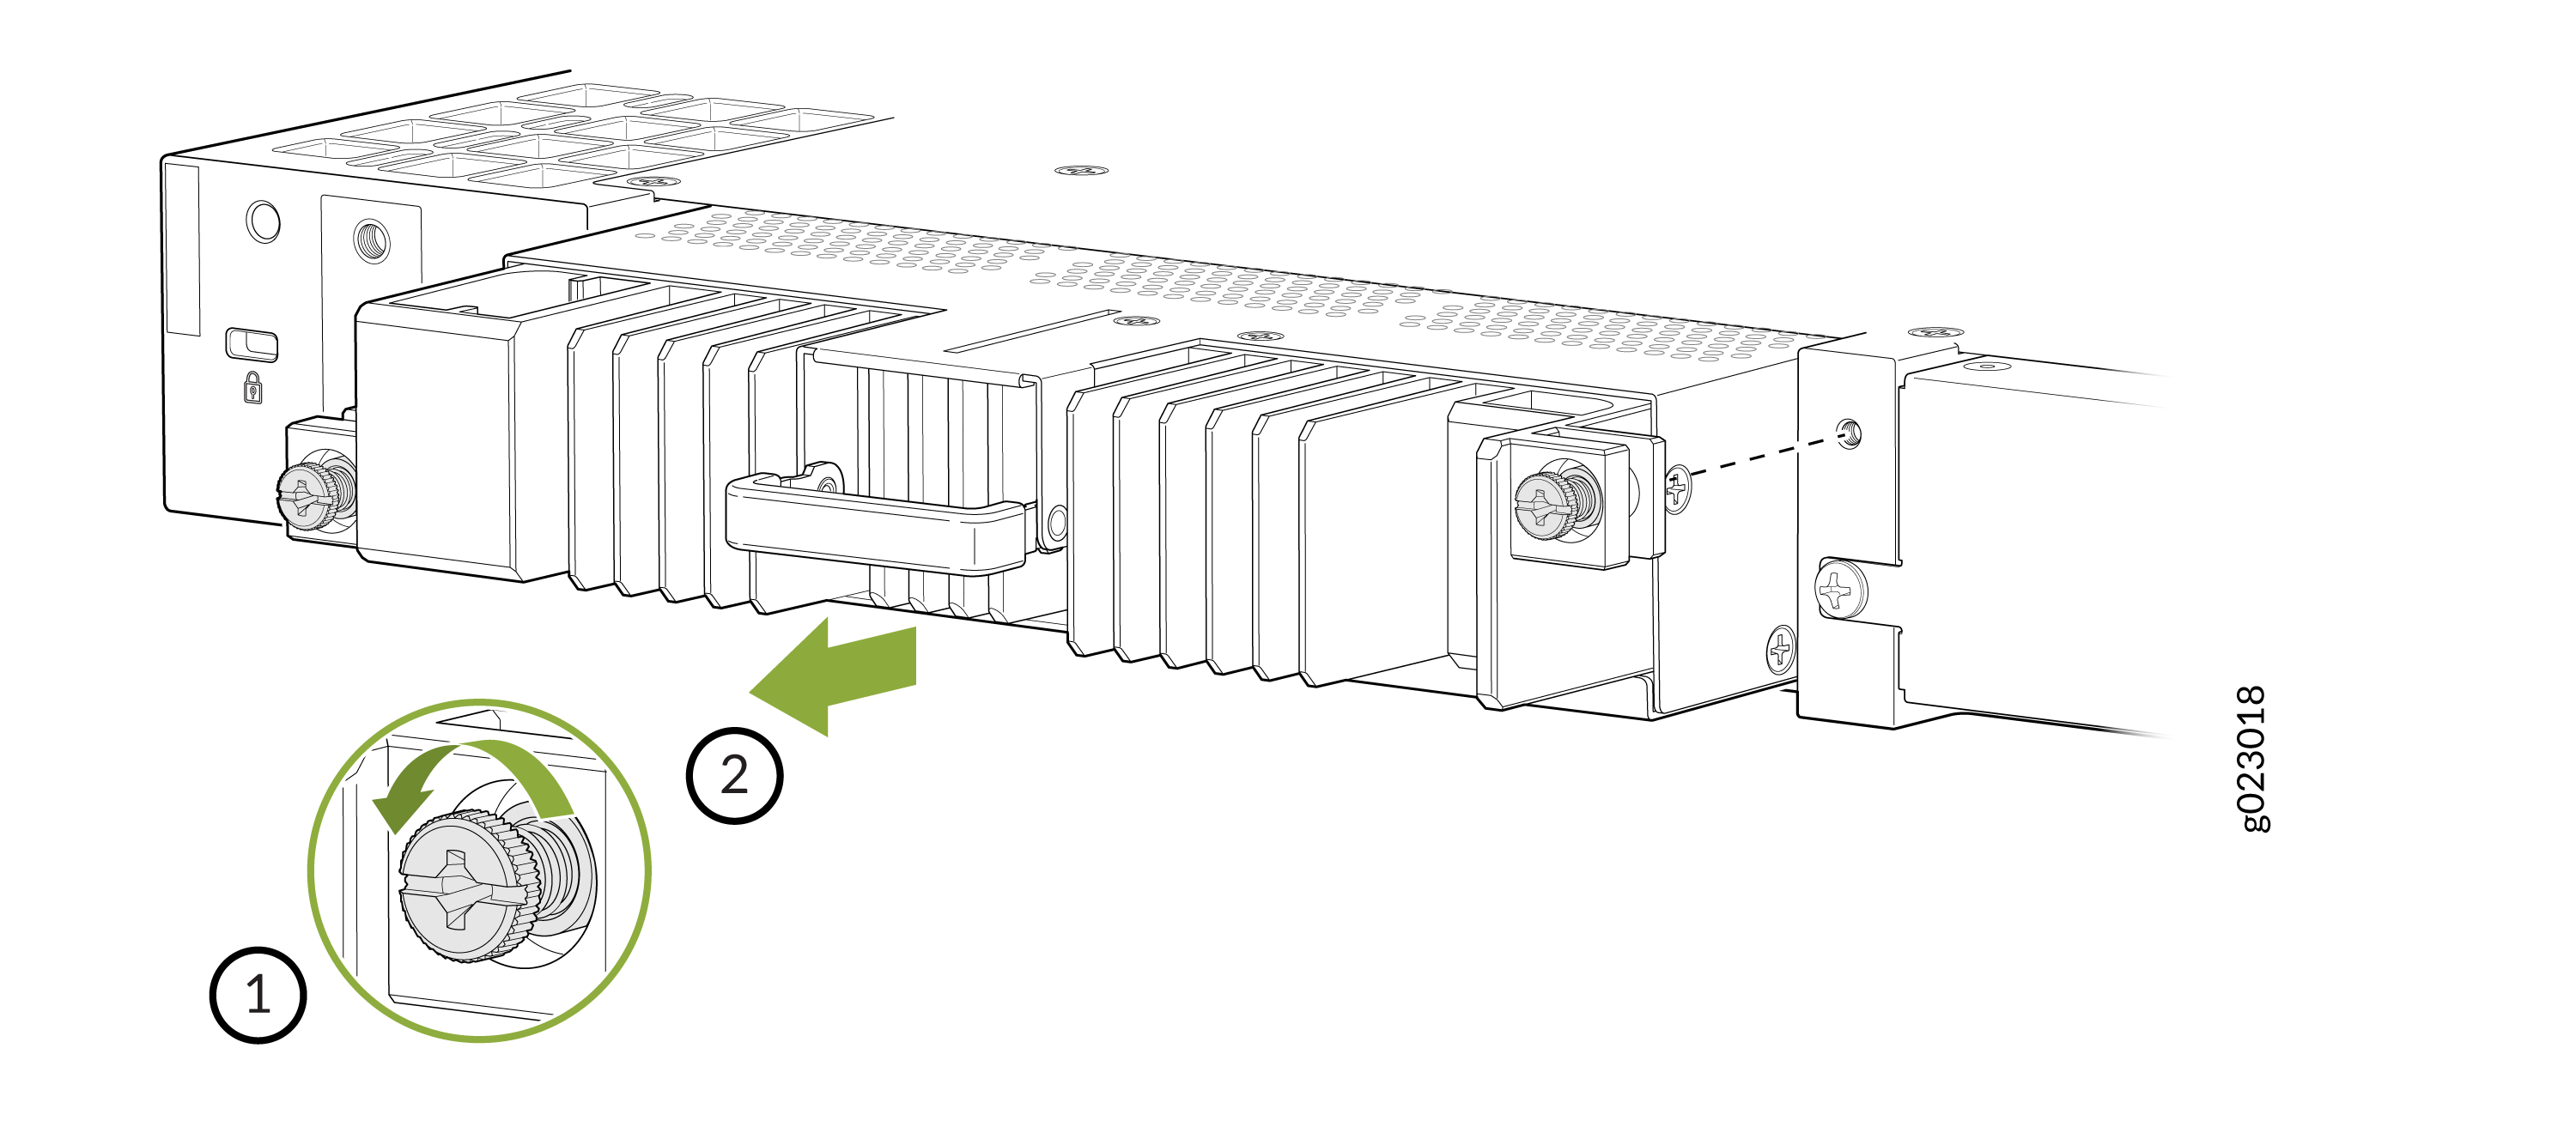
To remove an power supply from the switch:
-
Loosen the thumbnail screws and remove the PSU from the PSU slot.
Figure 3: Remove the PSU