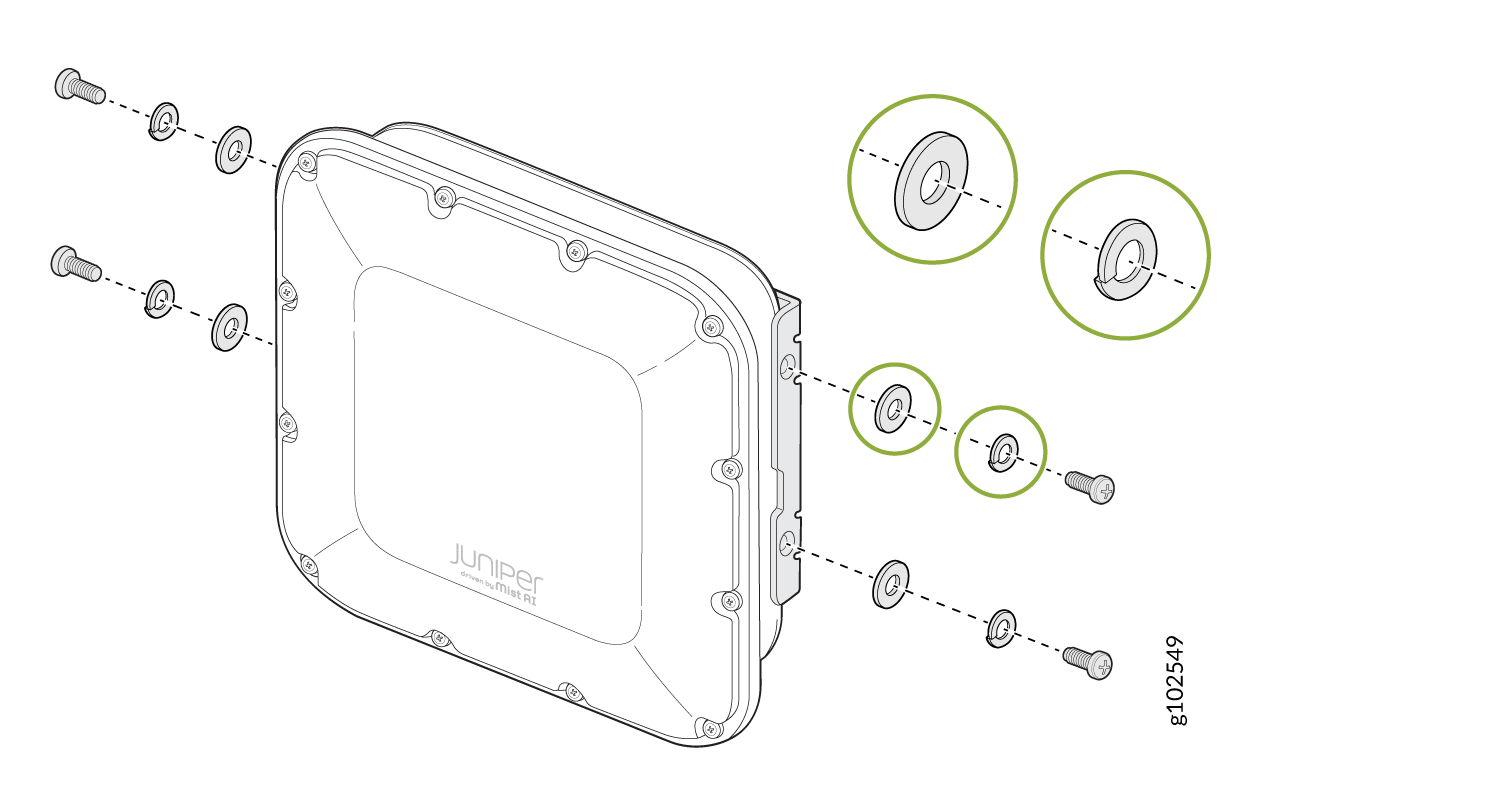
Mount an Access Point on a Wall (Flush Mount)
The mounting procedures differ by the mounting bracket used. The various mounting brackets and their supported access points (APs) are listed below:
-
APOUTBR-FM: AP61 and AP63.
-
APOUTBR-FM2: AP64 and AP66.
Mount an Access Point Using the APOUTBR-FM Bracket
Note:
This topic is applicable to the following access points (APs): AP61 and AP63.
You will need the APOUTBR-FM mounting kit.
To mount an AP on a wall:
-
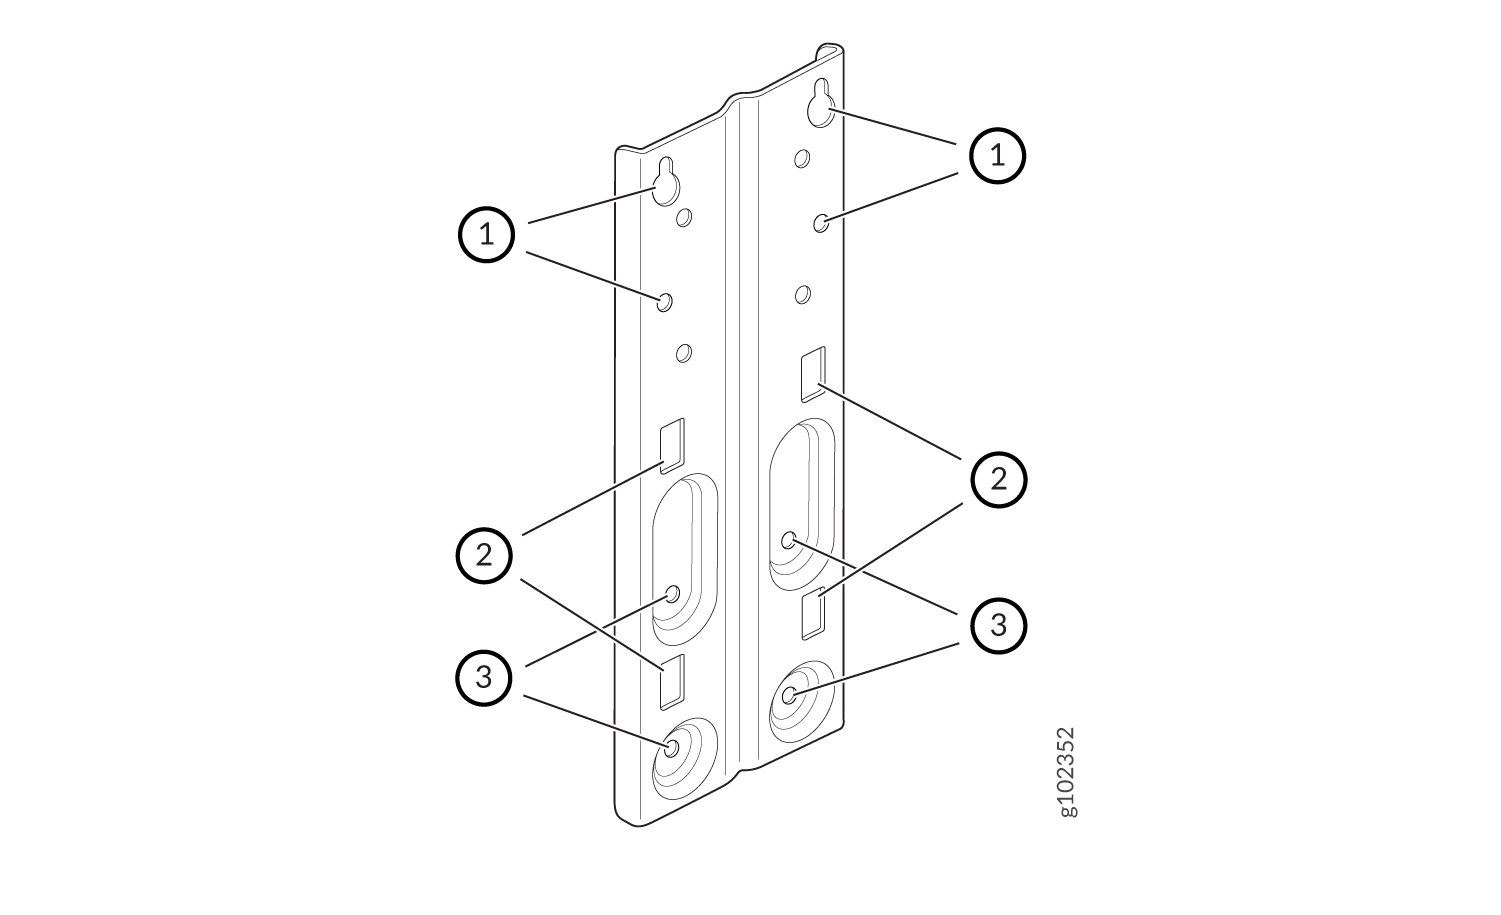
Drill four holes on the wall in such a way that they align with the
location of holes marked with callout #1 in Figure 1. Insert anchors in all the
four holes.
Figure 1: APOUTBR-FM Flush Mount Bracket
-
Attach the APOUTBR-FM flush mount bracket to the AP by using the four
screws, washers, and spring washers provided along with the AP.
Use the bracket screw holes marked with callout #3 in Figure 1.Figure 2: Attach the APOUTBR-FM Flush Mount Bracket to the AP
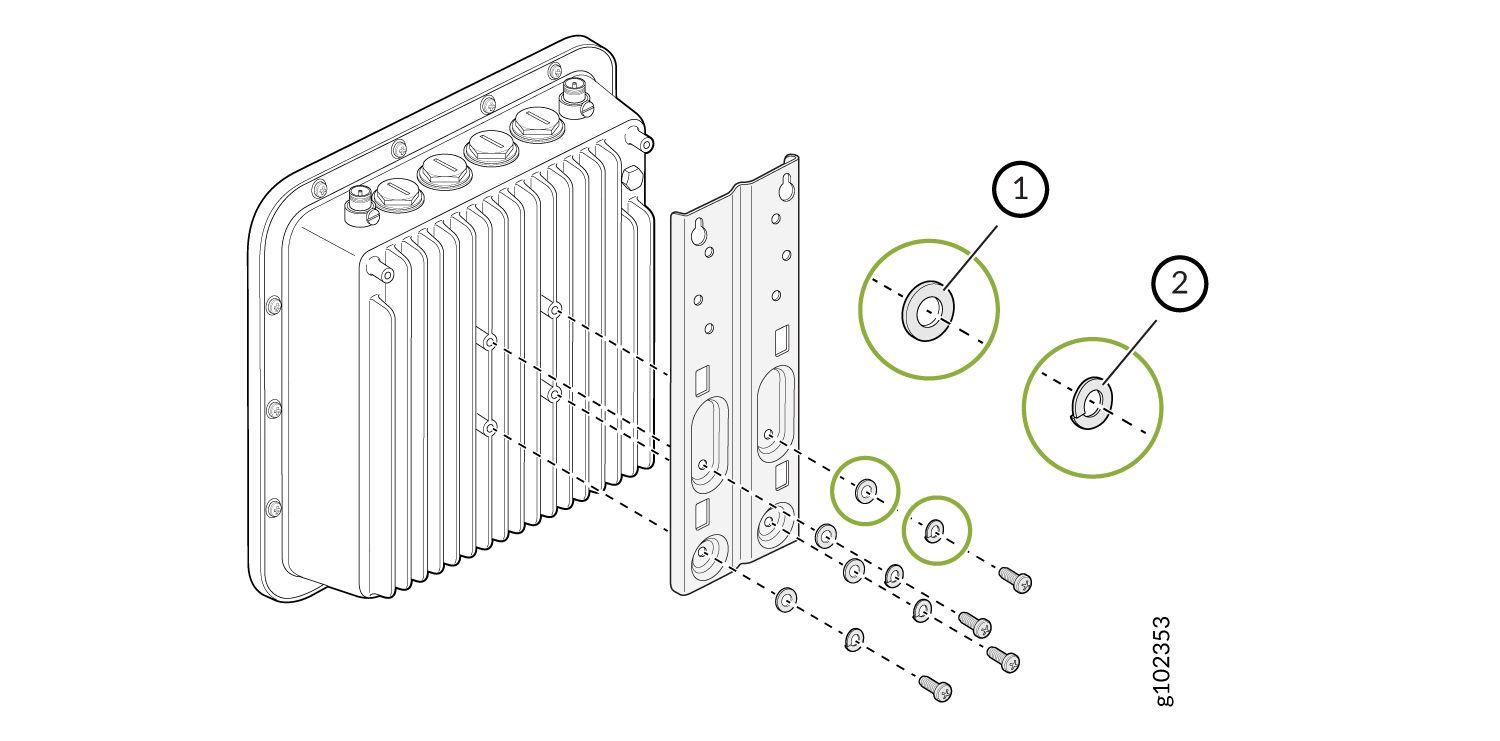
1—Washer 2—Spring washer -
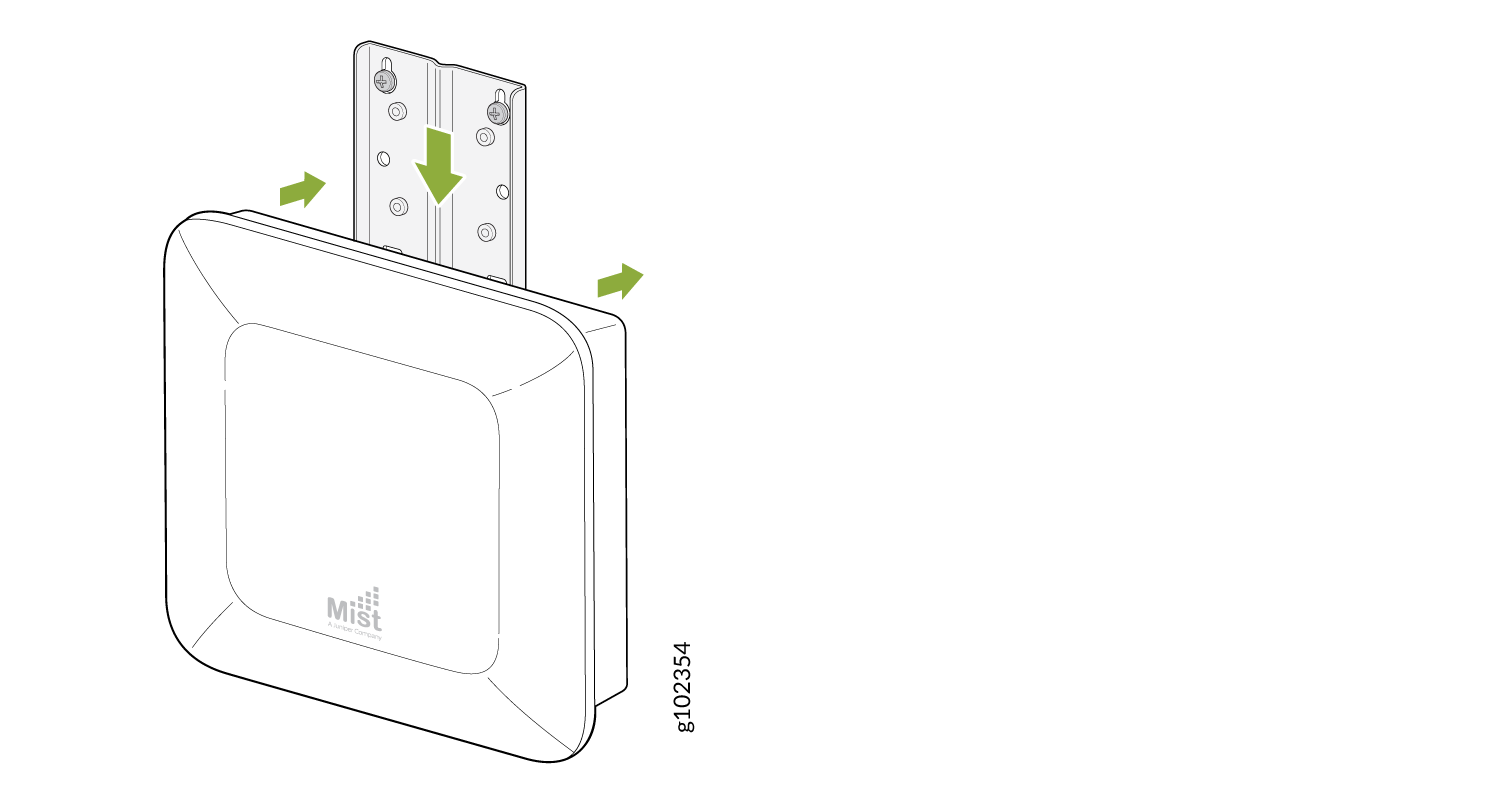
Position the AP such that the two screws that you inserted into the wall in
Step 1 fit into the holes in the bracket. Slide the AP downward so that the
screws lock in place.
Figure 3: Mount the AP on a Wall (Flush Mount)
-
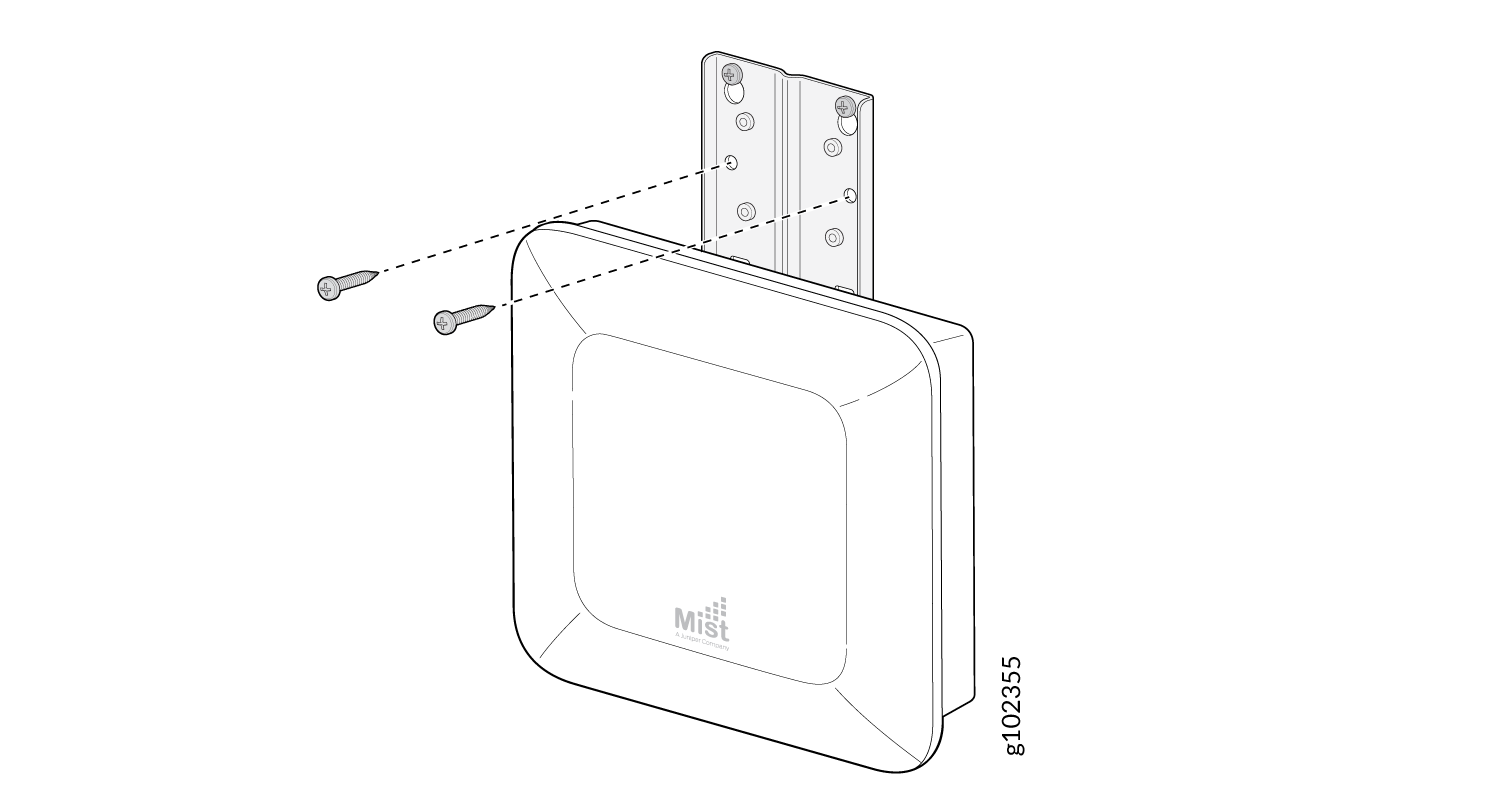
Insert the other two screws through the bracket into the holes in the wall
and then tighten all the four screws.
Figure 4: Secure the AP to a Wall
Mount an Access Point Using the APOUTBR-FM2 Bracket
Note:
This topic is applicable to the following access points (APs): AP64 and AP66.
You will need the APOUTBR-FM2 mounting kit.
To mount an AP on a wall:
-
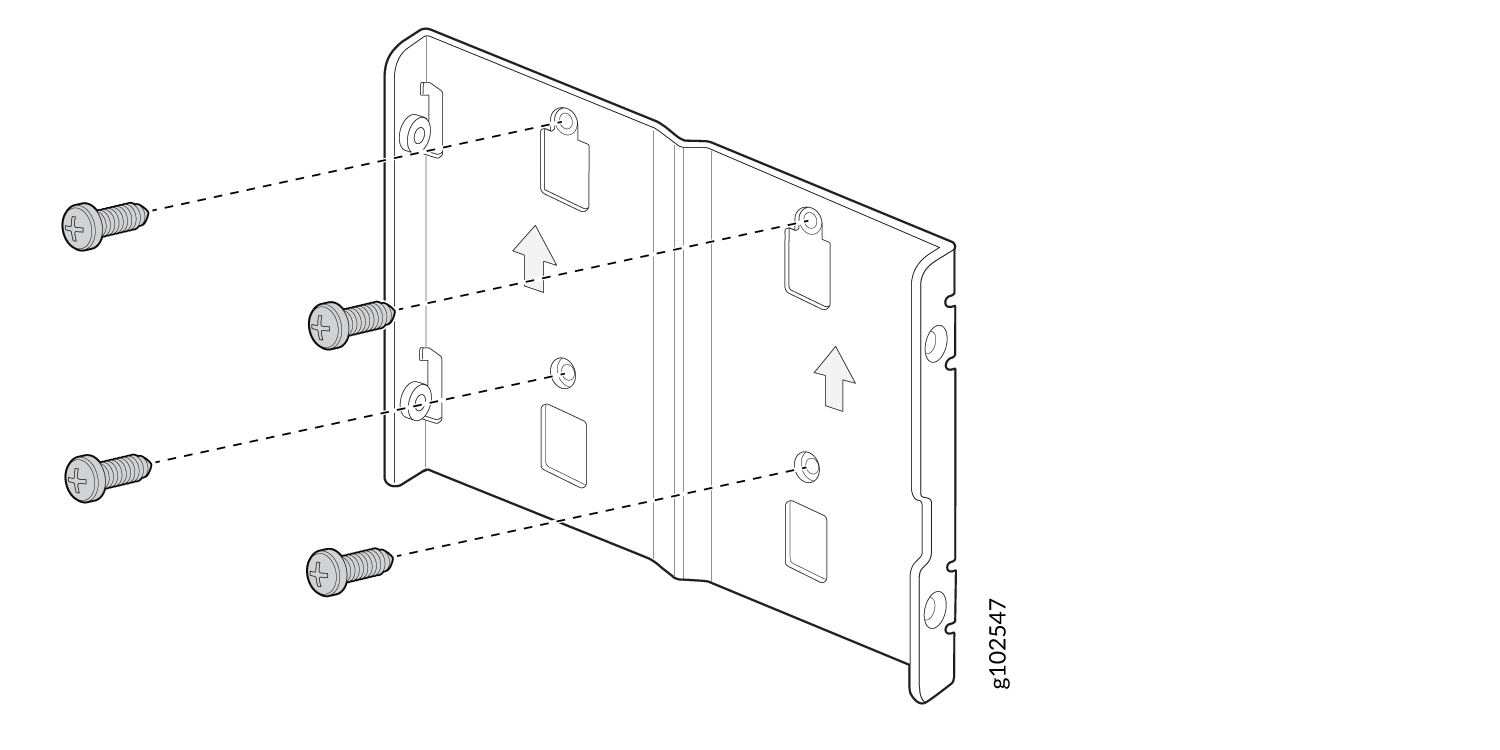
Install the APOUTBR-FM2 mounting bracket on the wall using the four
screws.
Figure 5: Install the APOUTBR-FM2 Mounting Bracket
-
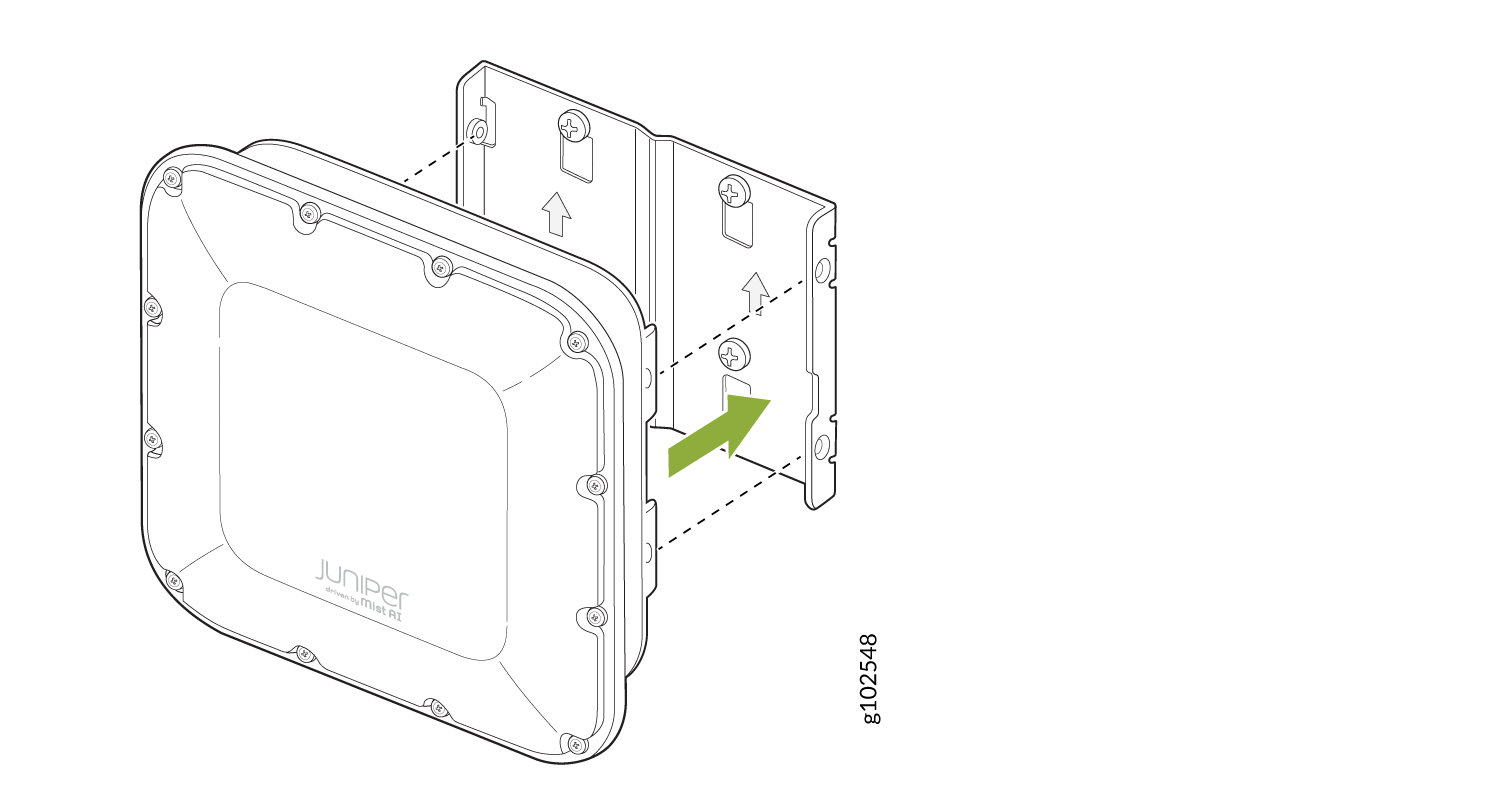
Attach the AP to the APOUTBR-FM2 mounting bracket.
Figure 6: Attach the AP to the APOUTBR-FM2
-
Secure the AP by using the four M6 screws, washers, and lock washers
provided along with the AP.
Figure 7: Mount the AP on a Wall (Flush Mount)