
Mount an Access Point on a Double-Gang Junction Box
The mounting procedures differ by the mounting bracket used. The various mounting brackets and their supported access points (APs) are listed below:
-
APBR-U: AP21, AP24, AP27, AP32, AP33, AP34, AP36, AP37, AP41, AP43, AP45, AP47, and BT11.
-
APBR-WP1: AP12
-
APBR-WP2: AP17
-
AP-600H-MNT2: AP-723H
Mount an Access Point Using the APBR-U Bracket
This topic is applicable to the following access points (APs): AP21, AP24, AP27, AP32, AP33, AP34, AP36, AP37, AP41, AP43, AP45, AP47, and BT11.
You will need the APBR-U universal mounting bracket.
-
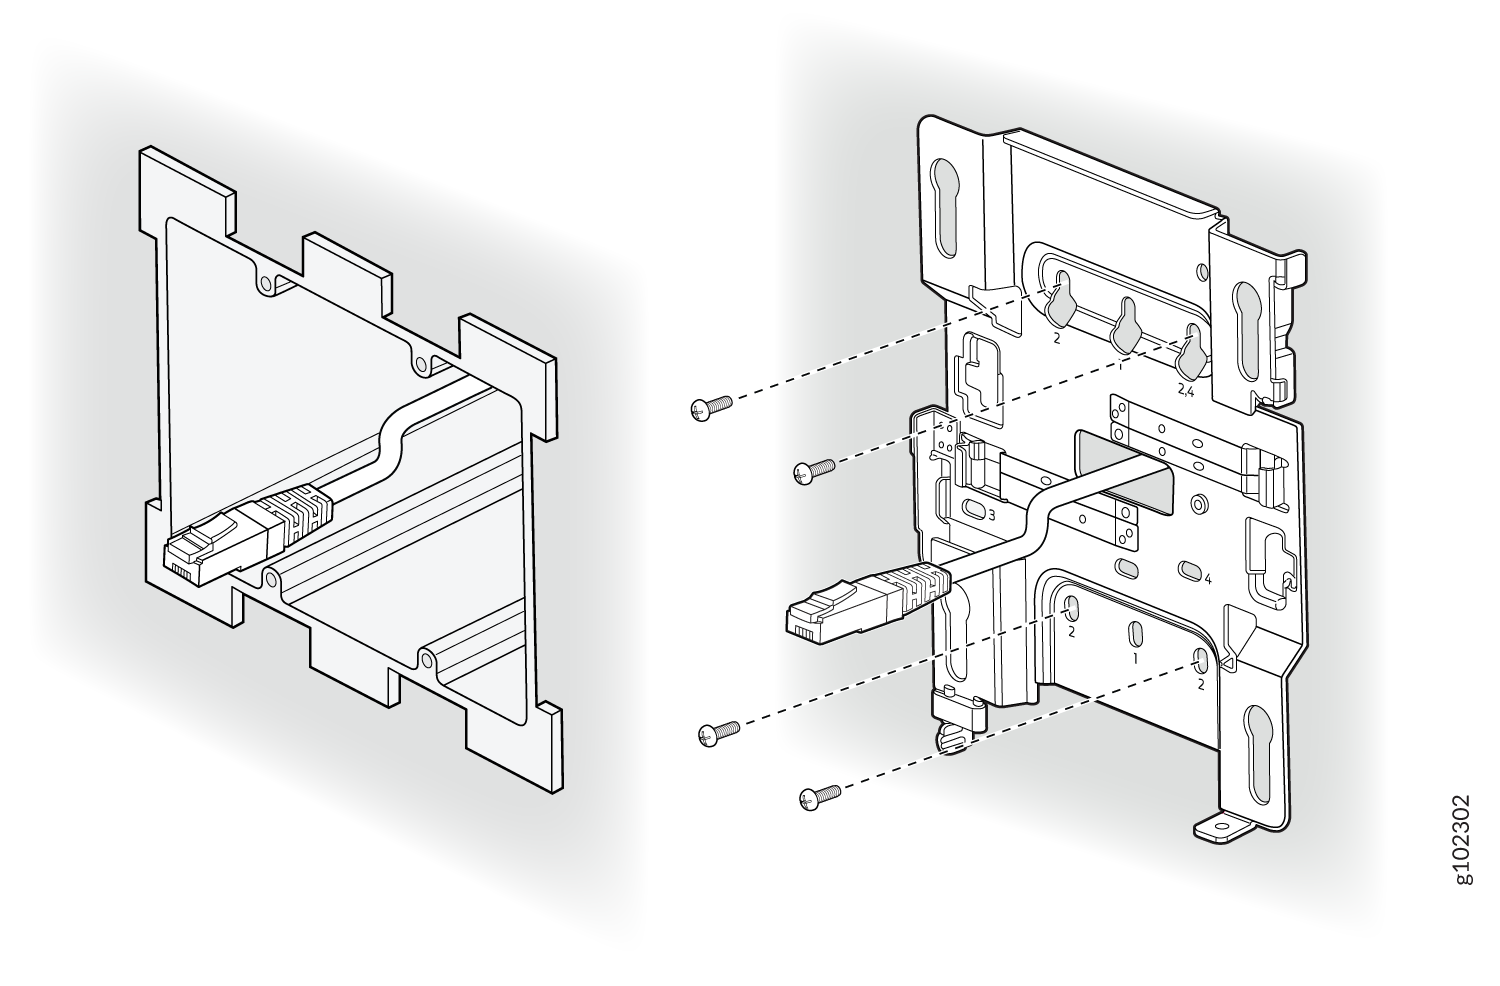
Attach the mounting bracket to the double-gang junction box by using four
screws. Ensure that you insert the screws in the holes marked 2 as shown in
Figure 1.
Figure 1: Attach the APBR-U Mounting Bracket to the Double-Gang Junction Box
-
Position the AP such that the shoulder screws on the AP engage with the
keyholes of the mounting bracket. Slide and lock the AP in place.
Figure 2: Mount the AP on the Double-Gang Junction Box
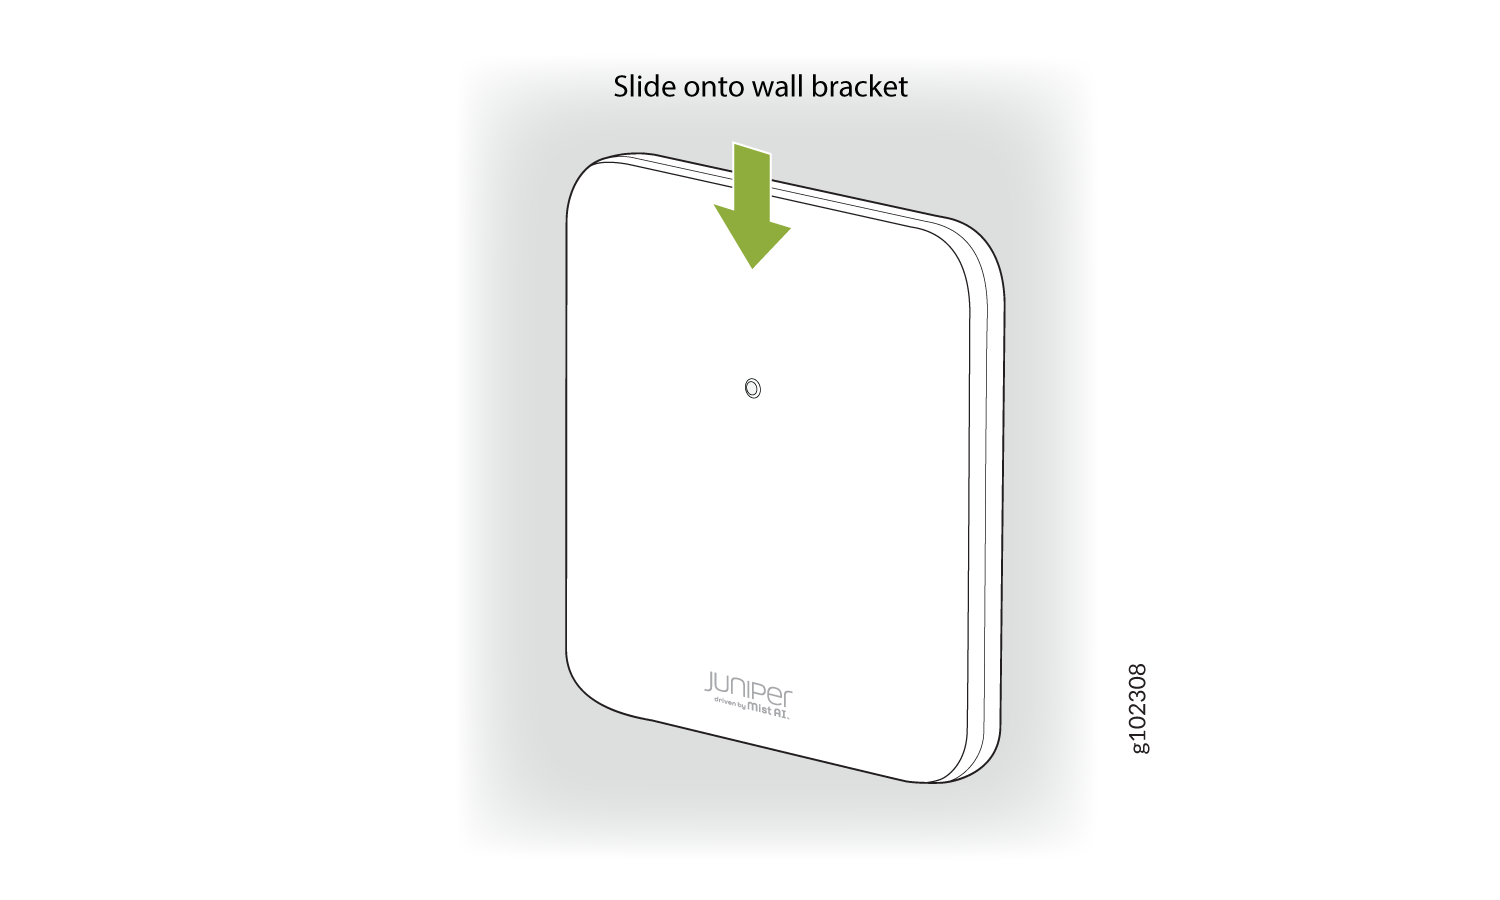
This is a US double gang box, and it attaches as shown here. And the AP would be installed normally
Mount an Access Point Using the APBR-WP1 Bracket
This topic is applicable to AP12 access points (APs).
You will need the APBR-WP1 wall plate mounting bracket.
-
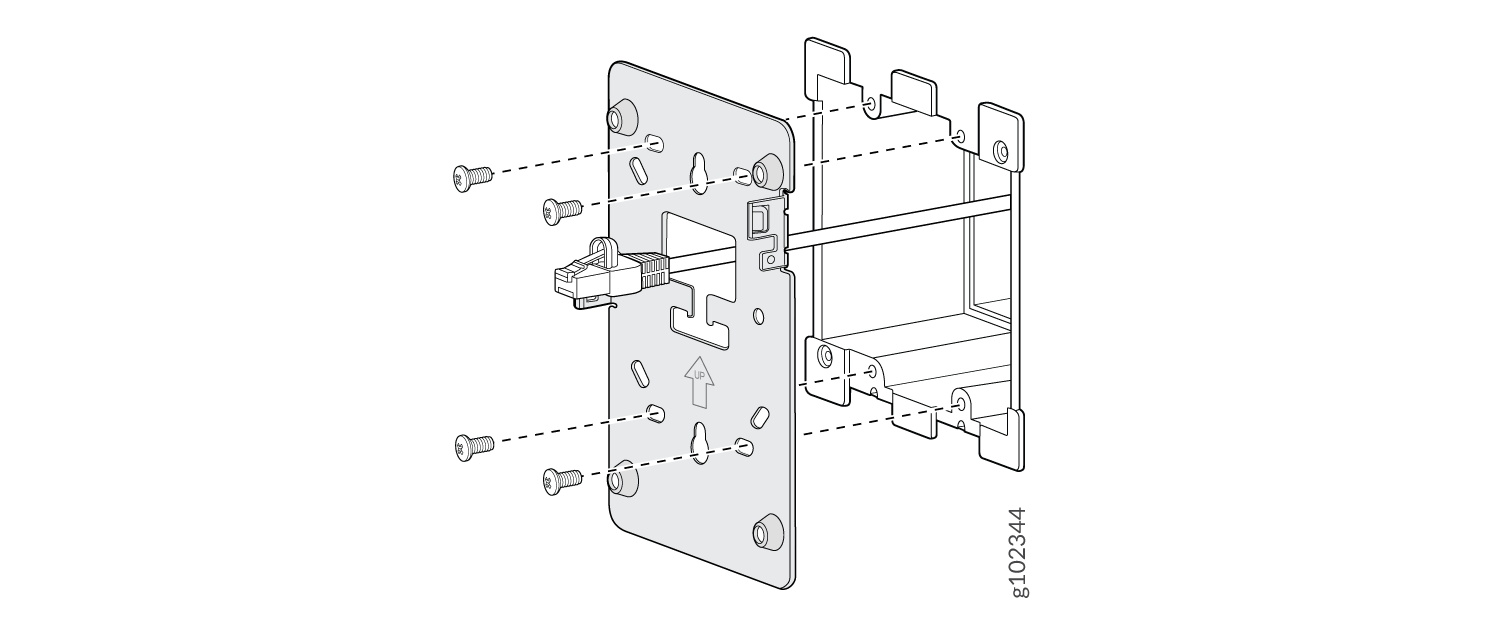
Attach the wall plate to the double-gang junction box as shown in Figure 3.
Figure 3: Attach the Wall Plate Bracket to the Double-Gang Junction Box
-
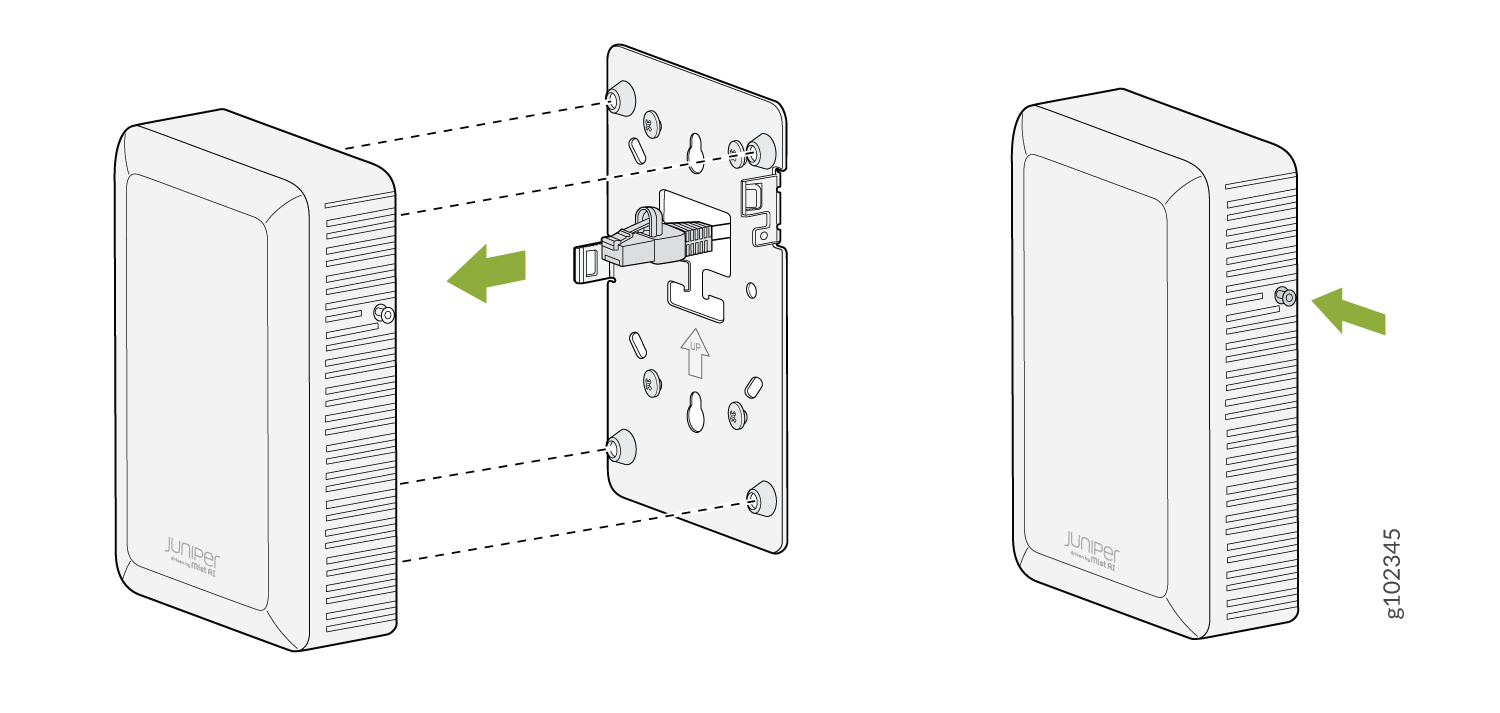
Slide the AP onto the wall plate until the lock is engaged. Then, tighten
the security screw.
Mount an Access Point Using the APBR-WP2 Bracket
This topic is applicable to AP17 access points (APs).
You will need the APBR-WP2 wall plate mounting bracket.
-
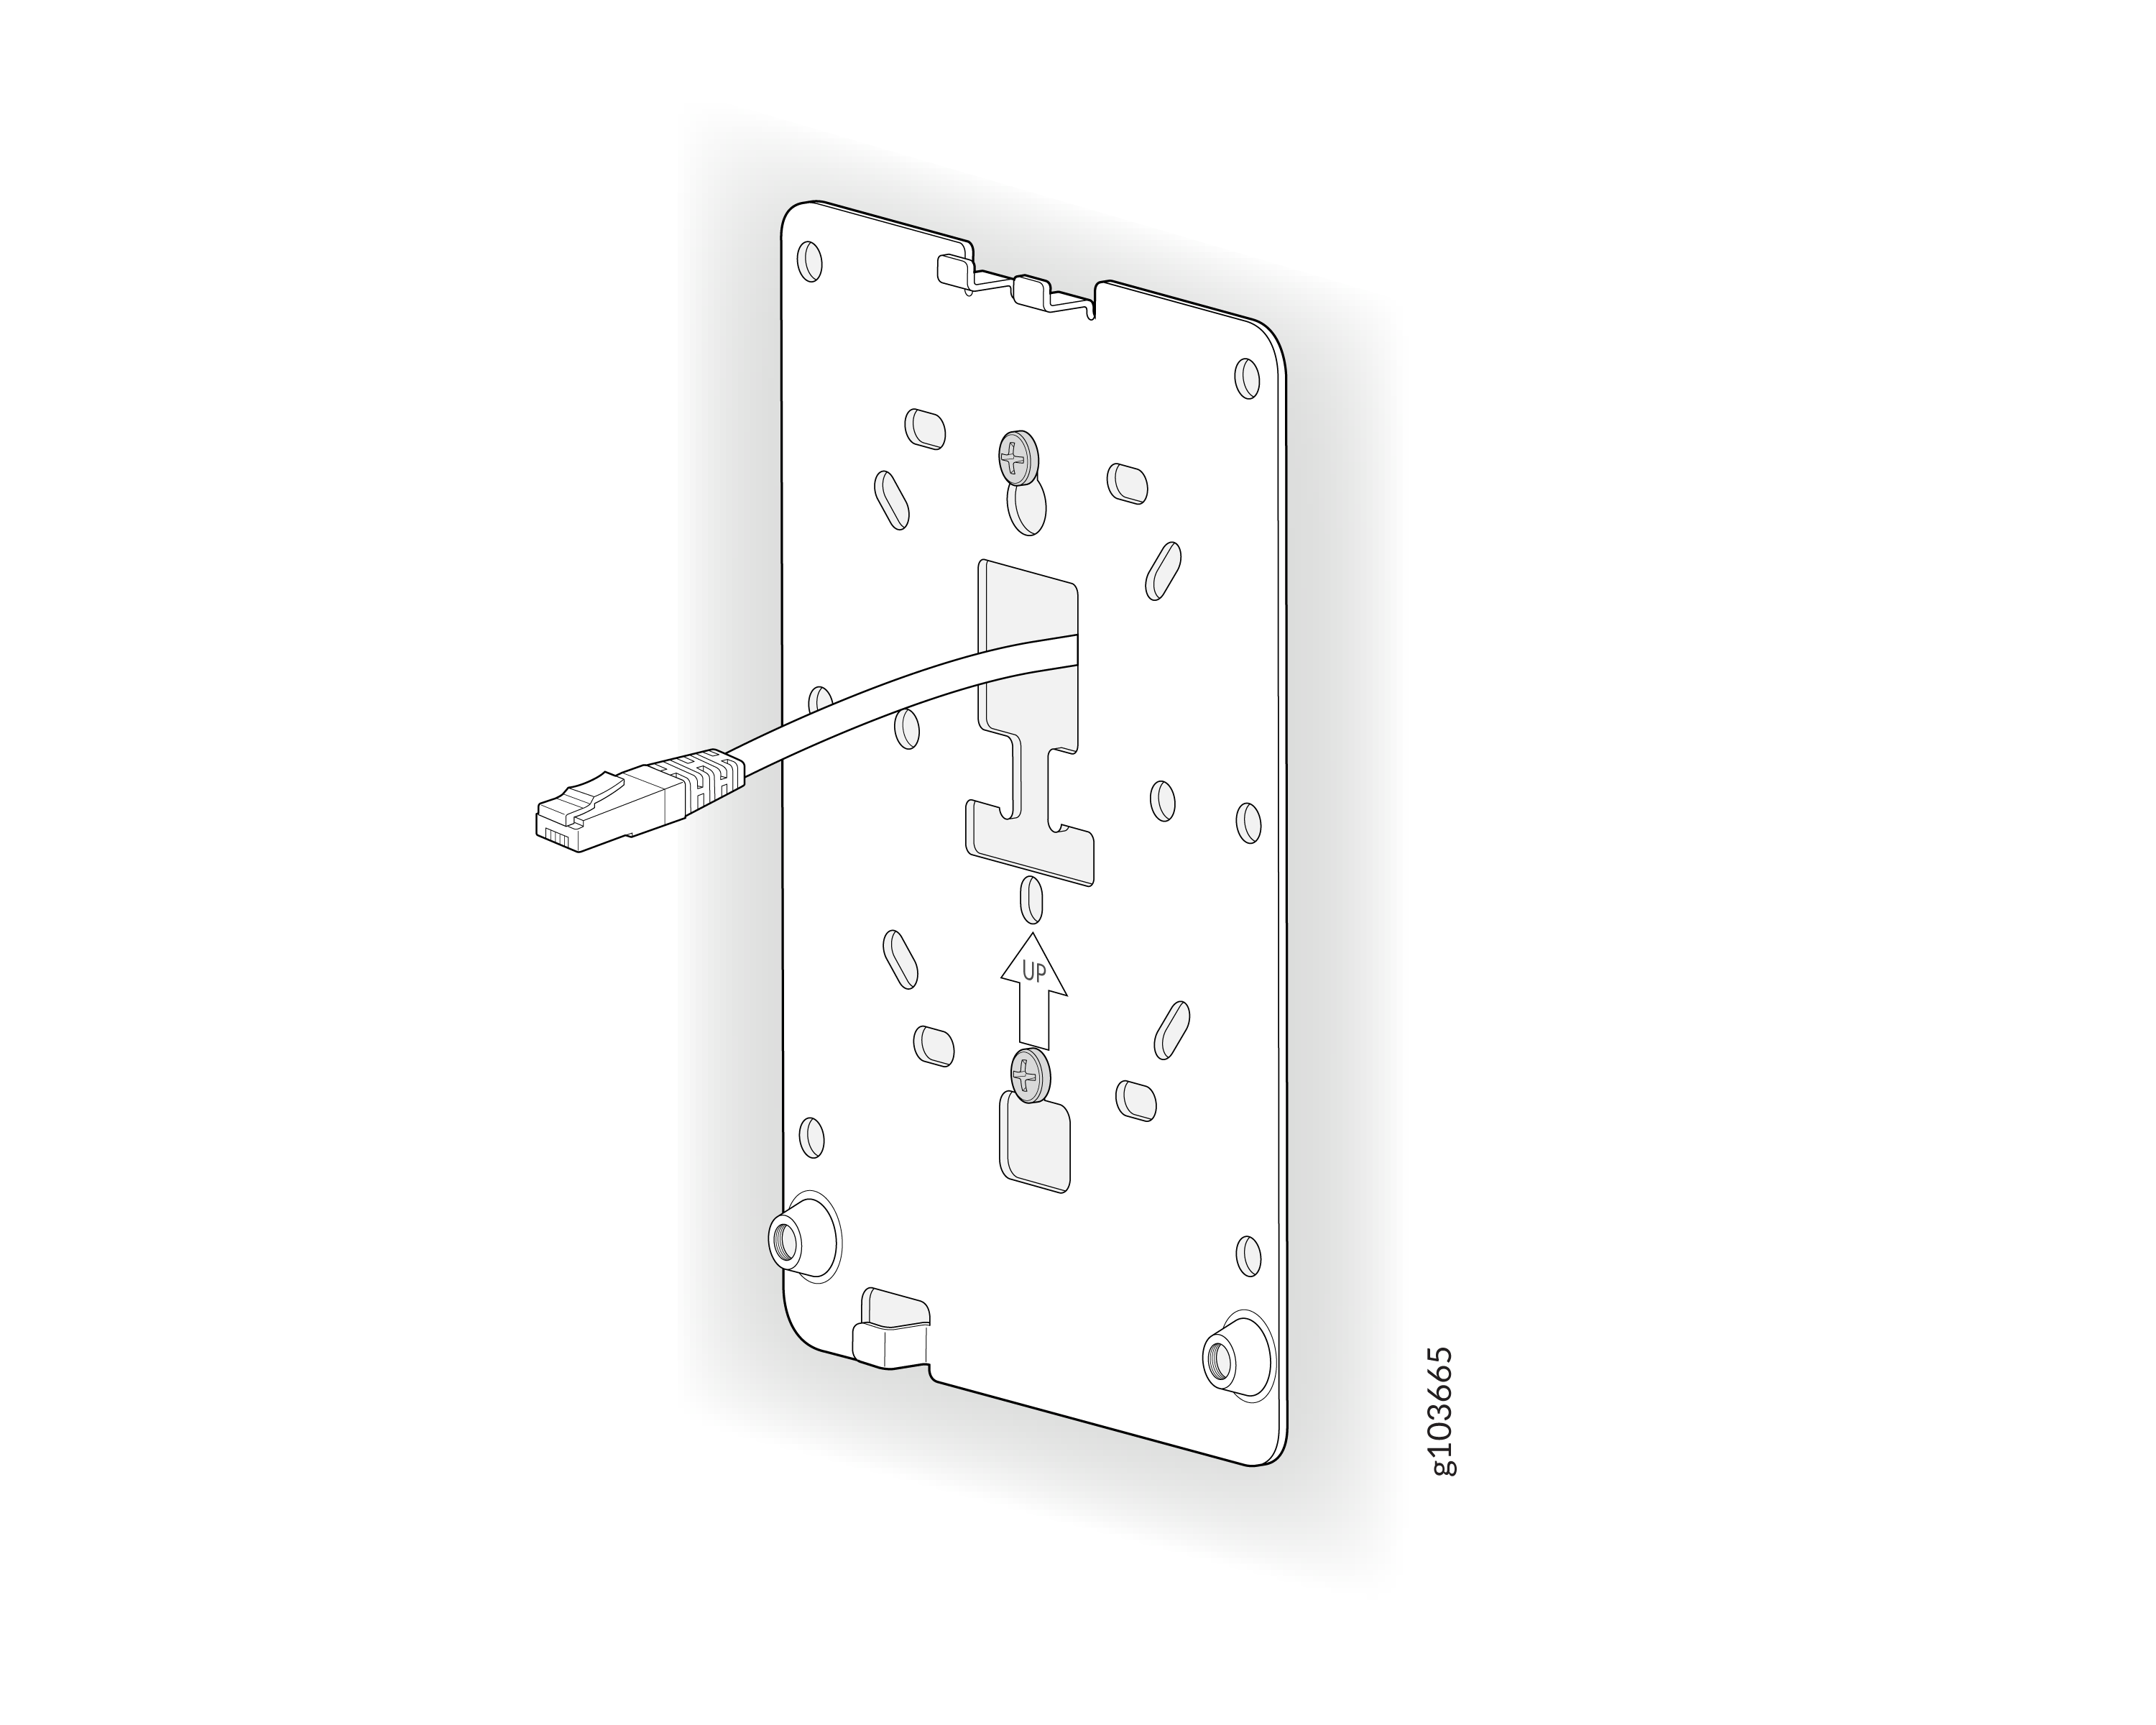
Secure the APBR-WP2 wall plate mounting bracket to the junction box.
-
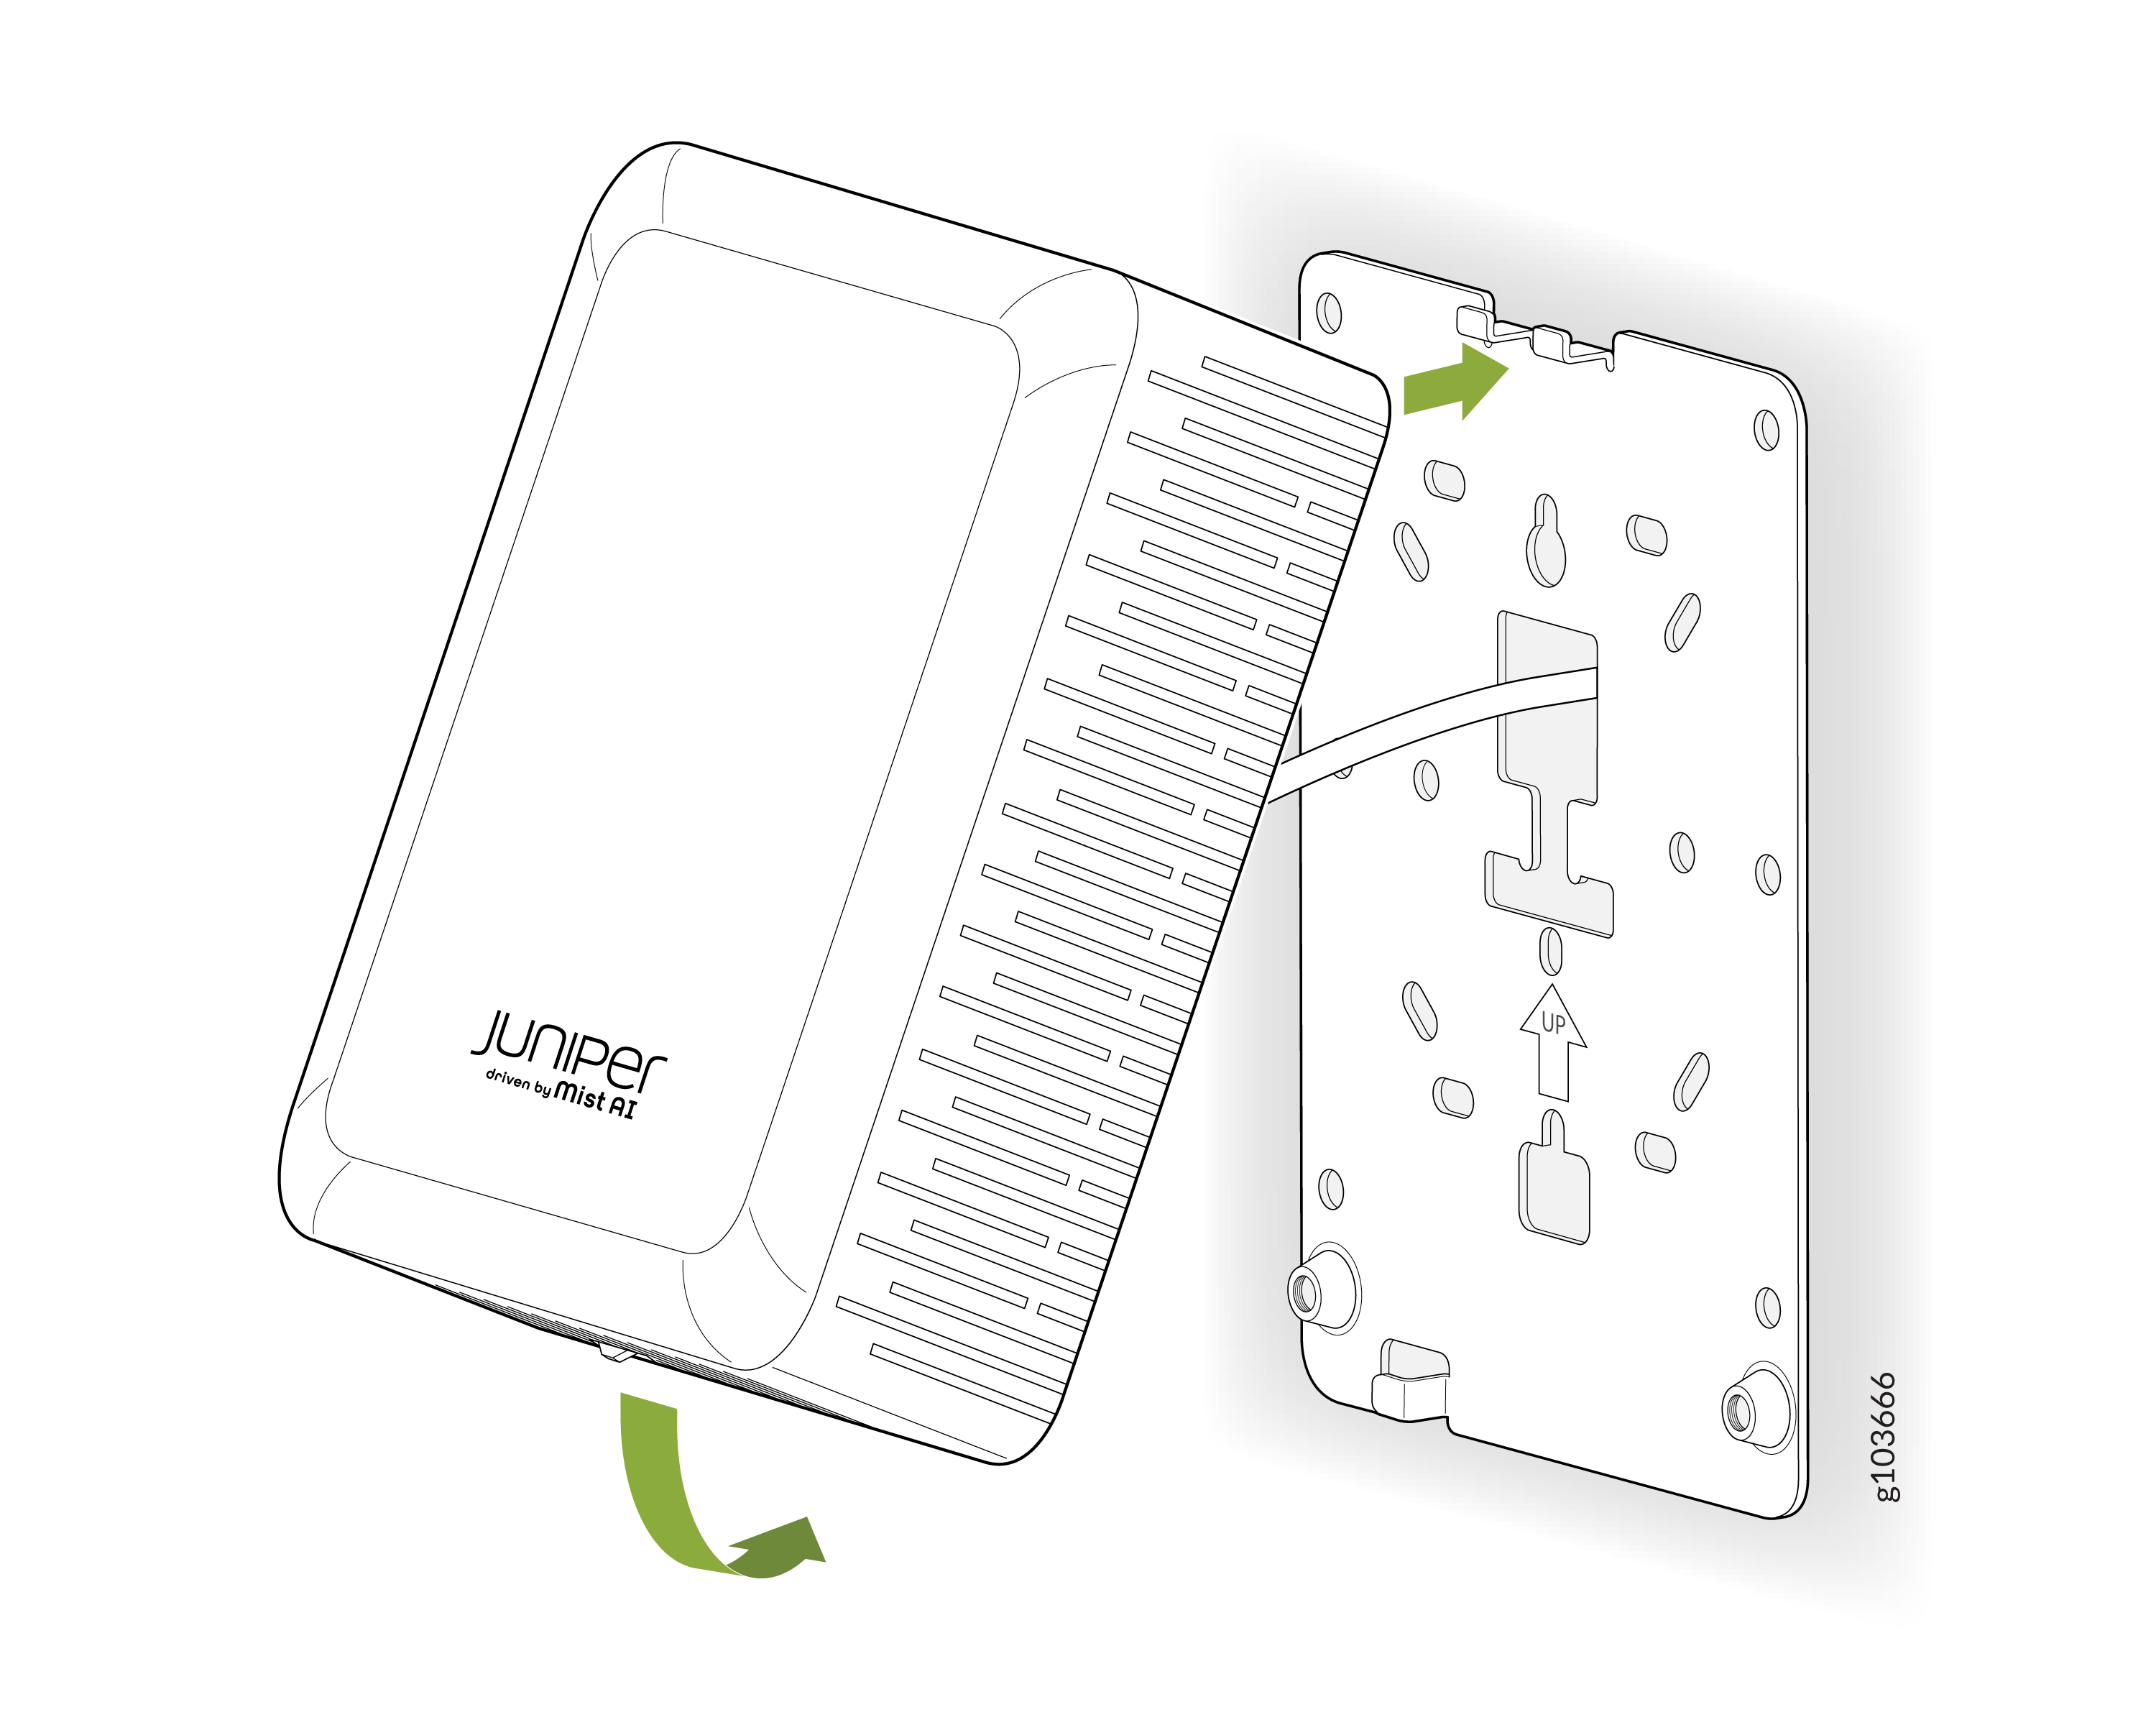
Align the top of the AP to the hook on top of the mounting bracket. Rotate
the AP so that the bottom of the AP is flush with the mounting
bracket.
-
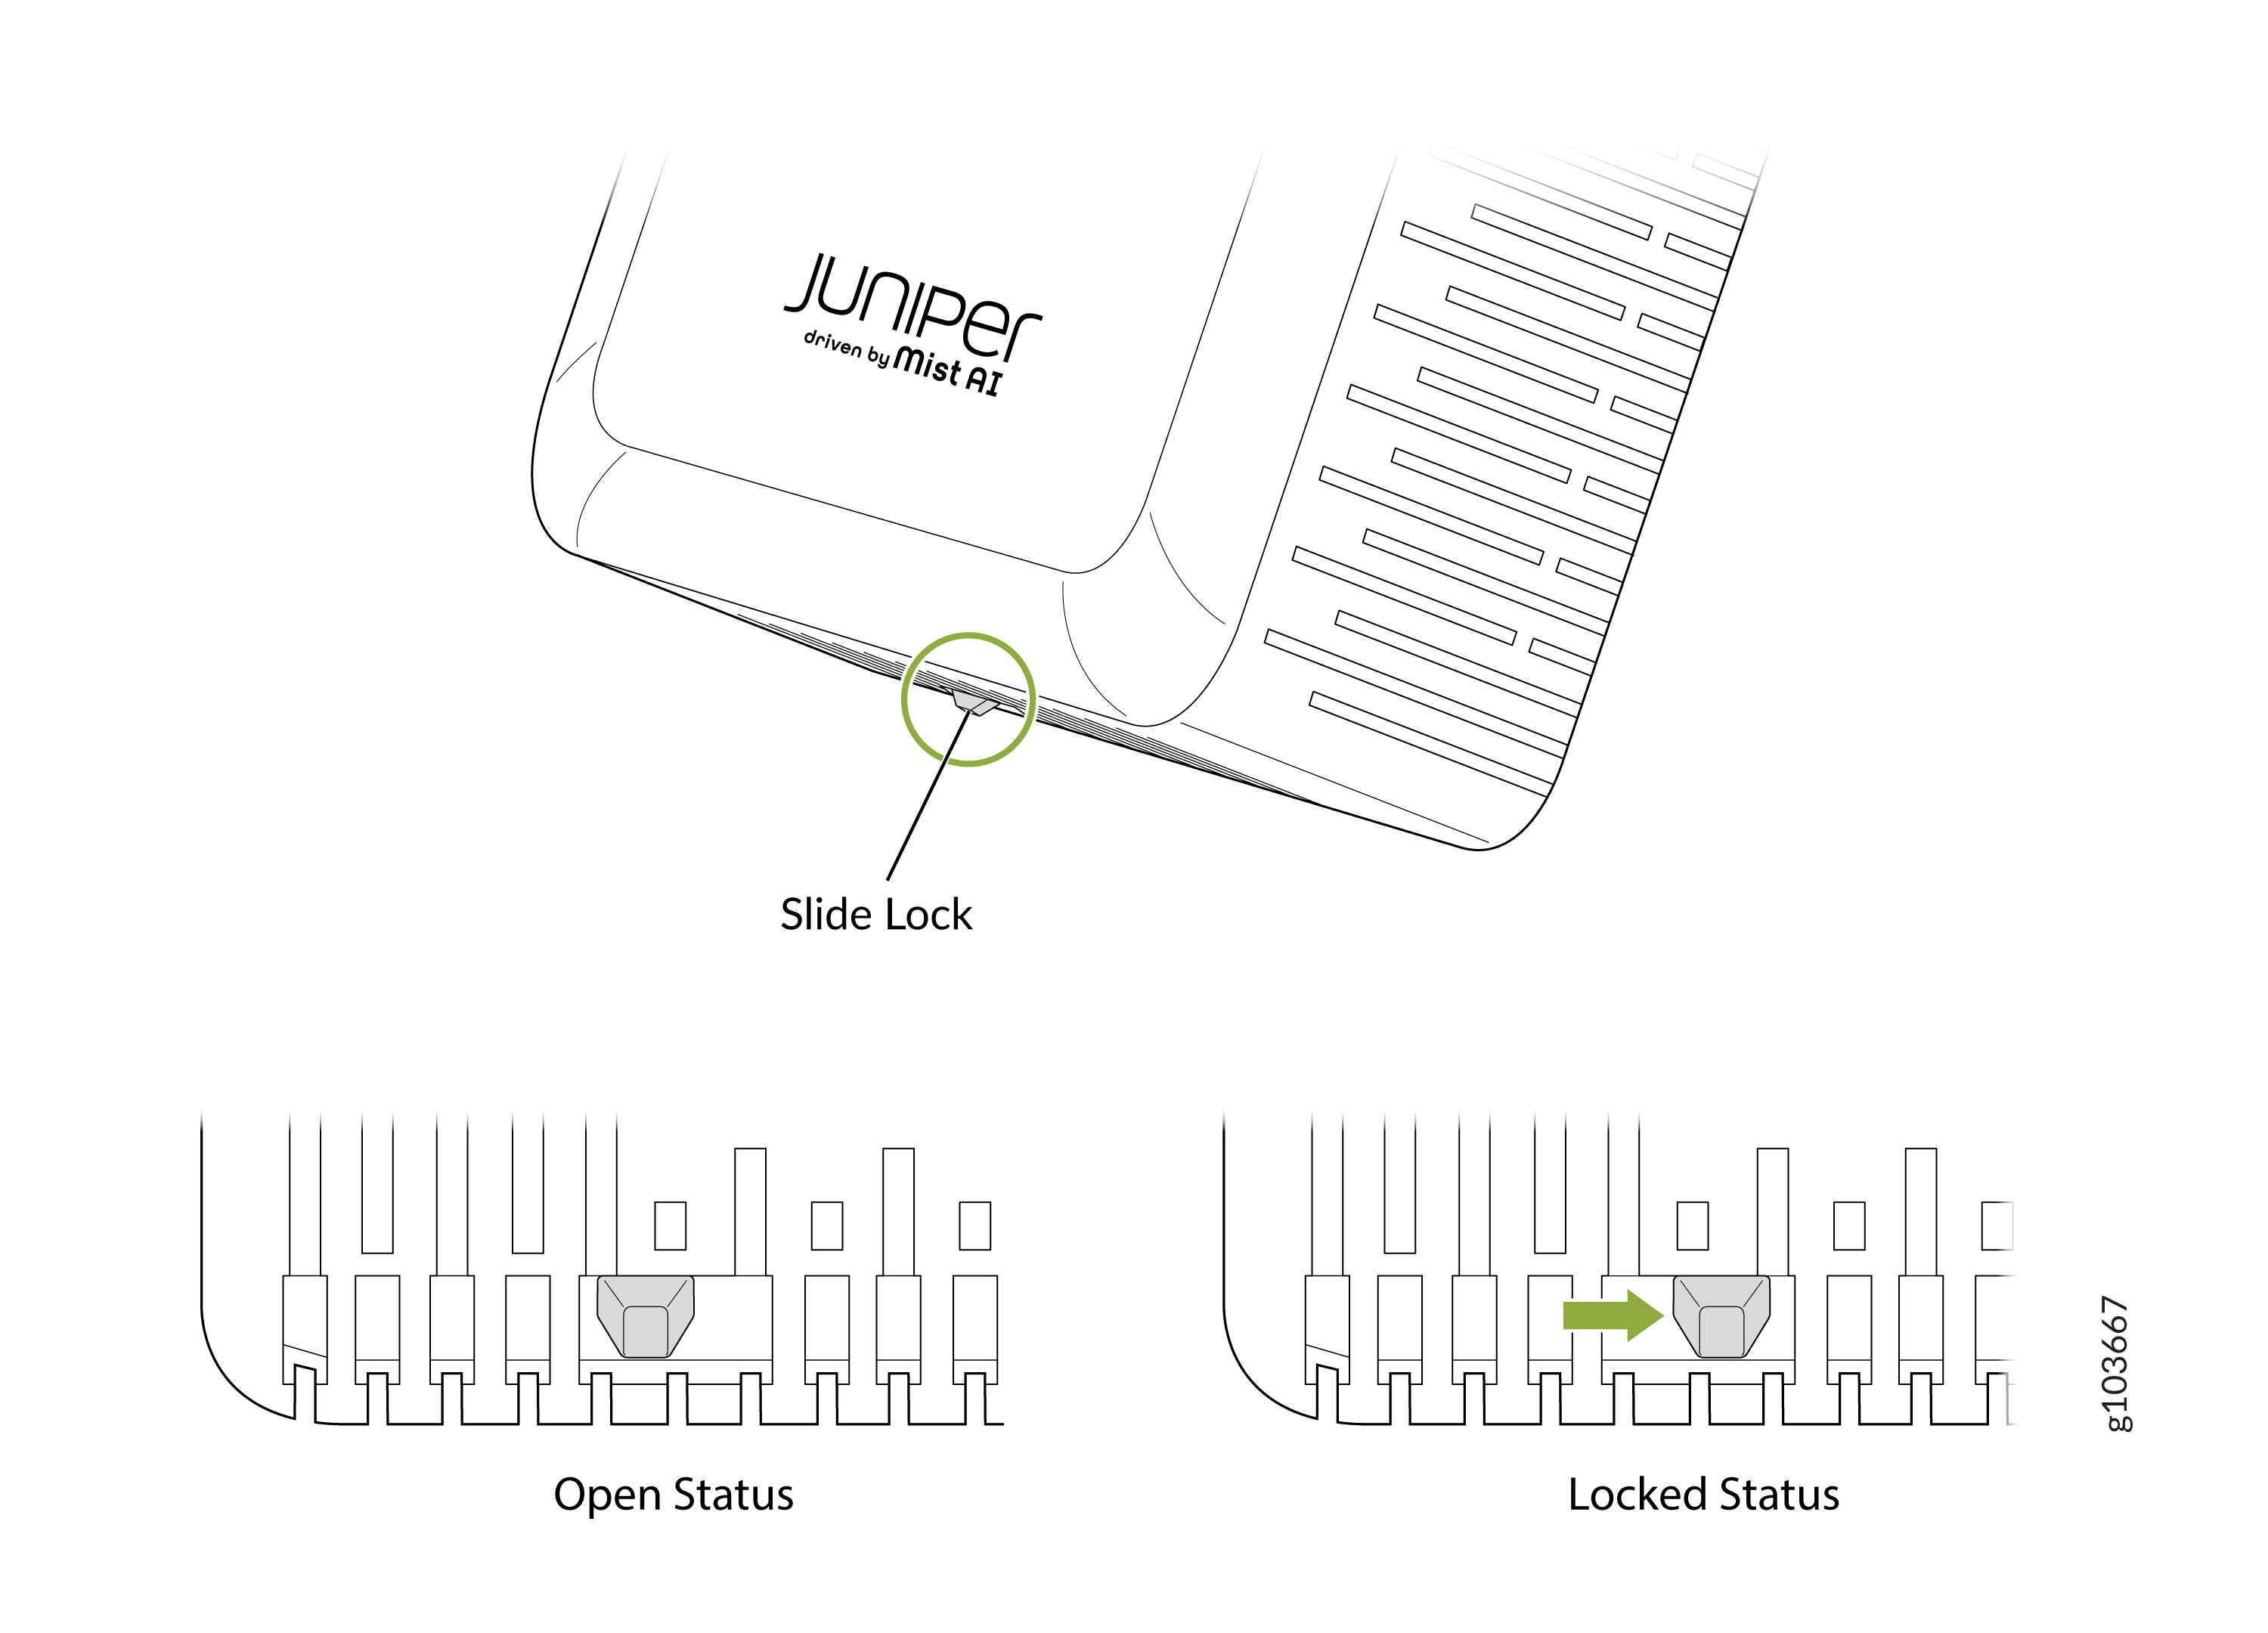
Secure the lock on the bottom of the AP by sliding the lock to the right
until you hear a click.
-
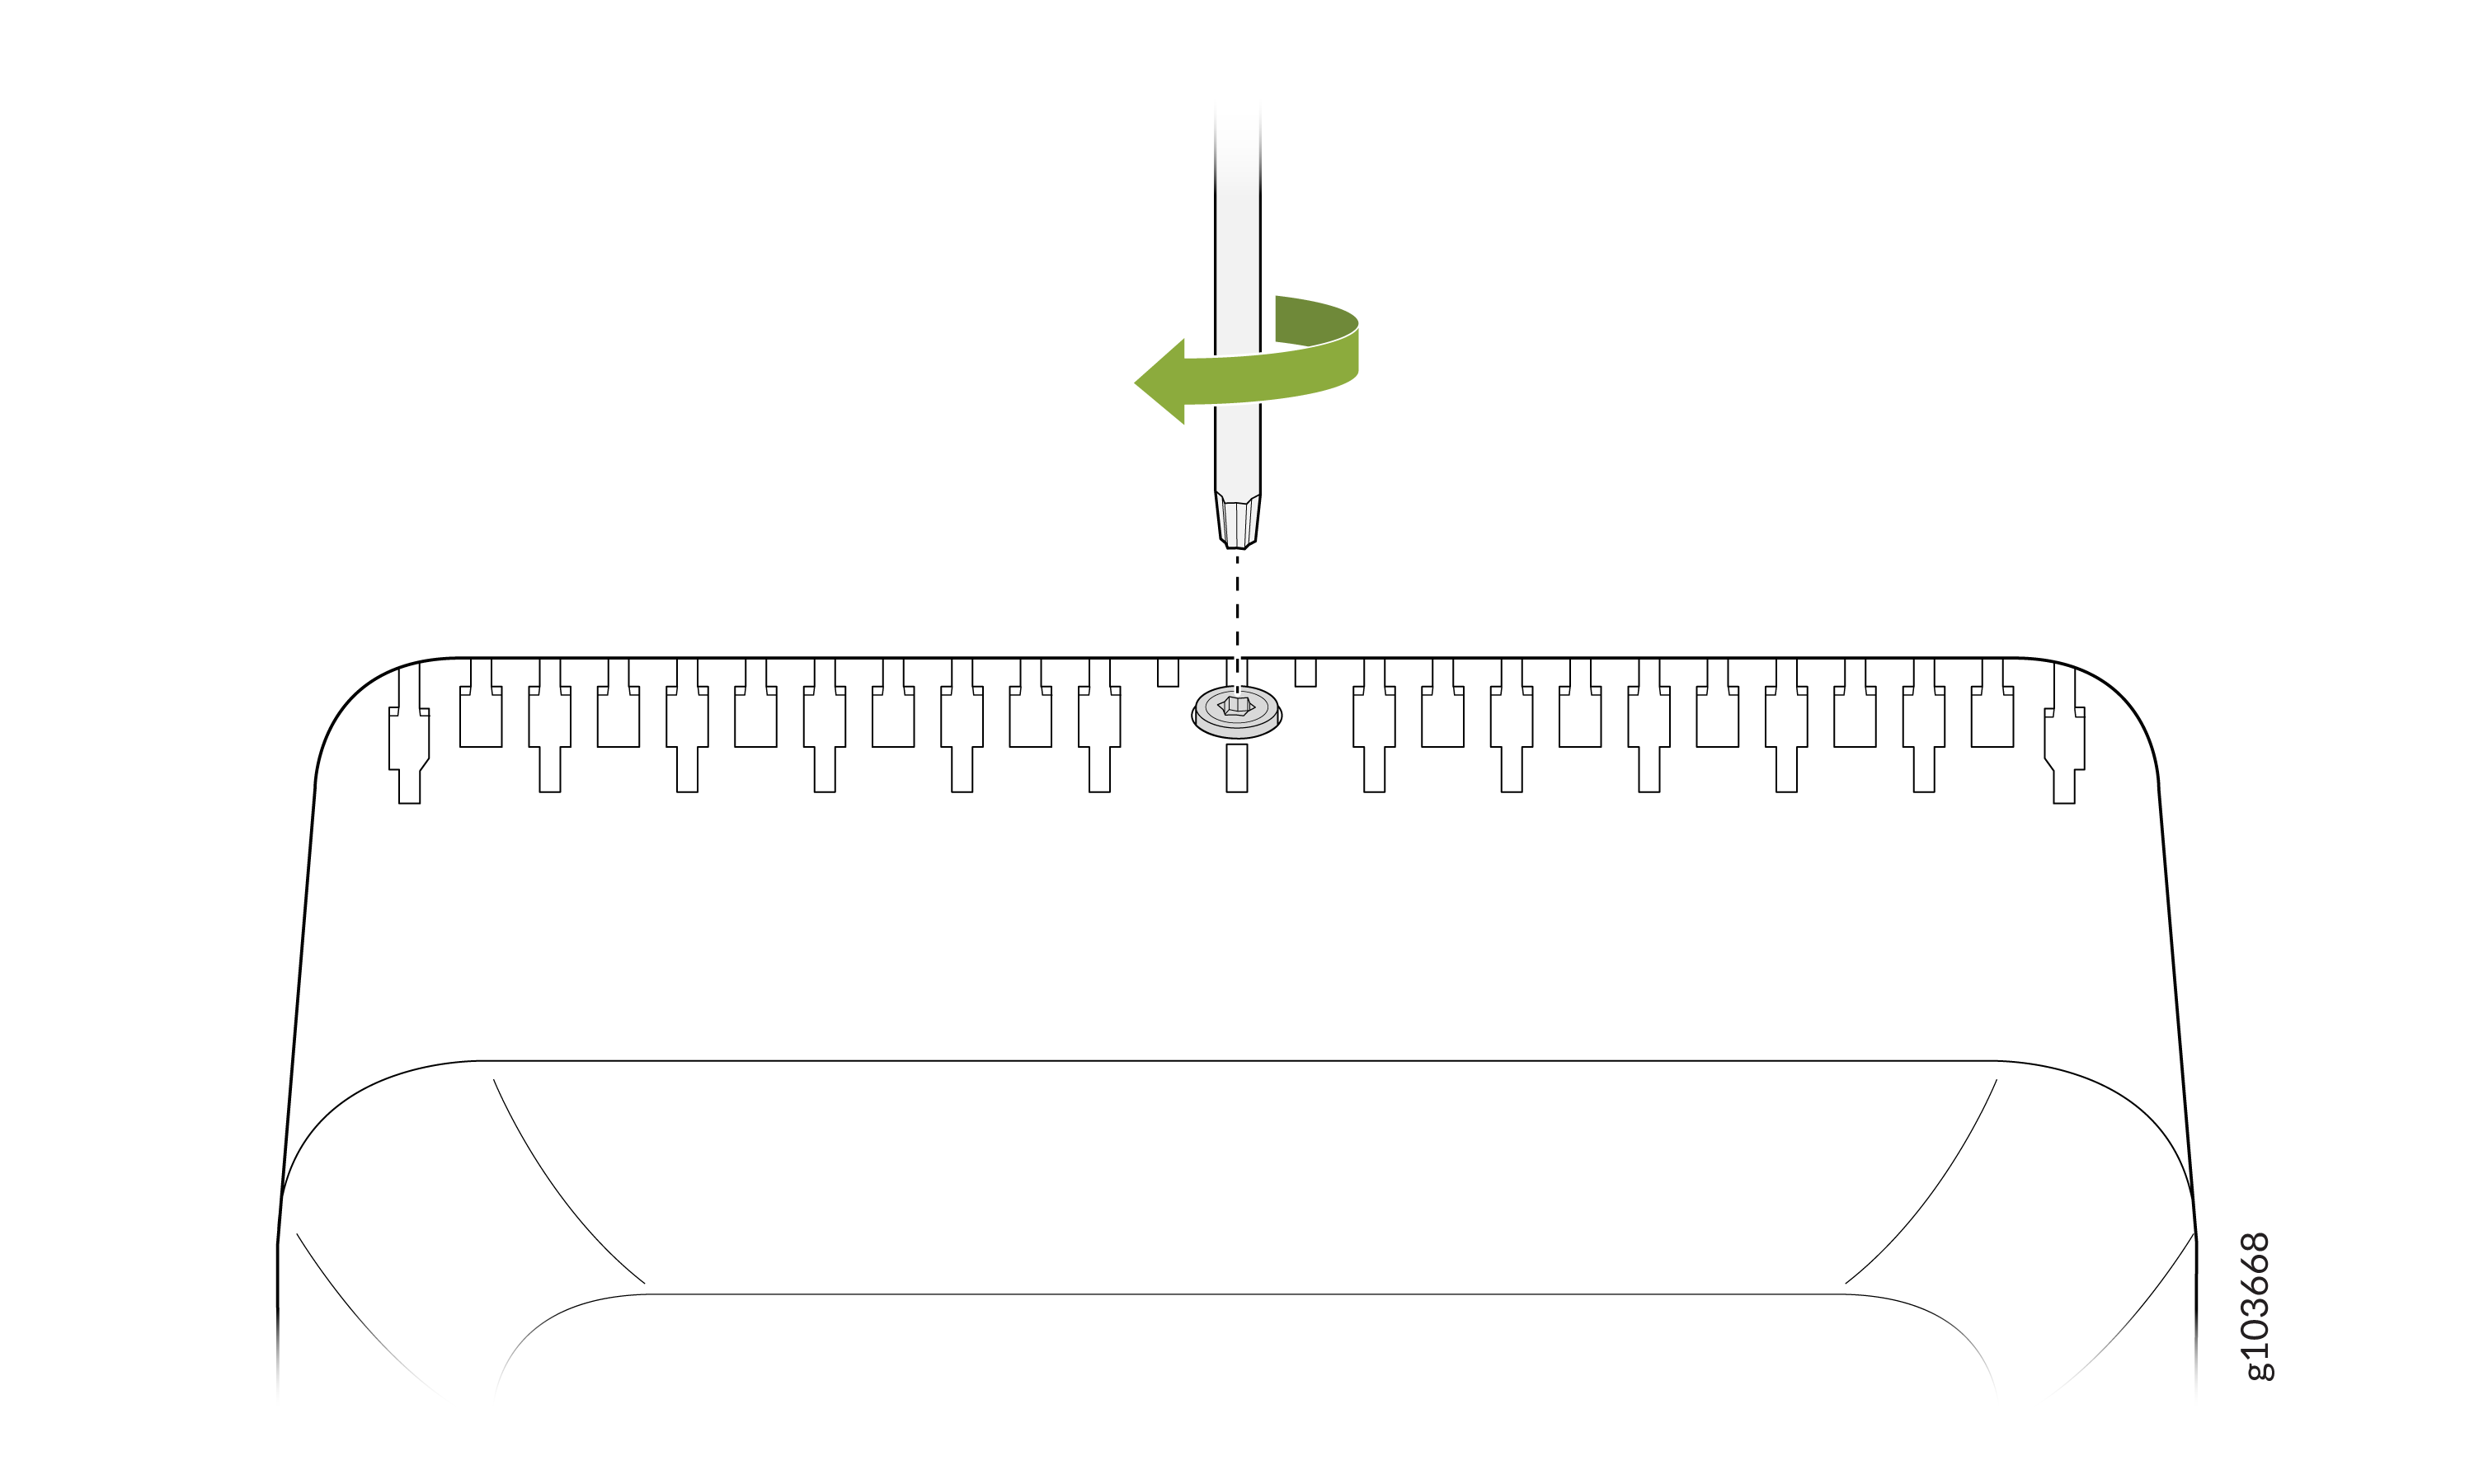
Secure the AP using the captive T8 screw on top of the AP.
Mount an Access Point Using the AP-600H-MNT2 Bracket
This topic is applicable to AP-723H access points (APs).