Mount an Access Point on a Pole (Articulating Mount)
The mounting procedures differ by the mounting bracket used. The various mounting brackets and their supported access points (APs) are listed below:
-
APOUTBR-ART: AP61.
-
APOUTBR-ART2: AP63, AP64, and AP66.
Mount an Access Point Using the APOUTBR-ART Bracket
Note:
This topic is applicable to the following access points (APs): AP61.
You will need the APOUTBR-ART mounting kit. You can use this kit to mount the AP on a pole which has a diameter greater than 1.5 in. (35 mm) and less than 3 in. (80 mm).
To mount an AP on a pole:
-
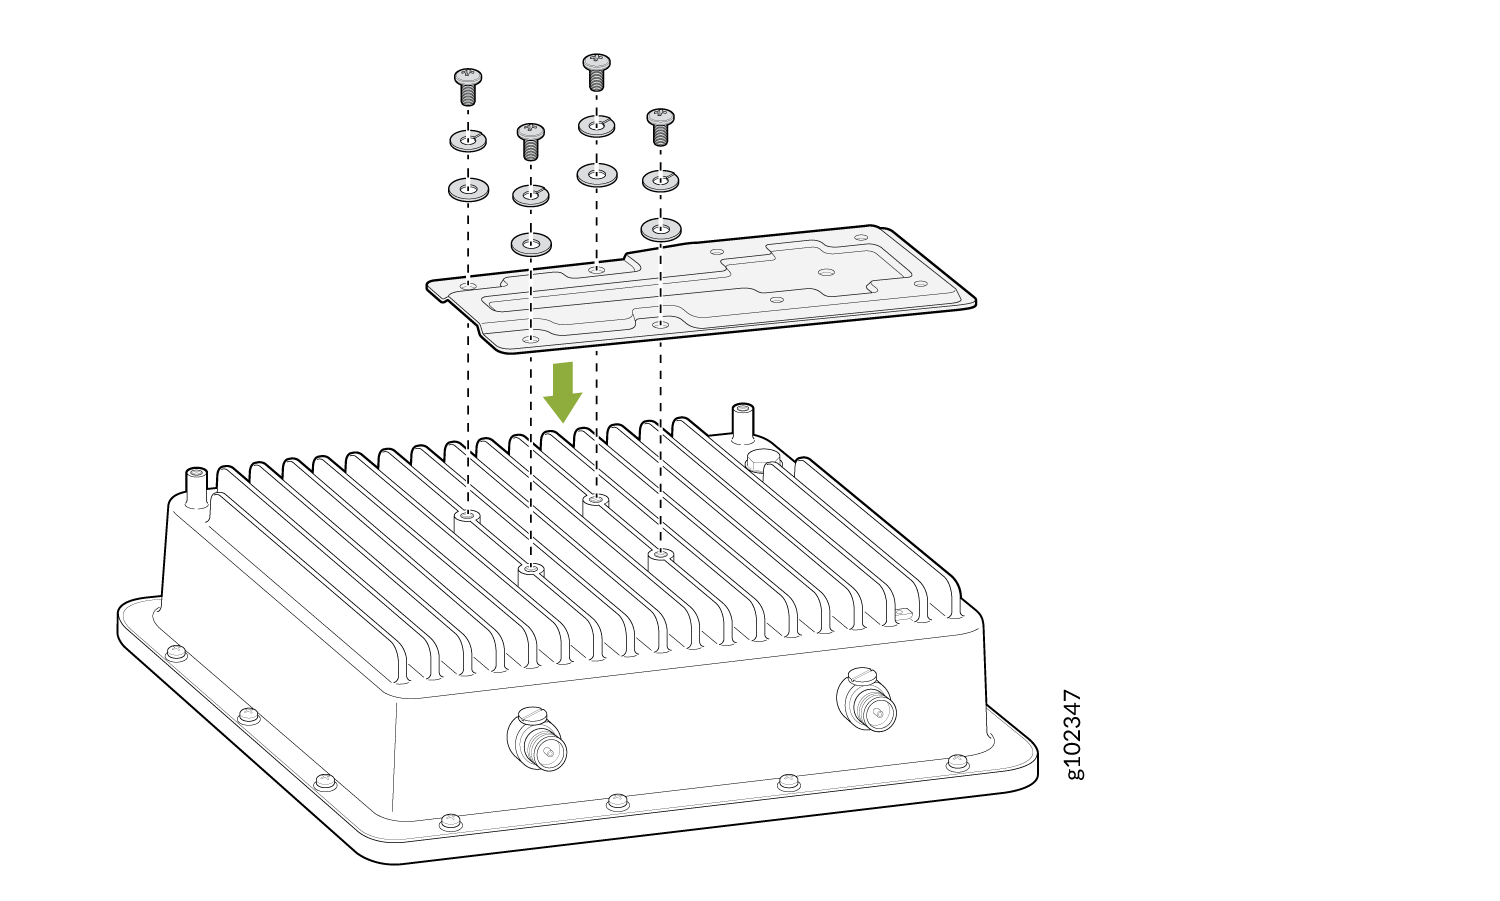
Attach the metal plate to the AP by using the four M6x16 screws, washers,
and spring washers.
Figure 1: Attach the Metal Plate to the AP
-
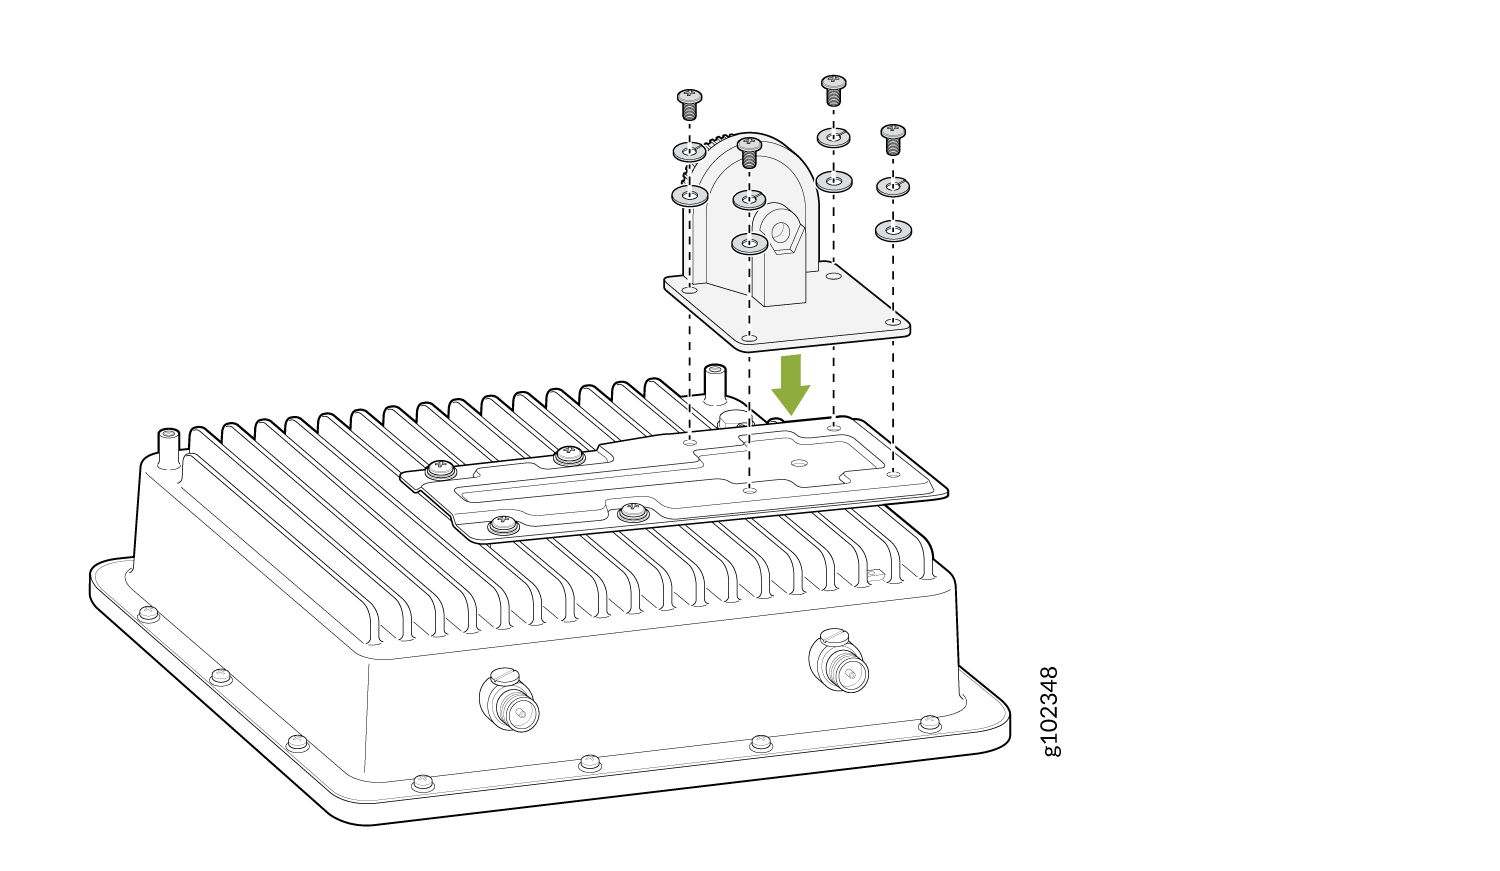
Attach the articulating bracket to the metal plate by using the four M6x10
screws, washers, and spring washers.
Figure 2: Attach the Articulating Bracket to the Metal Plate on the AP
-
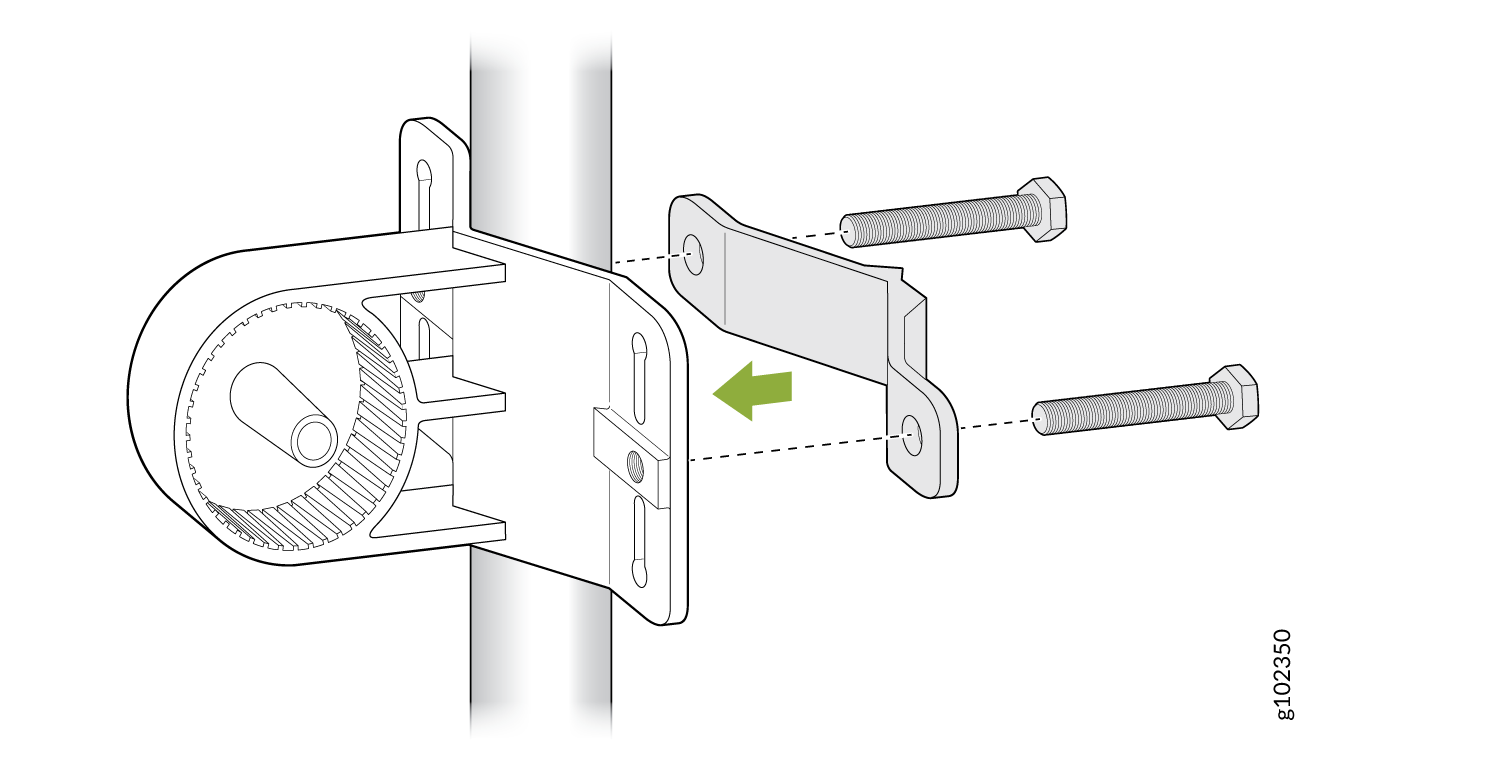
Install the T-form bracket on the pole by using the provided screw bolts
and nuts.
Figure 3: Install the T-Form Bracket on the Pole
-
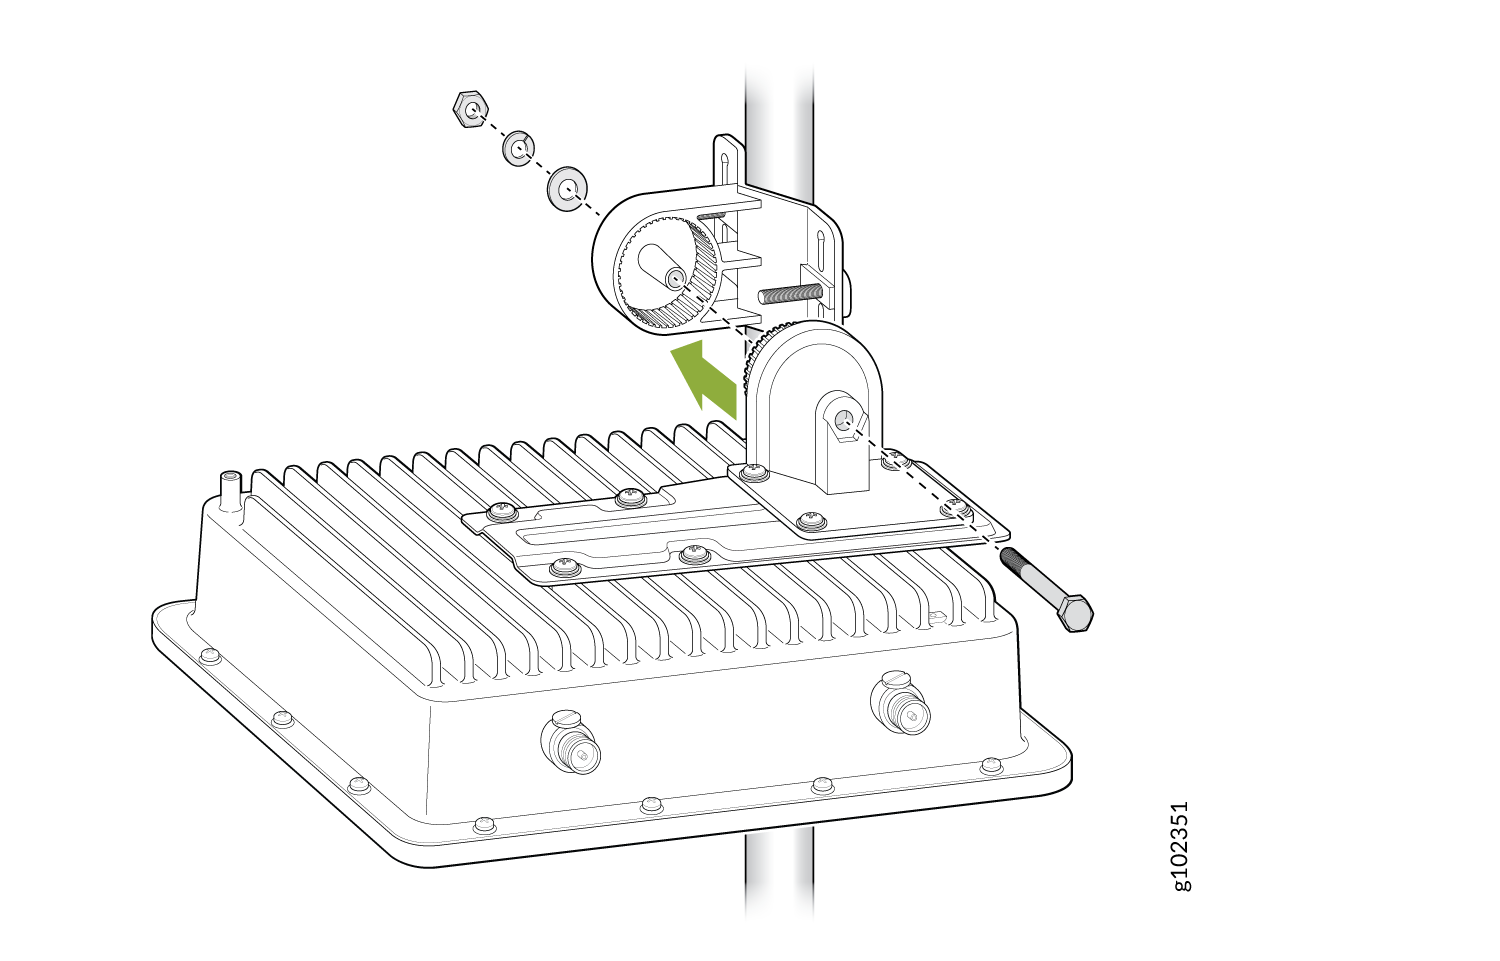
Attach the articulating bracket to the T-form bracket by using M8x80
screws.
Figure 4: Mount the AP on a Pole (Articulating Mount)
Mount an Access Point Using the APOUTBR-ART2 Bracket
Note:
This topic is applicable to the following access points (APs): AP63, AP64, and AP66.
You will need the APOUTBR-ART2 mounting kit.
To mount an AP on a pole:
-
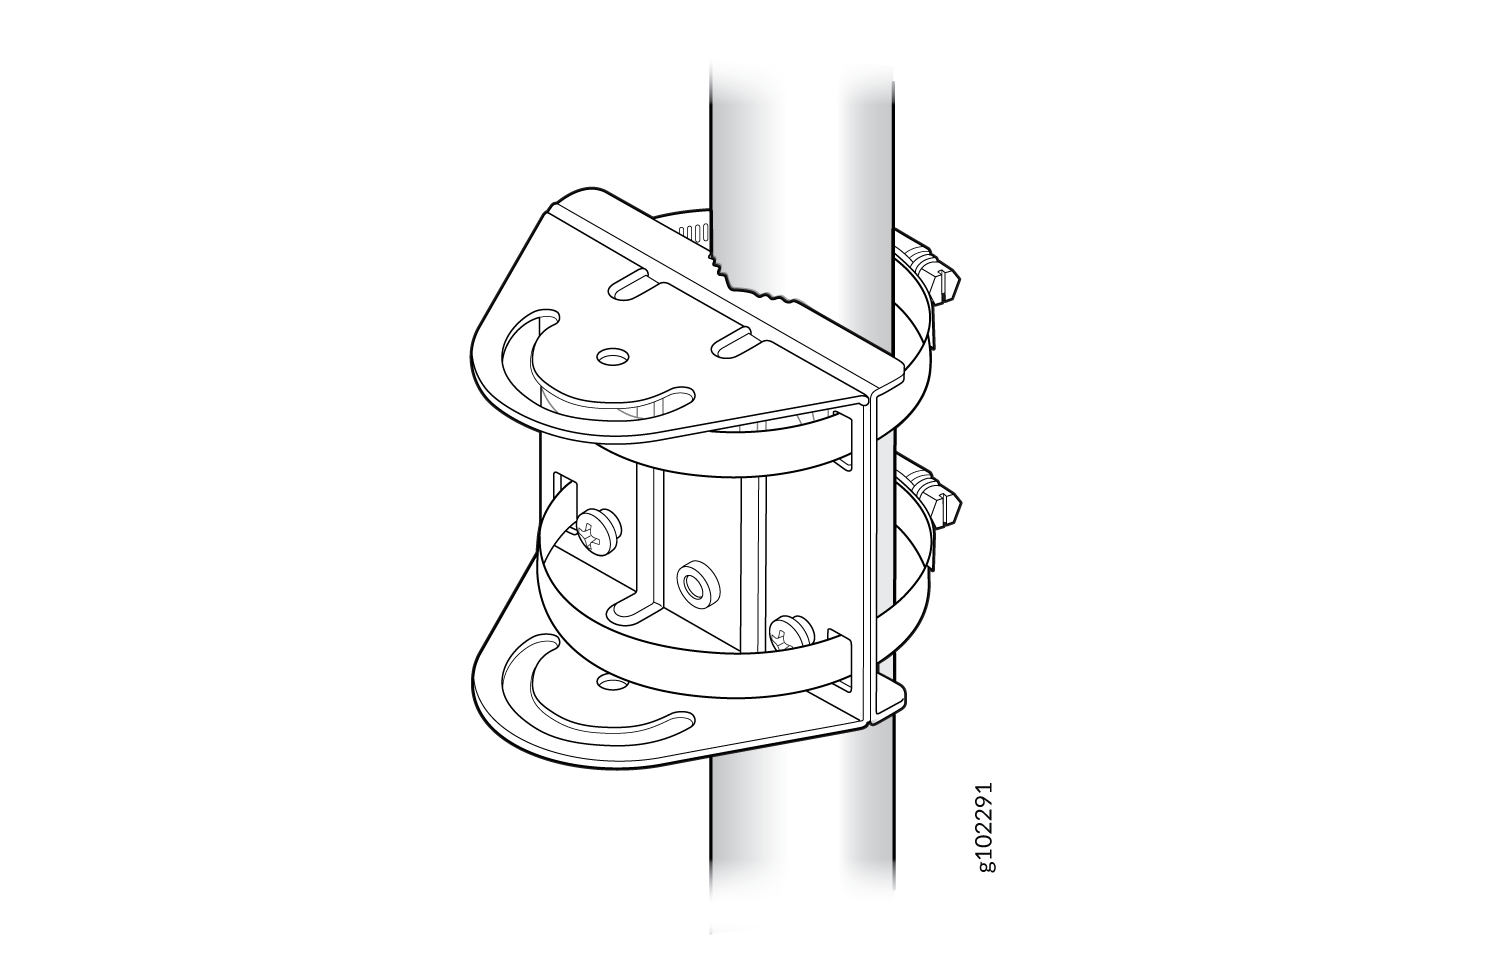
Attach the APOUTBR-ART2 mounting bracket 1 to the pole. Wind the open end
of the hose clamps around the pole and tighten the hose clamp screws by
using a screwdriver. Tighten the screws until the bracket is secured in
place.
Figure 5: Attach the APOUTBR-ART2 Mounting Bracket 1 to a Pole
-
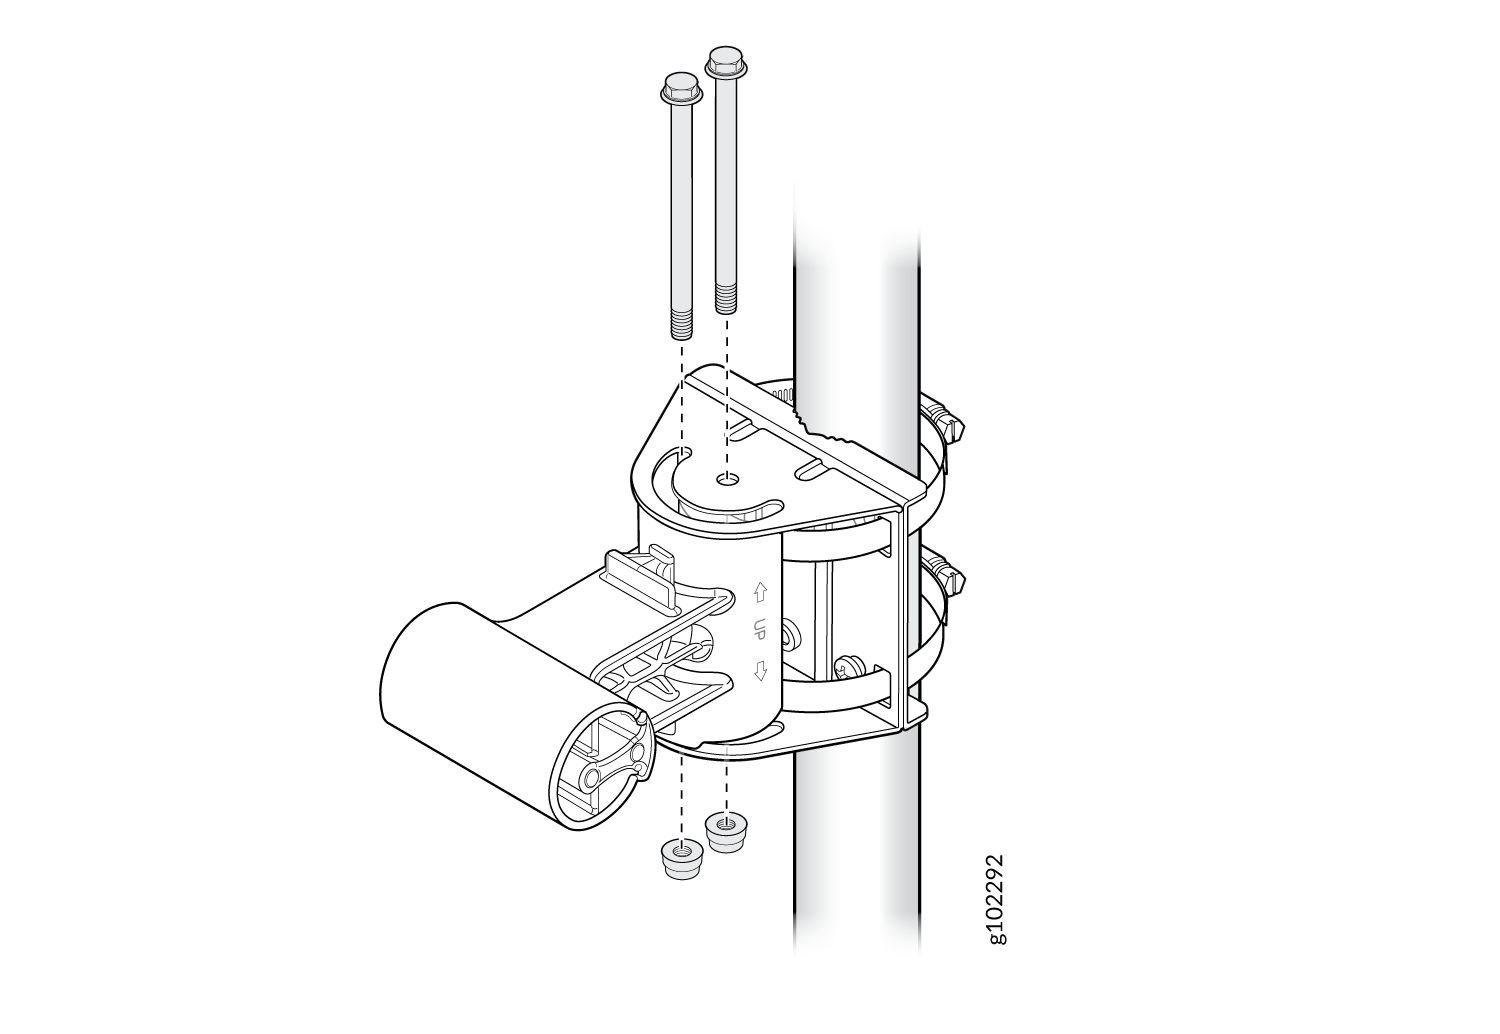
Attach the APOUTBR-ART2 mounting bracket 2 to the mounting bracket 1 by
using two bolts and nuts included in the bracket kit. Orient the side with
the label ← UP → as shown in Figure 6.
Figure 6: Attach the APOUTBR-ART2 Mounting Bracket 2 to the Mounting Bracket 1
-
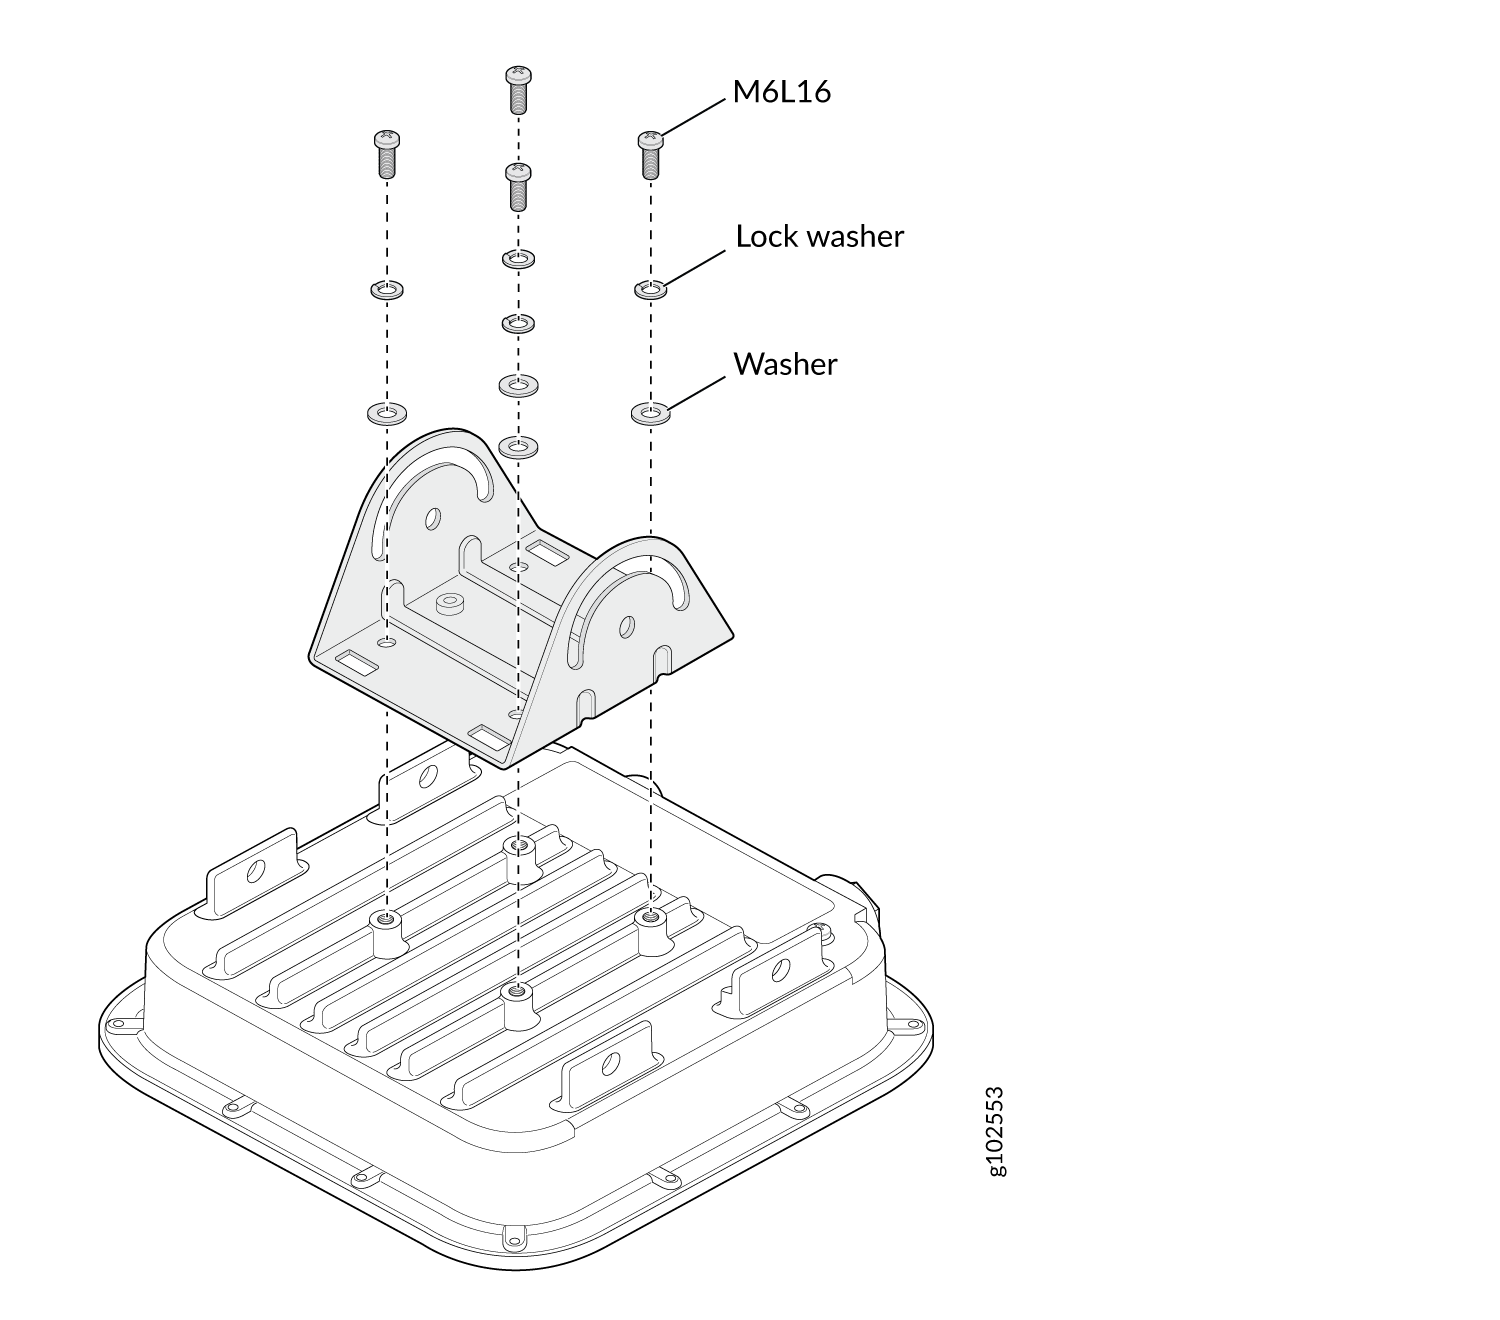
Attach the APOUTBR-ART2 mounting bracket 3 to the AP by using the four M6
screws, washers, and lock washers provided along with the AP.
Figure 7: Attach the APOUTBR-ART2 Mounting Bracket 3 to the AP
-
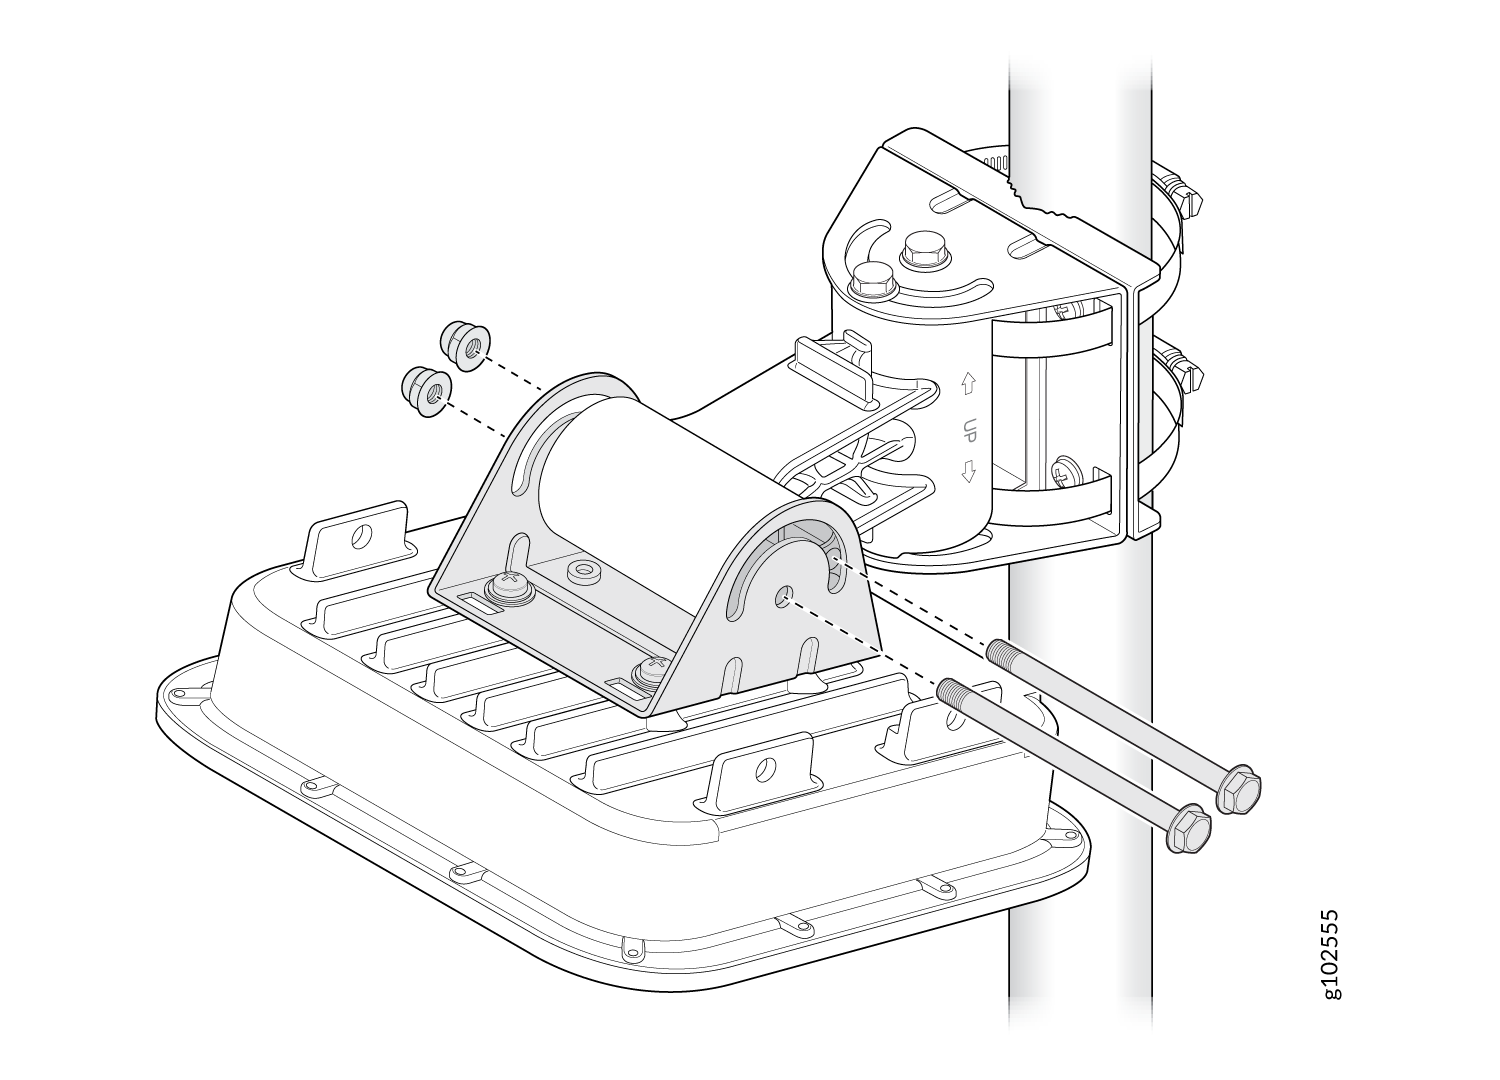
Attach the APOUTBR-ART2 mounting bracket 2 to the mounting bracket 3 by
using two bolts and nuts.
Figure 8: Mount the AP on a Pole (Articulating Mount)