ACX7509 Flexible PIC Concentrator Maintenance
Maintaining ACX7509 routers includes removing and reinstalling Flexible PIC Concentrators (FPCs).
Flexible PIC Concentrators (FPCs) on the ACX7509 router are field-replaceable units (FRUs) that can be installed in FPC slots on the front of the chassis. The FPCs are hot-insertable and hot-removable: you can remove and replace them without powering off the router or disrupting router functions.
If you have the optional cable management system, it is not necessary to remove the cable management system before replacing an FPC.
The ACX7509 chassis supports JNP-FPC-16C, JNP-FPC-4CD, and JNP-FPC-20Y types of FPCs. The replacement procedure is the same for all three FPCs.
Before you replace an FPC from the router chassis:
-
Ensure that you have taken the necessary precautions to prevent electrostatic discharge (ESD) damage.
-
If there are any optical cables (including transceivers) installed in the FPC, remove them before you replace the FPC.
Ensure that you have the following equipment available before replacing a Forwarding Engine Board (FEB):
-
Antistatic bag or antistatic mat
-
ESD grounding strap to wrap around your bare wrist and connect to an ESD point on the chassis
Figure 1: ESD Point on Front of the ACX7509 Router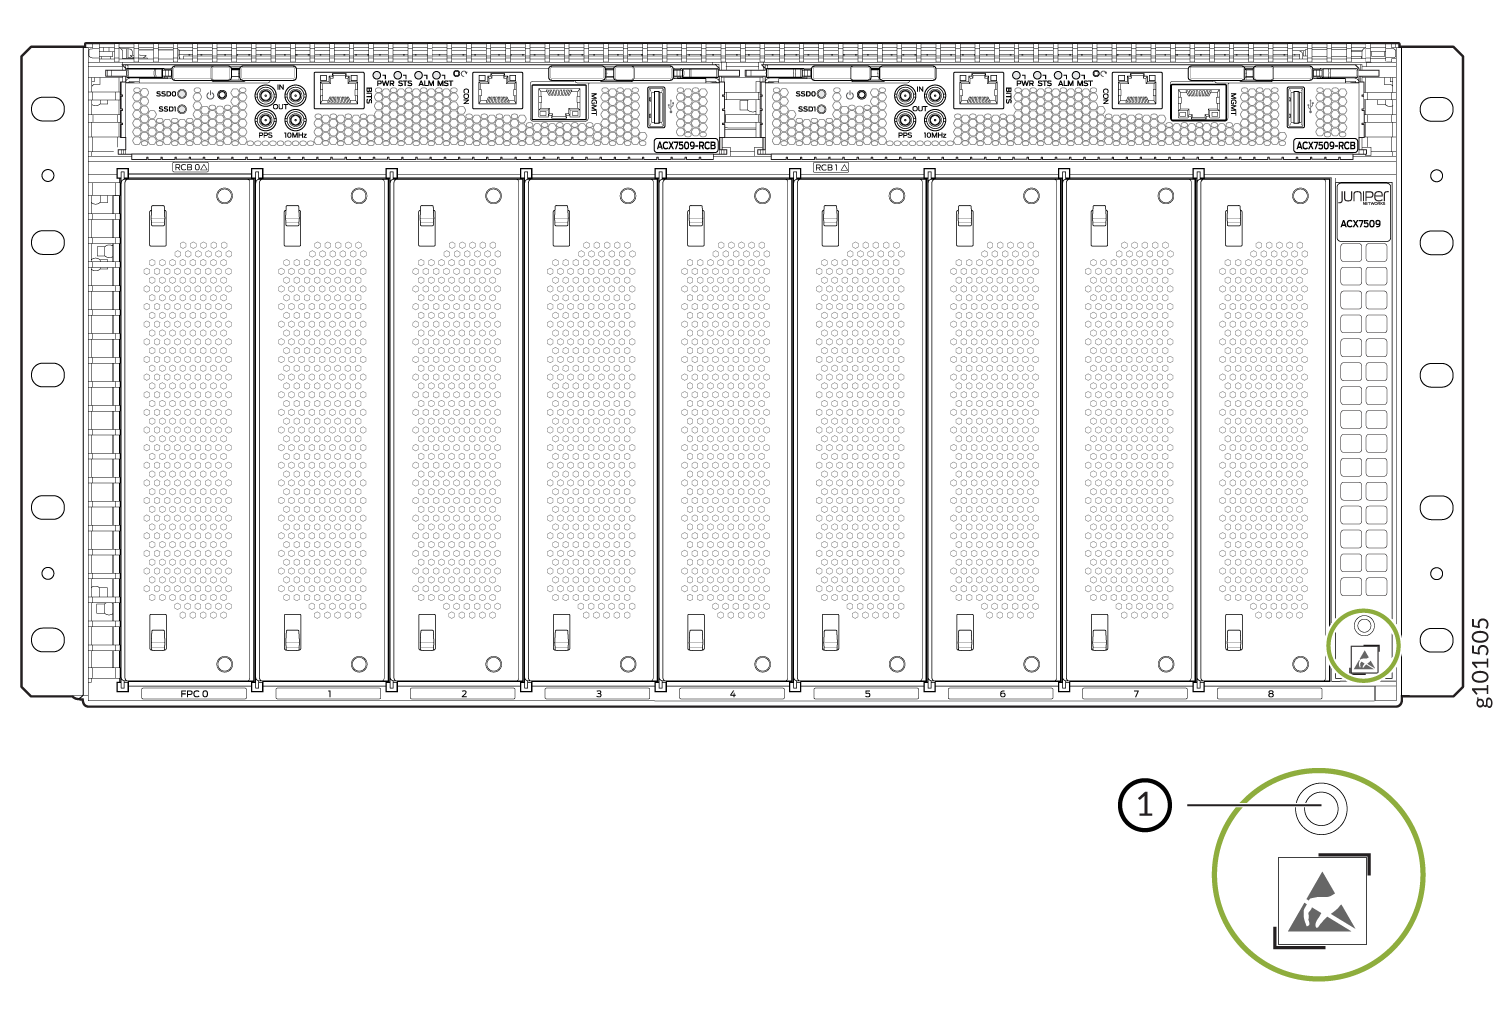 1—
1—ESD point
-
Replacement FPC or a cover for the empty slot
Remove a Flexible PIC Concentrator from the ACX7509 Router
To remove an FPC from a ACX7509 router chassis:
-
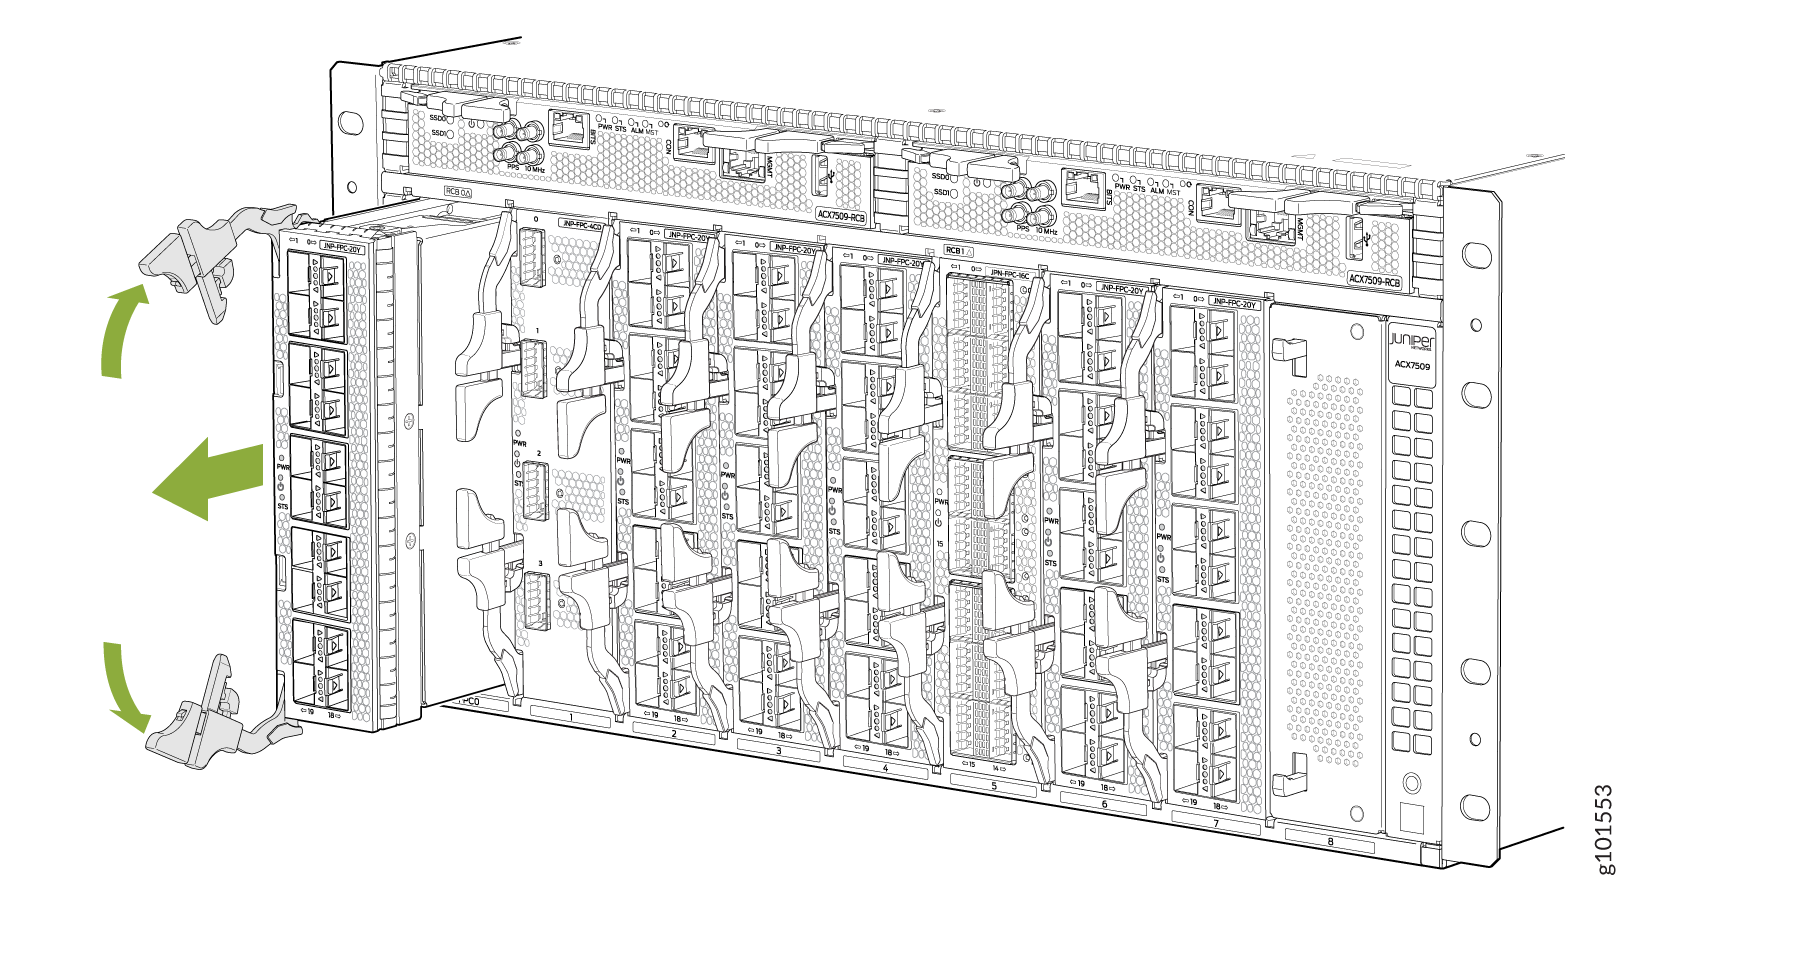
Unlatch the ejector handles, and spread them apart. The FPC slides about a
quarter of the way out of the slot. See Figure 2
Figure 2: Removing an ACX7509 FPC
Install a Flexible PIC Concentrator in the ACX7509 Router
To install an FPC in the ACX7509 router chassis:
-
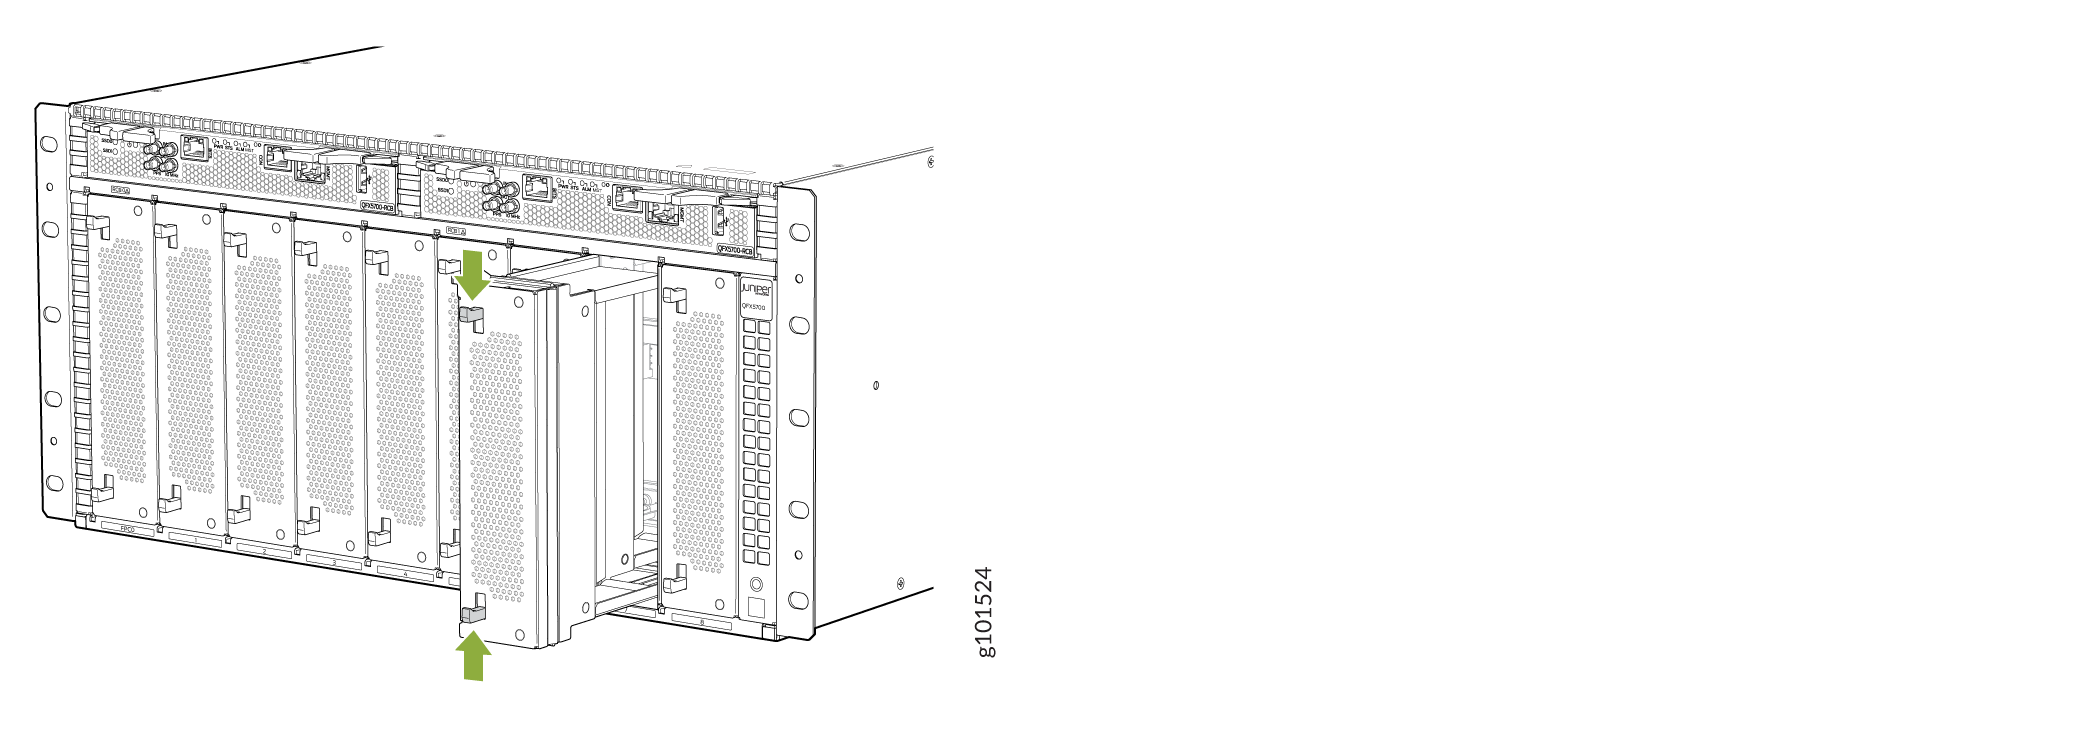
Either remove the failing FPC (see Remove a Flexible PIC Concentrator from the ACX7509 Router) or, if an FPC blank (JNP5K-FPC-BLNK) is installed,
press the handles on the blank and gently pull the blank out of the slot
(see Figure 3).
Figure 3: Removing the FPC Blank
 CAUTION:
Do not lift the FPC by holding the edge connectors or the handles on the faceplate. Neither the handles nor the edge connectors can support the weight of the FPC. Lifting the FPC by the handles or edge connectors might bend the connectors, which would prevent the FPCs from being properly seated in the chassis.
-
Grasp the two ejector handles, and fold them inward until they latch to
seat the FPC (seeFigure 4).
Figure 4: Installing an ACX7509 FPC

-
Ensure that the ejectors are firmly locked in position (see Figure 5).
Figure 5: How to lock the ejectors
