Help us improve your experience.

Let us know what you think.

Do you have time for a two-minute survey?


ACX7332 Air Filter Unit Maintenance

Learn how to install the air filter unit and replace the air filter.

The air filter unit consists of four parts: the outer filter cover, the air filter, the inner cage, and the cable management brackets. The air filter sits right inside the outer filter cover and the inner cage. The air filter unit is installed in the front of the chassis and is secured to the rack rails by captive screws.
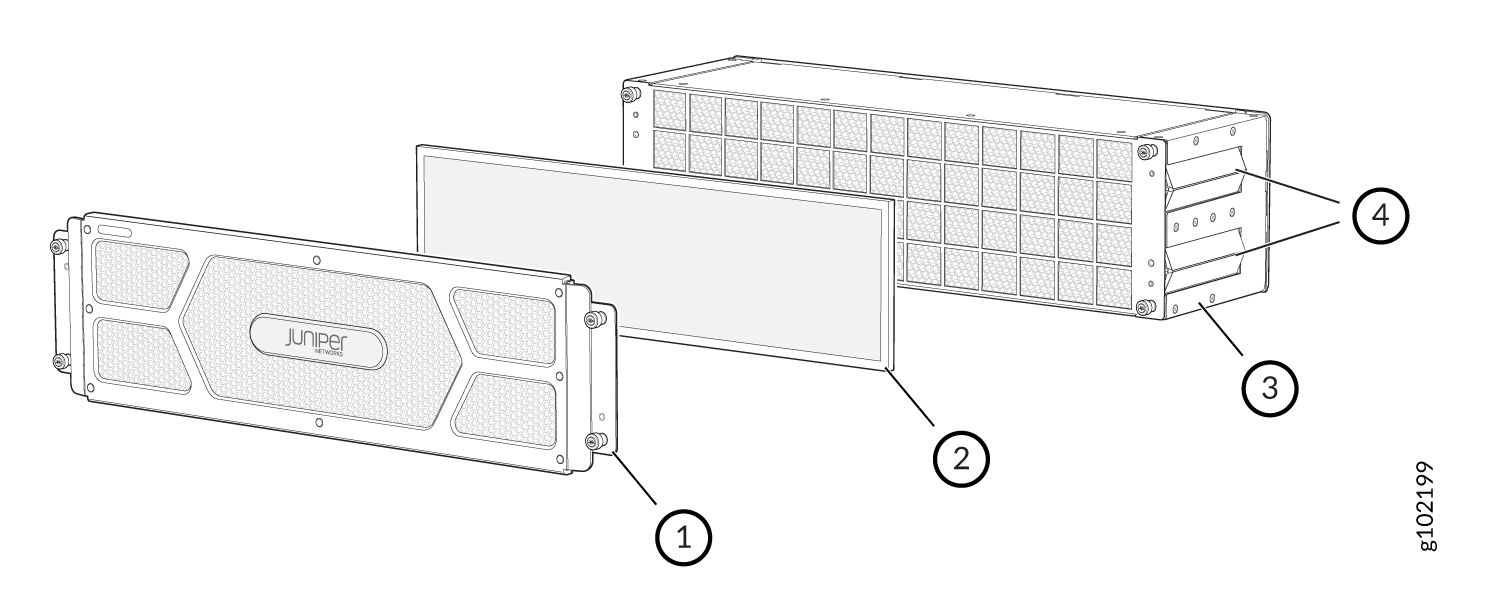
Figure 1: Air Filter Unit Air Filter Unit
  1

Outer filter cover

  3

Inner cage

  2

Air filter

  4

Cable management brackets

Note:

You must replace the air filter every 6 months.

Install Air Filter Unit in a Two-Post Rack

To install an air filter unit in a two-post rack:

  1. Attach an electrostatic discharge (ESD) grounding strap to your bare wrist, and connect the strap to one of the ESD points on the chassis.
  2. Attach the cable management brackets on each side of the chassis.
    Figure 2: Attach the Cable Management Brackets to the Chassis Juniper Networks router showing how to attach or remove mounting brackets with green arrows indicating direction for rack-mounting.
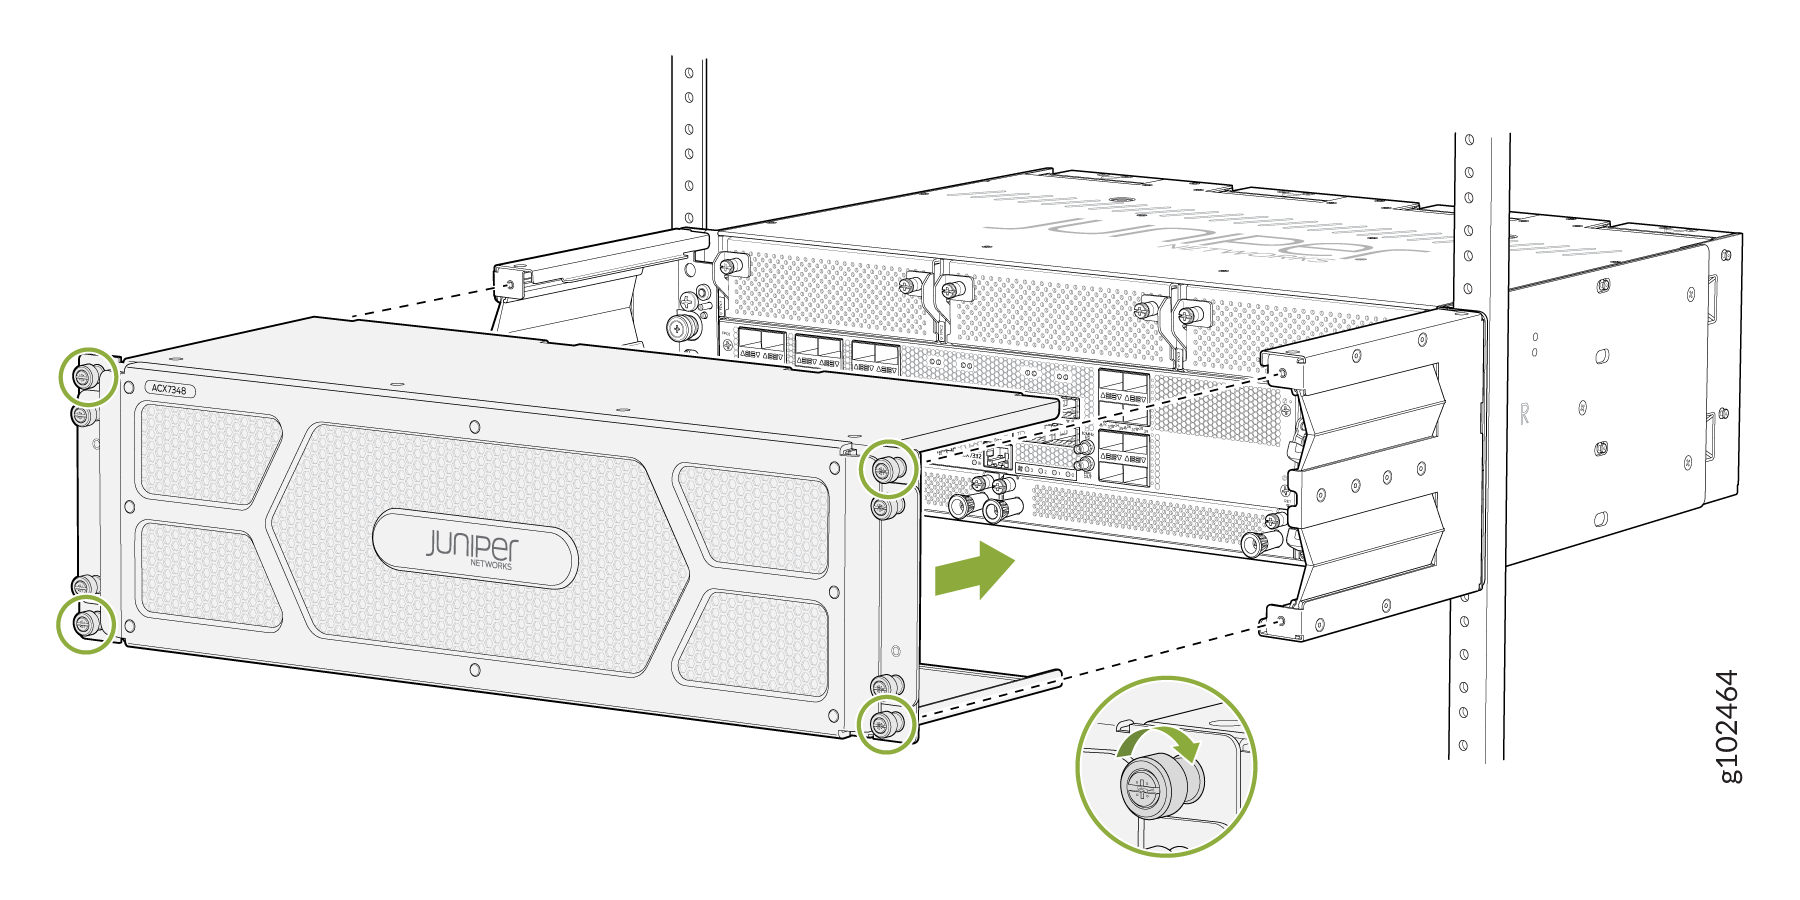
  3. Grasp both sides of the router, lift the router, and position it in the rack, aligning the holes of the mounting brackets with the holes in the front post of the rack. Align the bottom hole in both the mounting brackets with a hole in each rack post, making sure that the chassis is level.
    Figure 3: Mount the Chassis to the Rack Rack-mounted Juniper Networks device installation with green arrow guiding direction and labeled ports for network connections.
  4. Secure the mounting brackets to the rack by using four screws appropriate for your rack. Tighten the screws.
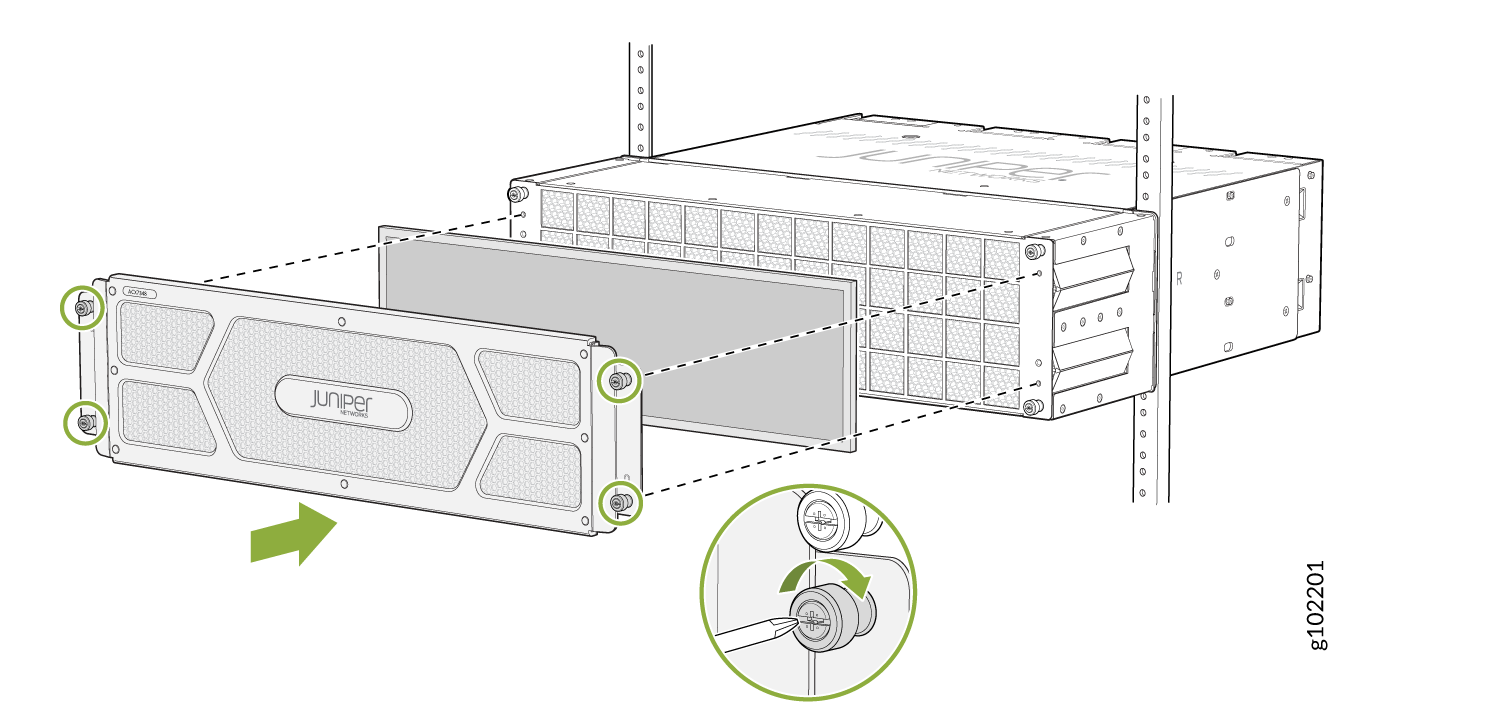
  5. Slide the outer cage of the air filter unit into the rails on the cable management brackets until it stops.
    Figure 4: Install the Air Filter Juniper Networks ACX7348 router being installed or removed from rack; screws in green indicate where to tighten or loosen.
  6. Tighten the captive screws to secure the air filter unit to the cable management brackets.

Install Air filter Unit in a Four-Post Rack

To install an air filter unit in a four-post rack:

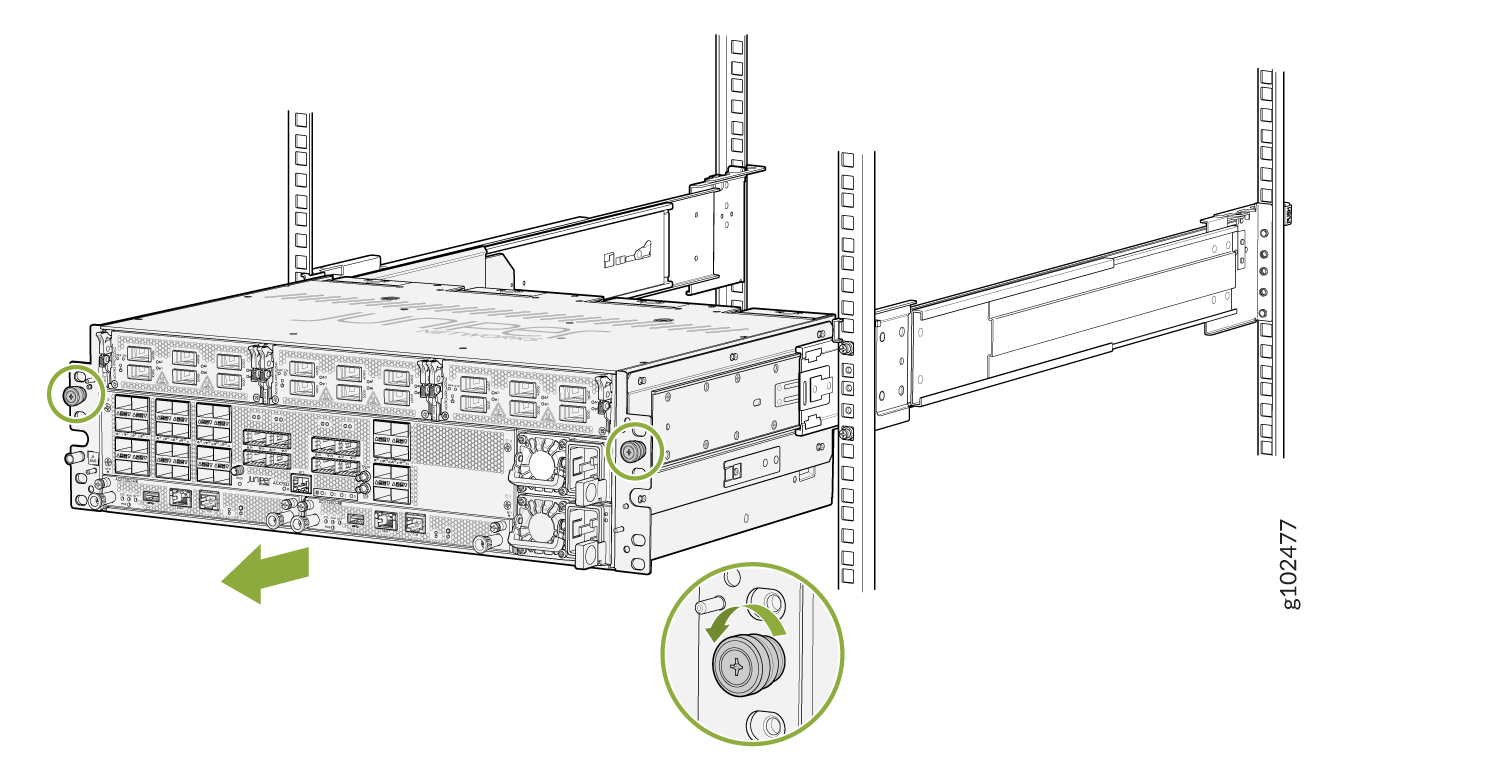
  1. After the chassis is already installed on a 4-post rack, loosen the thumb screws and pull out the chassis.
    Figure 5: Loosen the Thumb Screws Server device on sliding rails in a rack, with green circles on screws or knobs and a green arrow indicating movement direction.
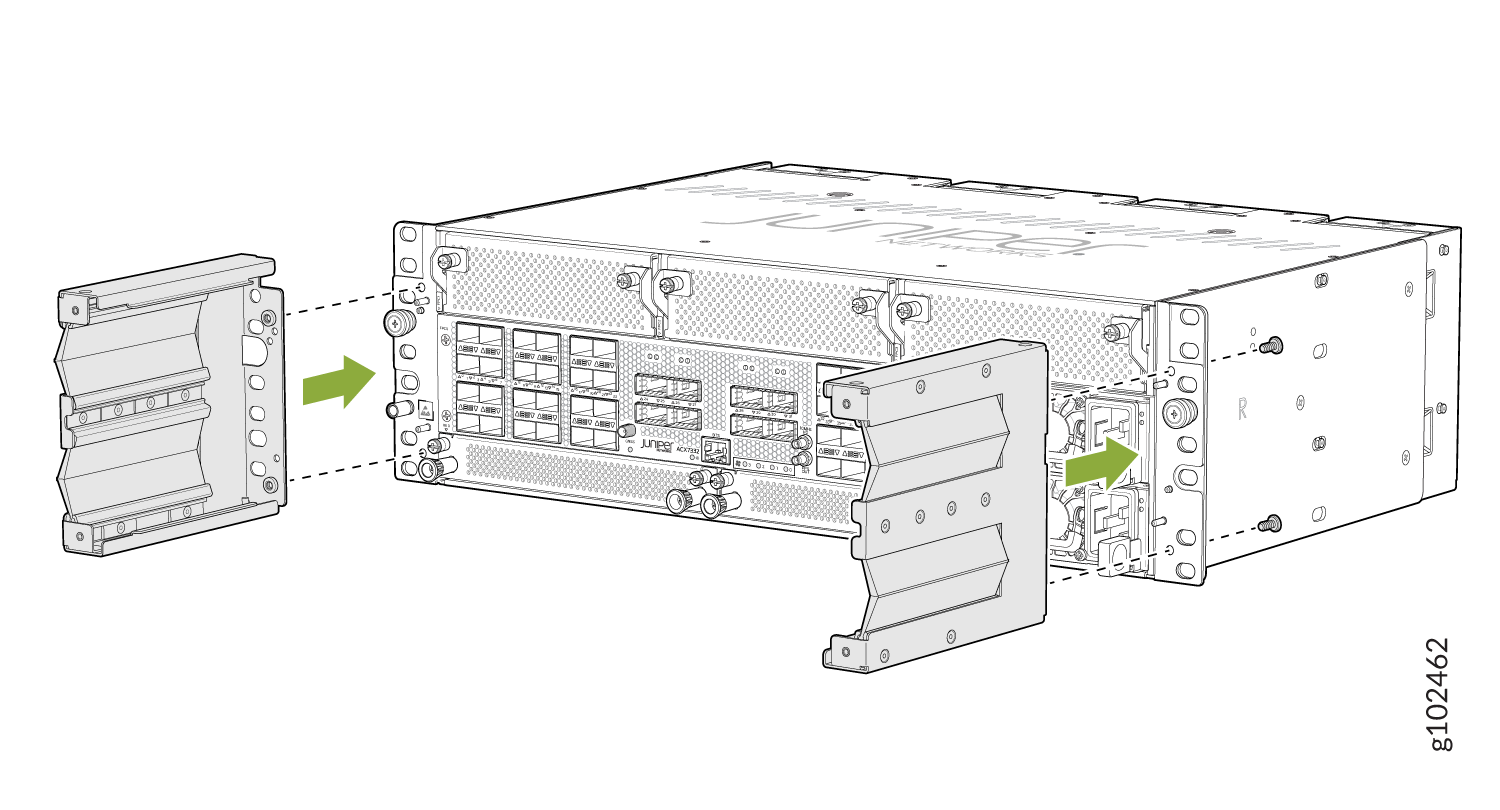
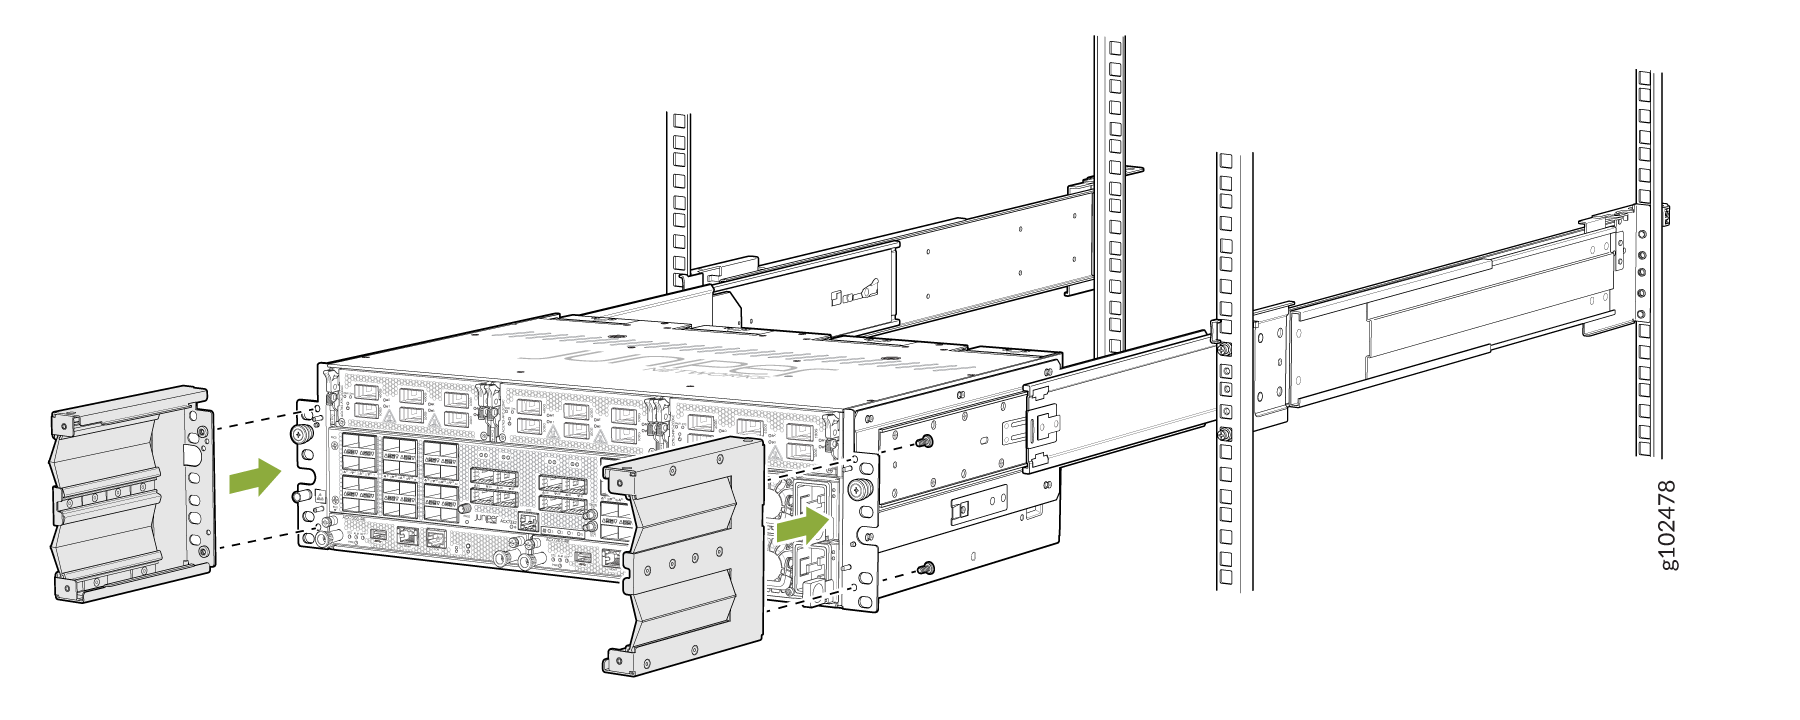
  2. Attach the cable management brackets on both sides of the chassis.
    Figure 6: Attach Cable Management Brackets on the Chassis Rack-mounted server being installed or serviced with green arrows indicating side panel movement.
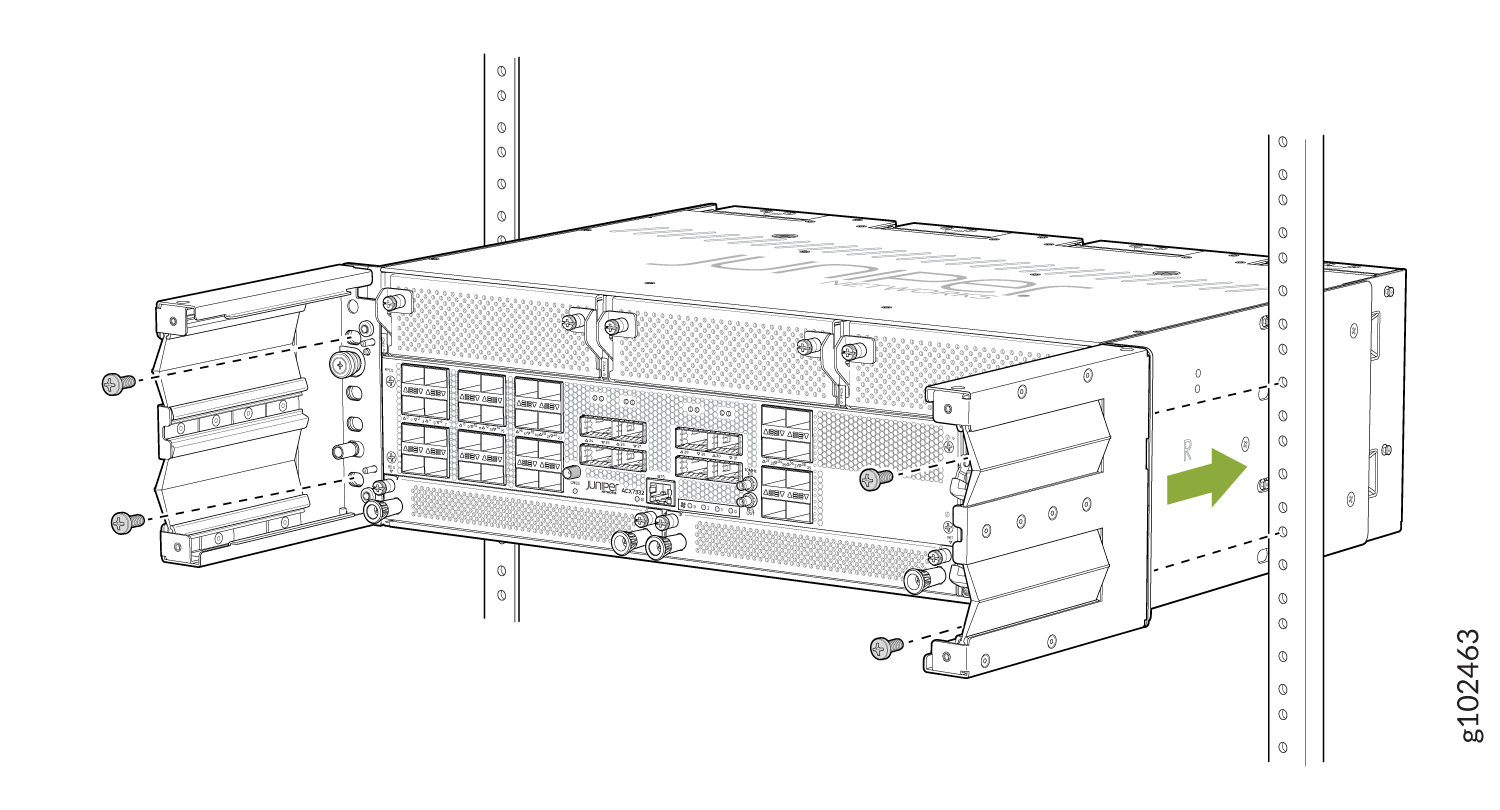
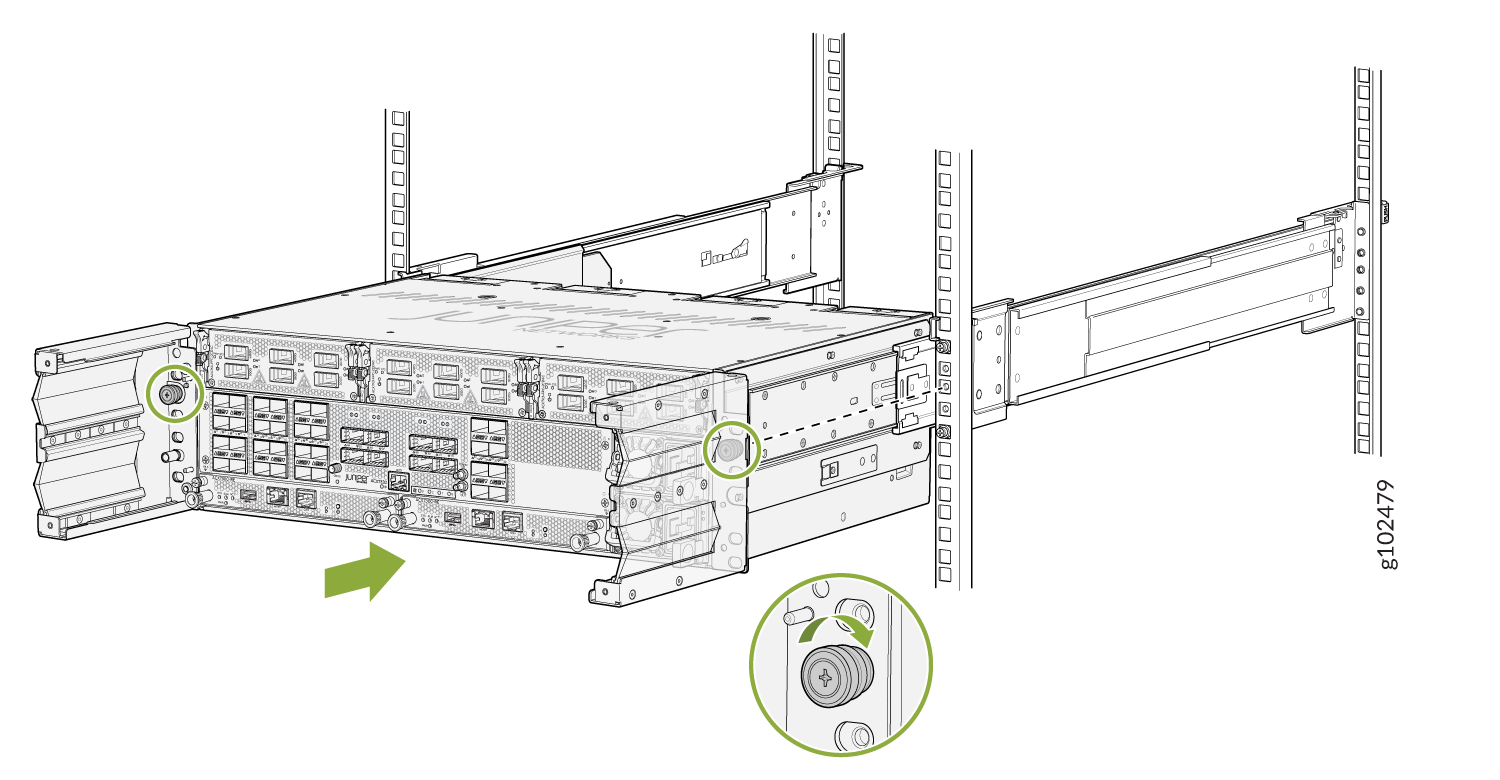
  3. Push the chassis back (with the cable management brackets installed) and tighten the thumb screws to secure the device to the 4 post rack.
    Figure 7: Server mounted in rack with sliding rails, partially extended for component access. Green circles highlight screws for securing or locking server. Green arrow shows pull-out direction for maintenance.
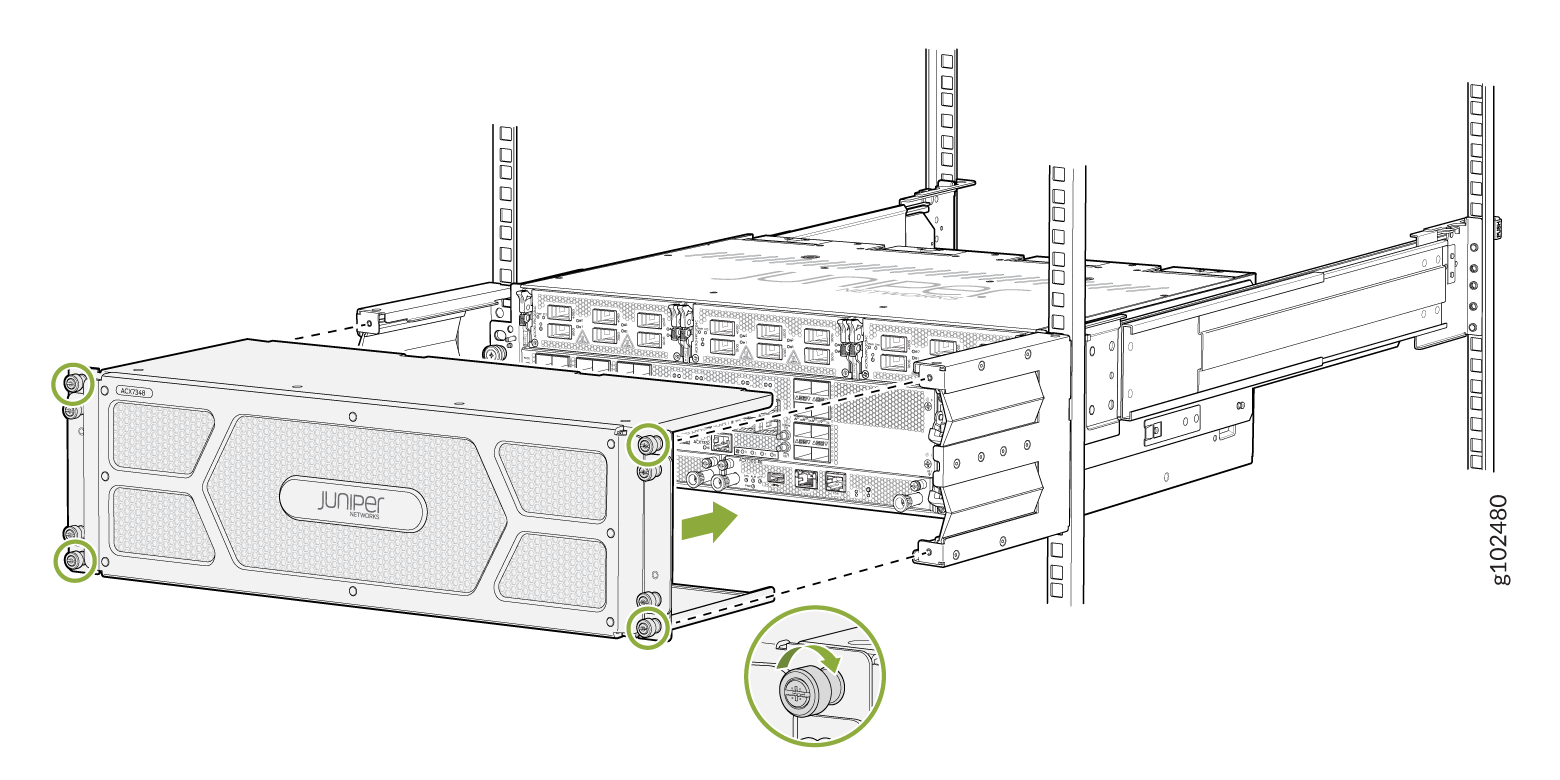
  4. Slide the outer cage into the rails on the cable management brackets until it stops.
    Figure 8: Attach the filter door Securing a Juniper Networks ACX Series router to a rack using screws highlighted in green circles.
  5. Tighten the captive screws to secure the air filter unit to the cable management brackets.

Replace the Air Filter

The air filter sits right inside the outer filter cover and the inner cage. The air filter unit is installed into the cable management brackets, and is held tightly by captive screws.

Note:

You must replace the air filter every 6 months.

Remove the Air Filter

To remove the air filter:

  1. Attach an electrostatic discharge (ESD) grounding strap to your bare wrist, and connect the strap to one of the ESD points on the chassis.
  2. On the front of the router, loosen the captive screws on each side of the air filter unit.
  3. Remove the outer air filter cover by grasping the head of the loosened screws, and pulling it out. The air filter is located at the center of the air filter unit, and just behind the outer filter cover. See #xd_ec5d1d001bf7574e--5257d188-18ab7ec2181--7fe7__fig_dqm_45c_wyb.
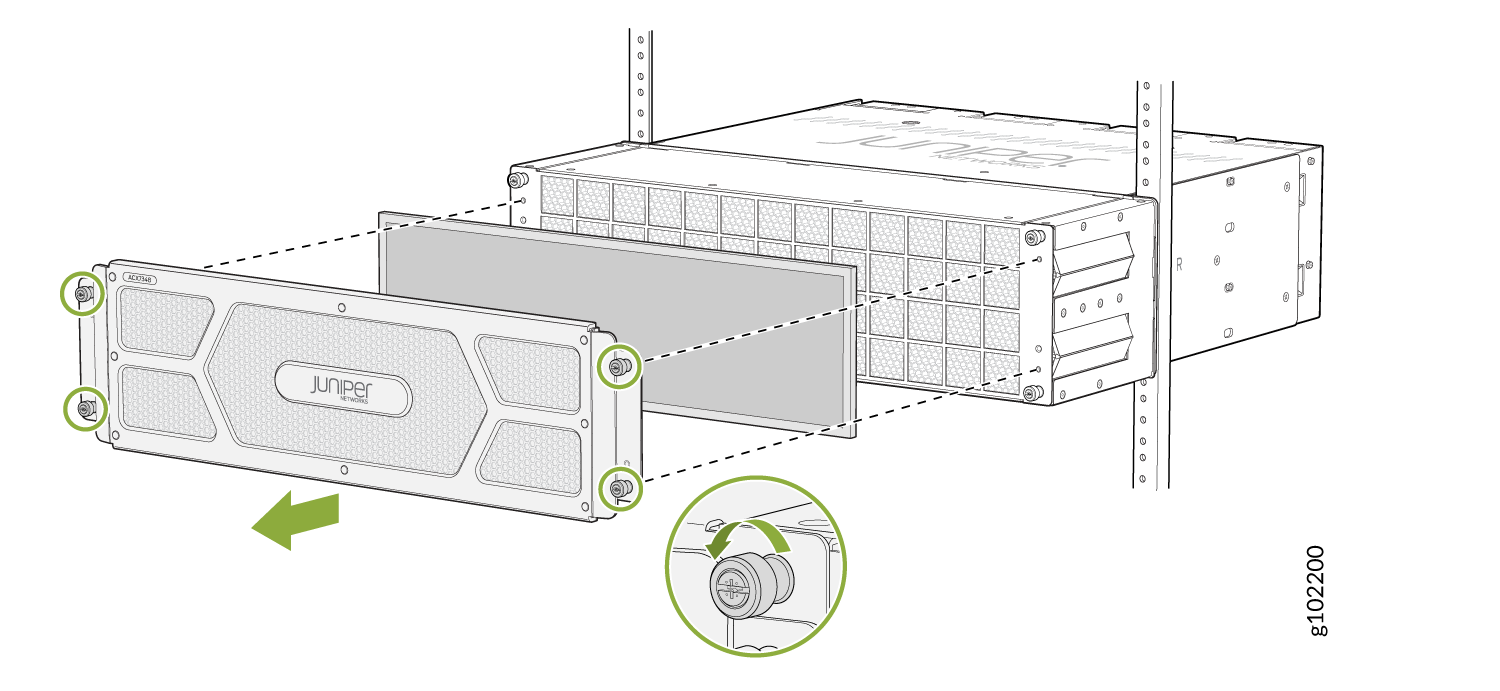
  4. Pull the air filter straight out from the air filter unit. See Figure 9.
    Figure 9: Remove the Air Filter from the Chassis Remove the Air Filter from the Chassis

Install the Air Filter

To install the air filter:

  1. Attach an electrostatic discharge (ESD) grounding strap to your bare wrist, and connect the strap to one of the ESD points on the chassis.
  2. On the front of the router, loosen the captive screws on each side of the air filter unit.
  3. Grasp the head of the loosened screws, and pull out the outer air filter cover. The air filter is installed at the center of the air filter unit, just behind the outer filter cover. See #xd_ec5d1d001bf7574e--5257d188-18ab7ec2181--7fe7__fig_dqm_45c_wyb.
  4. Slide the air filter straight onto inner filter cage (see Figure 10).
    Figure 10: Install the Air Filter Install the Air Filter
  5. Place the outer air filter cover back into its place, and tighten the captive screws to secure the air filter unit.