Connect ACX710 to Power
Connect Earth Ground to ACX710 Routers
To meet safety and electromagnetic interference (EMI) requirements and to ensure proper operation, the router must be adequately grounded before power is connected.
You need a protective earthing terminal bracket for connecting the chassis to earth ground. This two-holed bracket is attached on the side of the chassis through the mounting rail, and provides a protective earthing terminal for the router. The grounding points are in the form of studs that are sized for M6 Torx screws. (You need to provide these screws with integrated washers as we do not ship them in the accessory kit).
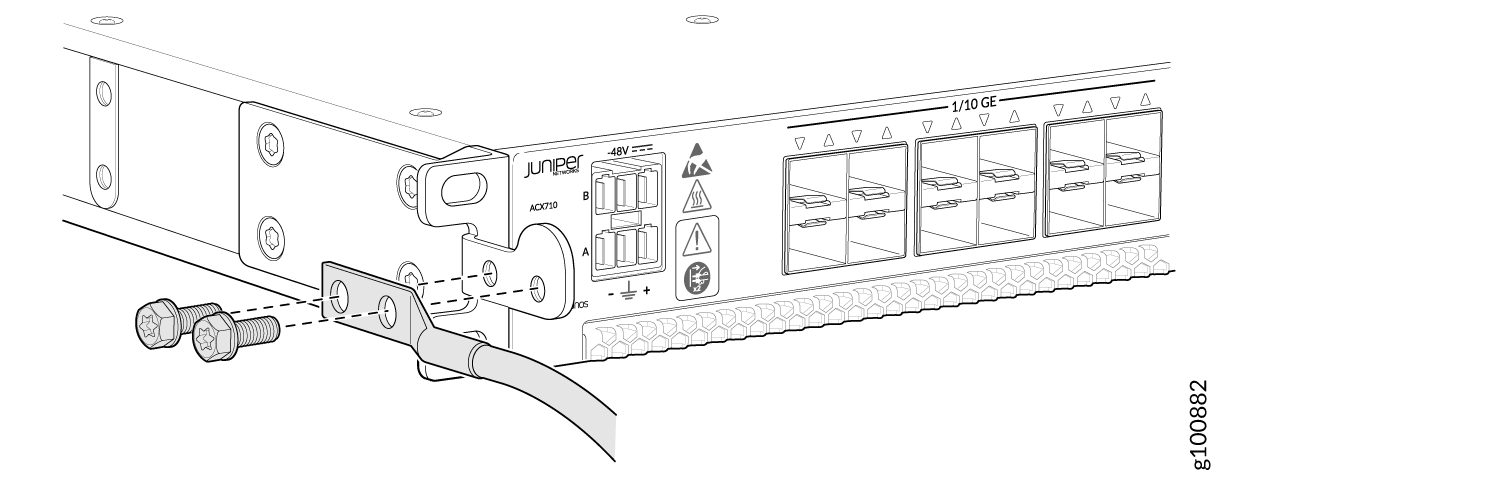
You must install the ACX710 in a restricted-access location and ensure that the chassis is always properly grounded. The ACX710 has a two-hole protective grounding terminal provided on the chassis. See Figure 1. Under all circumstances, use this grounding connection to ground the chassis. For AC-powered systems, you must also use the grounding wire in the AC power cord along with the two-hole grounding lug connection. This tested system meets or exceeds all applicable EMC regulatory requirements with the two-hole protective grounding terminal.
To ground the ACX710 router:
- Place the grounding cable lug over the grounding points
on the side of the chassis (see Figure 1).Figure 1: Connect the Grounding Cable to the ACX710 Router
Bare connectors and all grounding surfaces must be brought to a bright finish and coated with an antioxidant before crimp connections are made.
Non-conductive coatings on equipment that is to be bonded or grounded should be removed from threads and other contact surfaces to assure electrical continuity. To screw the box to its rack, use the thread-forming type unit mounting screws that remove any paint or non-conductive coatings to establish metal-to-metal contact.
DC Power Cabling
Before you connect the DC power cable, you must ensure that the polarity of the DC power cable installation is correct.
Figure 2, Figure 3, and Figure 4 show the DC power cabling styles for an ACX710 router.
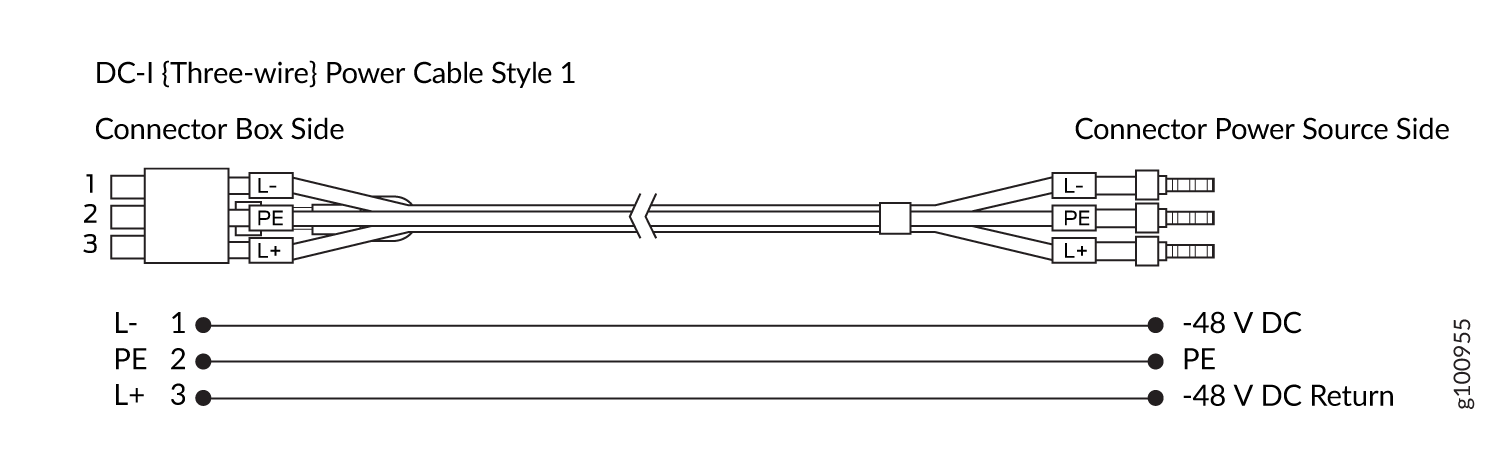
Table 1 lists the DC power cables that follow the DC 3-wire power cable style 1.
| Juniper Part Number | Power Cable Assembly | |
|---|---|---|
| Length | Gauge | |
|
ACX700DC310 |
10000 mm |
14 AWG |
|
ACX700DC32 |
2500 mm |
14 AWG |
|
ACX700DC35 |
5000 mm |
14 AWG |
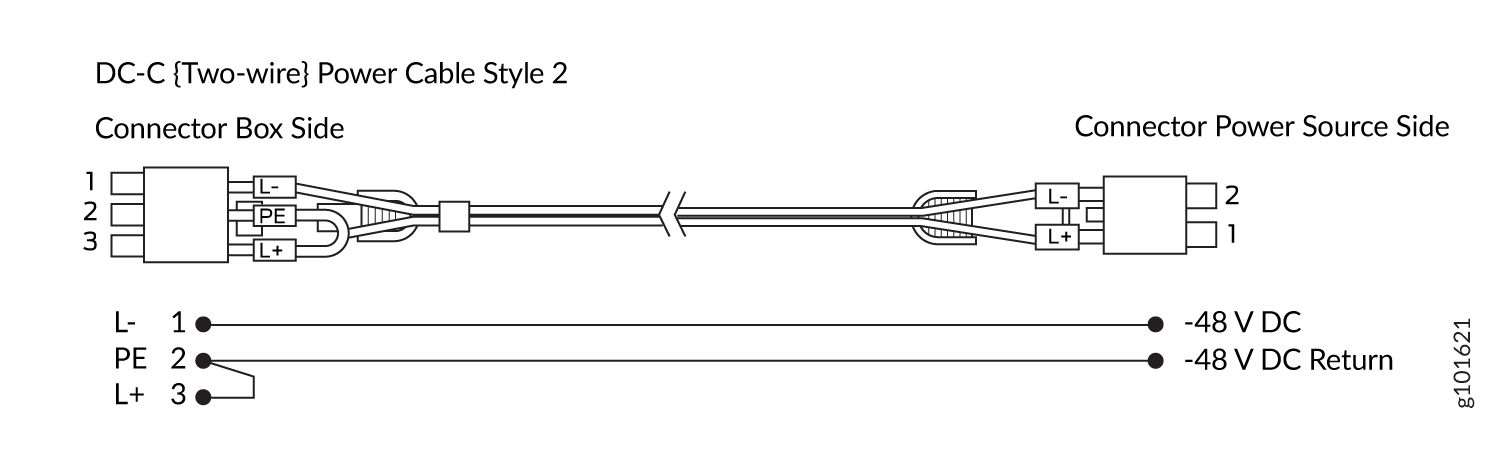
Table 2 lists the DC power cable that follows DC 2-wire power cable style 2.
| Juniper Part Number | Power Cable Assembly | |
|---|---|---|
| Length | Gauge | |
|
ACX700DC21 |
1800 mm |
14 AWG |
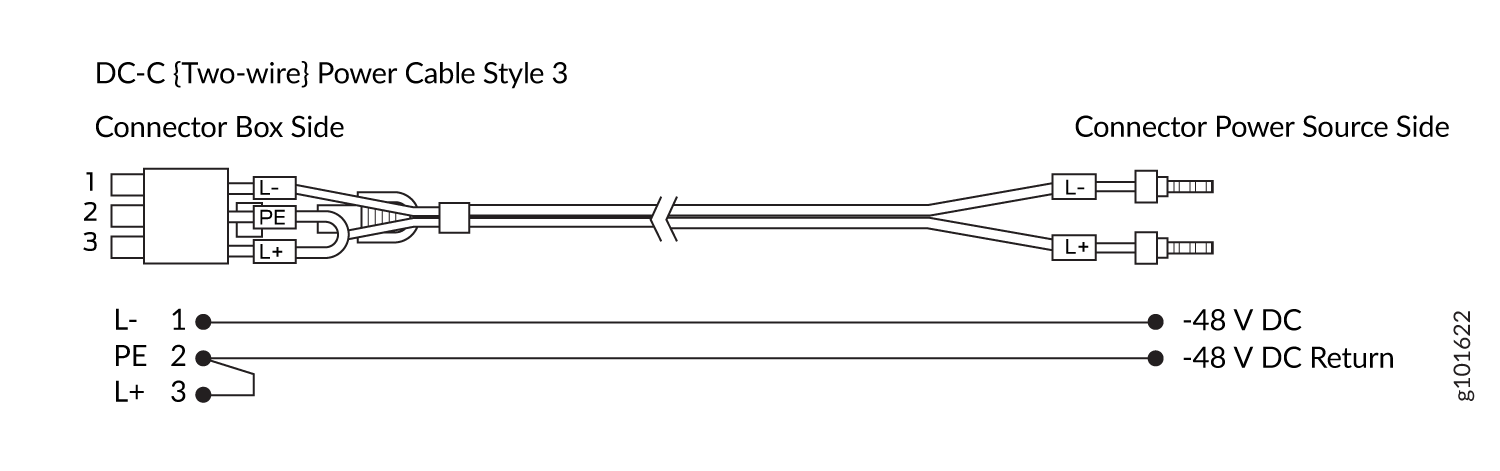
Table 3 lists the DC power cables that follow power cable style 3.
| Juniper Part Number | Power Cable Assembly | |
|---|---|---|
| Length | Gauge | |
|
ACX700DC22 |
2500 mm |
14 AWG |
|
ACX700DC210 |
10000 mm |
14 AWG |
|
ACX700DC25 |
5000 mm |
14 AWG |
For DC-I (three-wire) power cable style 1, if PE is connected to –48 V DC at DC power sources, it will cause a short circuit and the circuit breaker on the DC power sources will be tripped.
For DC-C (two-wire) power cable style 3, if the –48 V DC return is connected to –48 V DC at DC power sources, it will cause a short circuit and the circuit breaker on the DC power source will be tripped.
Connect DC Power to an ACX710 Router
Before you begin connecting DC power to the router:
Ensure that you have taken the necessary precautions to prevent electrostatic discharge (ESD) damage (see Prevention of Electrostatic Discharge Damage).
Ensure that you have connected the router chassis to earth ground.
CAUTION:Before you connect power to the router, a licensed electrician must attach a cable lug to the grounding and power cables that you supply. A cable with an incorrectly attached lug can damage the router (for example, by causing a short circuit).
To meet safety and electromagnetic interference (EMI) requirements and to ensure proper operation, you must connect the chassis to earth ground before you connect the chassis to power.
Ensure that you have the following parts and tools available:
DC power source cables
Multimeter (not provided)
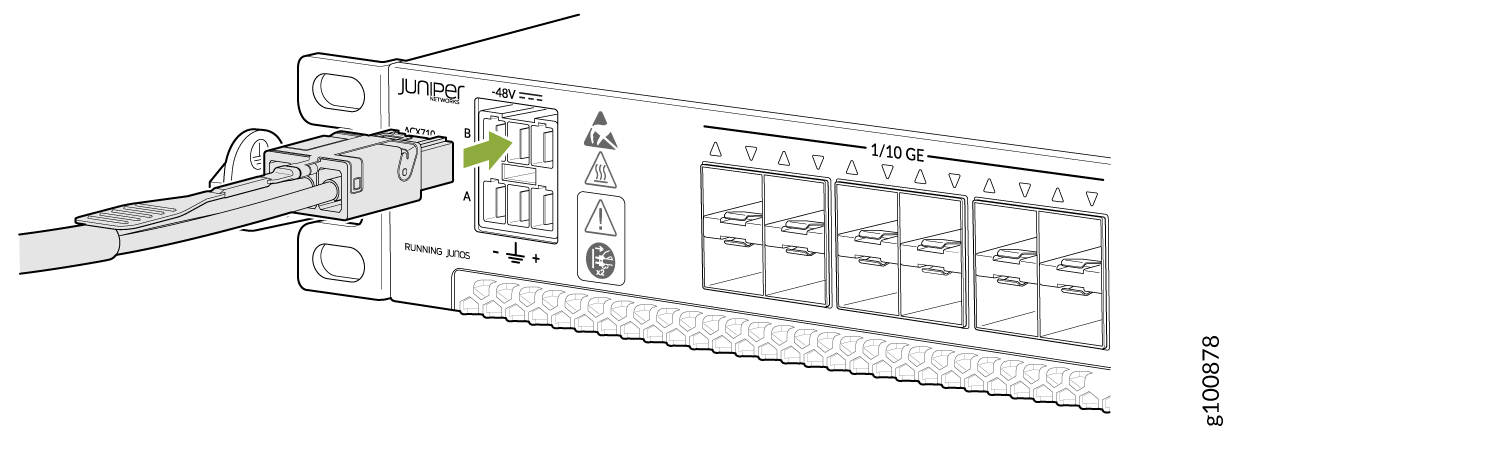
To connect DC power to an ACX710 router:
- Insert the power cord firmly into the inlet.Figure 5: Connect a DC Power Cord to an ACX710 Router