Install ACX7020 in a Rack
Use the information in this topic to install the ACX7020 router in a rack.
You can install an ACX7020 router into a 19-inch, 21-inch, or 23-inch two-post rack or a cabinet.
Unpack an ACX7020 Router
The ACX7020 router chassis is a rigid sheet-metal structure that houses the hardware components. We ship the ACX7020 router in a cardboard carton, secured with foam packing material. The carton also contains an accessory box and quick start instructions.
The shipping carton maximally protects the ACX7020 routers. Do not unpack the router until you are ready to begin installation.
To unpack an ACX7020 router:
- Move the shipping carton to a staging area as close to the installation site as possible, where you have enough room to remove the system components.
- Position the carton so that the arrows are pointing up.
- Open the top flaps on the shipping carton.
- Remove the accessory box, and verify the contents against the inventory included in the box.
- Pull out the packing material that holds the router in place.
- Verify the chassis components that you received.
- Save the shipping carton and packing materials in case you need to move or ship the router later.
|
Component |
Quantity |
|
|---|---|---|
|
Chassis with in-built PSMs and fans Note: The AC model consists of two AC PSMs
that support dual input feeds and the DC model consists of a
single DC PSM that supports a dual input feed.
|
1 |
|
|
AC power cord(s) appropriate for your geographical location. Note:
Power cords are not shipped with DC models. |
2 |
|
|
Power Cord Retainer Note:
Power cord retainer are shipped with only AC models. |
2 |
|
|
19-inch two-post rack mount kit (RMK)—ACX702X-RMK-19 Spare rack mount kits order numbers:
|
1 |
|
|
Air Filter Mesh—660-179223 (ACX7020-FLTR ) |
1 |
|
|
Documentation roadmap card |
1 |
|
|
Dust Caps-Optics Ports (SFP/SFP+) |
20 |
|
|
Grounding lug kit that consists of the following items:
|
||
|
2 |
||
|
1 |
||
We no longer include the RJ-45 console cable with the DB-9 adapter as part of the device package. If the console cable and adapter are not included in your device package, or if you need a different type of adapter, you can order the following separately:
-
RJ-45 to DB-9 adapter (JNP-CBL-RJ45-DB9)
-
RJ-45 to USB-C adapter (JNP-CBL-RJ45-USBC)
-
RJ-45 to USB-A adapter (JNP-CBL-RJ45-USBA)
If you want to use RJ-45 to USB-A or RJ-45 to USB-C adapter you must have X64 (64-Bit) Virtual COM port (VCP) driver installed on your PC. See, https://ftdichip.com/drivers/vcp-drivers/ to download the driver.
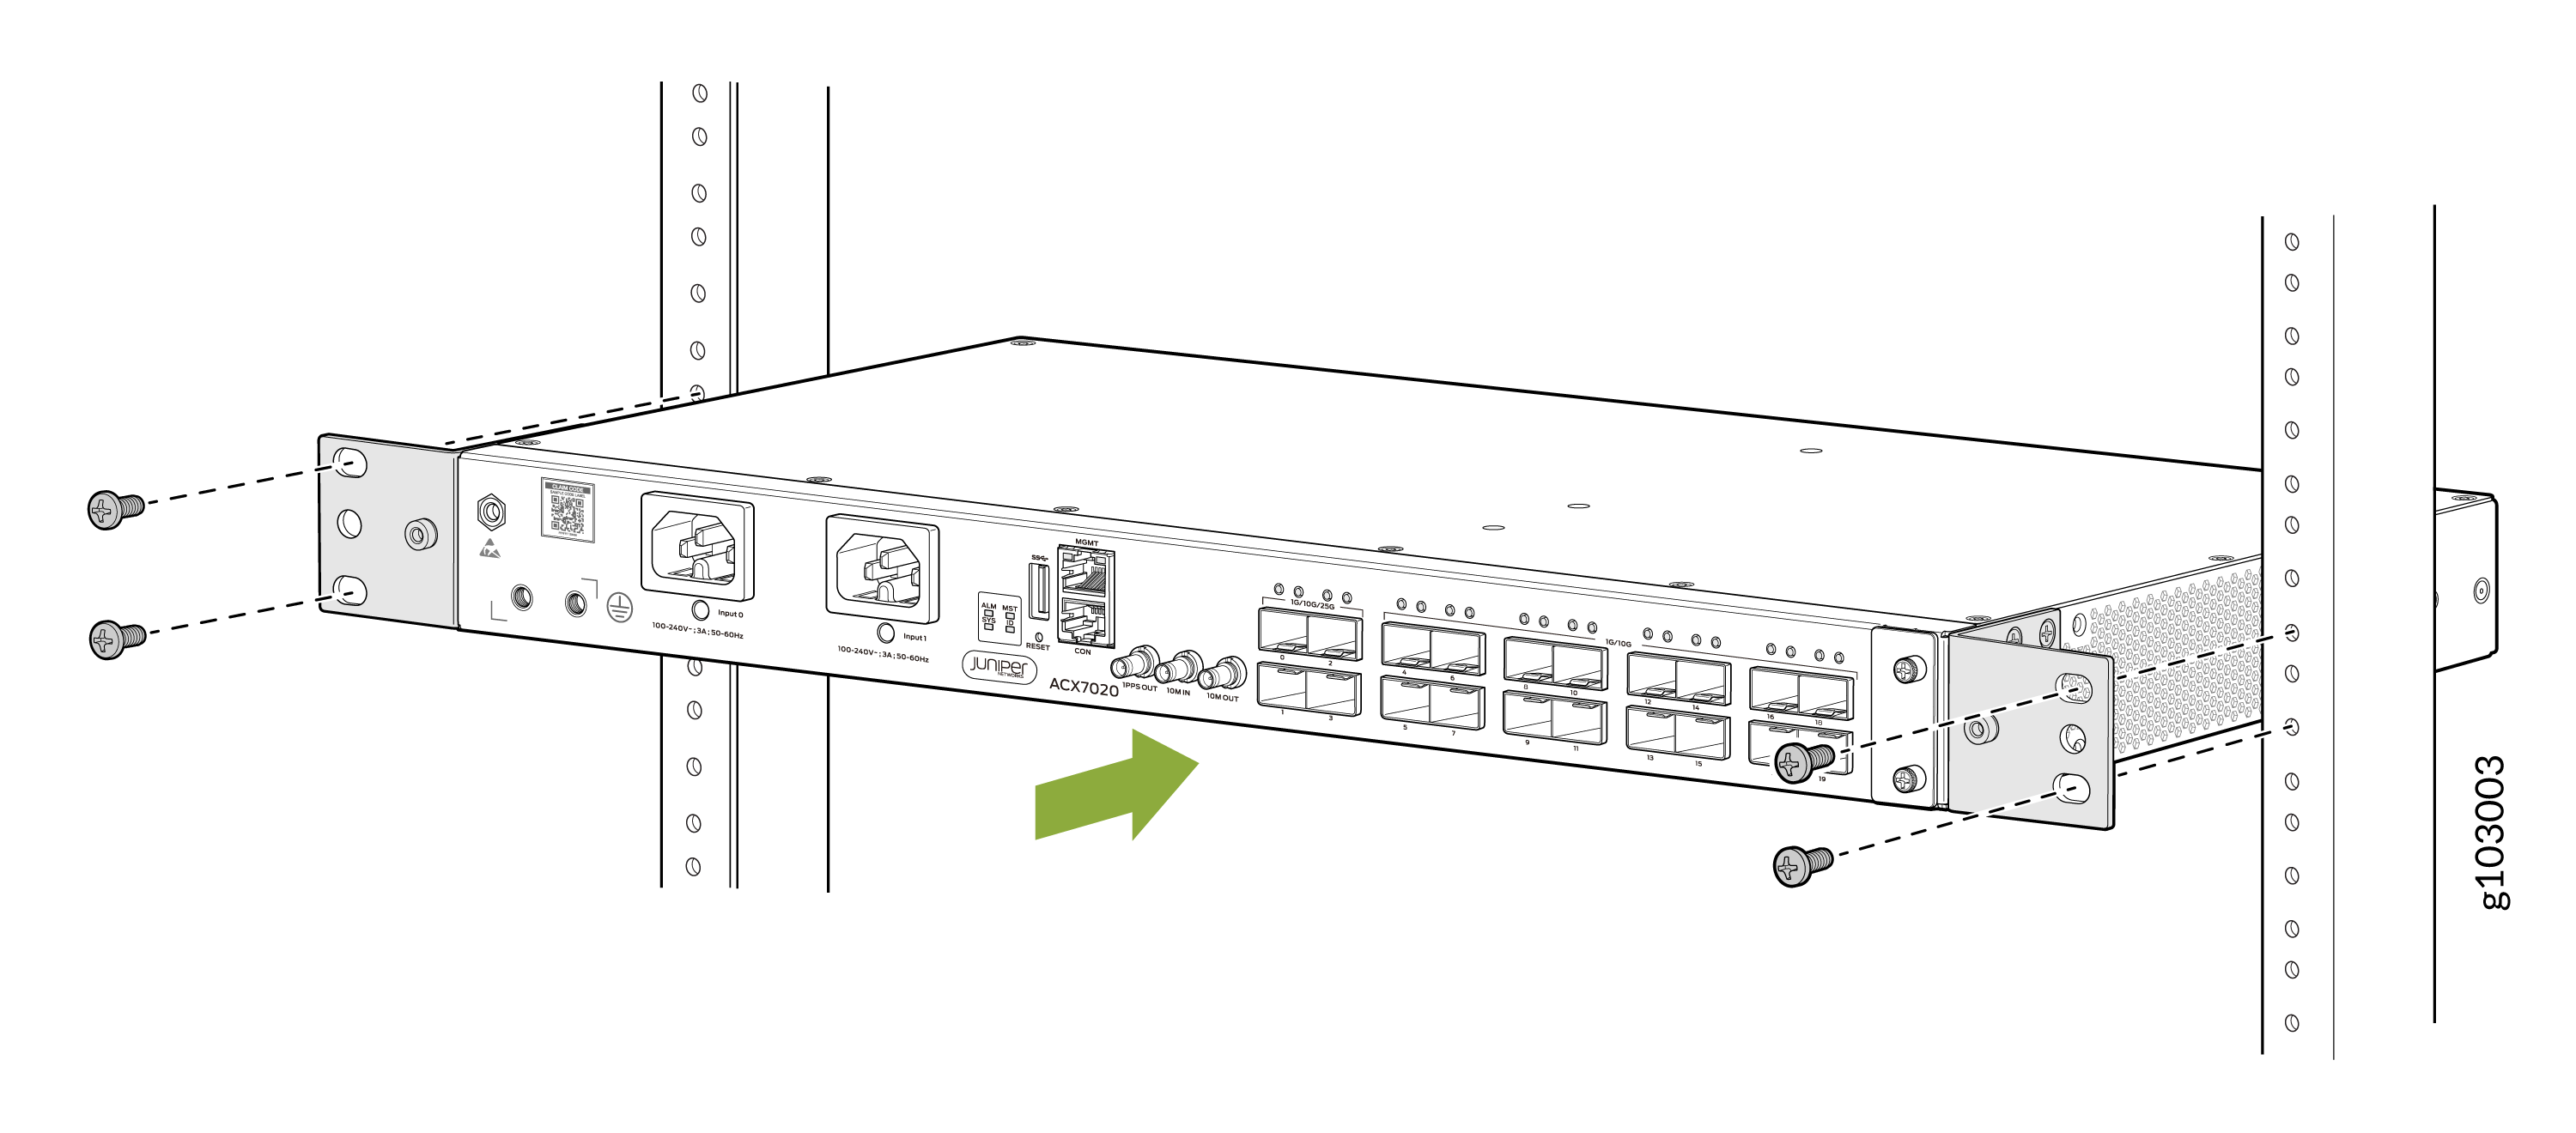
Mount an ACX7020 in a 19-in. Two-Post Rack
Be sure that you have the following parts and tools available to install the router:
-
Two rack mounting brackets (provided)
-
Four screws to secure the mounting brackets to the rack (not provided)
-
A Phillips (+) screwdriver, number 1, 2, or 3, depending on the size of your rack-mounting screws (not provided)
-
An ESD grounding strap (not provided)
-
Four rack mount screws (not provided)
To mount an ACX7020 router on two posts of a rack:
-
Align the holes in the front-mounting brackets with the holes on the side
of the chassis.
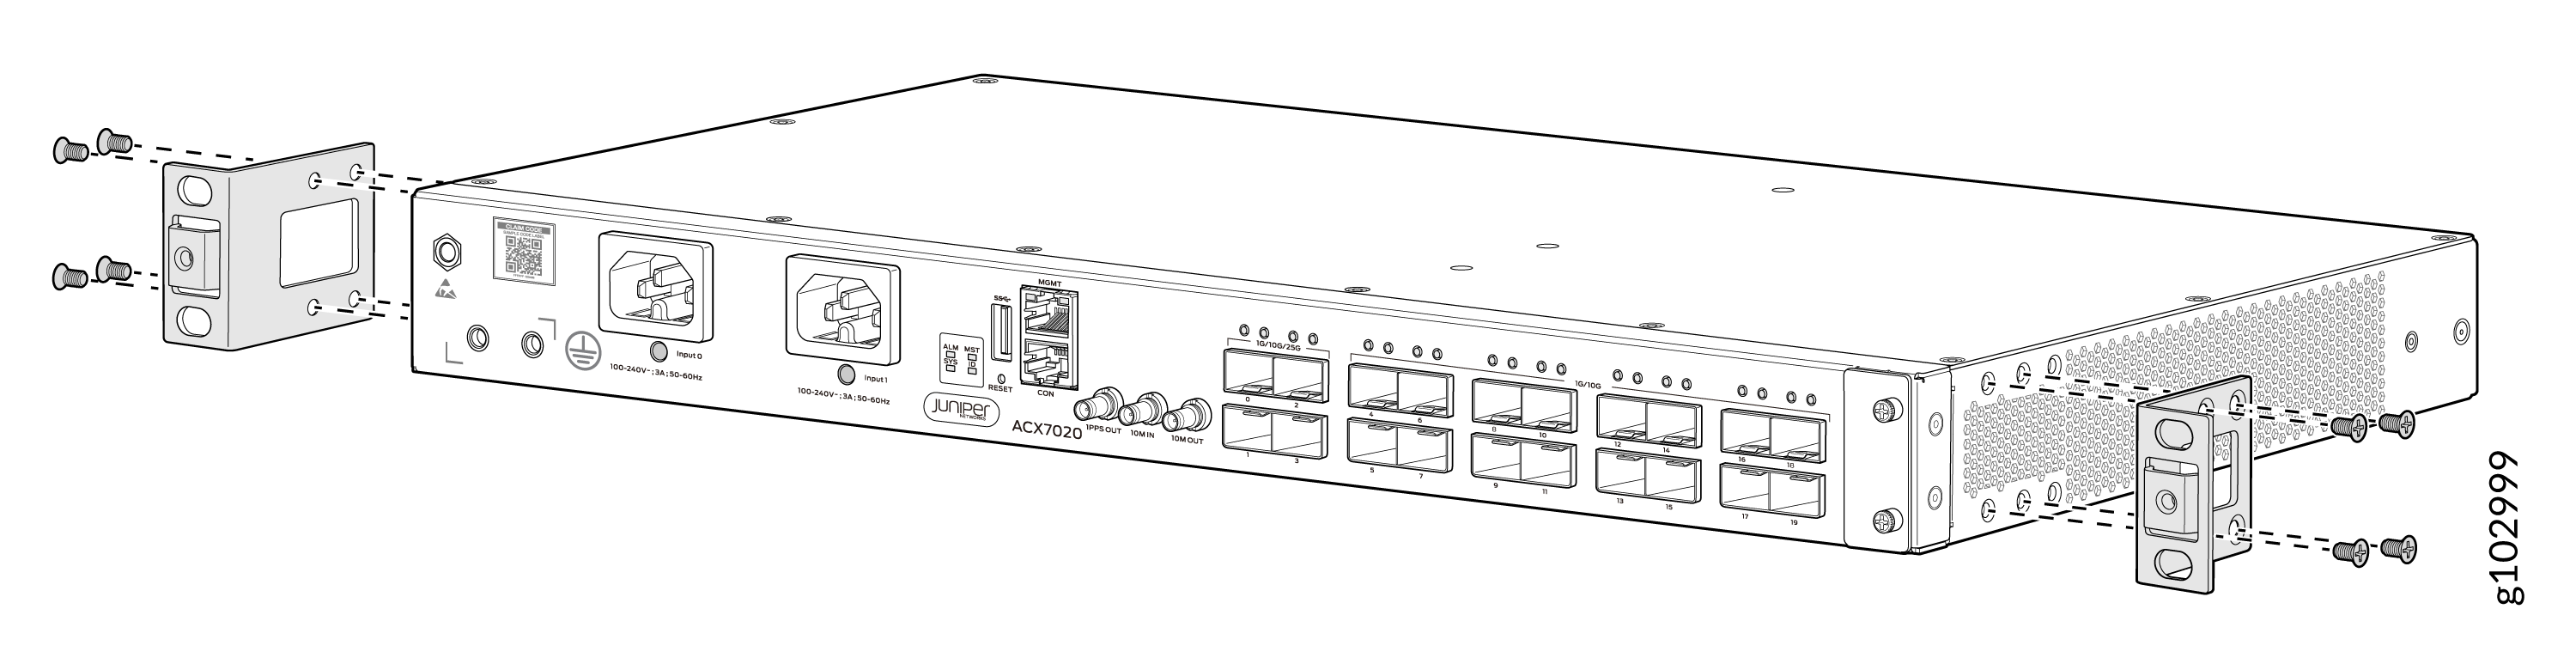
-
Lift the router and position it in the rack. Line up the top and bottom
holes in each mounting bracket with the holes in each rack rail, making sure
the router is level.
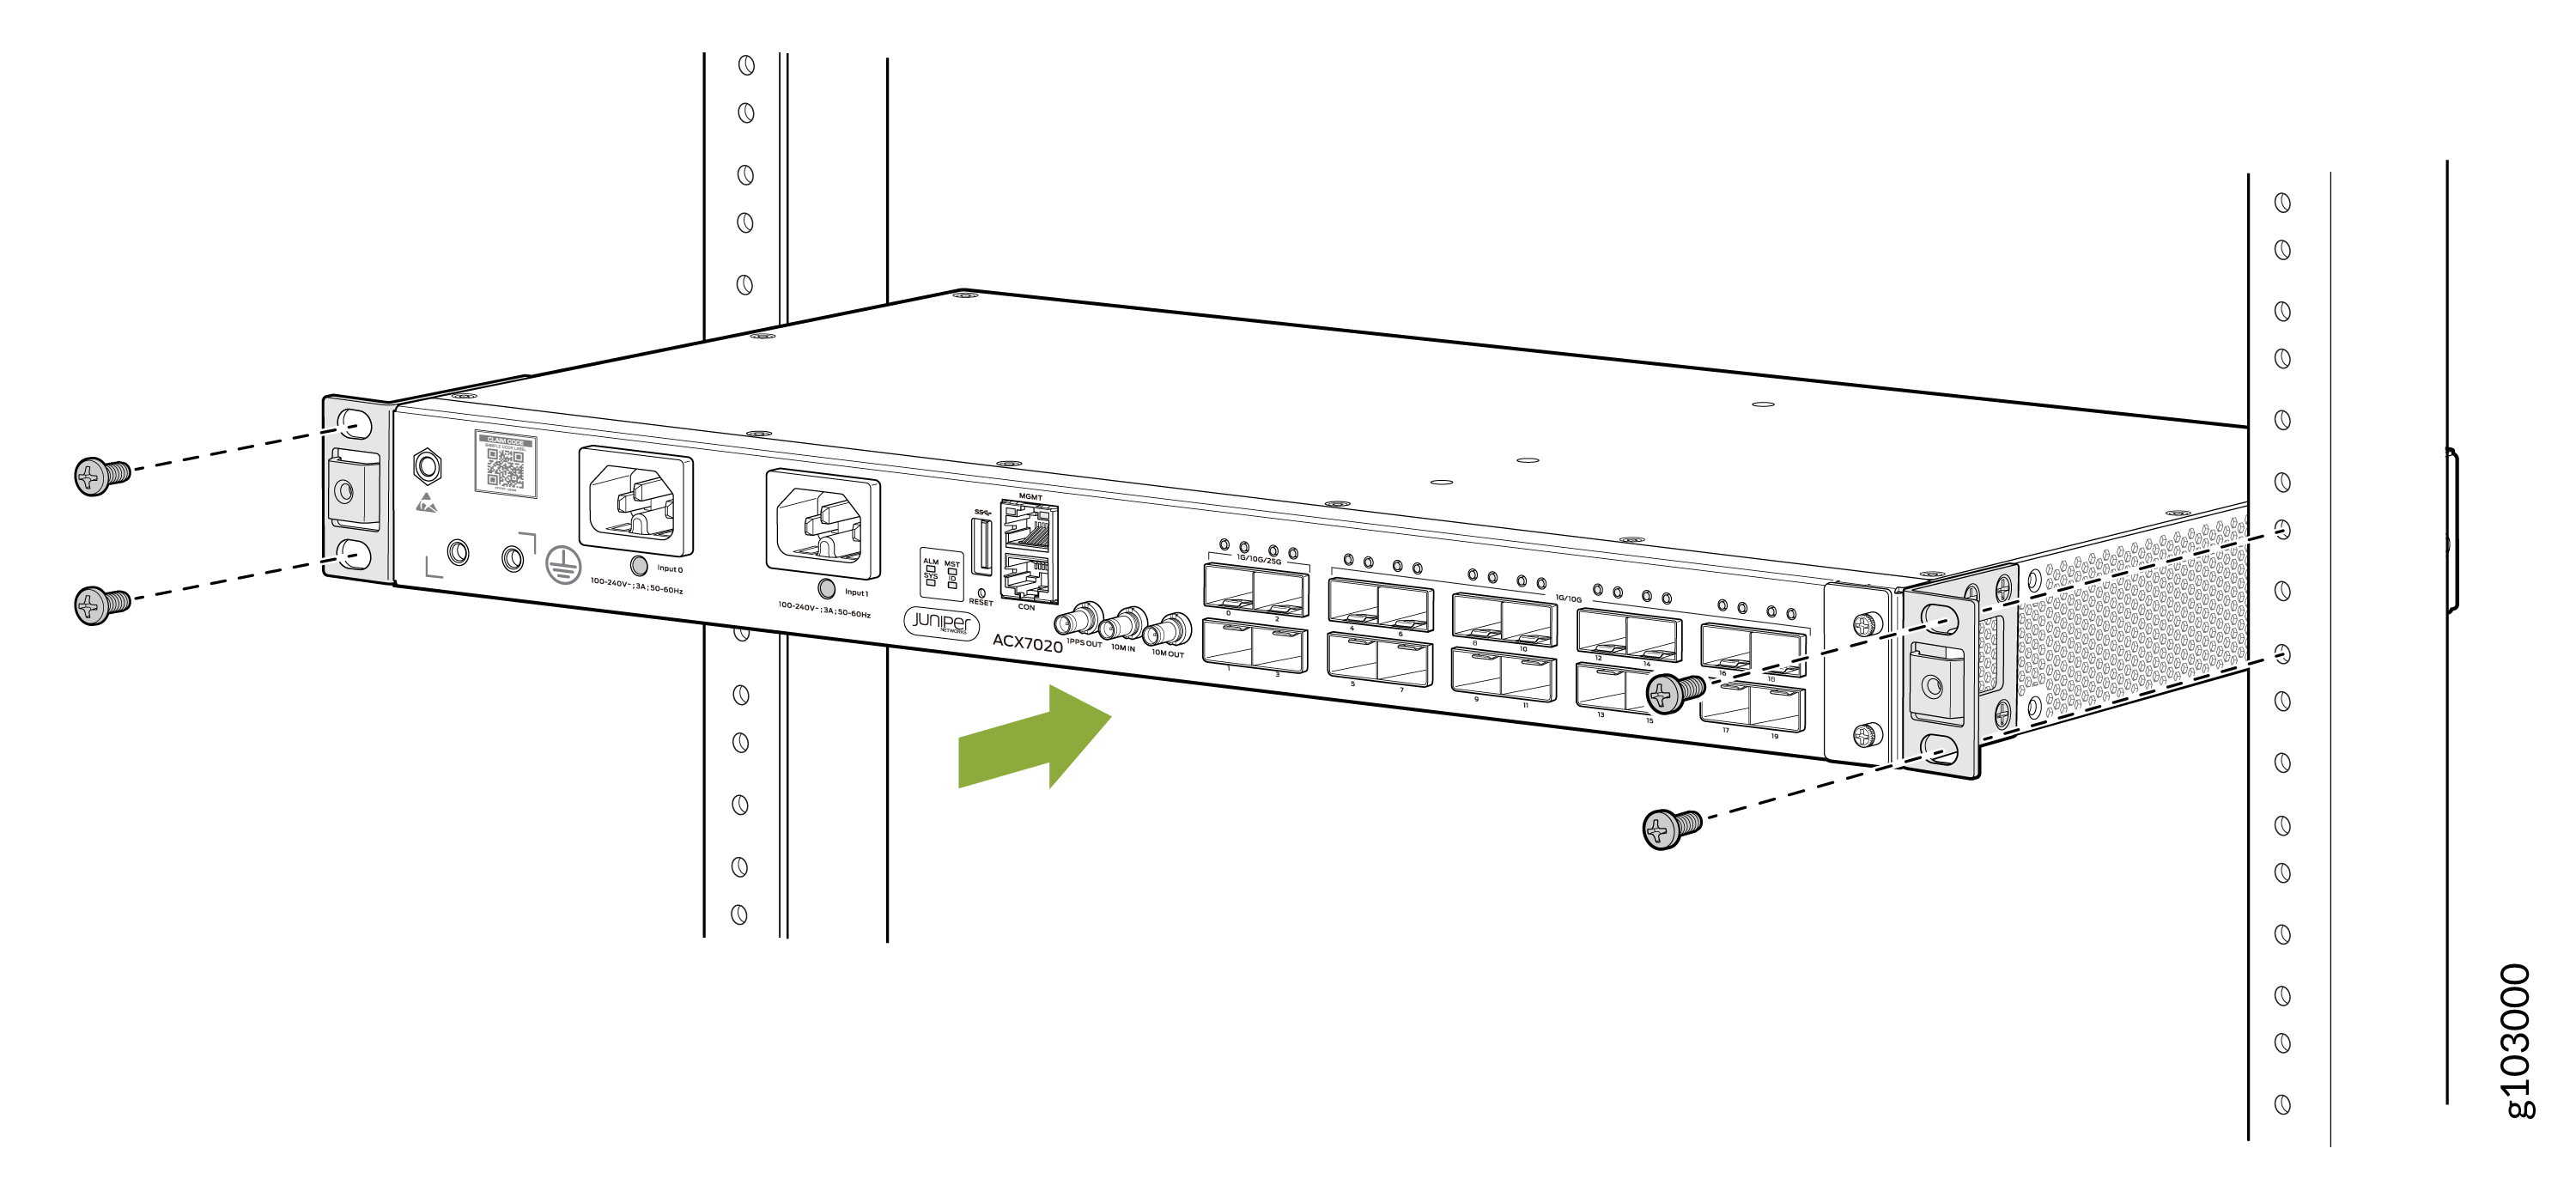
-
Check to see that the mounting screws on each side of the rack are aligned
and the router is level.

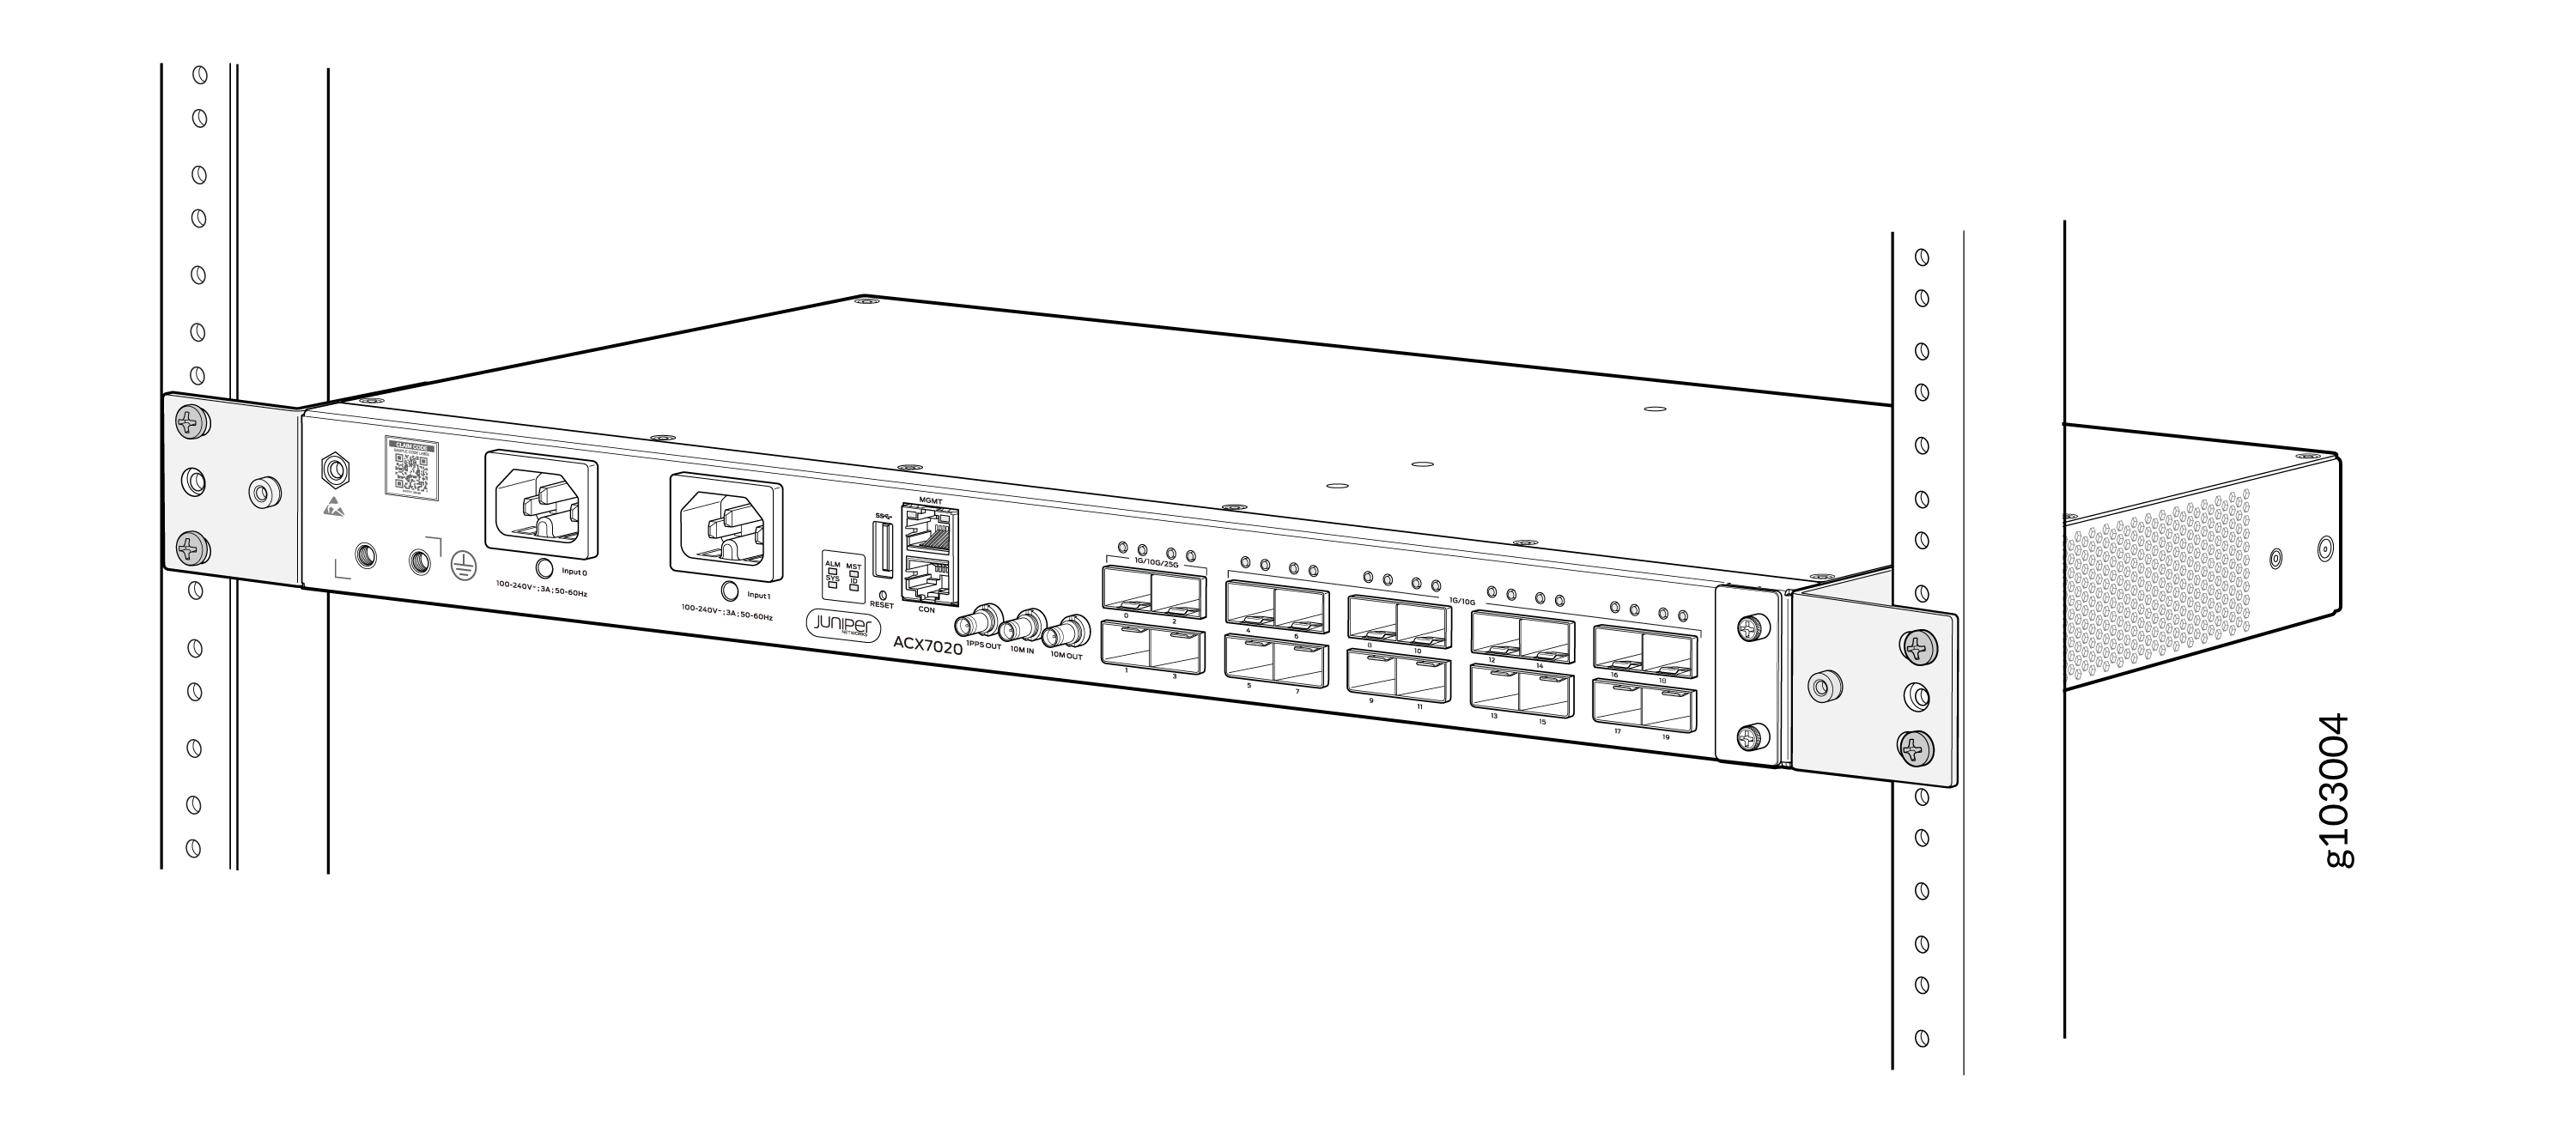
Mount an ACX7020 in a 21-in. or 23-in. Two-Post Rack
Be sure that you have the following parts and tools available to install the router:
-
Four screws to secure the mounting brackets to the rack (not provided)
-
A Phillips (+) screwdriver, number 1, 2, or 3, depending on the size of your rack-mounting screws (not provided)
-
An ESD grounding strap (not provided)
-
Mounting bracket for 21-in. or 23-in. rack install (not provided)
To mount an ACX7020 router on two posts of a rack:
-
Align the holes in the front-mounting brackets with the holes on the side
of the chassis.
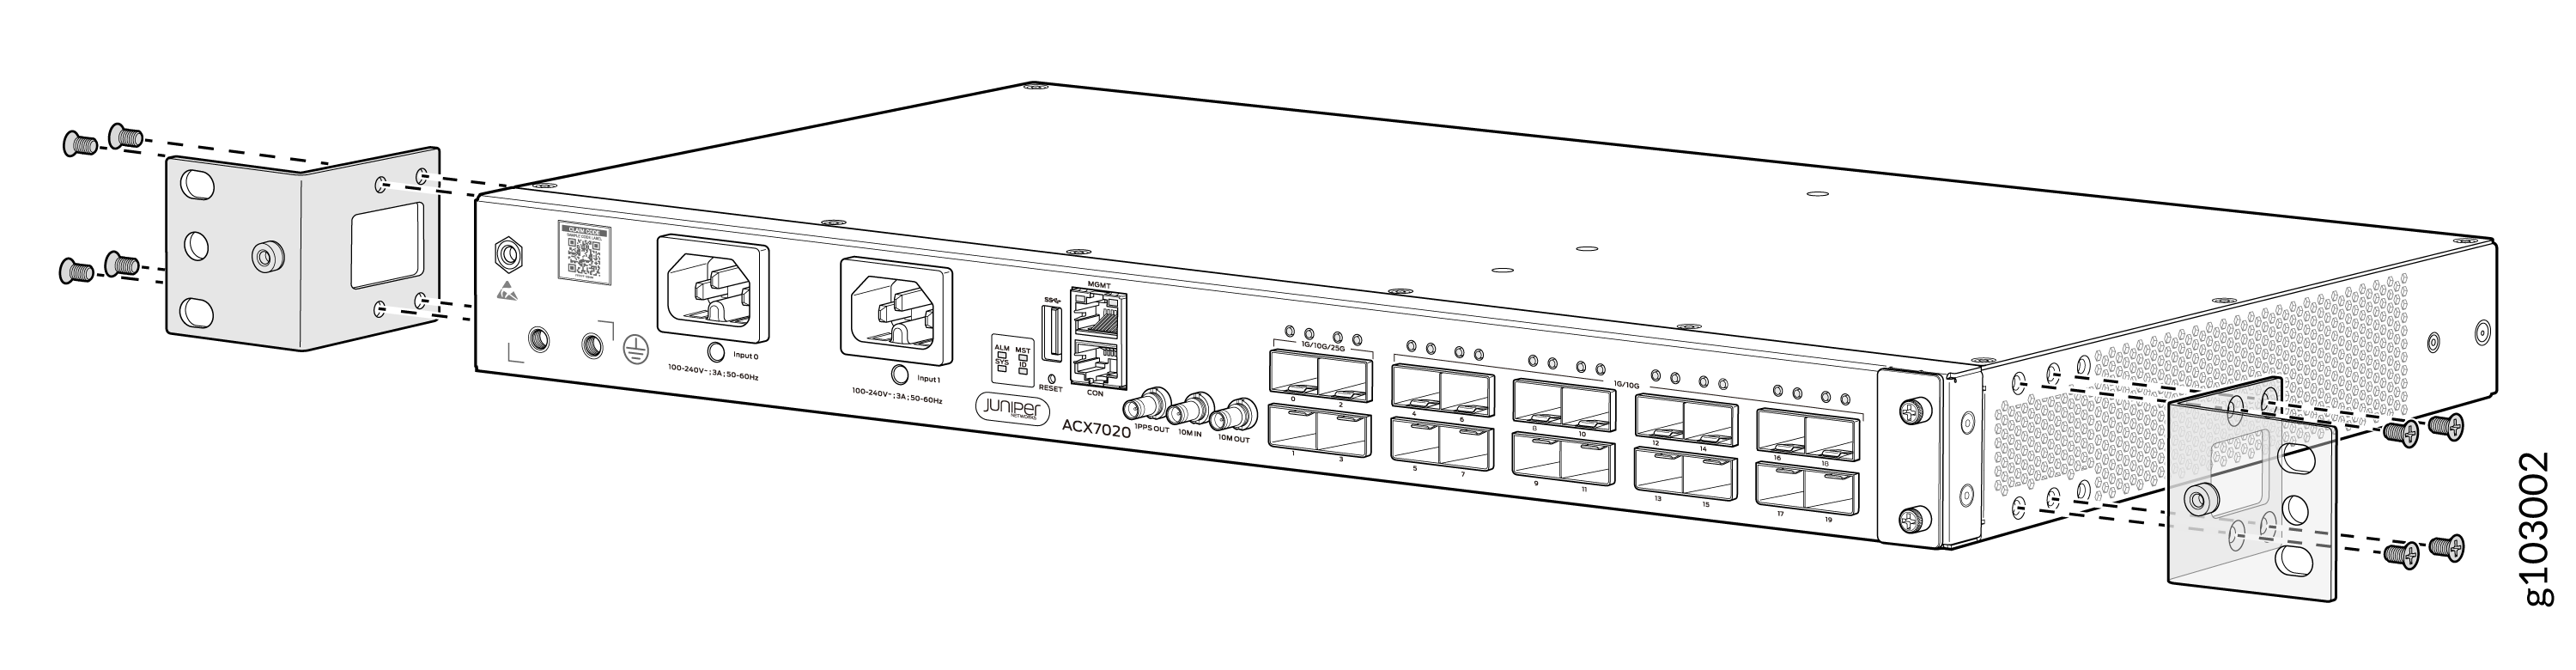
-
Lift the router and position it in the rack. Line up the top and bottom
holes in each mounting bracket with the holes in each rack rail, making sure
the router is level.
-
Check to see that the mounting screws on each side of the rack are aligned
and the router is level.