Contacting Customer Support and Returning the Chassis or Components
How to Return a Hardware Component to Juniper Networks, Inc.
If a hardware component fails, please contact Juniper Networks, Inc. to obtain a Return Material Authorization (RMA) number. This number is used to track the returned material at the factory and to return repaired or new components to the customer as needed.
Do not return any component to Juniper Networks, Inc. unless you have first obtained an RMA number. Juniper Networks, Inc. reserves the right to refuse shipments that do not have an RMA. Refused shipments are returned to the customer by collect freight.
For more information about return and repair policies, see the customer support webpage at https://support.juniper.net/support/.
For product problems or technical support issues, contact the Juniper Networks Technical Assistance Center (JTAC) by using the Service Request Manager link at https://support.juniper.net/support/ or at 1-888-314-JTAC (within the United States) or 1-408-745-9500 (from outside the United States).
To return a defective hardware component:
Displaying ACX1000 and ACX1100 Components and Serial Numbers
Before contacting Juniper Networks, Inc. to request a Return Materials Authorization (RMA), you must find the serial number on the router or component. To display all of the router components and their serial numbers, enter the following command-line interface (CLI) command:
user@host> show chassis hardware
Hardware inventory:
Item             Version  Part number  Serial number     Description
Chassis                                                  ACX1000
Midplane         REV 00   650-037055   HT0211309196      ACX1000
Routing Engine            BUILTIN      BUILTIN           Routing Engine
FEB 0                     BUILTIN      BUILTIN           Forwarding Engine Processor
FPC 0                     BUILTIN      BUILTIN           FPC BUILTIN
    PIC 0                 BUILTIN      BUILTIN           8x CHE1T1, RJ48
    PIC 1                 BUILTIN      BUILTIN           8x 1GE(LAN) RJ45
    PIC 2                 BUILTIN      BUILTIN           4x 1GE(LAN) SFP, RJ45
      Xcvr 0     REV 01   740-031851   PM30L2R           SFP-SX
      Xcvr 1     REV 01   740-011782   P9C26MZ           SFP-SX
      Xcvr 2     REV 02   740-011613   PJH27W4           SFP-SX
      Xcvr 3     REV 01   740-011613   PD82PLA           SFP-SX
Most components also have a small rectangular serial number ID label (see Figure 1) attached to the component body.
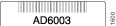
ACX1000 and ACX1100 Chassis Serial Number Label
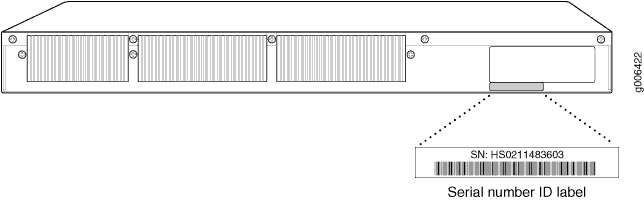
The chassis serial number is located on the rear of the chassis (see Figure 2).
Guidelines for Packing Hardware Components for Shipment
To pack and ship individual components:
When you return components, make sure that they are adequately protected with packing materials and packed so that the pieces are prevented from moving around inside the carton.
Use the original shipping materials if they are available.
Place individual components in antistatic bags.
Write the RMA number on the exterior of the box to ensure proper tracking.
Do not stack any of the hardware components.
Packing the ACX Series Router for Shipment
To pack the router for shipment: