Enabling SR-IOV for VMware
The physical network interfaces support single root I/O virtualization (SR-IOV) capability and can be connected to the VMs using PCI passthrough. Before you enable SR-IOV for VMware, note the following:
-
SR-IOV is only supported with Intel Ivy Bridge CPU (or higher) and Intel X520 NICs using ixgbe driver or X710 NICs with 10G ports and using i40e driver. Any other NIC models are not supported.
Support for ixgbe driver and i40e driver is available from Junos OS Release 18.4R1 onwards.
-
Starting in Junos OS Release 18.4R1, in VMware deployments operating in SR-IOV mode with an ESXi server, support is available for VLAN-tagged traffic for vMX interfaces.
To enable vMX with vSphere for SR-IOV adapters, perform these tasks:
Enable SR-IOV on a Physical Adapter
To enable SR-IOV on a physical adapter in vSphere client:
-
Navigate to the host in the left navigation pane and click the
Manage tab. Go to Hardware
tab. Under PCI Devices option, select the physical adapter and click
Configure SR-IOV option.
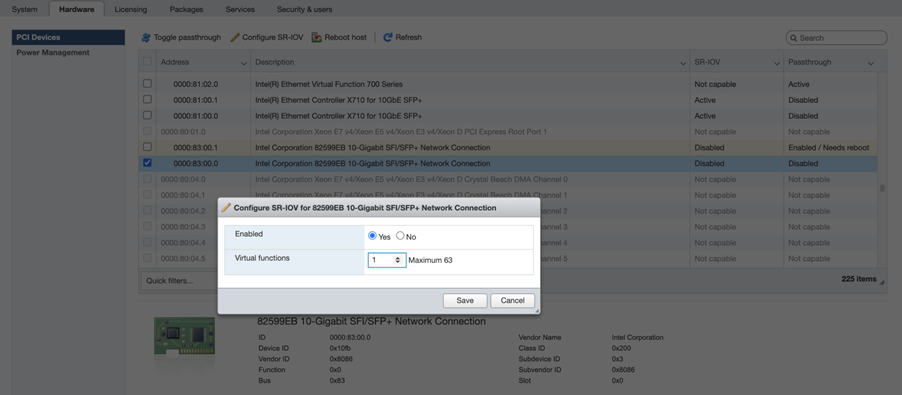
-
In the populated window, select Yes to enable
SR-IOV. In the virtual functions text box, specify the number of virtual
functions to configure for the adapter.
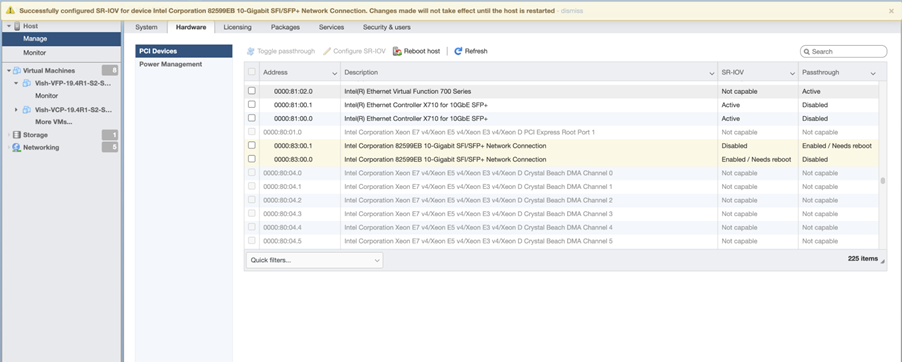
- Click Save.
- Restart the host.
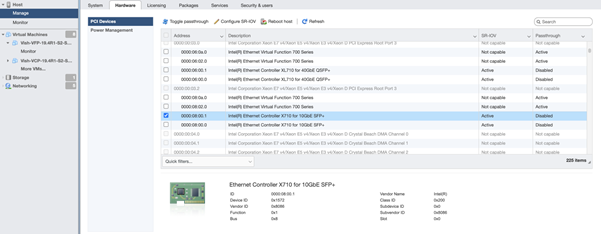
-
Verify the status of SR-IOV post reboot. The status is displayed as Active.
Add vSwitch and Port Groups
To add vSwitch and Port Groups:
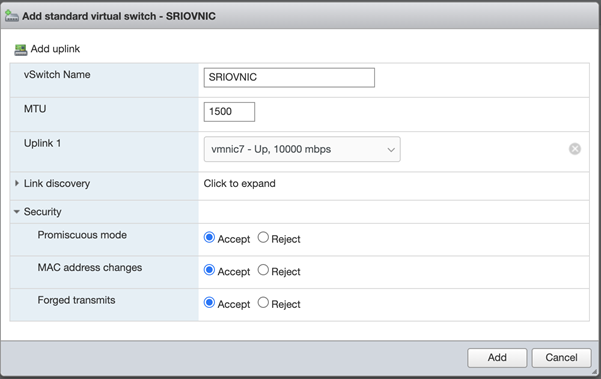
-
To create vSwitch: Navigate to Networking tab and
select Virtual Switches and click Add
standard virtual switch.
-
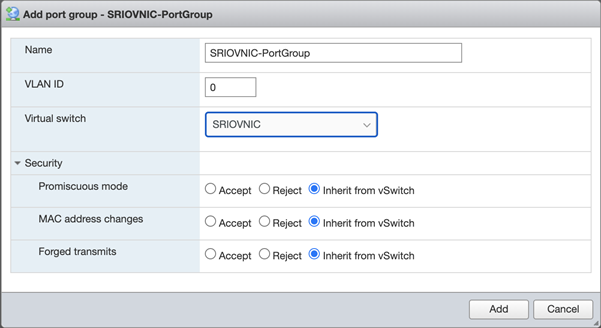
To create port groups: Navigate to Networking tab
and select Port Groups and click Add port
group.
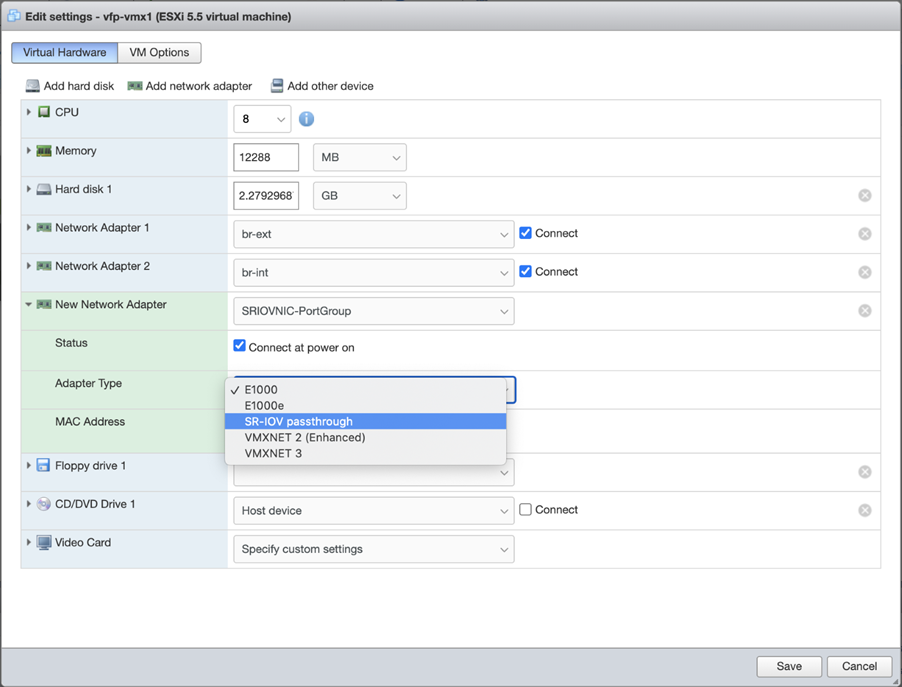
Assigning the SR-IOV NIC to the VFP VM
To assign the SR-IOV to the VFP VM using the vSphere Web Client:
-
Under New Network Adapter, select the respective port group for mapping.

-
Change Adapter Type as SR-IOV passthrough.
-
Map Physical function to respective SR-IOV NIC.

Enable VLAN Tagging on SR-IOV Interfaces
We've used the hardware and software combination for the following procedure:
- VMware ESXi version 6.5 Update 3
- i40en driver version 1.10.6 for Intel 700 Series network adapters
- Firmware version 7.20 for Intel 700 Series network adapters
-
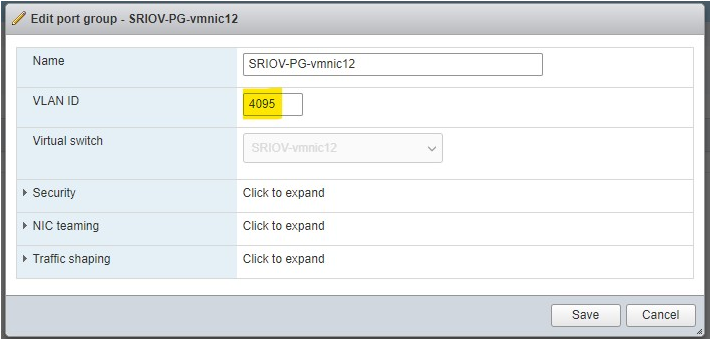
Log in to the ESXi Web console . Navigate to
Networking and select Port
groups tab. Edit the settings for the required port.
Enable the VLAN trunking for the vSwitch that includes the SR-IOV interface. You must set the VLAN value to 4095.
Note the following:
-
The VLAN ID 4095 allows any VLAN traffic.
-
The VLAN ID 0 does not allow any VLAN traffic.
-
Ensure that you have configured the VLAN ID matching to the VLAN configuration on the mapped interface. Example: If you have configured a VLAN ID 100 on the associated logical interface, then use VLAN ID 100 for SR-IOV. This setting enables receive and forwarding incoming frames that contain a matching VLAN ID that is VLAN 100.
-