KVM virt-managerによるSecurity Director Insightsのインストール
始める前に
-
スナップショットがないことを確認します。ディスク サイズを拡張する前に、スナップショットを削除する必要があります。
-
ディスク サイズを拡張する前に、VM のクローンを作成してバックアップを作成することをお勧めします。
KVM virt-manager GUI パッケージを使用して Security Director Insights をインストールして起動できます。
開始する前に、次のことを確認する必要があります。
-
ホスト OS に KVM、qemu、virt-manager、および libvirt がすでにインストールされている。
-
SSH経由でKVMにアクセスするためのブリッジネットワークを作成しました。
このドキュメントでは、ブリッジ ネットワーク br0 を Netplan で作成します。 図 1 は、/etc/netplan/00-installer-config.yaml ファイルの構成例を示しています。
図 1: br0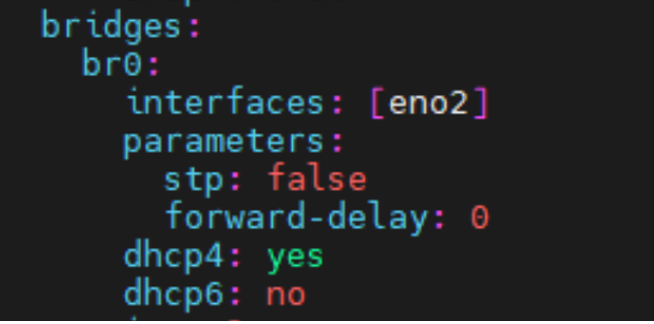 の設定例
の設定例
Security Director Insights with virt-managerをインストールするには:
- ホストOSで、
virt-managerと入力します。[Virtual Machine Manager] ページが表示されます ( 図 2 参照)。
図 2: [Virtual Machine Manager] ページ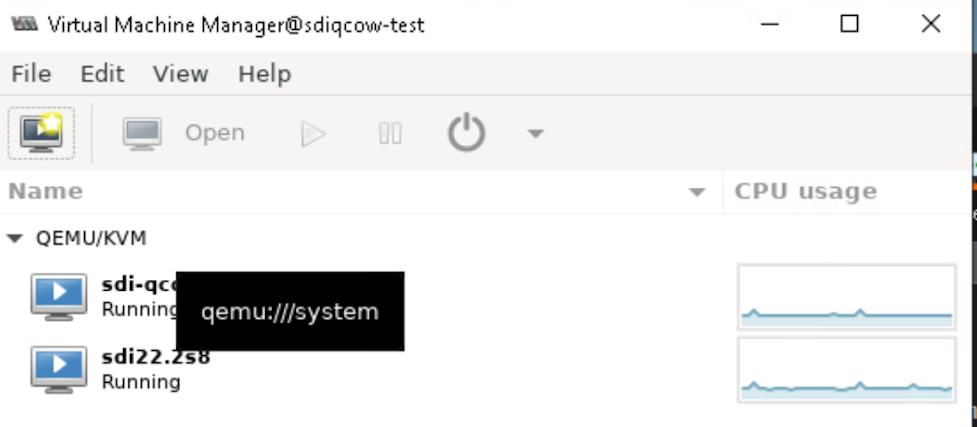 手記:
手記:virt-managerを使用するには、ホストOSの管理者権限が必要です。 - [Create a new virtual machine] アイコンをクリックします (図 3 参照)。
[新しい仮想マシンの作成] ページが表示されます。
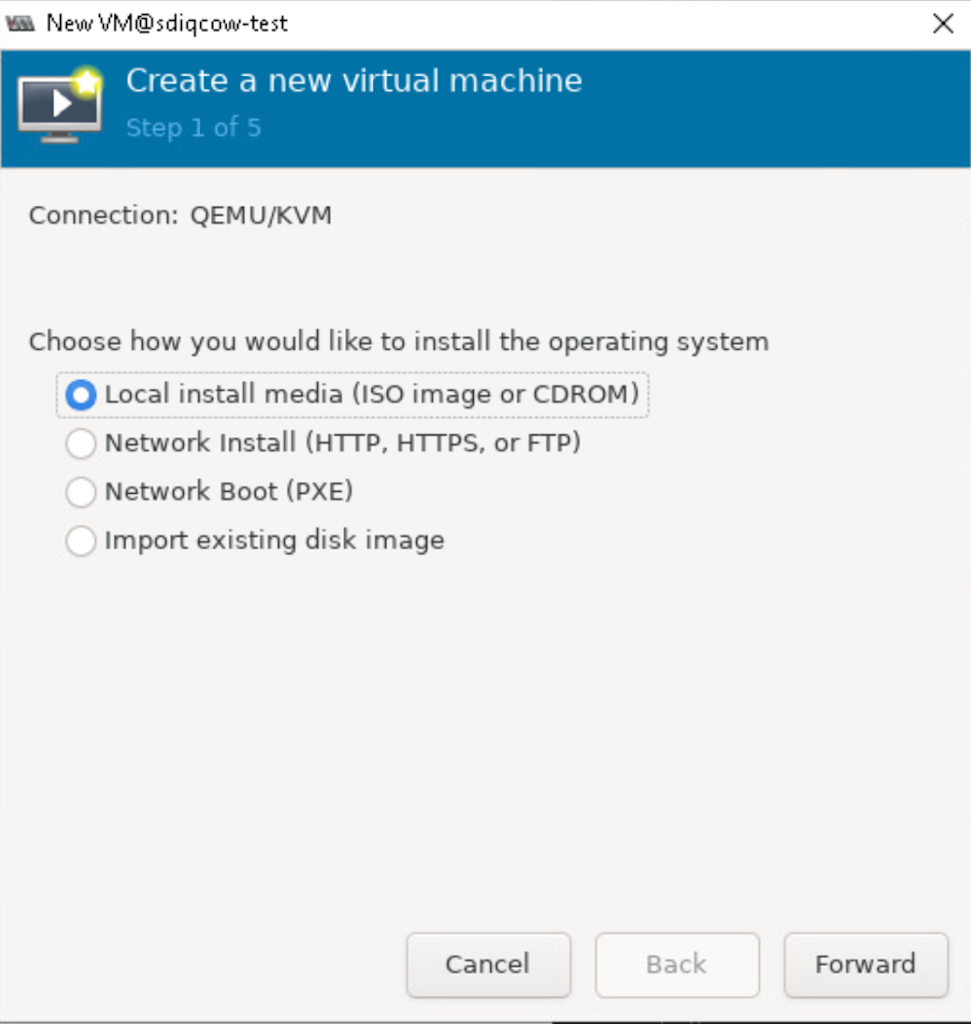
図 3: 新しい仮想マシン を作成する
を作成する
- 「既存のディスクイメージをインポート」を選択し、「進む」をクリックします。
図4:ディスクイメージ
 のインポート
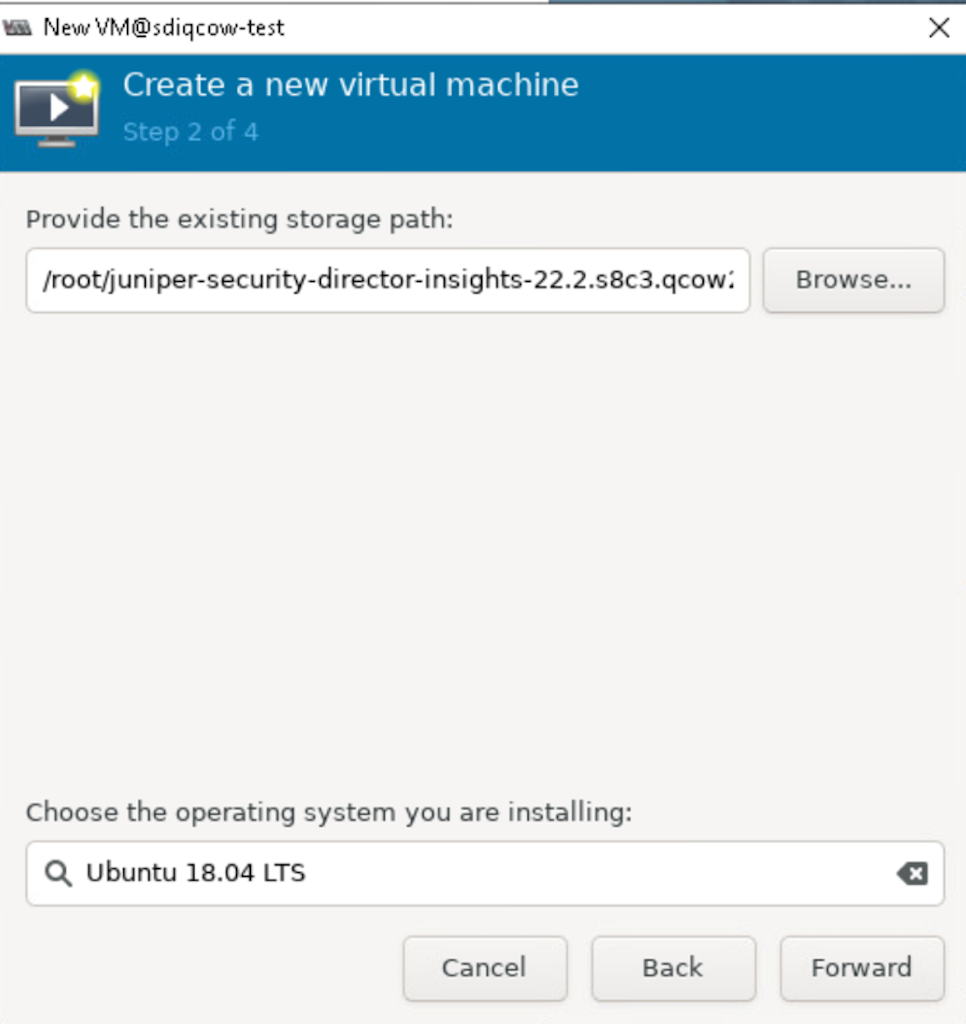
- ダウンロードした Security Director Insights イメージの場所を参照し、イメージを選択します。
図5:ストレージパスとオペレーティングシステム
 の選択
の選択
- 図 6 に示すように、RAM を 16384 MB に、CPU を 8 に設定します。
図 6: メモリと CPU の構成
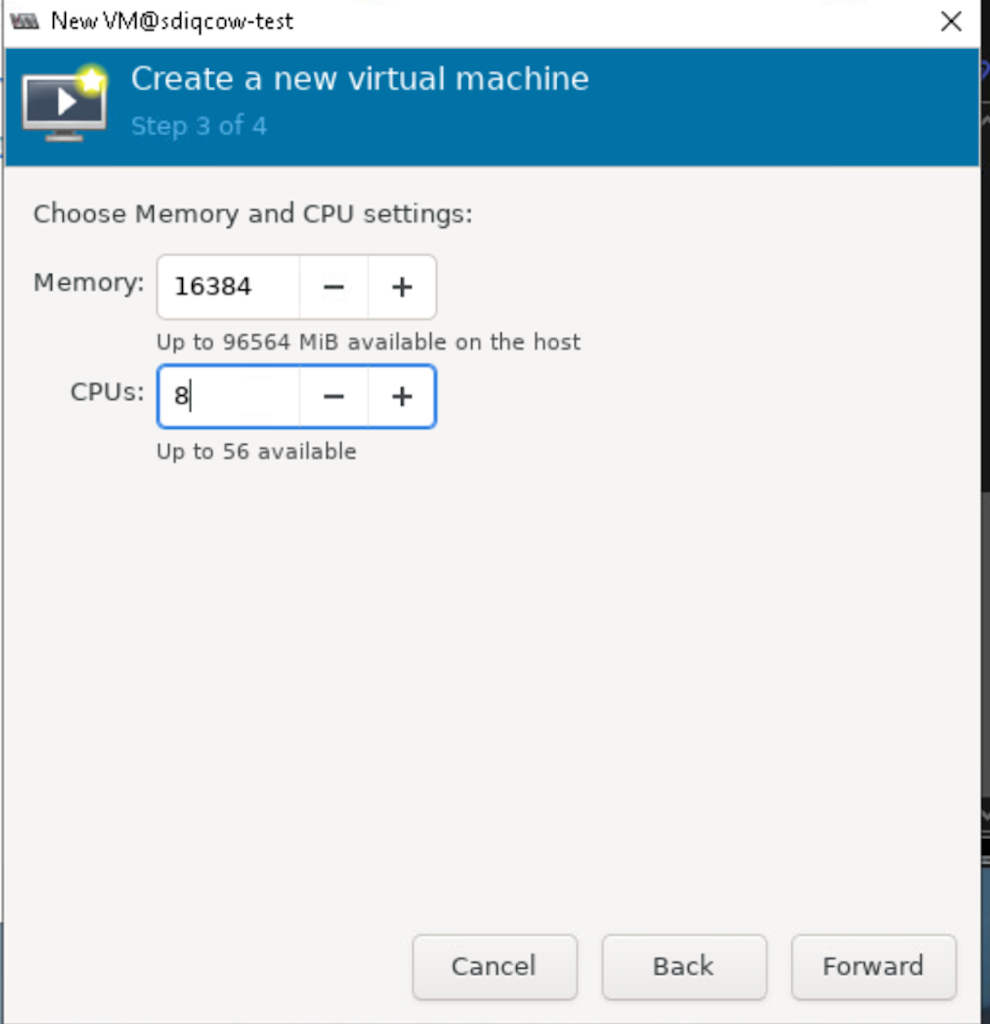
[ 進む] をクリックします。
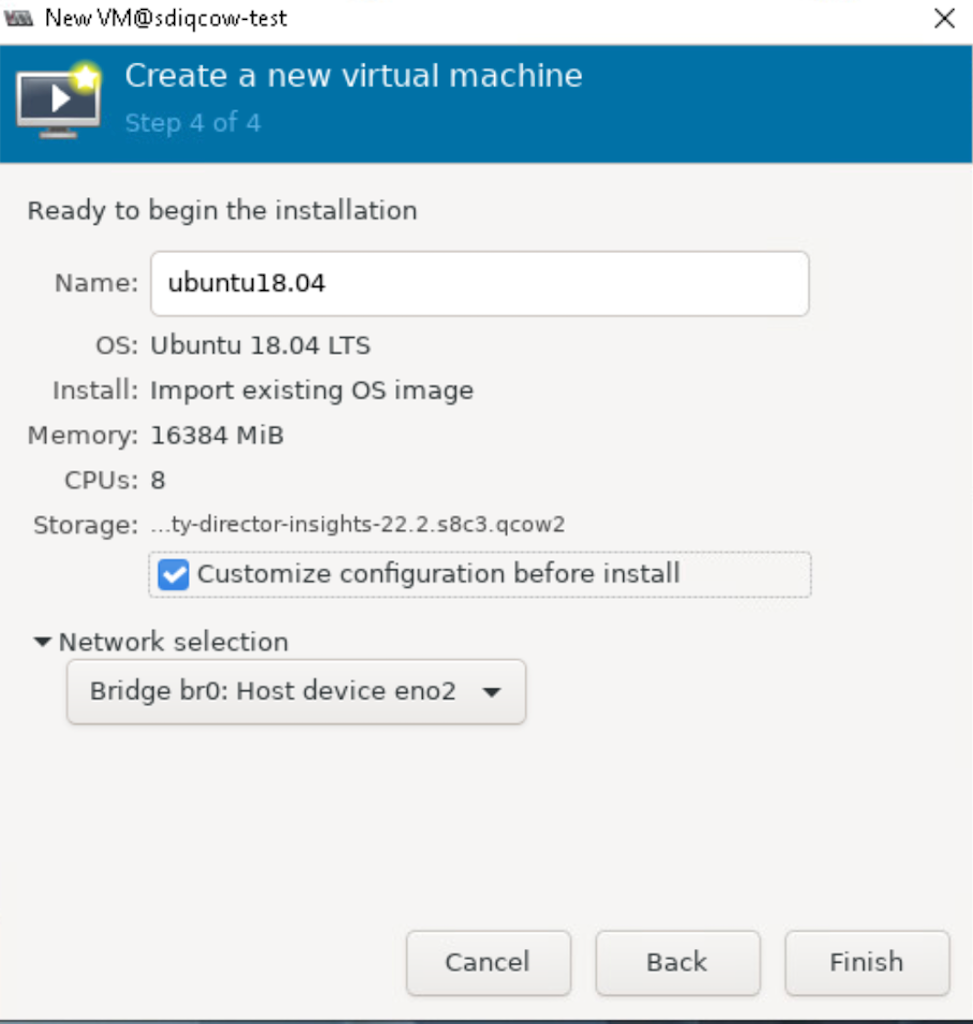
- [Customize configuration before install](インストール前に構成をカスタマイズする)オプションを選択します(図 7 参照)。
図 7:[Network Selection](ネットワーク選択)ページ
- [Add Hardware] をクリックします(図 8 参照)。
[Add New Virtual Hardware] ページが表示されます。
図8:ハードウェアオプションの追加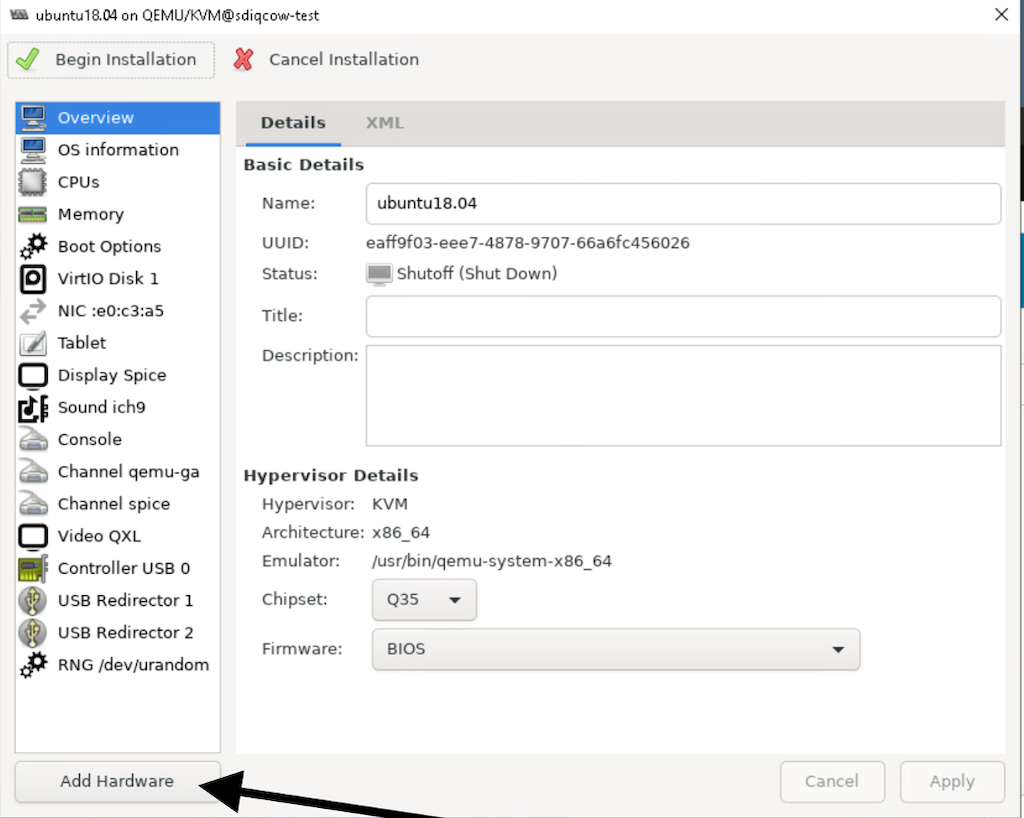
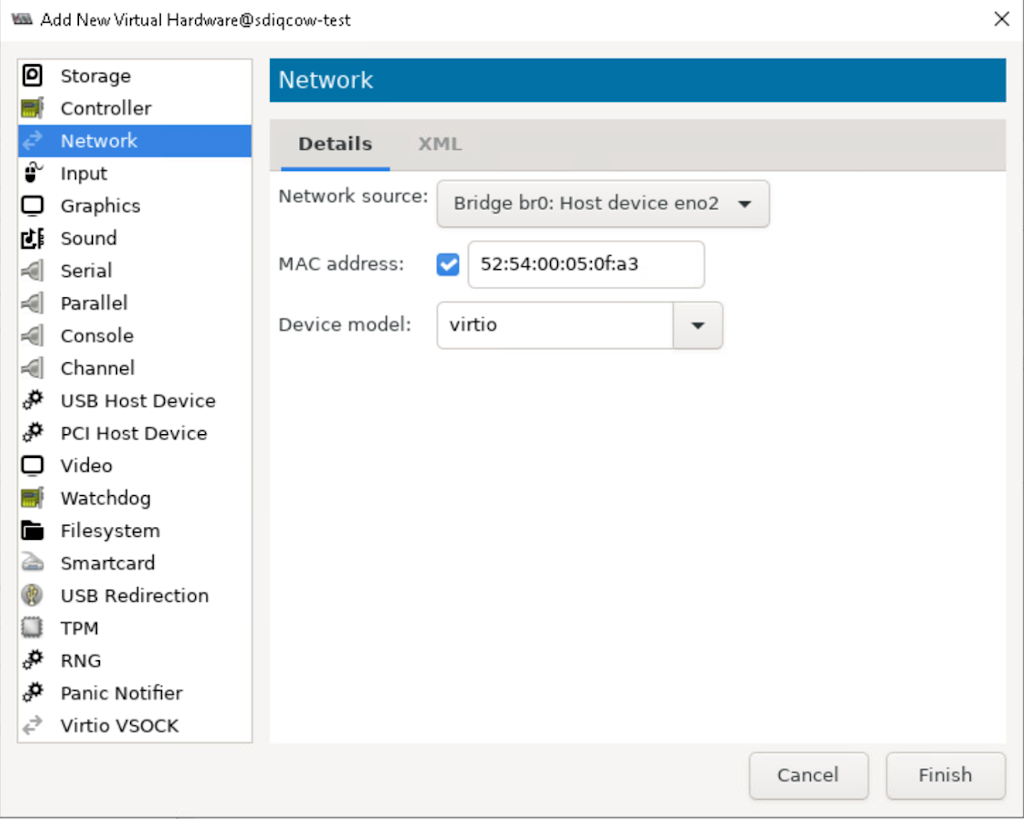
- 左側のメニューから[ネットワーク]を選択し、[完了]をクリックします。
図 9: [Network Details] ページ
- 「インストールの開始」をクリックします。
図10:インストールの開始
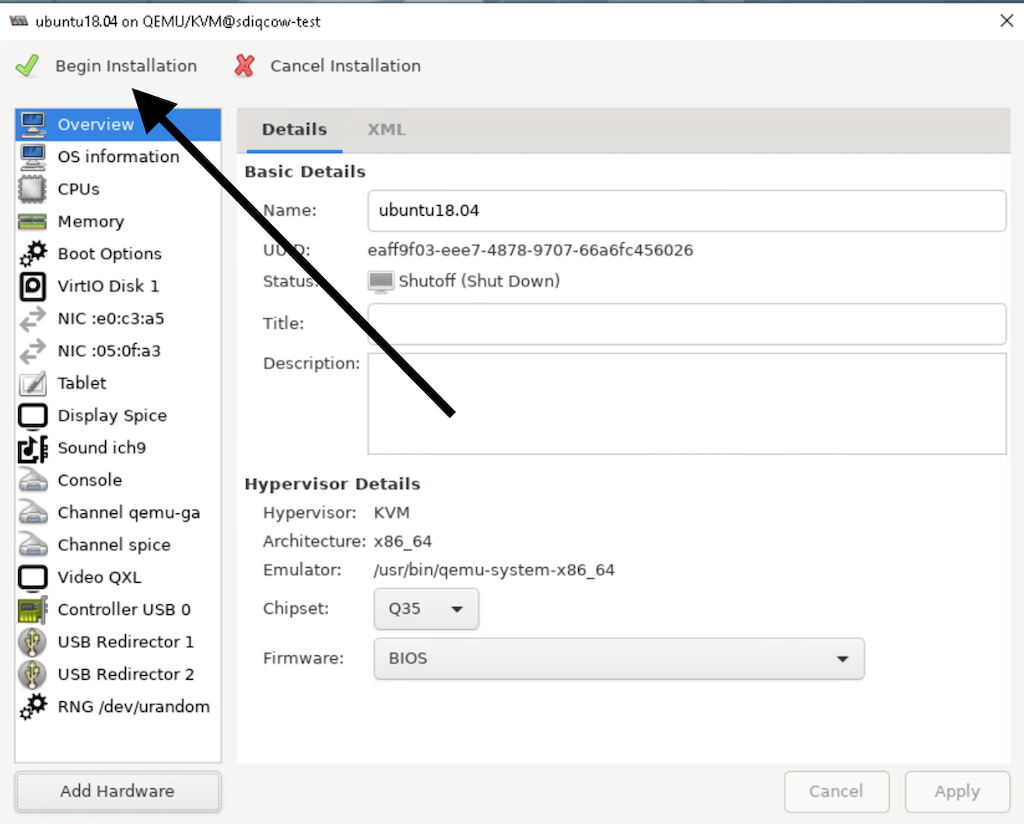
VM マネージャーが仮想マシンを作成し、Security Director Insights コンソールを起動します。
Expand the VM Disk Size
プロシージャ
KVM virt-manager で使用可能な最大サイズまでディスクを拡張するには、次のようにします。
-
KVM のホストにログインし、VM の電源を切ります ( 図 11 を参照)。
図 11: VM の電源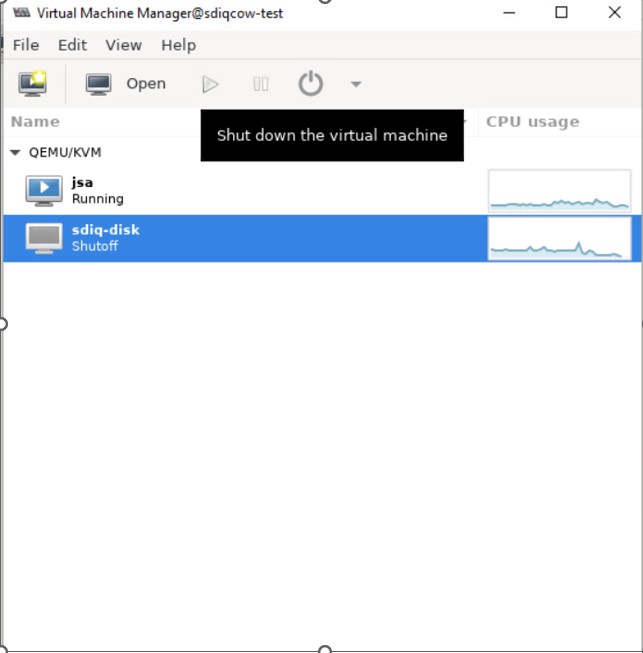
-
ホストから、
qemu-img resize vmdisk.img +XGコマンドを使用してディスクサイズを増やします。ここで、vmdisk.imgはイメージの名前で、XGはディスクを拡張するGBサイズです。
サイズは、ディスクをどの程度拡張するかを示します。これは、ディスクの最大サイズではありません。
-
KVMの電源を入れ、管理CLIにログインします。サーバーモードに切り替えて
set disk-partition-to-fullコマンドを実行します。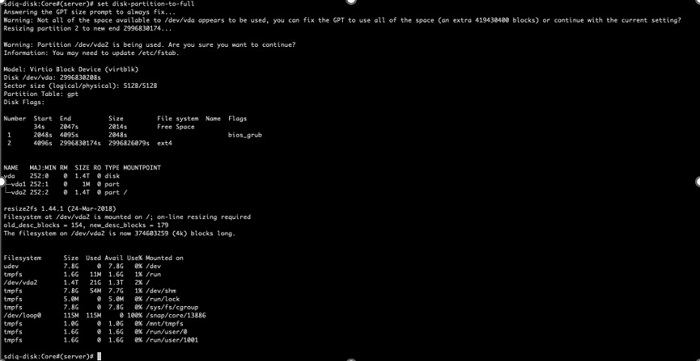
新しいディスクサイズは /dev/vda2 のサイズです。