WLAN テンプレートの設定
WLANテンプレートを構成して使用することにより、構成プロセスを合理化し、組織内のさまざまなWLAN間で一貫性を確保します。
Juniper Mistポータルでは、WLANテンプレート(組織>無線>WLANテンプレート)を使用して、統一されたユーザーポリシーを設定し、組織、選択したサイト、選択したWLANに選択的に適用できます。WLAN テンプレートで作成されたポリシーを使用すると、ソーシャル メディア サイトなどの指定されたリソースへのユーザのアクセスを管理できます。また、ネットワークのセグメンテーションにも使用して、IoTデバイスをプライベートネットワークから遠ざけ、悪意のある人物がデバイスにアクセスした場合の露出を制限することもできます。
大規模な導入では、各 WLAN(SSID)に対して 1 つの WLAN テンプレートを作成することを推奨します。自動化をサポートするため、WLAN テンプレート内ですべての WLAN を定義することも推奨します。WLANテンプレートは、自動化やポリシーの確実な適用に有効です。
- 複数のサイト
- サイトグループ
- 組織全体
- 特定のサイトを除外する
- 特定のデバイスプロファイル内のAP。
- 上記の任意の組み合わせ
ポリシーの作成方法と使用方法の詳細については、 WxLANアクセスポリシー を参照してください。
図 1:WLAN テンプレート 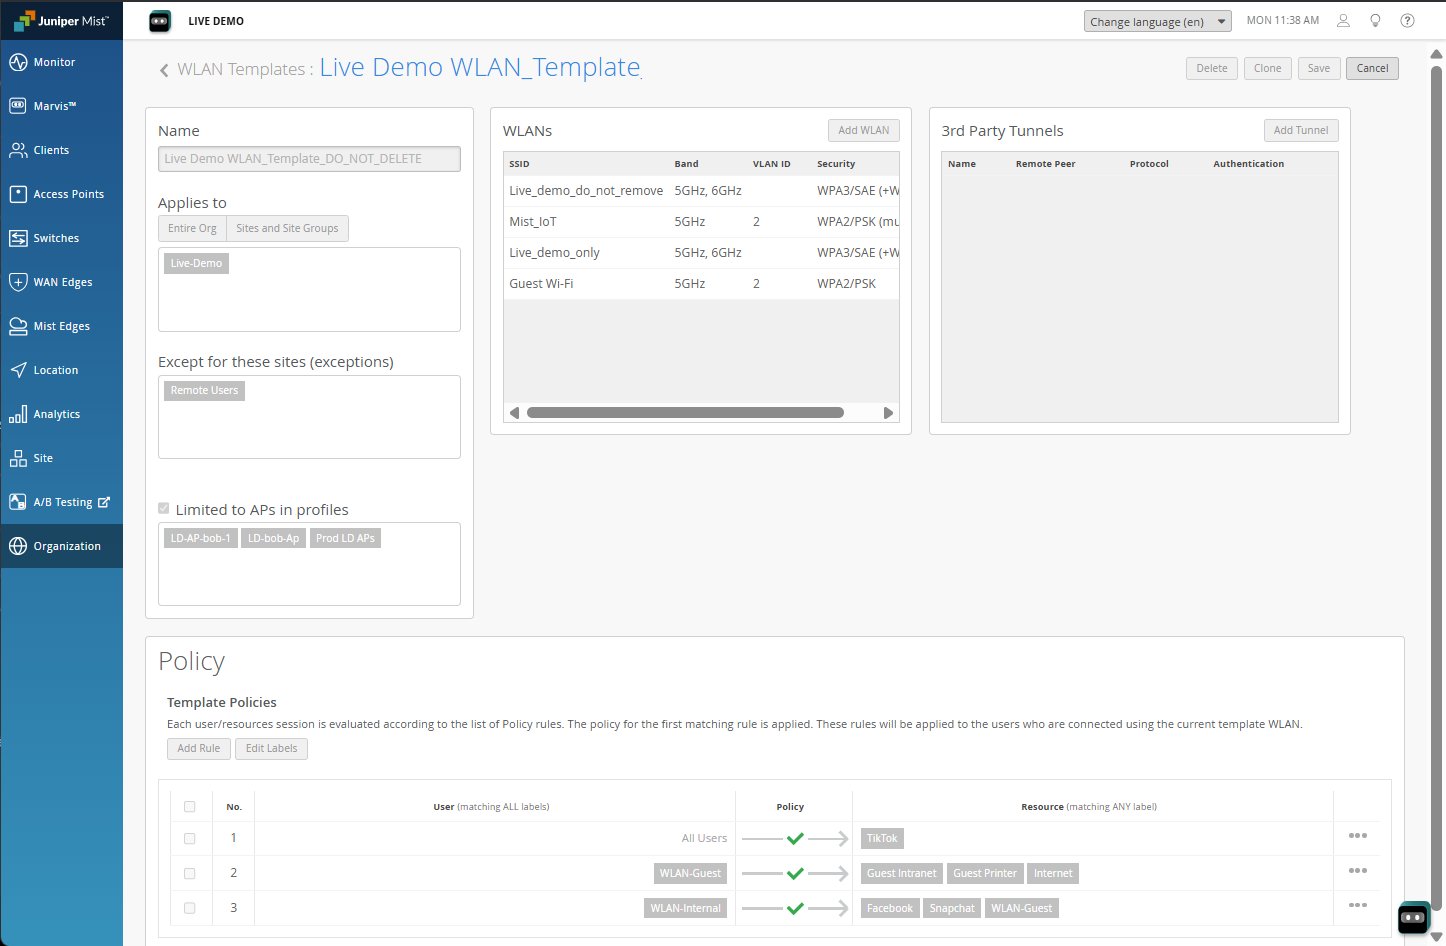 のユーザー ポリシー
のユーザー ポリシー
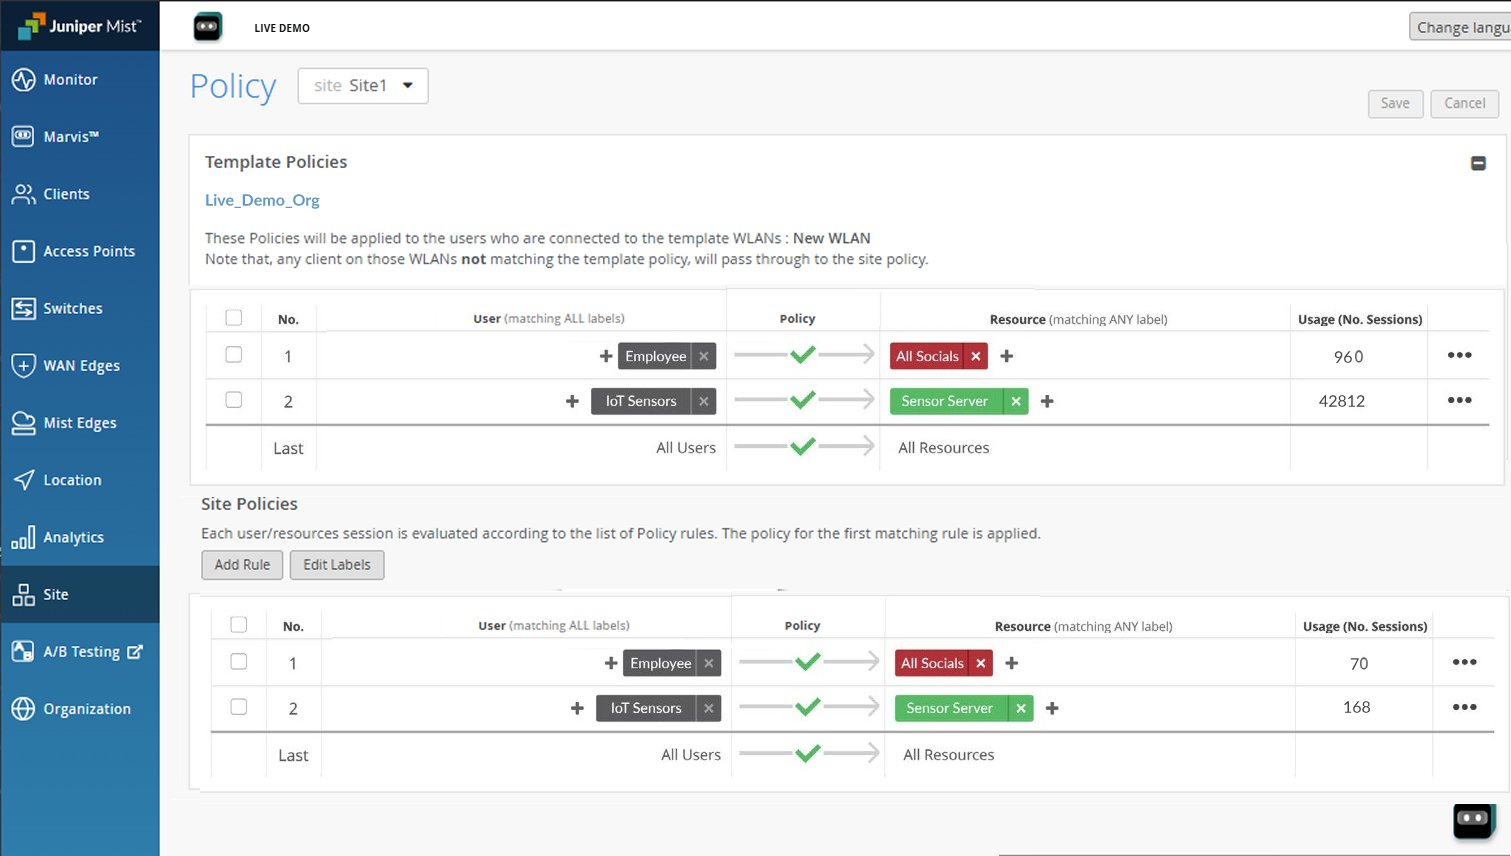
サイト固有のユーザーアクセスポリシーをサイトレベルで作成することもできます。 サイト>ワイヤレス |ポリシー。
[サイト ポリシー] ページでは、ポリシーの使用状況の統計情報 (サイト ポリシーと WLAN テンプレートの一部として作成されたサイト ポリシーの両方について、ヒット数、またはポリシーが適用された回数) を確認できます。
図 2: [User Access Policy Summary]
WLAN テンプレートを作成するには、次の手順に従います。