Creating and Updating a Firewall Policy Using Change Control Workflow
To create, approve, and update a firewall policy using the Change Control Workflow, perform these tasks:
Creating a Change Request
The following procedure explains the steps policy administrators need to take to submit change requests.
To create a change request:
- Configure the Change Control Workflow:
Select Network Management Platform > Administration > Applications.
The Applications page appears.
Right-click Security Director and click Modify Application Settings.
The Modify Security Director Settings page appears.
Click Change-Control-Workflow.
The Change Control Workflow page appears in the right pane, as shown in Figure 1.
Figure 1: Change Control Workflow Configuration 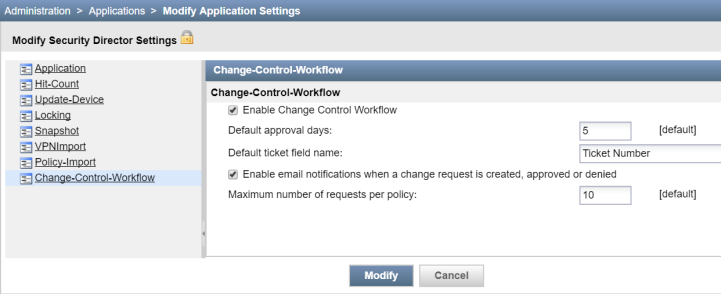
Select the Enable Change Control Workflow option to enable the Change Control Workflow for all the firewall and NAT policies.
By default, the Change Control Workflow option is disabled. When you enable this option, you are logged out of Security Director.
In the Default approval days field, enter the default number of days for reviewers to approve or deny the change request. The default value is five days.
In the Default ticket field name field, enter the ticket name.
The ticket name that you enter here appears on the Create Change Request page as a separate field where you can enter the ticket number. The default name is Ticket Number.
Enable the e-mail notification option for approvers and requesters when a change request is created, approved, or denied. By default, this option is disabled.
In the Maximum number of requests per policy field, enter the maximum number of outstanding change requests that can exist in an undeployed state for a policy. The default value is 10 requests.
Click Modify.
A confirmation page appears to enable the Change Control Workflow, as shown in Figure 2.
Figure 2: Confirm Change Control Workflow 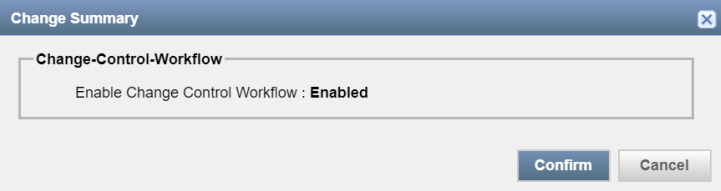
Click Confirm.
- Request approval for a change request.
In the Firewall Policies page, select the policy, and click Request Change.
The Create Change Request page appears, as shown in Figure 3. You can also edit a policy rule and create a change request from the Policy Rules page.
Figure 3: Create Change Request Page 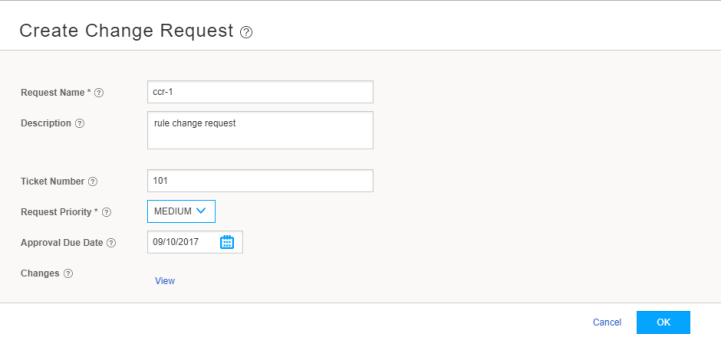
In the Request Name field, enter the name of your change request. You can enter a maximum of 63 characters.
In the Description field, enter the description for your change request. You can use a maximum of 255 characters.
In the Ticket Number field, enter the ticket number for your change request. The maximum length is 255 characters.
This number is an identifier to a ticket in your ticketing system. You can map more than one change request to a ticket.
From the Request Priority list, select the priority for your change request to let the approver know the criticality of your change request.
The default priority is High.
In the Approval Due Date field, select a due date for approval.
By default, the number of days that you configured in Step 1 are set for approval.
In the Changes field, click View to view the unsubmitted changes before creating a change request.
Click Ok.
A change request for your policy is created for approval. Any changes to the shared objects or rules of the policy are also submitted for change request approval. This change request appears in the workspace of the approver to take appropriate action.
Approving a Change Request
The following steps explain the procedure for approvers to take necessary action on the submitted change requests:
- Review the submitted change requests by the policy administrators.
Click Security Director > Configure > Change Management > Change Requests.
Approver can see the changes submitted information, as shown in Figure 4.
Figure 4: Change Requests Page 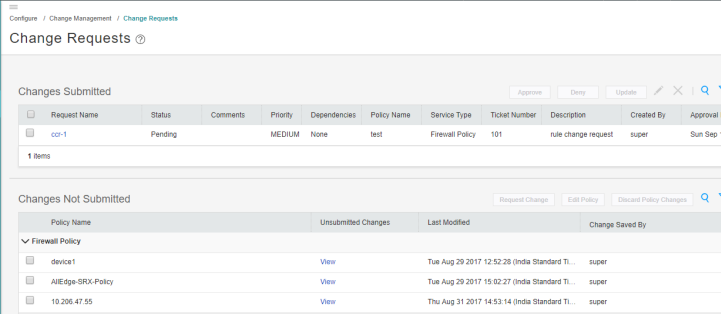
Under the Changes Submitted section, review the change request in the pending state and check for any dependencies. In the Dependencies column, click View to view dependencies.
- Approve or deny the change request.
After reviewing the change request, click Approve or Deny.
A confirmation window appears to approve or deny the change request. A comment in the confirmation window for the Deny action is mandatory, as shown in Figure 5 and Figure 6.
Figure 5: Approve Request Page 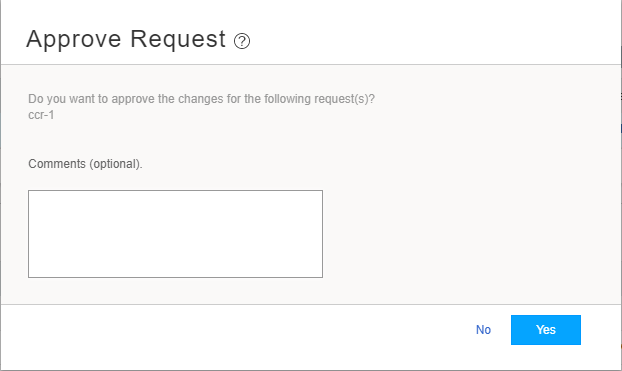
Figure 6: Deny Request Page 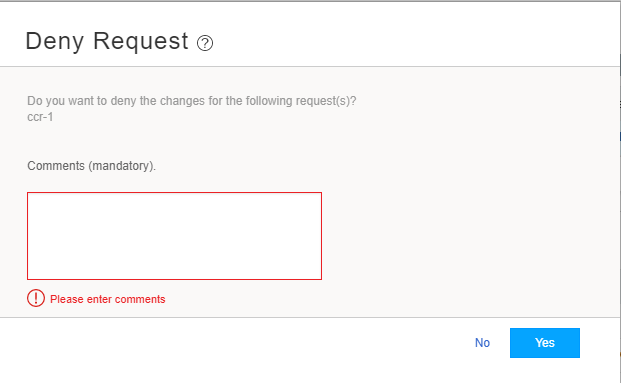
Note Ensure that the change request does not have any dependencies before the approval. If there is a dependency, you must approve all the parent change requests before approving a child change request.
Before denying a change request, you must ensure that all the change requests that are dependent on the selected change request for denial are already in the denied state. A warning message is displayed if the dependent change requests are not in the denied state.
Click Yes to approve or deny the request.
The change request workspace of the policy administrator shows all the change requests that were approved or rejected. An e-mail is sent to the requester and other approvers about the approval or denial of the corresponding change request.
Publishing and Updating the Approved Change Request
The change request workspace of the policy administrator shows the change requests that are approved or rejected. The policy administrators can update only the approved change requests. Updating a change request is the same as publishing and updating in succession. You can either update the change request immediately or schedule to update later.
To update a change request:
- Click Security Director > Configure > Change Management > Change Requests.
You see the information on changes submitted.
- In the Changes Submitted area, select the approved change
request and click Update.
The Update Change Request page appears, as shown in Figure 7.
Figure 7: Update Change Request Page 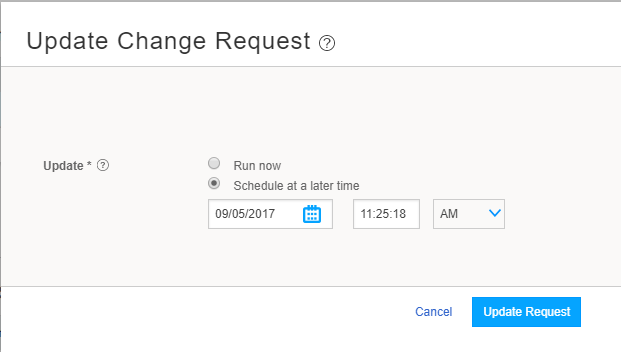
- Select the Run now option to update the changes
immediately or the Schedule at a later time option to schedule
the update later.
If the selected change request has dependencies, then the user is notified that the deployment of dependency change requests will also be scheduled (if they have not been already) or advanced (if they have been scheduled for a later time) to the same time as that of the selected change request.
A new snapshot of the policy is created. This snapshot is used as the source to publish and update. This new snapshot is essentially the previously deployed snapshot of the policy along with the changes from the selected change request. This snapshot is visible in the Manage Snapshots list.
- Click Update Request.
If either the publish job or update job fails, then the change request is moved to the Deployment Failed state. You can redeploy the failed change requests.
- Review and verify the publish and update job status.
The review, verification, and update is performed by the policy administrators.