安装 AP63 接入点
您可以使用两种方法将 AP63 安装在墙上或杆上:嵌入式安装或铰接式安装。
用于 AP63 的安装支架
您也可以单独订购嵌入式安装和铰接式安装支架。 表 1 列出了安装支架的部件号。
| 部件号 | 说明 |
|---|---|
| APOUTBR-调频 | 齐平安装支架 |
| APOUTBR-ART2 | 铰接式安装支架 |
用于嵌入式安装方法的安装支架
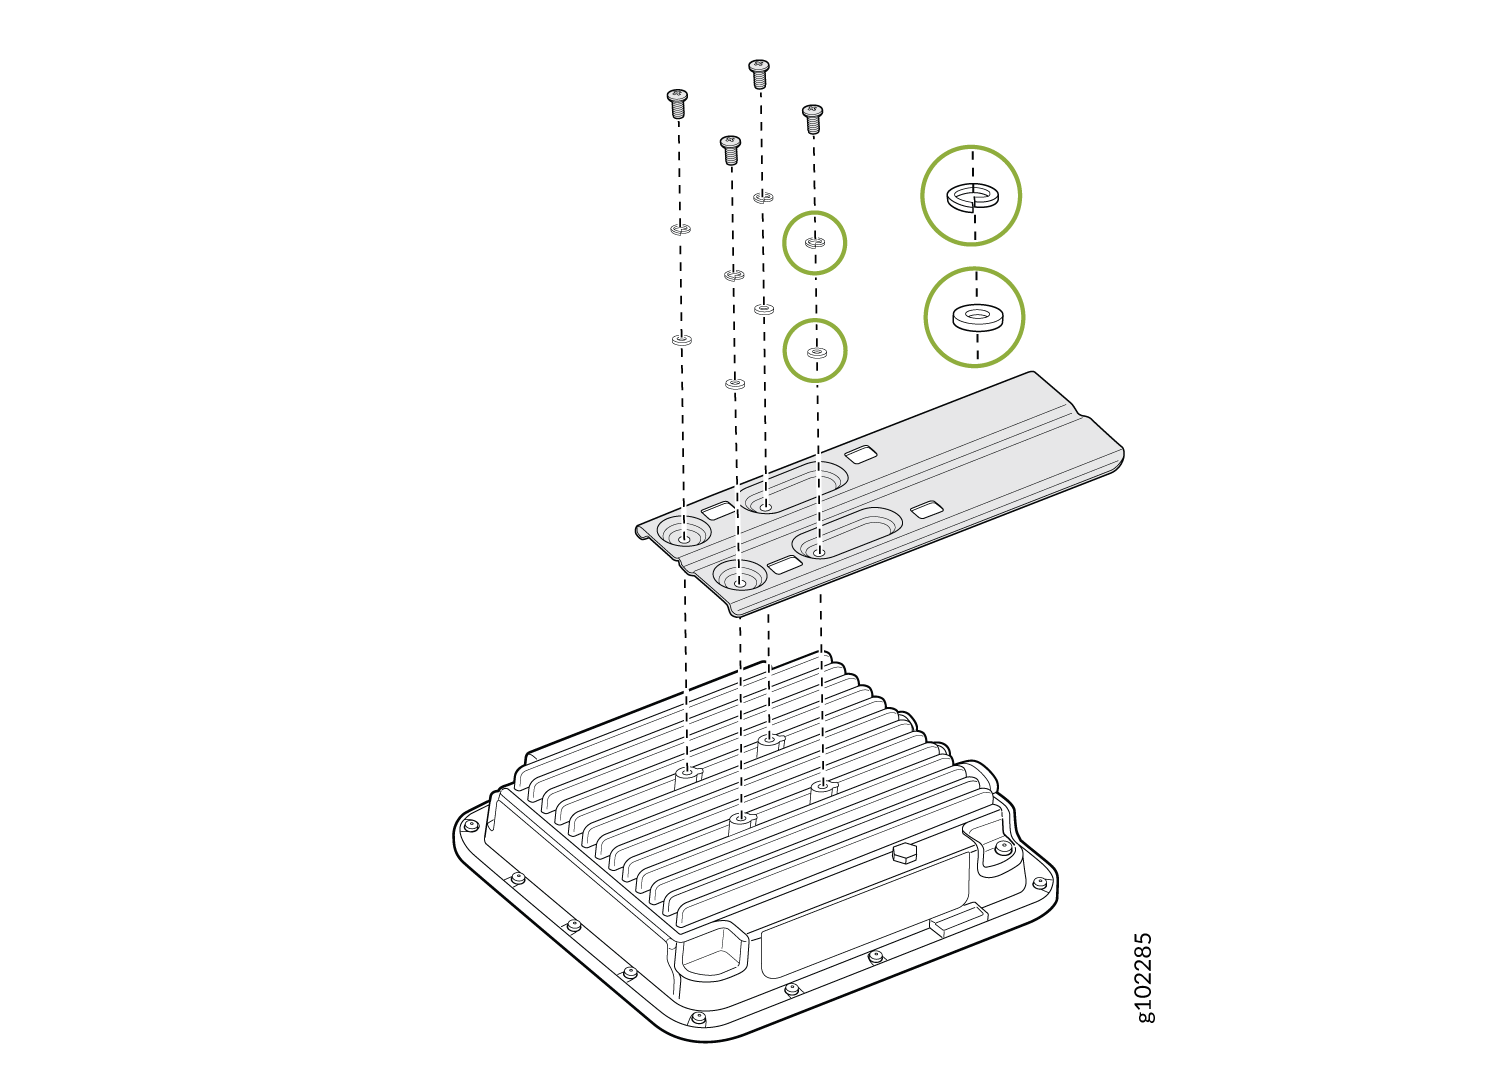
用于嵌入式安装的安装附件包括:
-
一个嵌入式安装支架(部件号:APOUTBR-FM)
-
两个软管夹
-
四个 M6 螺丝
-
四套 M6 螺钉、垫圈和弹簧垫圈
-
五组锚栓和螺钉
图 1:APOUTBR-FM 嵌入式安装支架
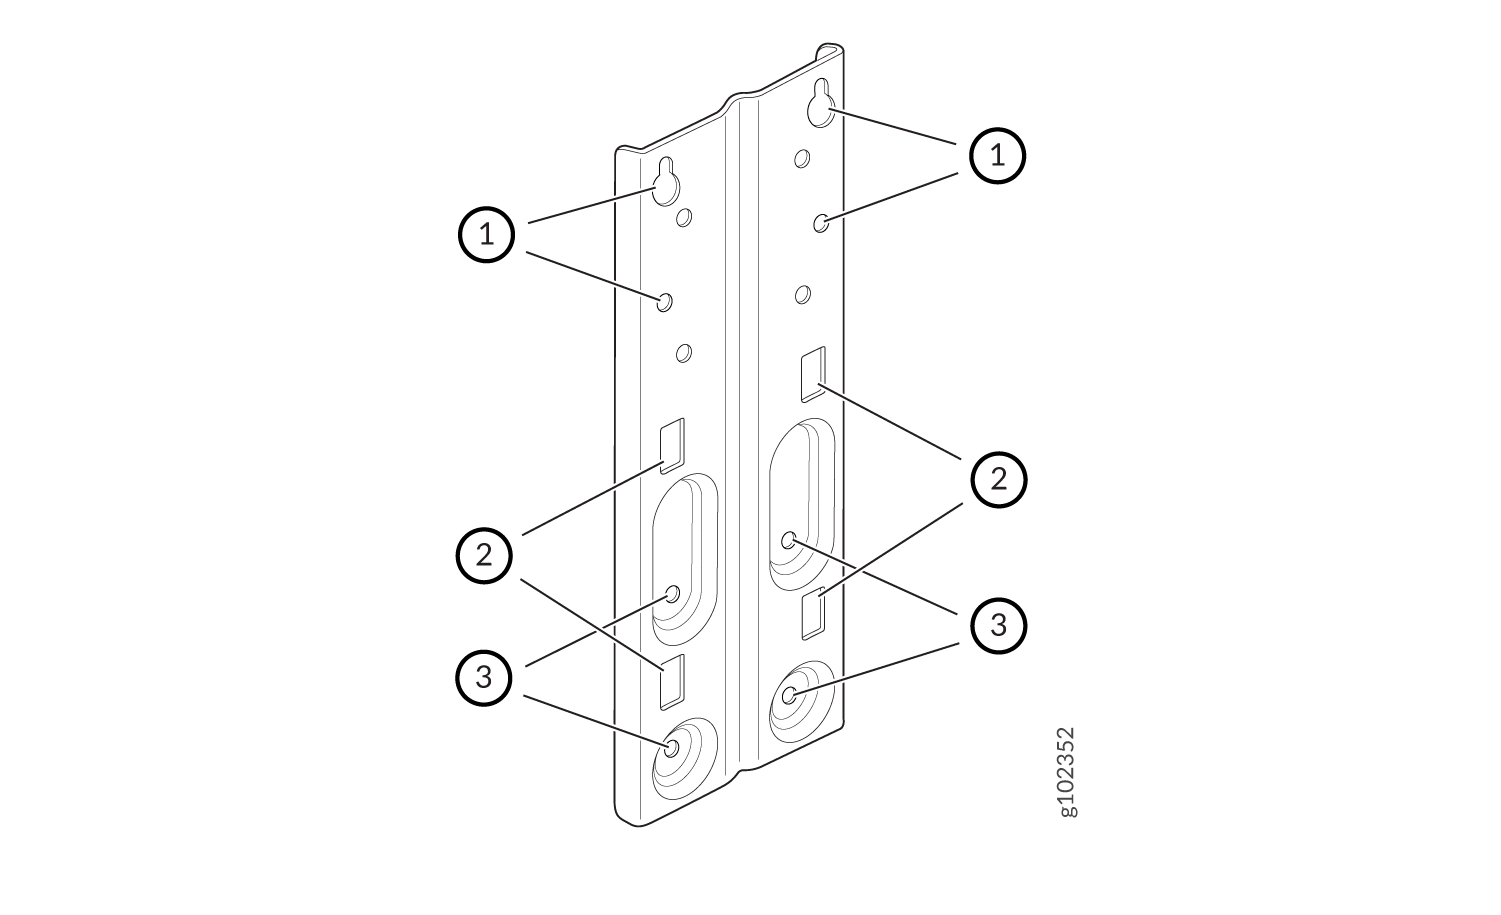
| 1 - 用于将 AP63 安装在墙上的螺丝孔 | 2 - 用于连接软管夹的孔 |
| 3 - 用于将支架连接到 AP63 的螺丝孔 |
用于铰接式安装方法的安装支架
用于铰接式安装的安装附件包括:
-
三个安装支架(部件号:APOUTBR-ART2):
安装支架 1
安装支架 2
安装支架 3
-
四个 M6x10mm 螺丝
-
四个螺栓和螺母
连接接地电缆
建议您在将 AP 安装到墙壁或电线杆上之前先将 AP 接地。AP63 的背面有一个单孔保护接地端子。使用此接地端子将 AP 接地。
将 AP63 接地:
- 拆下螺丝。
- 将连接到接地电缆的接地片放在接地端子上。
- 用螺钉将接地电缆接线片固定到接地端子上。
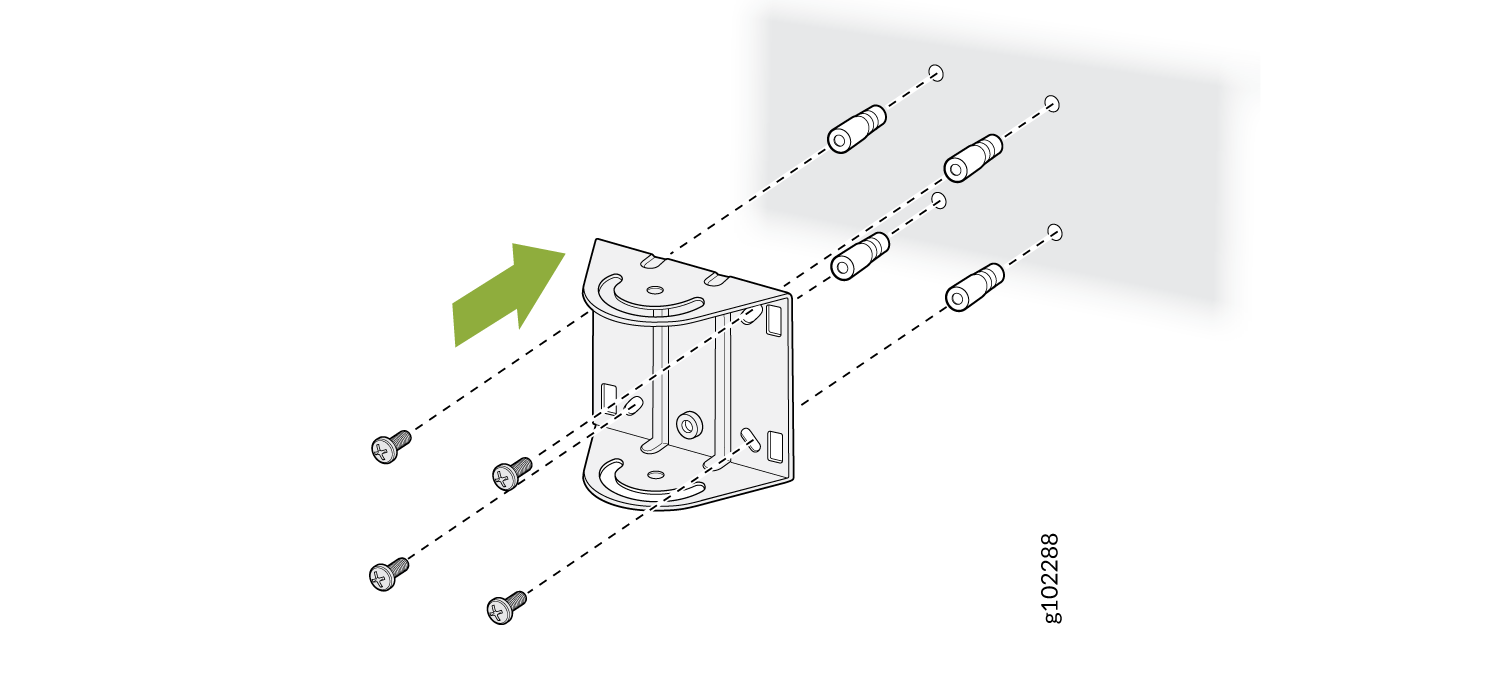
将 AP63 安装在墙上(嵌入式安装)
要将 AP63 齐平安装在墙上:
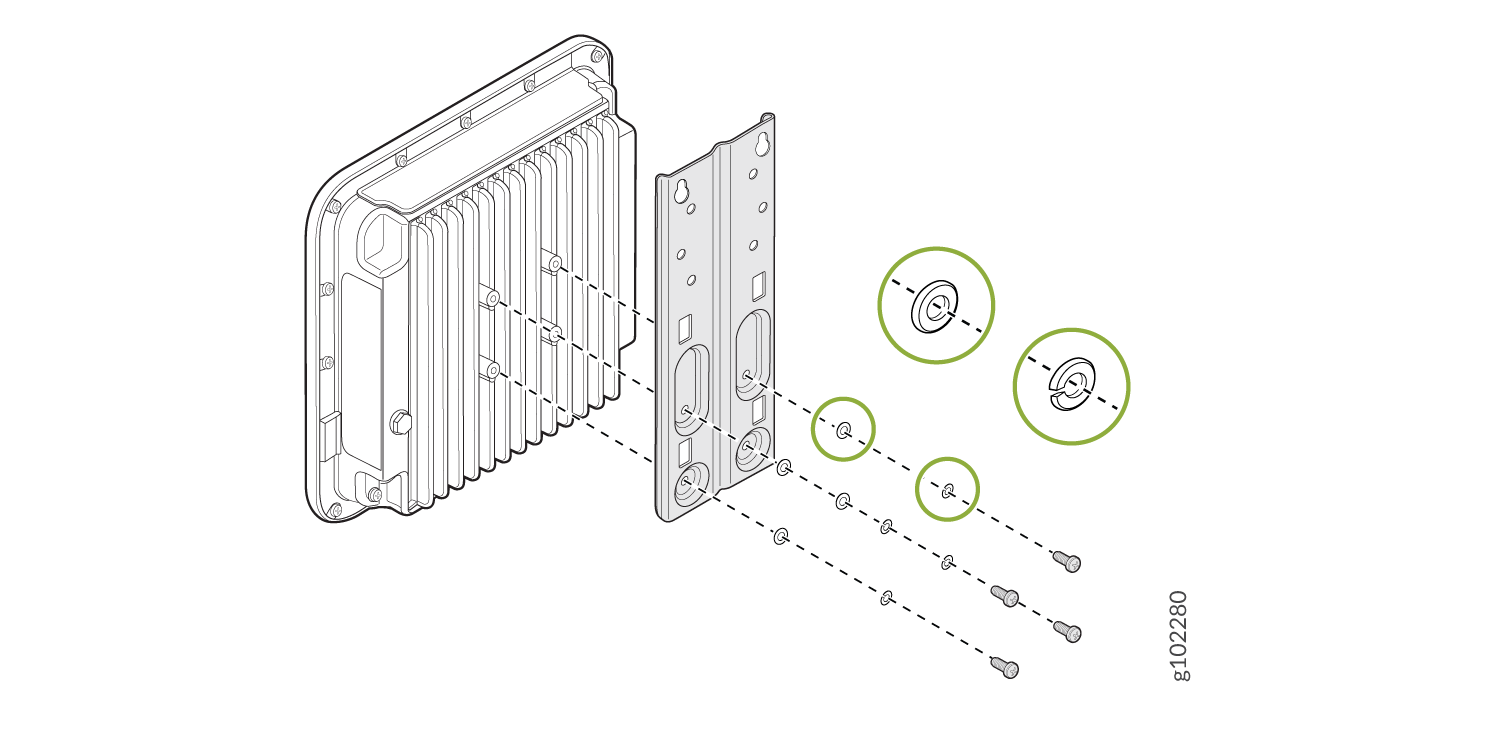
- 使用 AP 随附的四个螺钉、垫圈和锁紧垫圈,将 APOUTBR-FM 嵌入式安装支架连接到 AP。 使用图 3 中标有标注 #1 的支架螺钉孔。
图 2:将 APOUTBR-FM 嵌入式安装支架连接到 AP63
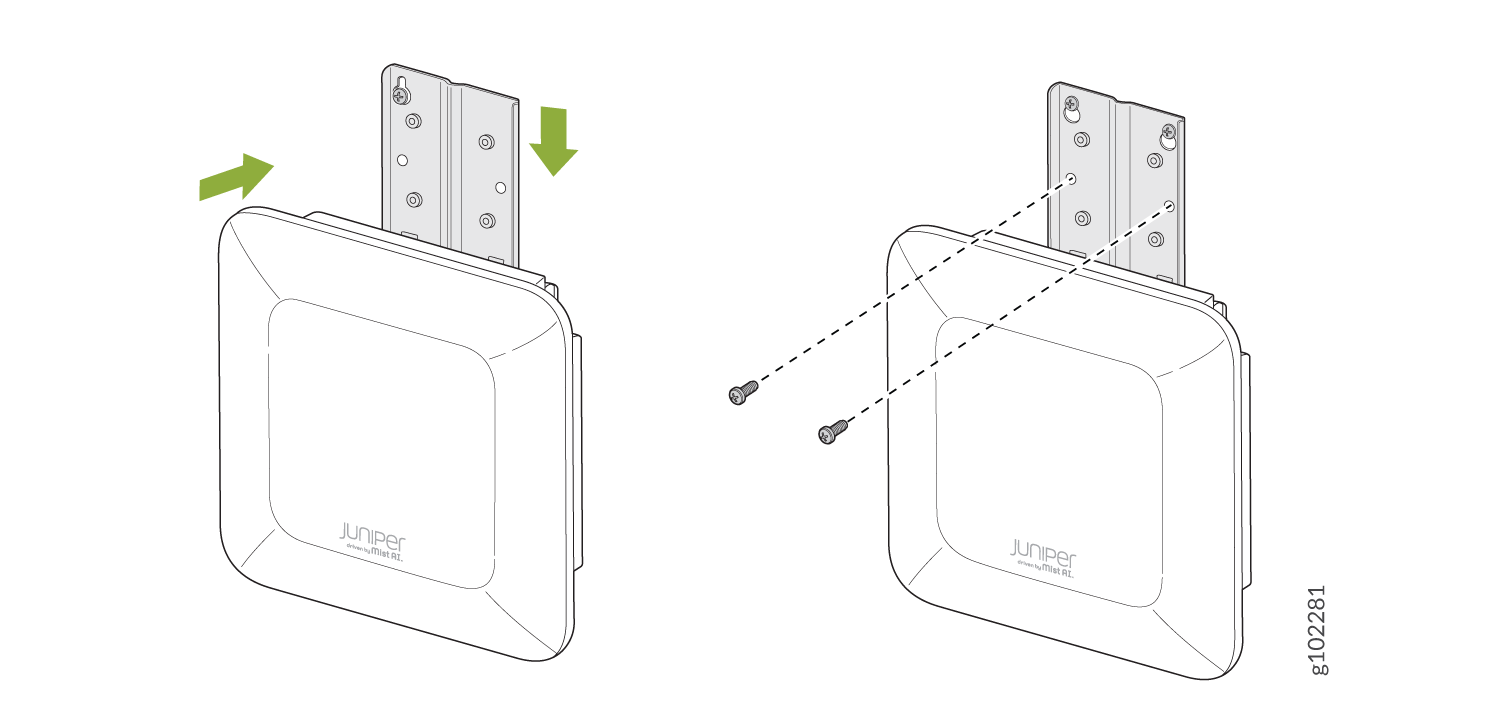
- 放置 AP,使您在步骤 1 中插入的两颗螺钉能够插入支架上的孔中。向下滑动接入点,使螺钉锁定到位。
图 3:将 AP63 安装在墙上(嵌入式安装)
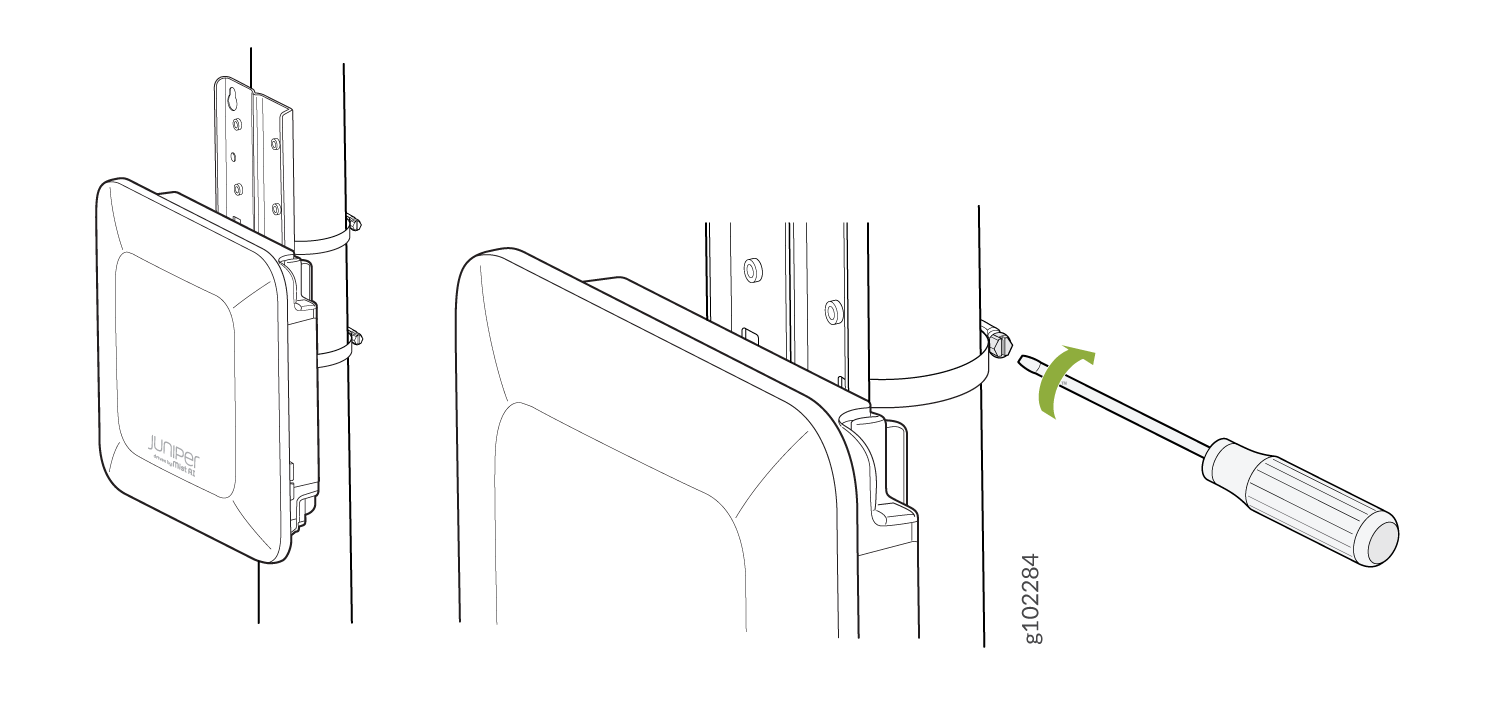
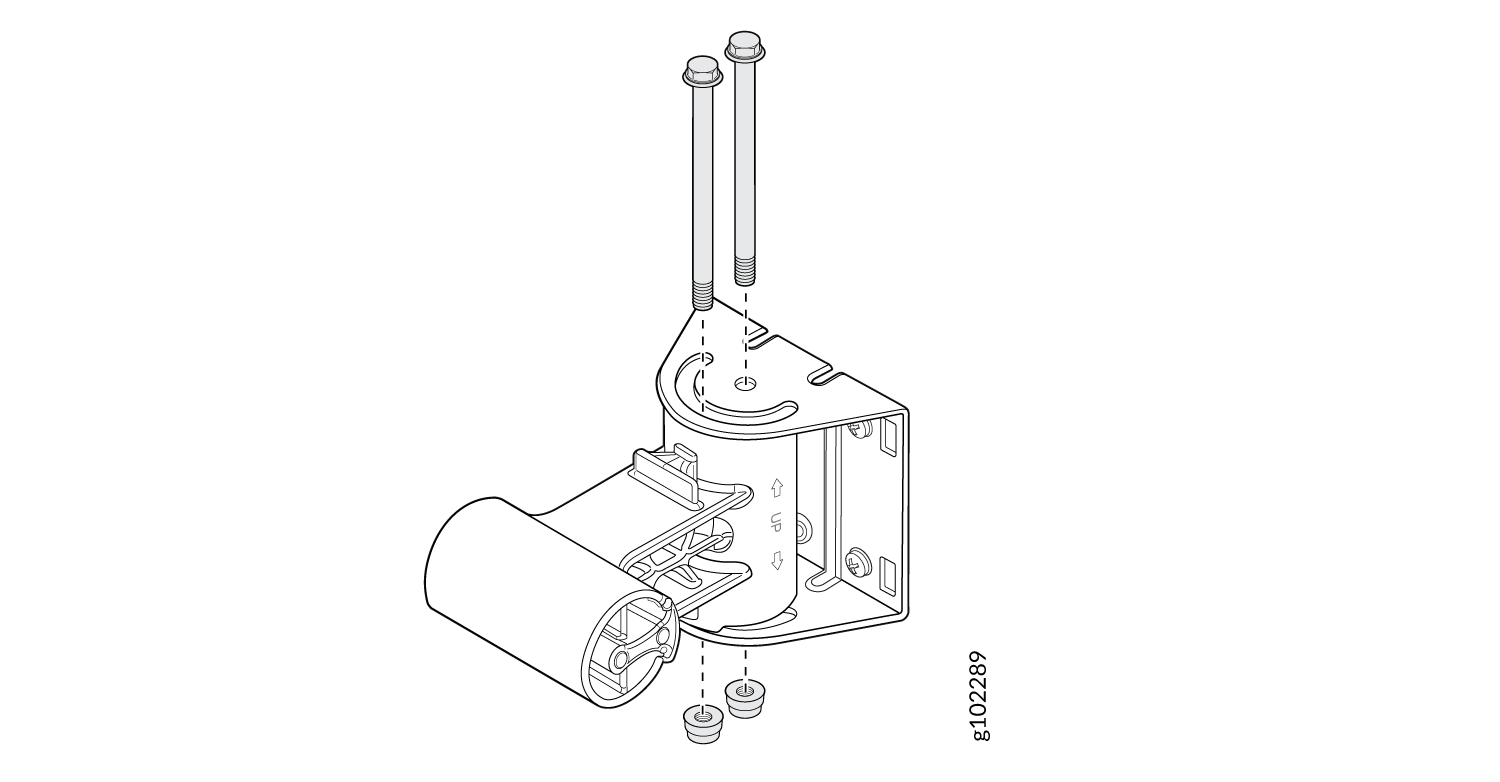
将 AP63 安装在杆上(嵌入式安装)
要将 AP63 齐平安装在杆子上:
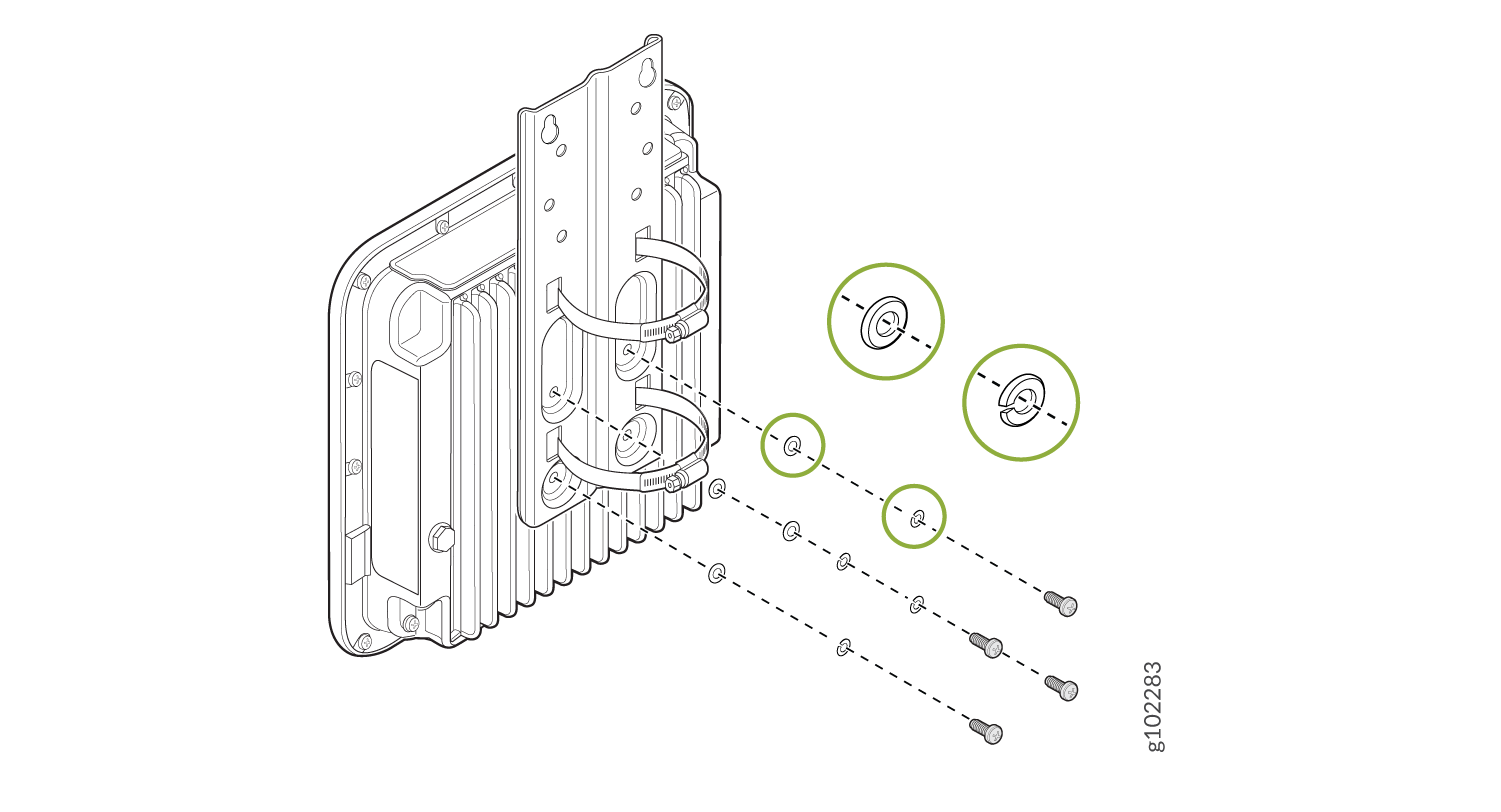
- 将软管夹连接到 APOUTBR-FM 嵌入式安装支架。使用螺丝刀松开软管夹,然后将软管夹穿过嵌入式安装支架中的插槽。
图 4:将软管夹amps 连接到 APOUTBR-FM 嵌入式安装支架

- 使用 AP 随附的四个螺钉、垫圈和锁紧垫圈,将 APOUTBR-FM 嵌入式安装支架连接到 AP。
图 5:将 APOUTBR-FM 嵌入式安装支架连接到 AP63
- 将 AP 安装在杆子上。将软管的开口端缠绕在杆上,然后用螺丝刀拧紧软管夹螺钉。拧紧螺钉,直到 AP 和支架组件固定到位。
图 6:将 AP63 安装在杆上(嵌入式安装)
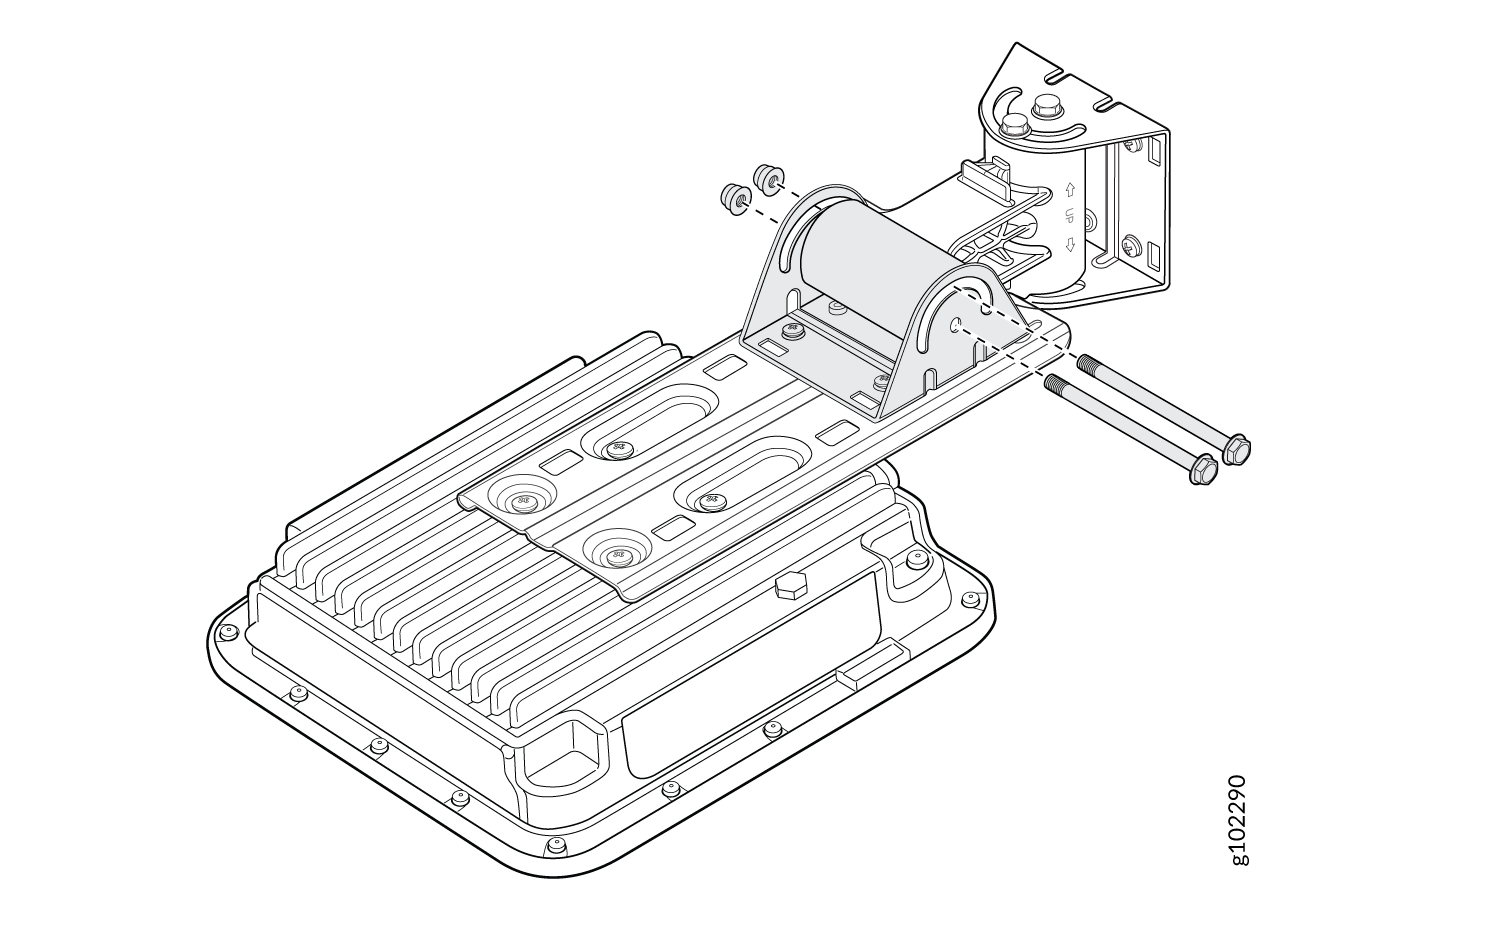
将 AP63 安装在墙上(铰接式安装)
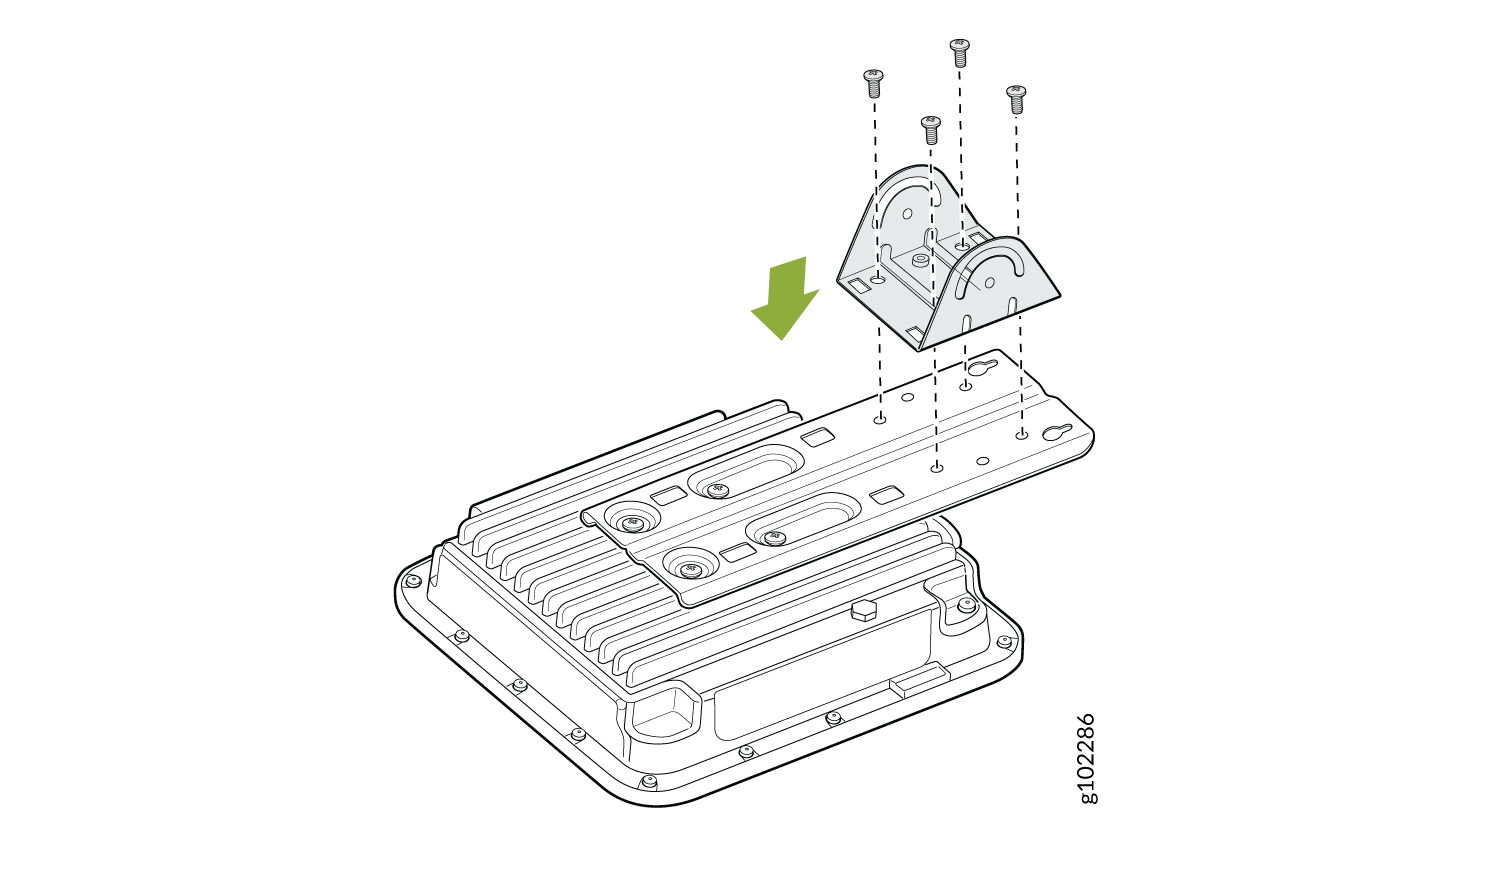
要使用铰接式安装支架将 AP63 安装在墙上:
- 使用四个 M6x16mm 螺钉、垫圈和锁垫圈将齐平安装支架 APOUTBR-FM 连接到 AP。
图 7:将 APOUTBR-FM 嵌入式安装支架连接到 AP63
- 使用四个 M6x10mm 螺钉将 APOUTBR-ART2 安装支架 3 连接到齐平安装支架 APOUTBR-FM。
图 8:将 APOUTBR-ART2 安装支架 3 连接到 APOUTBR-FM 嵌入式安装支架
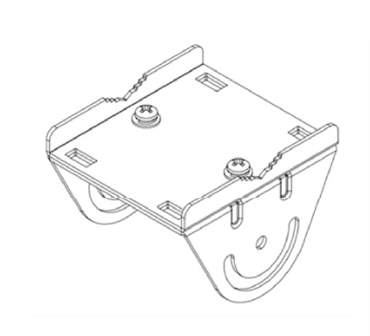
- 拆下两颗螺钉,拆卸 APOUTBR-ART2 安装支架 1。
图 9:拆卸 APOUTBR-ART2 安装支架 1
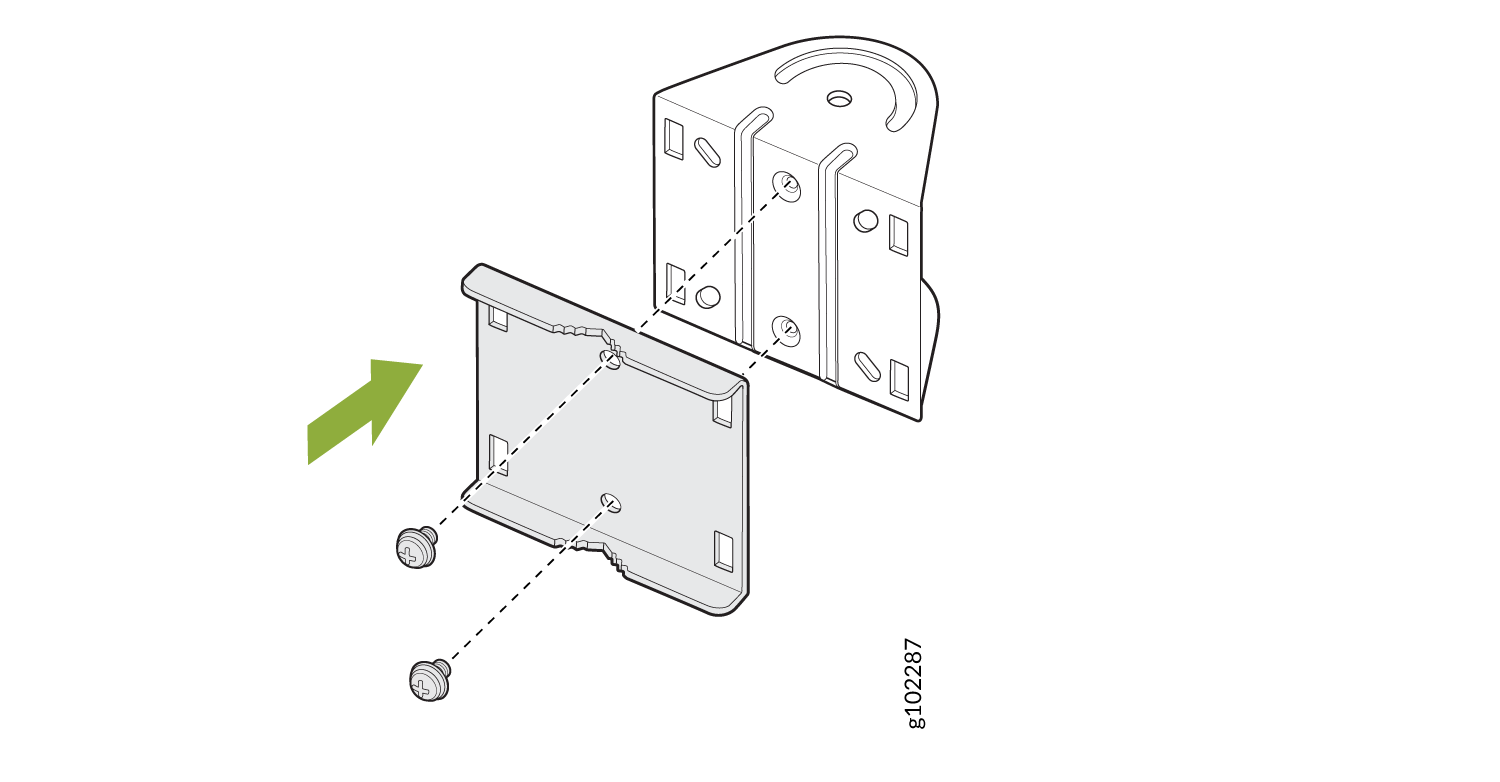
- 使用四个螺钉将 APOUTBR-ART2 安装支架 1 安装在墙上。
图 10:将 APOUTBR-ART2 安装支架 1 安装在墙上
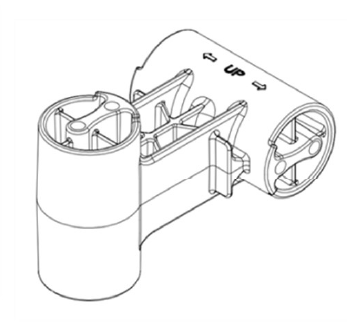
- 使用两个螺栓和螺母将 APOUTBR-ART2 安装支架 2 连接到安装支架 1。用“← UP →”定向侧面,如图 11 所示。
图 11:将 APOUTBR-ART2 安装支架 2 连接到安装支架 1
- 使用两个螺栓和螺母将 APOUTBR-ART2 安装支架 3 连接到安装支架 2。
图 12:将 APOUTBR-ART2 安装支架 3 连接到安装支架 2
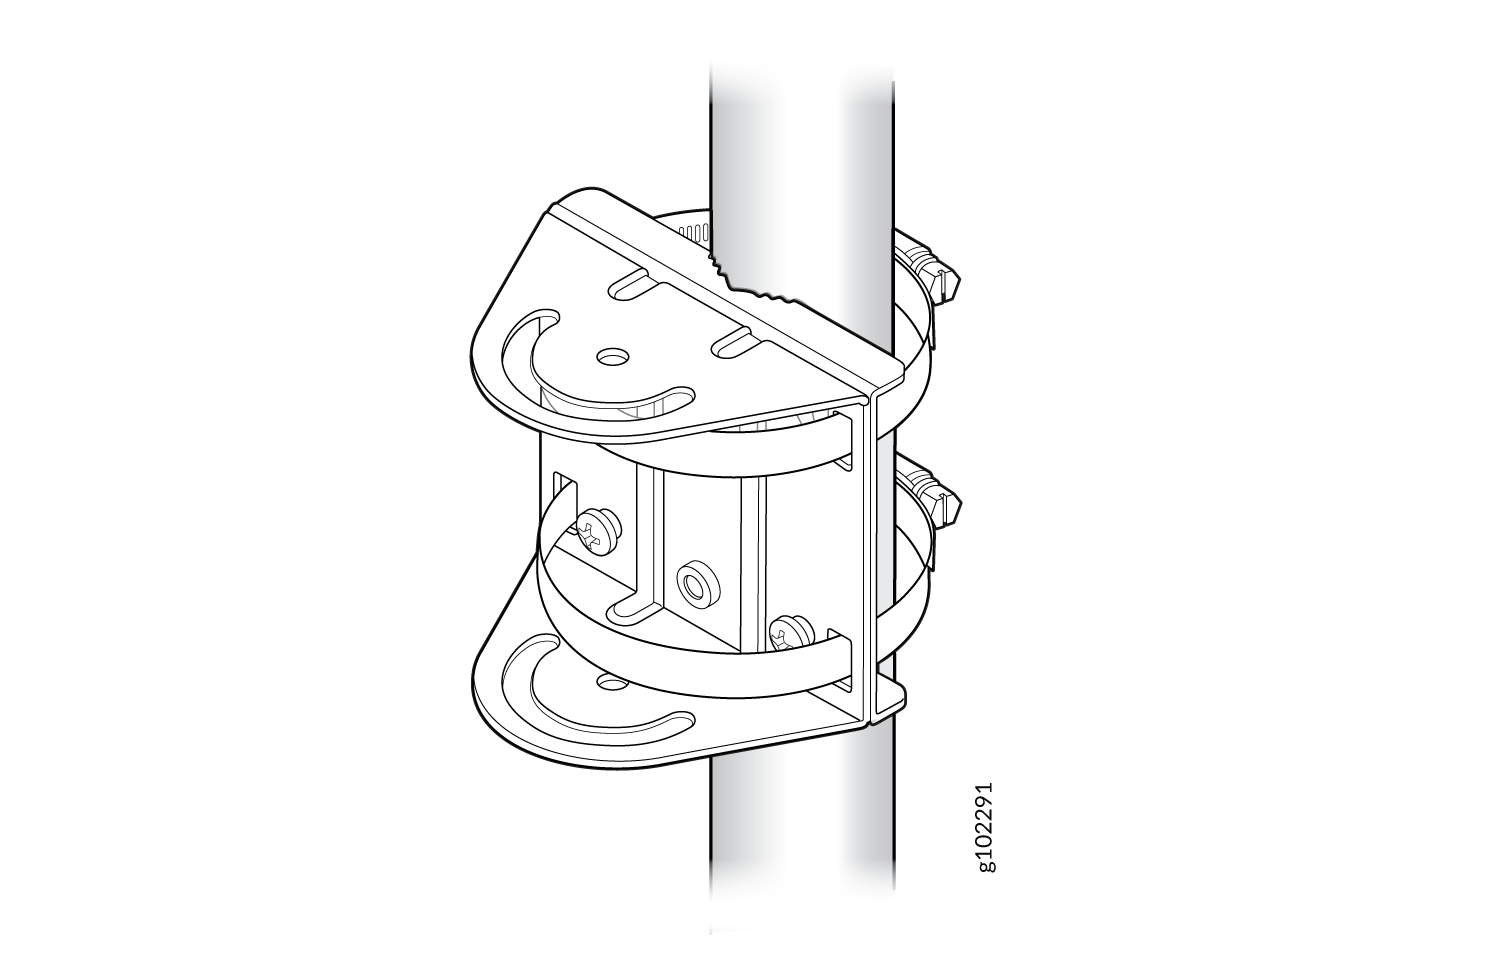
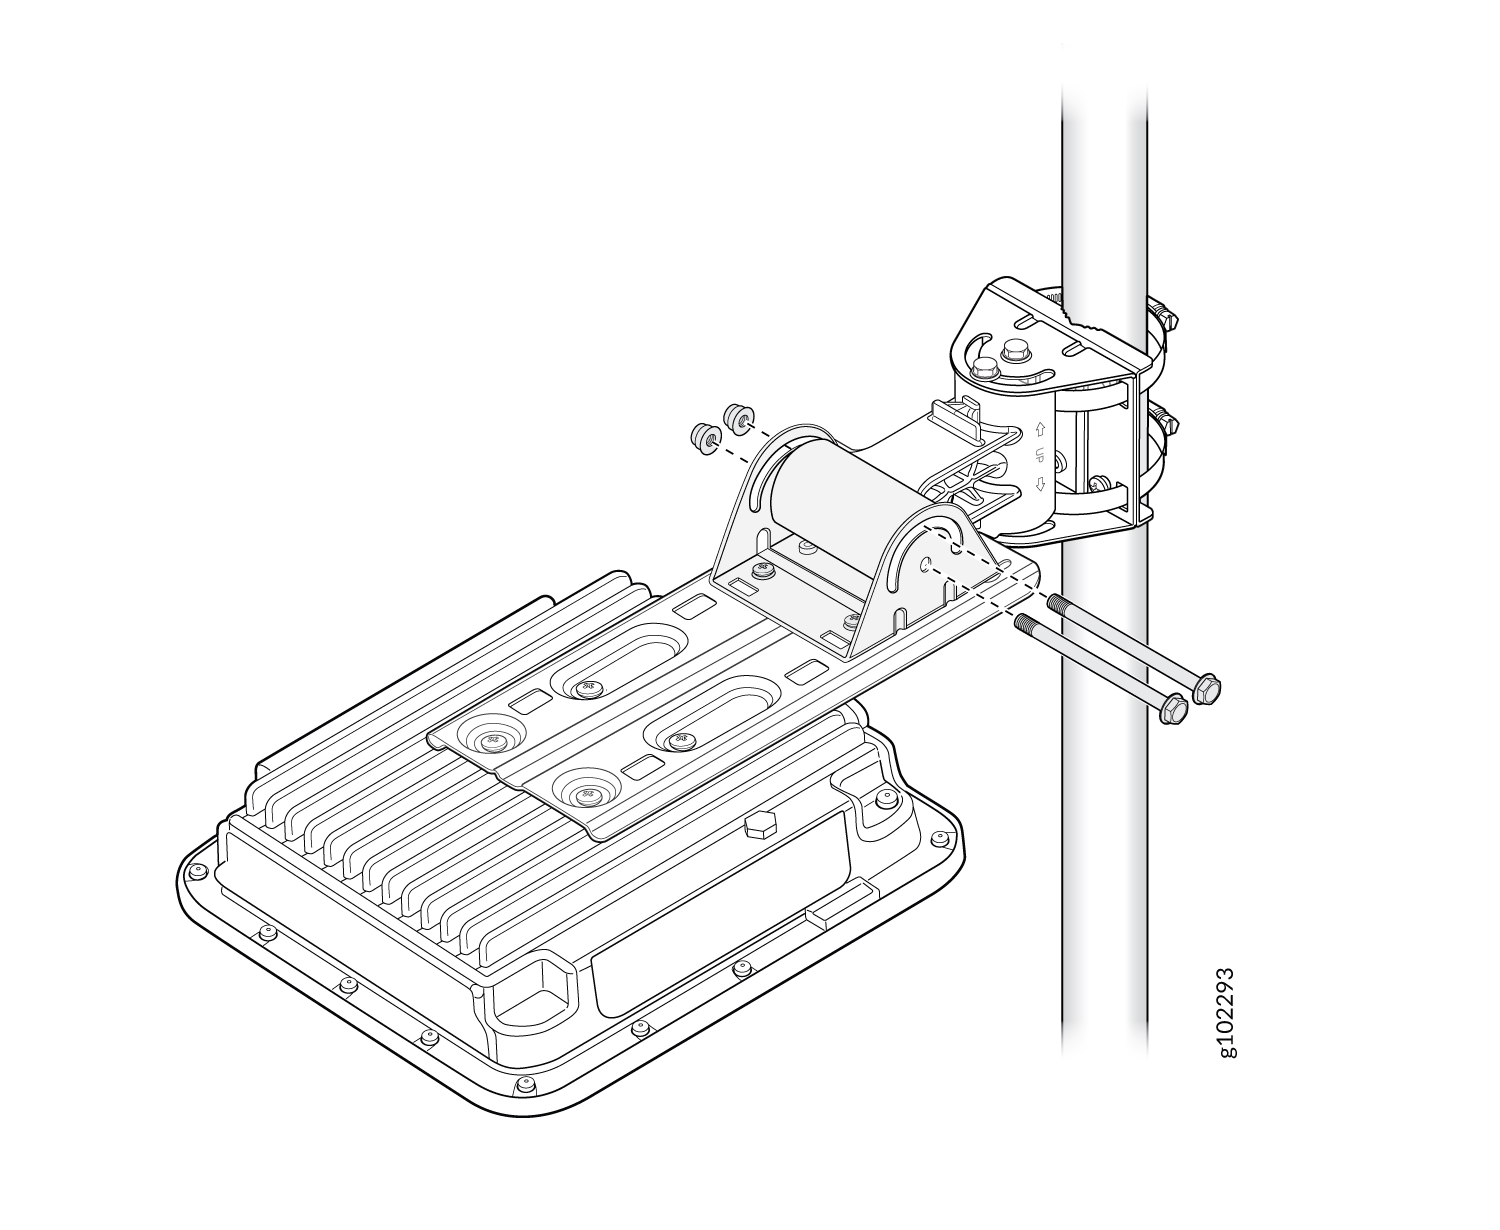
将 AP63 安装在杆上(铰接式安装)
要使用铰接式安装支架将 AP63 安装在墙上:
- 使用四个 M6x16mm 螺钉、垫圈和锁垫圈将齐平安装支架 APOUTBR-FM 连接到 AP。
图 13:将 APOUTBR-FM 嵌入式安装支架连接到 AP63
- 使用四个 M6x10mm 螺钉将 APOUTBR-ART2 安装支架 3 连接到齐平安装支架 APOUTBR-FM。
图 14:将 APOUTBR-ART2 安装支架 3 连接到 APOUTBR-FM 嵌入式安装支架
- 将 APOUTBR-ART2 安装支架 1 连接到杆上。将软管的开口端缠绕在杆上,然后用螺丝刀拧紧软管夹螺钉。拧紧螺钉,直到支架固定到位。
图 15:将 APOUTBR-ART2 安装支架 1 连接到杆上
- 使用支架套件中包含的两个螺栓和螺母,将 APOUTBR-ART2 安装支架 2 连接到安装支架 1。如图 16 所示,将带有标签← UP →的一面定向。
图 16:将 APOUTBR-ART2 安装支架 2 连接到安装支架 1

- 使用支架套件中包含的两个螺栓和螺母将 APOUTBR-ART2 安装支架 3 连接到安装支架 2。
图 17:将 APOUTBR-ART2 安装支架 3 连接到安装支架 2
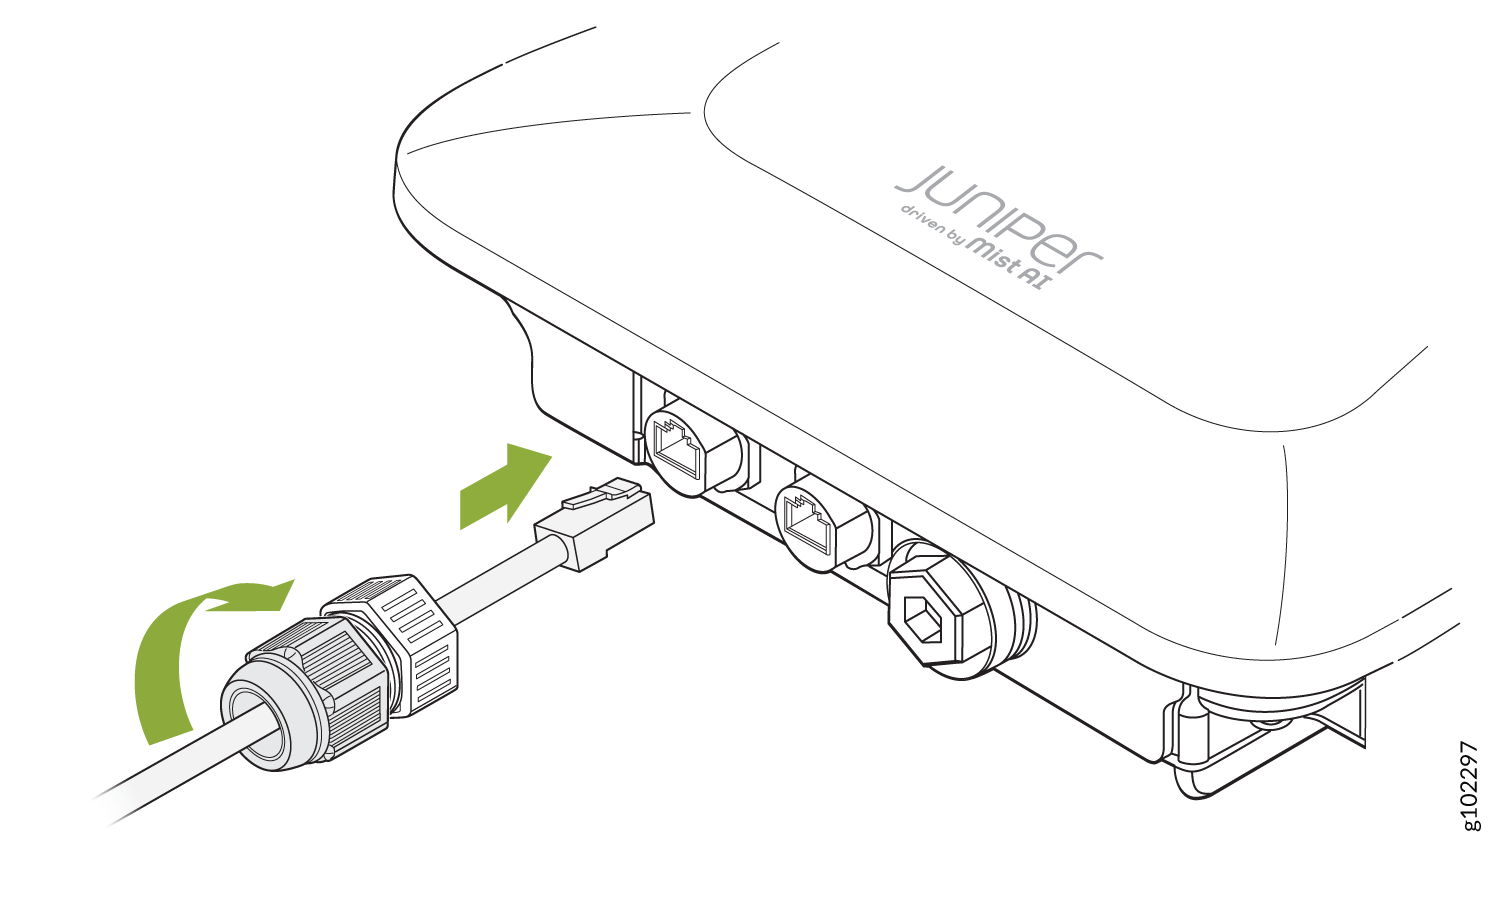
连接 RJ-45 电缆密封套
将 RJ-45 电缆连接到 AP 时,请使用 RJ-45 电缆密封套。电缆密封套有助于固定 RJ-45 电缆并保护电缆免受损坏。要使用电缆接头连接 RJ-45 电缆:
- 拆卸电缆密封套:
-
逆时针转动电缆密封套螺母,将其卸下。
-
取下蓝色封条。确保选择正确的密封件。电缆密封套有两个密封件:蓝色密封件(直径 7 mm 至 9.5 mm)和红色密封件(直径 5.5 mm 至 7 mm)。
图 18:拆卸 RJ-45 电缆密封套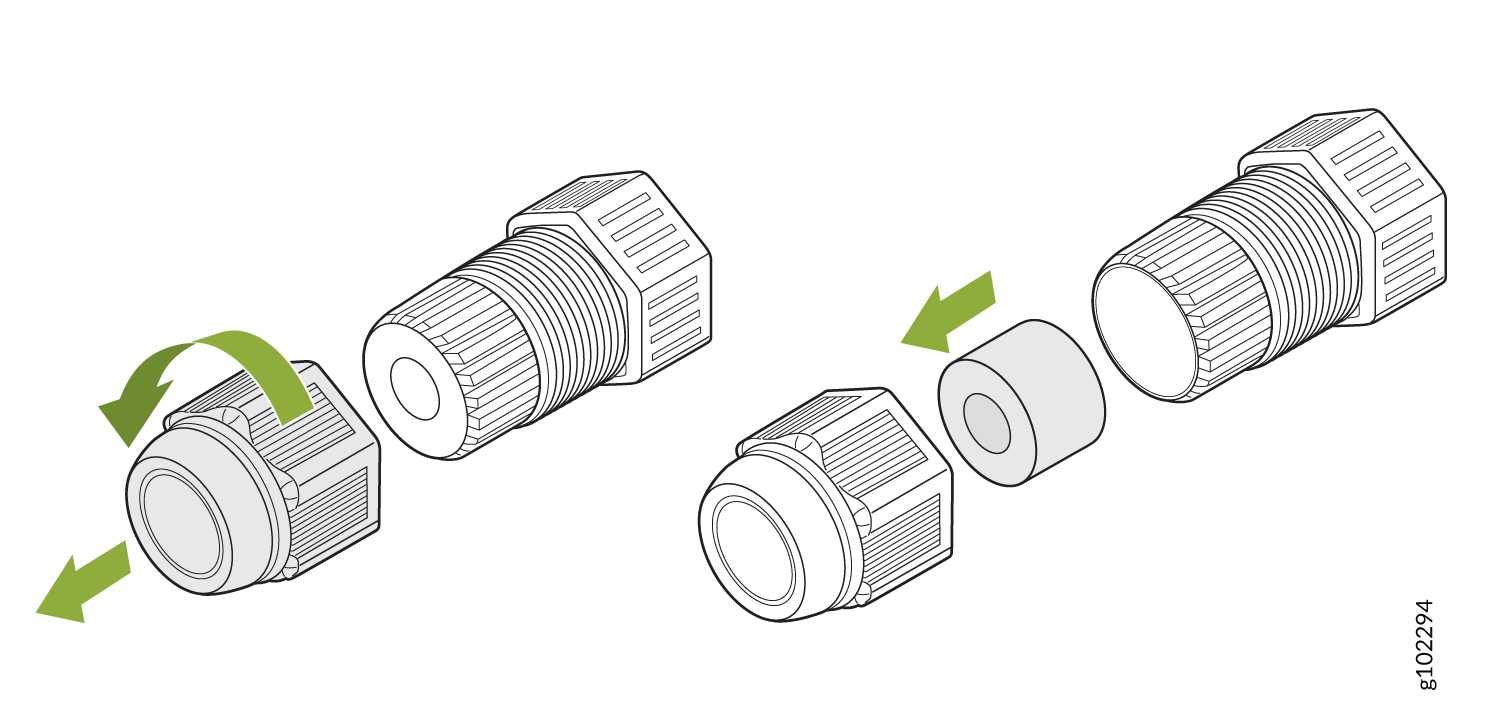
-
- 通过电缆接头插入 RJ-45 电缆:
-
打开密封件,将 RJ-45 电缆穿过螺母和密封件。
图 19:将 RJ-45 电缆插入电缆密封套的螺母和密封件
-
将 RJ-45 电缆穿过电缆密封套。将密封件推入电缆密封套并松松拧紧螺母。
图 20:将 RJ-45 电缆穿过电缆密封套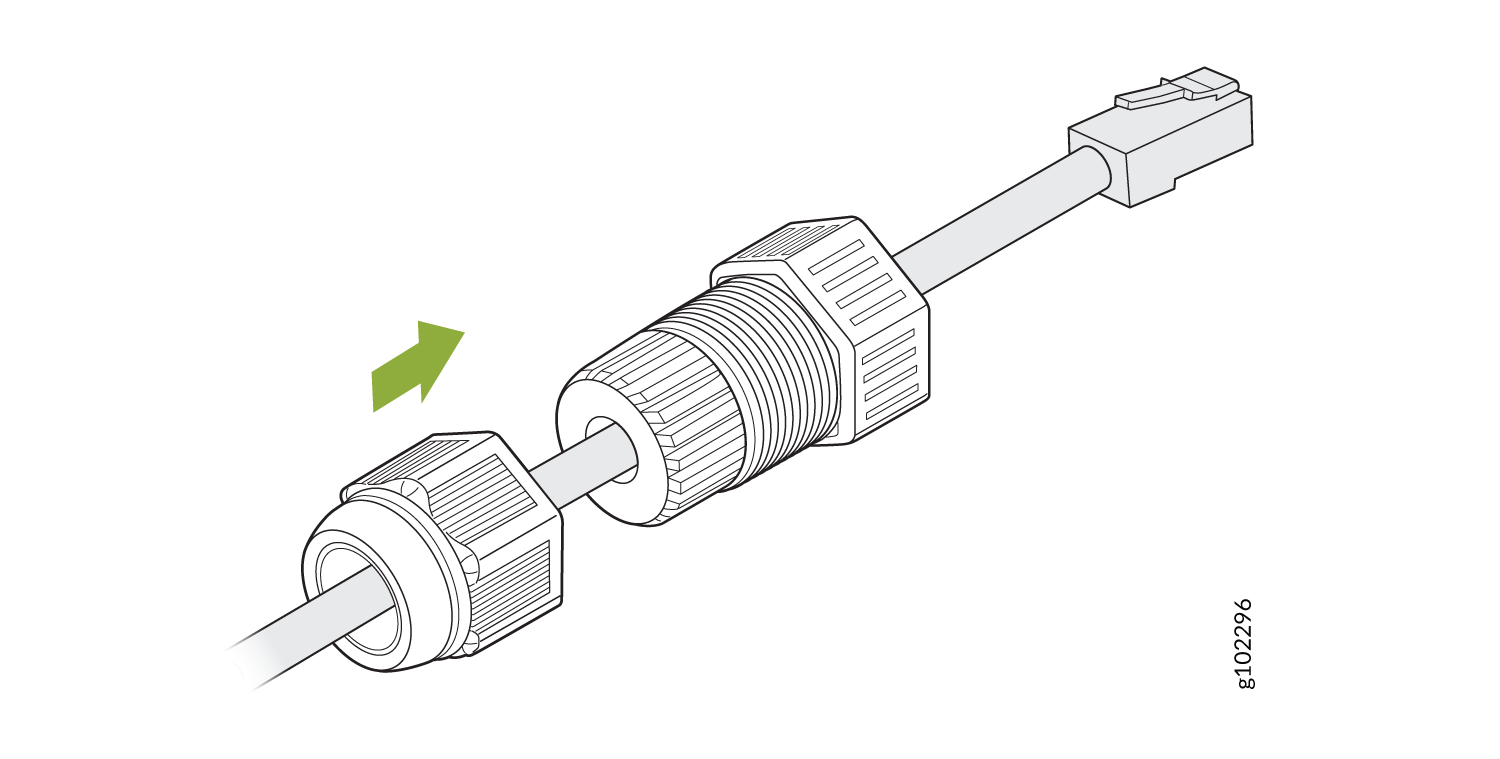
-
- 将 RJ-45 电缆连接到 AP 端口。将电缆接头连接到 AP 并以 10–12 kg-cm 的扭矩将其拧紧。然后,以 7-10 kg-cm 的扭矩将螺母完全拧紧到电缆密封套上。
图 21:将电缆接头连接到 AP63